
A bucket planter can look perfect on day one… and still fail fast if water can’t escape. When soil stays soggy, roots lose oxygen, plants stop growing, and root rot sneaks in quietly (usually right when you think you’re “watering properly”).
The fix is simple: give your bucket a reliable drainage system that drains excess water but still holds enough moisture to keep plants happy. This no-fail method works for veggies, flowers, and herbs—and you can upgrade it into a self-watering setup later if you want.
Why Drainage Matters (The 30-Second Root Rot Explanation)
Roots don’t just drink water—they also need oxygen. In a bucket with poor drainage, water collects at the bottom, soil stays saturated, and roots basically “suffocate.”
Common signs your bucket needs better drainage:
- Soil stays wet for days
- Yellowing leaves even when you fertilize
- Mushy stems near soil level
- Slow growth + droopy plants
Good drainage prevents waterlogging and helps you water with confidence.
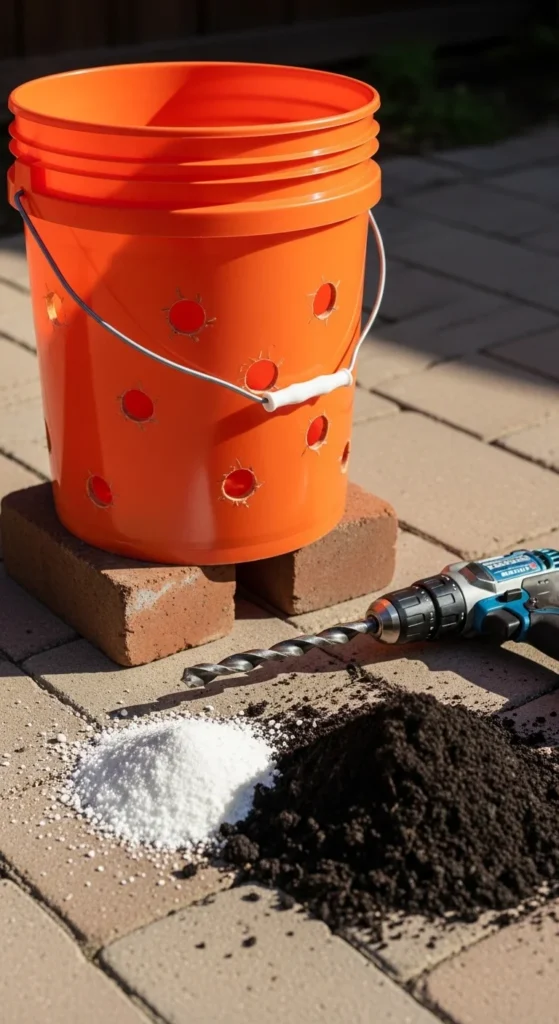
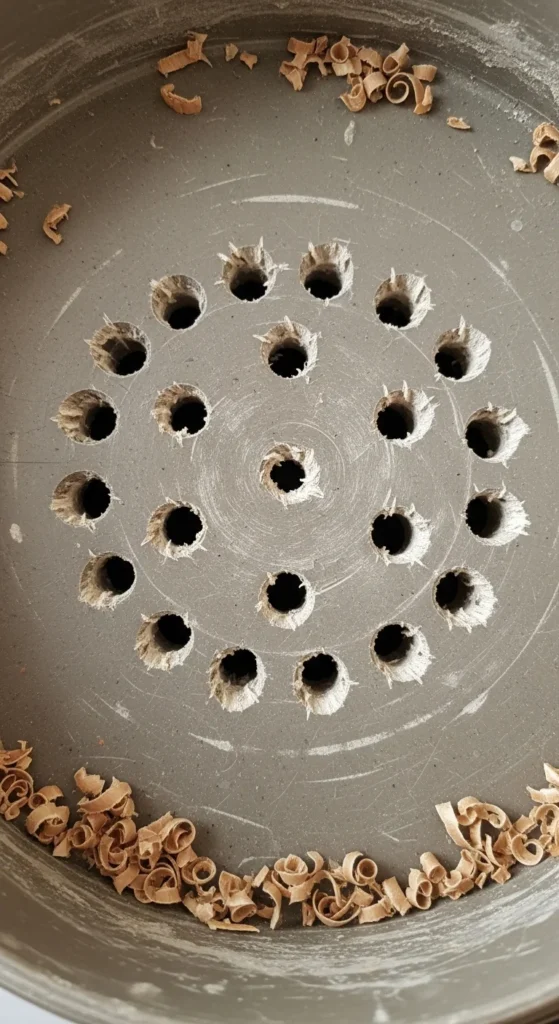
Step 1: Drill Bottom Drainage Holes (Your Core System)
This is non-negotiable for a standard bucket planter.
Best basic rule:
- Drill 5–8 holes in the bottom
- Hole size: ¼ to ½ inch diameter
- Space them evenly (don’t do “center-only” holes)
Easy patterns that work:
- 5-hole pattern: 1 center + 4 around
- 8-hole pattern: a circle around the base
Tip: If you’re growing heavy feeders like tomatoes, bigger holes (closer to ½ inch) are less likely to clog over time.
Step 2: Prevent Clogs With a Simple “Filter Layer”
One big reason bucket drainage fails is soil washing into holes and sealing them shut.
Quick no-fail filter options:
- A square of landscape fabric inside the bucket bottom
- Mesh/screen (window screen works)
- A piece of breathable fabric you don’t mind cutting
How to do it:
- Cut fabric slightly larger than the bucket base
- Lay it flat over the holes inside the bucket
- Then add your soil mix on top
This keeps soil in place while letting water flow freely.
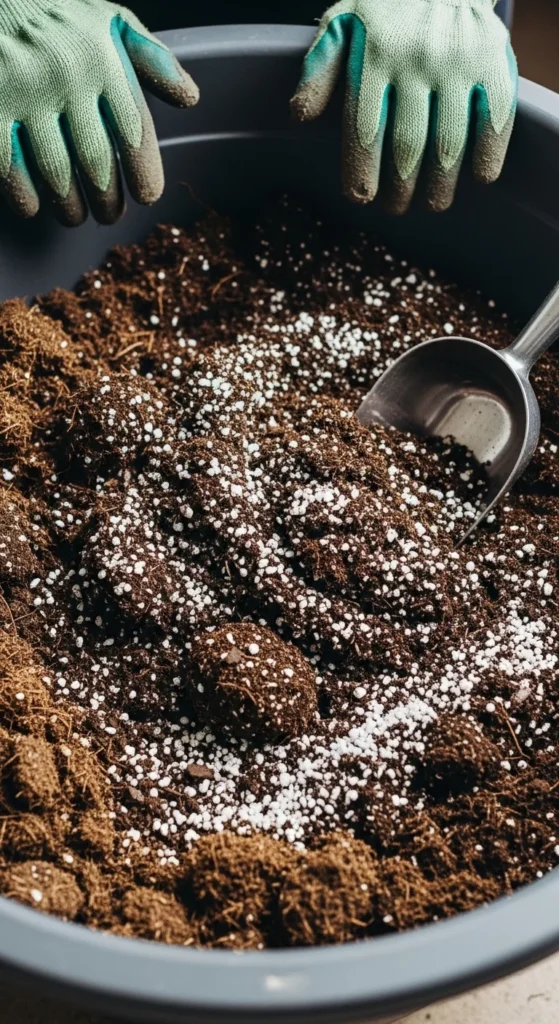
Step 3: Choose a Soil Mix That Drains (This Matters More Than Rocks)
Even with perfect holes, heavy soil can hold too much water. That’s why container gardening thrives on lighter blends.
A great DIY “drains-but-stays-moist” mix:
- 40% potting soil
- 30% perlite (or vermiculite)
- 30% compost
Why it works:
- Potting soil holds structure
- Perlite adds air pockets (so roots breathe)
- Compost fuels growth without compacting fast
If you want the simplest version:
- Potting mix + compost + a generous handful of perlite
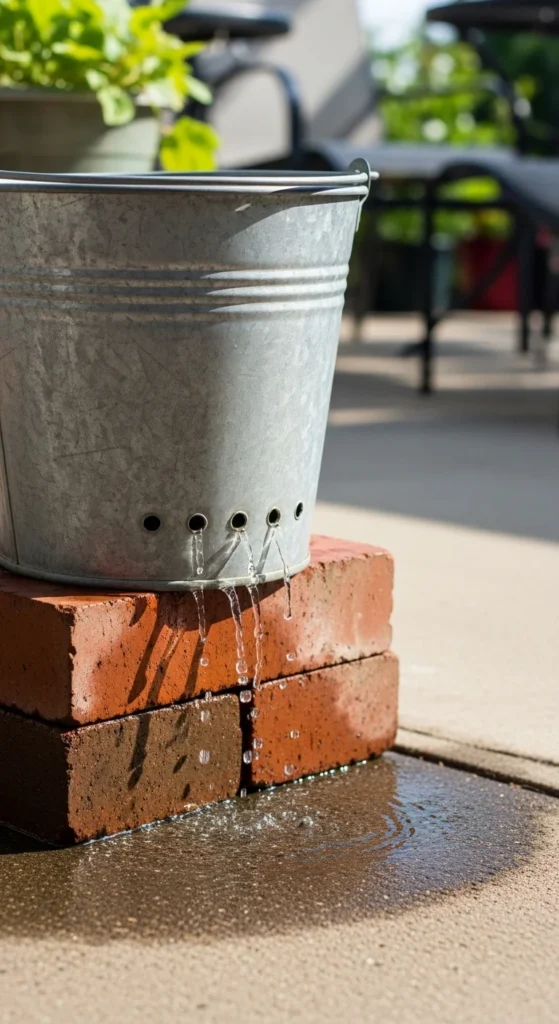
Step 4: Elevate the Bucket (The Tiny Fix That Makes a Huge Difference)
Here’s a sneaky drainage killer: buckets sitting flat on concrete can block bottom holes. The bucket might have holes… but water can’t escape.
Easy elevation ideas:
- 2 bricks (one on each side)
- Pot feet
- A small plant stand
- A scrap wood slat base
Even lifting the bucket ½ inch helps.
Bonus: elevation also improves airflow and reduces slime buildup under the bucket.
Step 5: Do the “Water Test” (So You Know It Works)
Before you plant your prized seedlings, do a quick test:
Drainage test:
- Place the empty bucket in its final spot
- Pour in water (a few liters is enough)
- Watch the flow—water should drain from multiple holes, not just one
If it drains slowly:
- Add 1–2 more holes
- Check if fabric is too thick or folded over holes
- Make sure the bucket isn’t sealed to the ground
Optional Upgrade: Add Side Holes for Overflow (Especially With Saucers)
If you use saucers underneath your buckets—or you live somewhere with sudden heavy rain—side holes can be your “overflow insurance.”
How to add them:
- Drill 3–6 small holes around the bucket
- Place them about 1 inch up from the bottom
This prevents stagnant water from sitting in that lowest layer.
Important note: If you plan to build a self-watering reservoir (SIP) later, side/overflow hole height will depend on where your reservoir sits.
Optional Upgrade: DIY Self-Watering Drainage (Low-Tech Automation)
Want less daily watering? You can turn bucket drainage into a self-watering system using wicking.
Two beginner-friendly options:
- Cotton rope wick: run a thick cotton rope through a bottom hole so it touches a water tray underneath
- Nested reservoir: place a smaller container inside the bucket base to hold water, with wicking material bringing moisture upward
These systems keep soil evenly moist without waterlogging—when built with the right overflow hole.
Myth-Bust: Should You Add Gravel at the Bottom?
You’ll see this tip everywhere, but it’s not always helpful.
What gravel can do:
- Reduce soil use slightly
- Keep fabric from sagging into holes
- Help prevent holes from clogging if used lightly
What can go wrong:
- A thick gravel “false bottom” can create a soggy zone where soil stays wet above it (the classic perched-water issue)
If you use gravel, keep it thin (1–2 inches max) and pair it with a well-draining soil mix—don’t rely on rocks alone.
Final Takeaway
If you want a bucket planter that doesn’t drown your plants, follow this simple formula:
- Drill 5–8 bottom holes (¼–½ inch)
- Add a fabric/mesh filter
- Use a well-draining soil blend (try 40/30/30)
- Elevate the bucket off the ground
- Do a quick water test before planting
📌 Save this guide for later—and the next time you set up buckets, you’ll have drainage that’s truly no-fail.

Leave a Reply