
Dreaming of fresh tomatoes, crisp cucumbers, or colorful flowers—but short on space? Bucket gardening is the beginner-friendly hack that turns patios, balconies, and tiny yards into productive mini gardens.
With just a few 5-gallon buckets, the right soil, and simple care, you can grow a surprising amount of food at home. No raised beds. No digging. No complicated tools.
Let’s walk through the easiest step-by-step setup so you can start today.
Why Bucket Gardening Is Perfect for Beginners
Bucket gardening keeps things simple and affordable. It’s especially popular for small spaces and first-time gardeners.
Why people love it:
- ✅ Works on patios, rooftops, and balconies
- ✅ Cheap and easy to set up
- ✅ Better control over soil quality
- ✅ Fewer weeds than in-ground gardens
- ✅ Portable — move plants to chase the sun
Plus, containers make it much easier to monitor watering and pests, which helps beginners succeed faster.
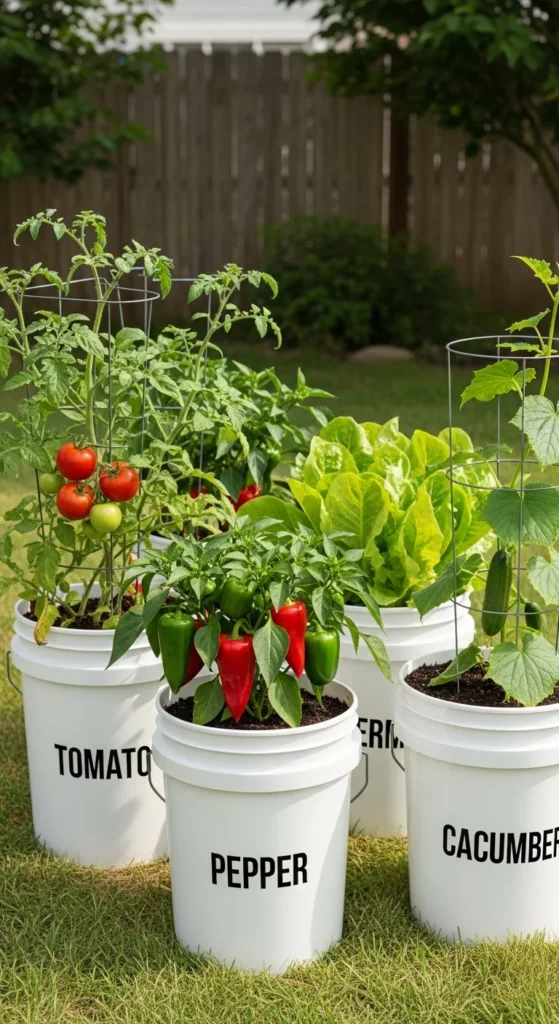
Step 1: Choose the Right Buckets
Your container is the foundation of success. The gold standard is the 5-gallon bucket.
What to look for:
- Food-grade plastic (especially for edibles)
- At least 12 inches deep
- Sturdy handle (optional but helpful)
- Light color in hot climates (keeps roots cooler)
💡 Pro tip: One plant per bucket works best for most vegetables. Crowding leads to weak growth.
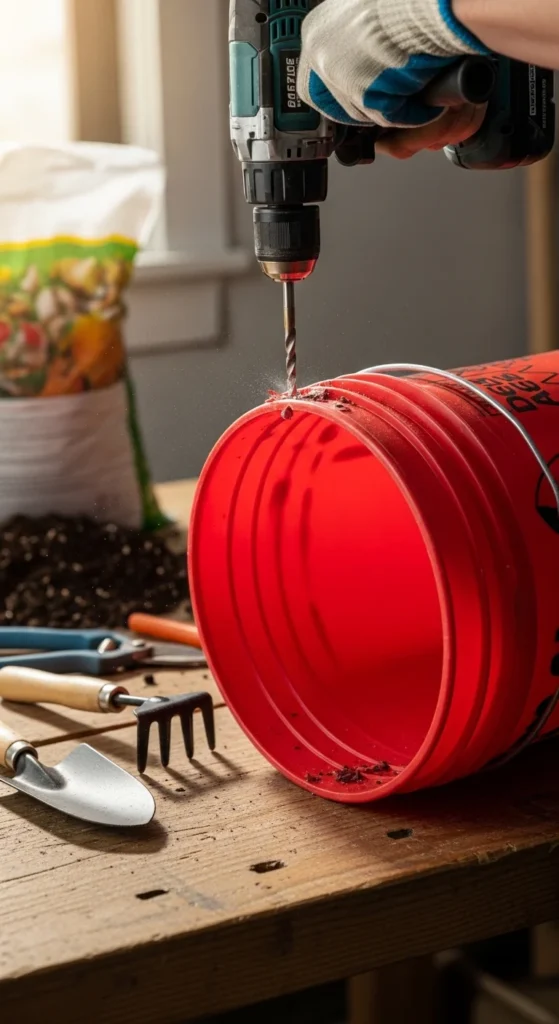
Step 2: Drill Proper Drainage Holes (Critical!)
Poor drainage is the #1 reason bucket gardens fail. Roots need oxygen as much as water.
How to do it right:
- Drill ½–1 inch holes in the bottom
- Space holes every 3–4 inches
- Add 6–10 holes per bucket
- Optional: add a few holes on the lower sides
🚫 Myth to skip: Don’t add gravel “false bottoms.” They actually trap water and can worsen root rot.
Step 3: Use the Right Soil Mix
This step makes a huge difference.
❌ Never use garden soil in buckets — it compacts and suffocates roots.
✅ Always use quality potting mix.
What good potting mix provides:
- Lightweight texture
- Good airflow
- Proper drainage
- Consistent moisture retention
💧 Before planting: Pre-moisten your potting mix. Dry soil can repel water at first.
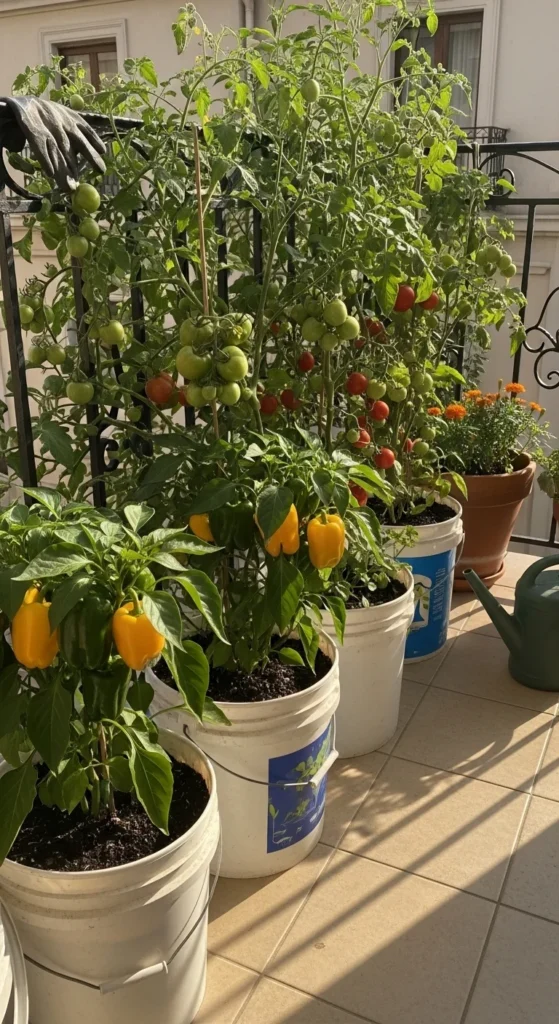
Step 4: Plant the Right Crops (Beginner Winners)
Not every plant loves container life. Start with proven performers.
Best plants for one bucket each:
- 🍅 Tomatoes (dwarf or patio varieties)
- 🌶️ Peppers
- 🥒 Cucumbers (with support)
- 🫘 Bush beans
- 🥬 Lettuce
- 🌼 Nasturtiums (edible flowers)
Beginner tip: Choose compact or dwarf varieties whenever possible. They’re bred for small spaces.
Step 5: Add Support for Vining Plants
Some plants need help staying upright.
Plants that usually need support:
- Cucumbers
- Pole beans
- Indeterminate tomatoes
Easy support options:
- Tomato cages
- Bamboo stakes
- Small trellis frames
- Vertical bucket racks
📐 Light hack: In tiered setups, place taller plants on top levels so they don’t shade smaller ones.
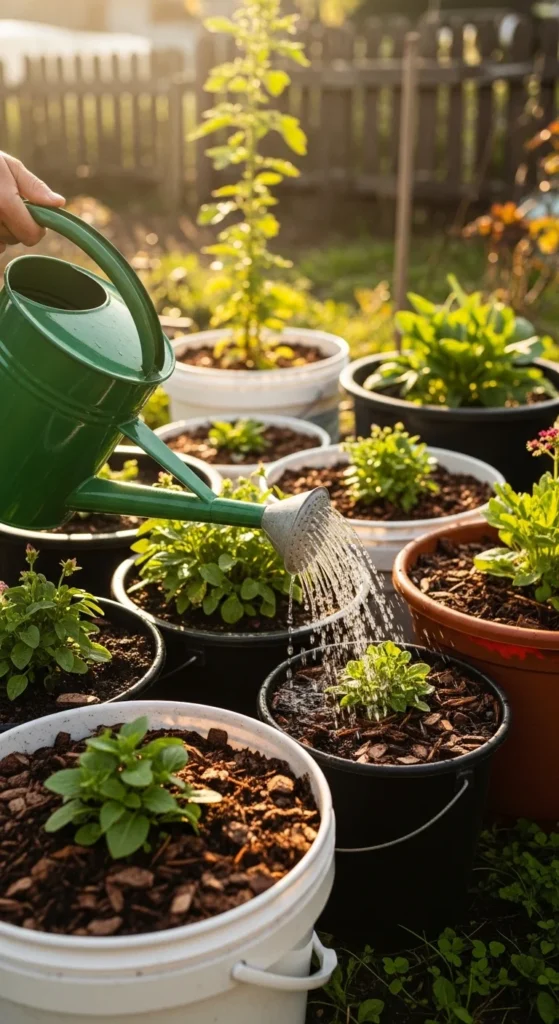
Step 6: Water the Smart Way
Container plants dry out faster than ground gardens, but overwatering is just as dangerous.
Use the finger test:
- Stick your finger 1–2 inches into the soil
- If dry → water
- If moist → wait
Watering rules:
- Water deeply until it drains out
- Water the soil, not the leaves
- Morning watering is best
- Mulch the top to retain moisture
🌿 Mulch options: straw, wood chips, or dry leaves.
Step 7: Feed Your Plants Regularly
Buckets have limited nutrients, so feeding matters.
Simple fertilizer schedule:
- Mix slow-release fertilizer into soil at planting
- Add about ½ cup per 5-gallon bucket
- Refeed every 8–10 weeks
Signs your plants need feeding:
- Pale leaves
- Slow growth
- Poor fruit production
Step 8: Do a Weekly 60-Second Plant Check
Container gardening makes pest control easier — if you stay consistent.
Once a week, check for:
- 🐛 Holes in leaves
- 🐜 Insects under leaves
- 🍂 Yellowing foliage
- 🌱 Soil dryness
Early detection prevents most big problems.
Smart Upgrades (Optional but Powerful)
Once you’re comfortable, try these trending upgrades:
- 🚿 Self-watering buckets (nested bucket system)
- 🧱 Vertical stacking frames for small spaces
- 🛒 Wheeled plant carts to follow the sun
- 🐟 Mini aquaponic setups for advanced growers
- 🍅 Upside-down tomato buckets for tight areas
Start simple — then level up.
Common Beginner Mistakes to Avoid
Save yourself frustration by skipping these:
- ❌ Too few drainage holes
- ❌ Using garden soil
- ❌ Overwatering on a schedule
- ❌ Planting multiple large plants in one bucket
- ❌ Reusing depleted potting soil without refreshing
Avoid these, and your success rate jumps dramatically.
Final Takeaway
Bucket gardening proves you don’t need a big yard to grow big results. With proper drainage, quality potting mix, and smart watering, even beginners can harvest fresh food from a tiny space.
Start with just one or two buckets, learn the rhythm, and expand from there.
🌱 Save this guide for later — your future garden will thank you!

Leave a Reply