
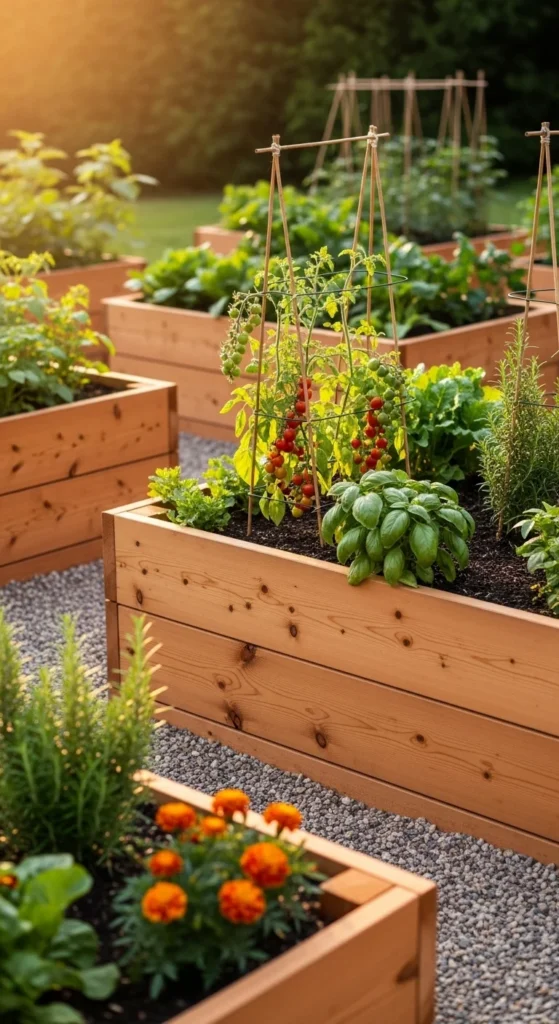
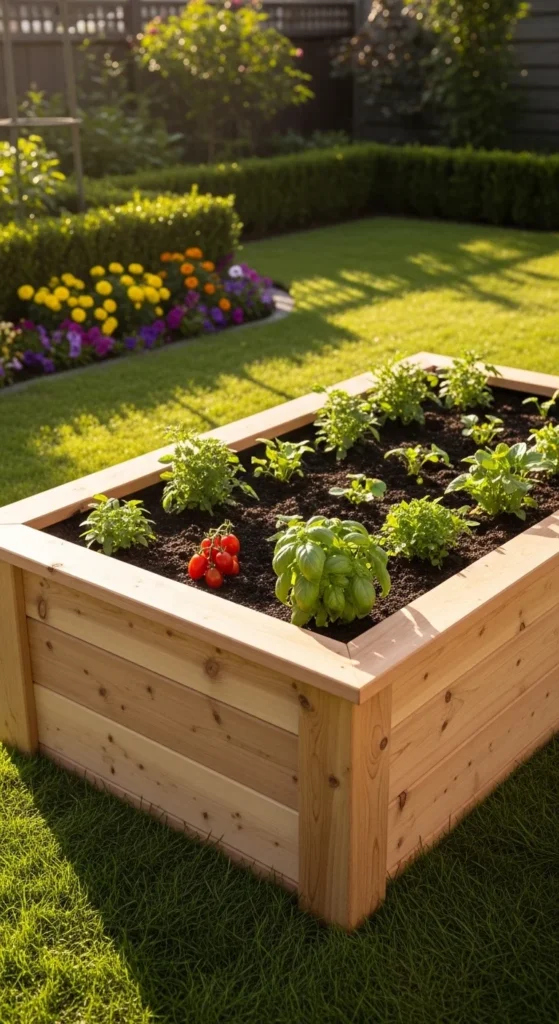
Wooden raised garden beds remain the top choice for home gardeners who want durability, natural style, and simple DIY assembly. Cedar continues to lead because it resists rot and insects without chemical treatment. With lumber prices still a concern in 2026, many gardeners are choosing smart builds that balance cost, longevity, and weekend-friendly construction. The classic wooden designs below focus on untreated wood, practical joinery, and realistic budgets so you can build once and enjoy harvests for years.
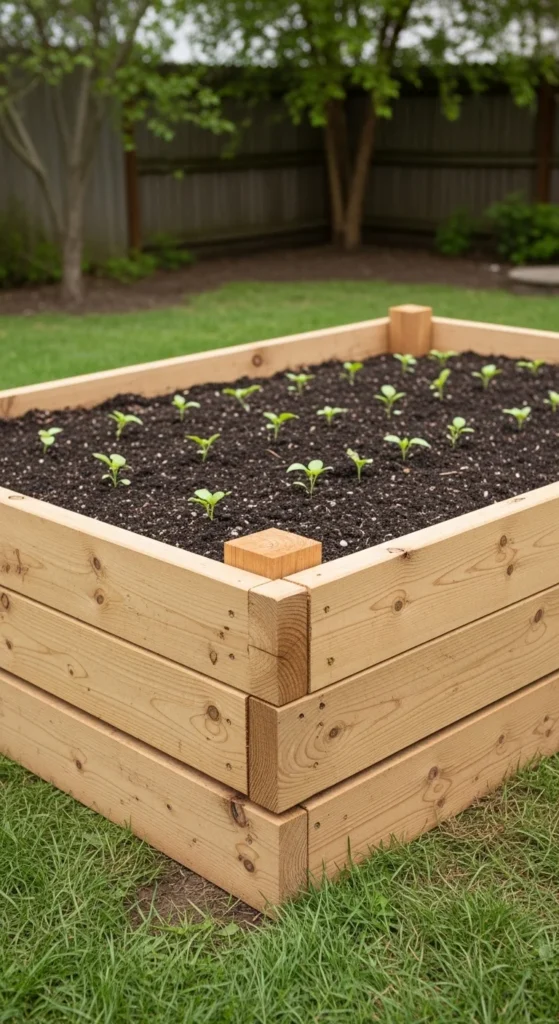
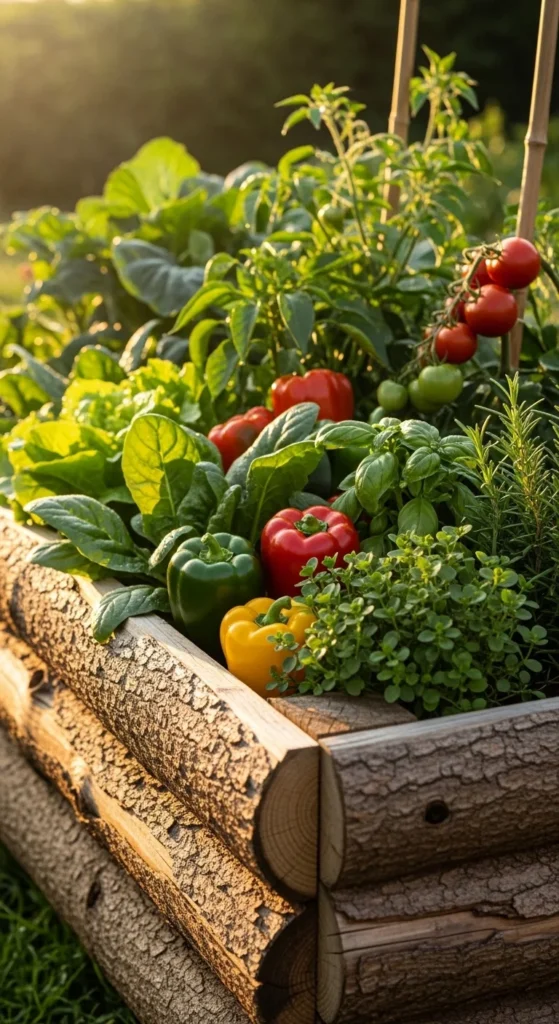
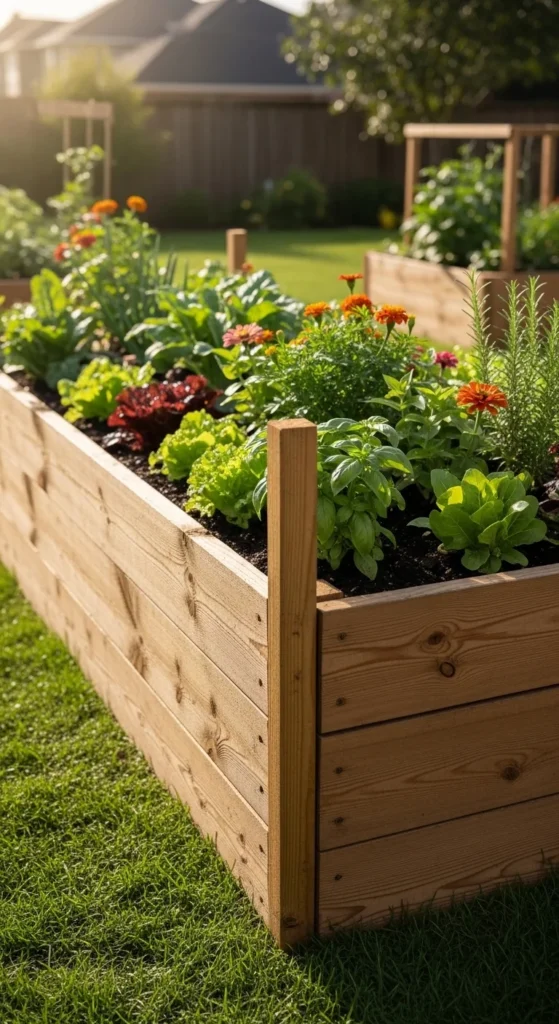
1. Western Red Cedar Classic Box
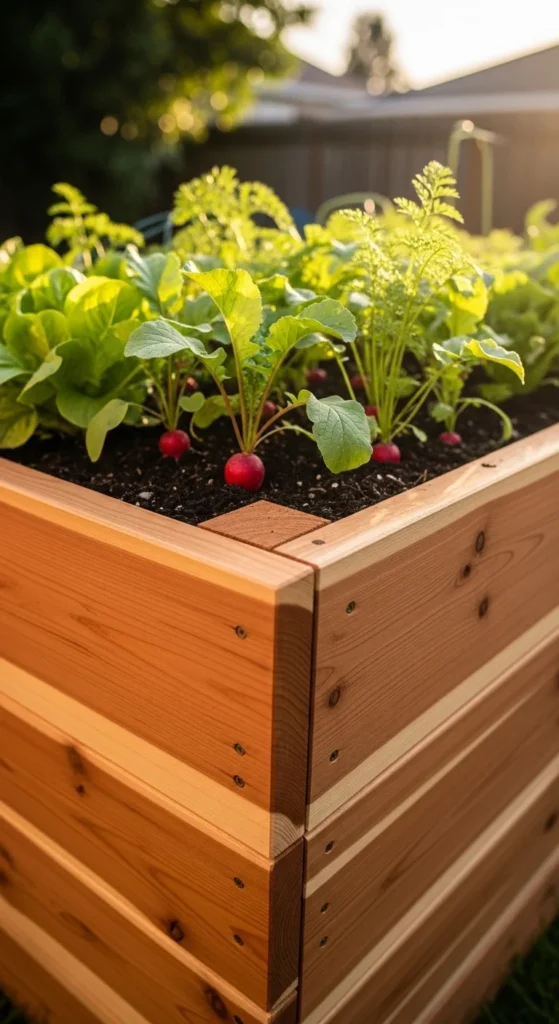
Western red cedar remains the gold standard for wooden raised beds. It naturally resists rot and insects, which means fewer repairs later. A simple rectangular cedar box works well for beginners and experienced gardeners alike.
- Material: untreated cedar boards
- Typical size: 4×8 feet
- Corner support: exterior deck screws into corner posts
Start by leveling the ground carefully. Even small dips can twist the frame. Place cardboard underneath to reduce weeds before filling.
Budget tip:
- Buy rough cedar boards instead of premium surfaced lumber to save money.
Helpful upgrade:
- Add a wide top cap board for a smoother edge when working.
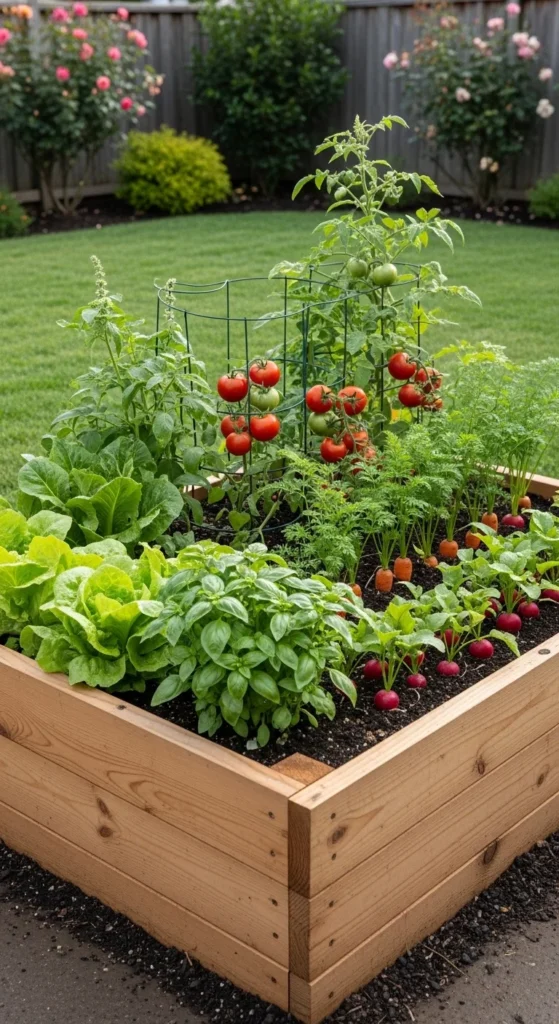
This classic layout supports tomatoes, peppers, beans, and mixed vegetables. With basic care, cedar beds often last many seasons while keeping that warm natural look.
2. Stackable Height Custom Bed

Stackable boards allow you to adjust bed height without rebuilding the frame. This method is popular for gardeners who want flexibility as crops change.
- Board size: typically 1 inch thick by about 5.5 inches tall
- Stack options:
- 2 boards ≈ 11 inches
- 3 boards ≈ 16.5 inches
- 4 boards ≈ 22 inches
Budget tip:
- Start with two layers and add more next season if deeper soil is needed.
Assembly tip:
- Use rust-resistant screws or metal pins to keep layers aligned.
This design works well when growing both shallow greens and deeper root crops in different seasons. It also makes future garden expansion much easier.
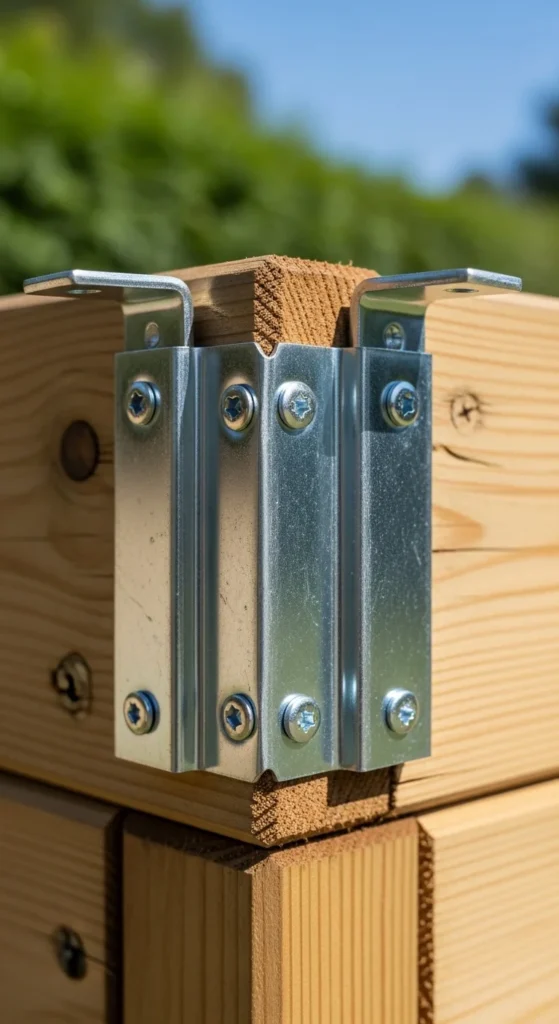
3. No-Power-Tool Corner Build
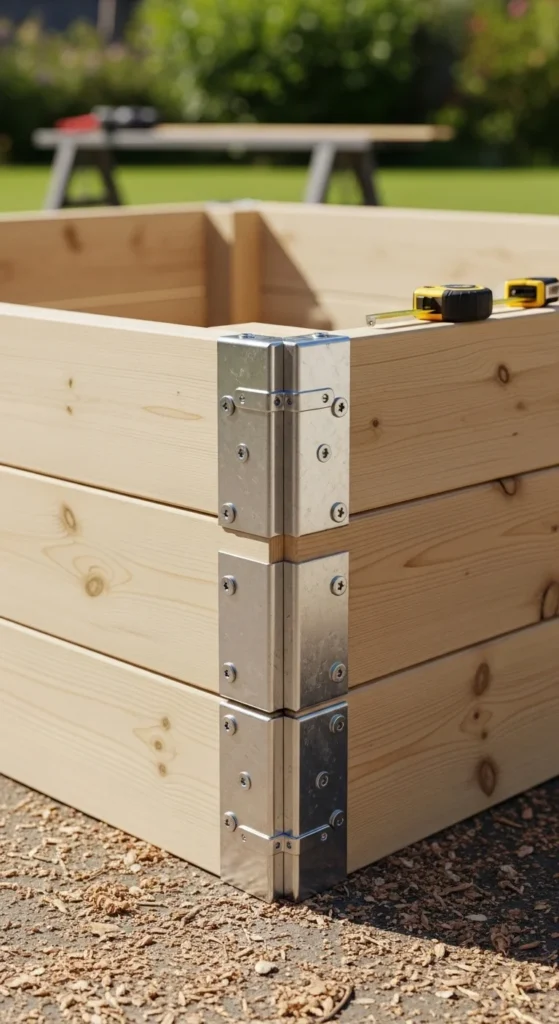
Framing angles simplify the build process and reduce measuring mistakes. This style is popular among beginners who want straight corners quickly.
- Hardware: metal corner brackets
- Fasteners: hex screws or bolts
- Tools: basic drill or hand wrench
Budget tip:
- Buy corner brackets in bulk packs for multiple beds.
Practical steps:
- Clamp boards before tightening
- Check for square corners
- Tighten gradually on each side
This approach creates a sturdy wooden bed without complex woodworking. It is especially helpful if you are building several beds in one weekend.
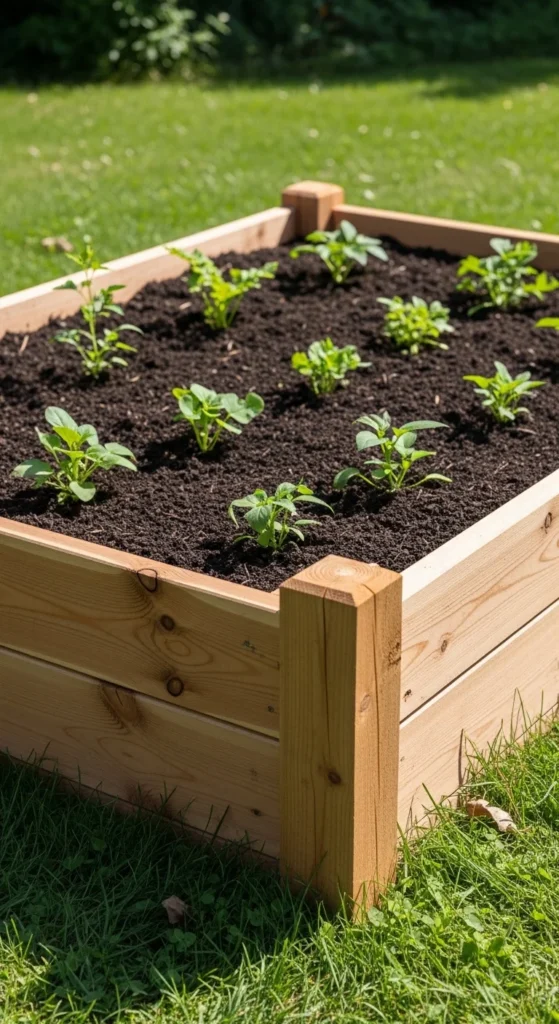
4. Pro Corner Support Plan
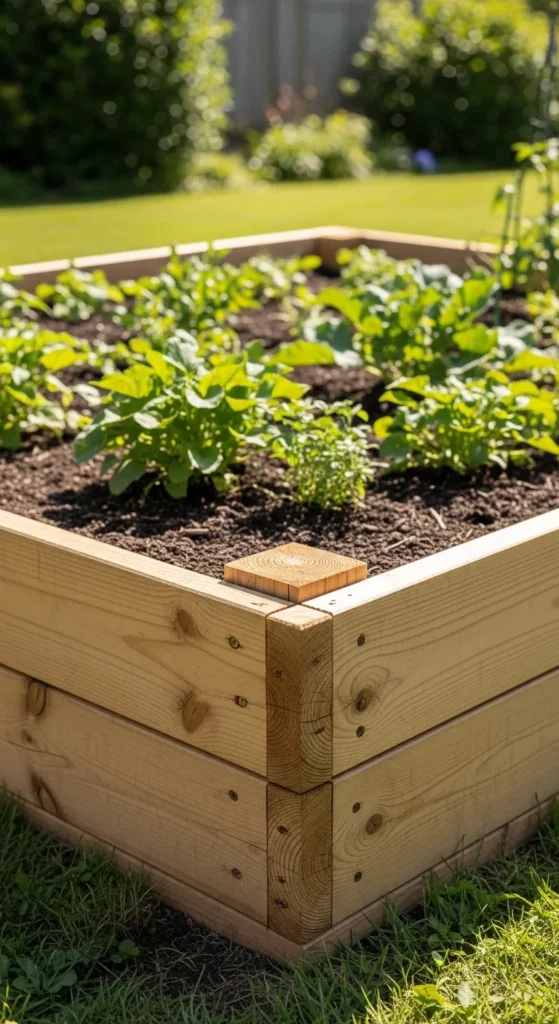
Using 4×4 corner posts creates a stronger wooden bed that holds shape for years. This design is common in long-lasting DIY builds.
- Posts: 4×4 untreated wood
- Walls: 2×6 or 2×12 boards
- Fastening: exterior screws driven from the outside
Budget tip:
- Cut long posts into shorter pieces to create multiple corner supports.
Helpful addition:
- Pre-drill pilot holes to prevent wood splitting.
This plan is ideal for larger beds that hold heavy soil. The extra support reduces bowing and keeps the frame square through many growing seasons.
5. Tool-Free Rod and Pin Kit Style
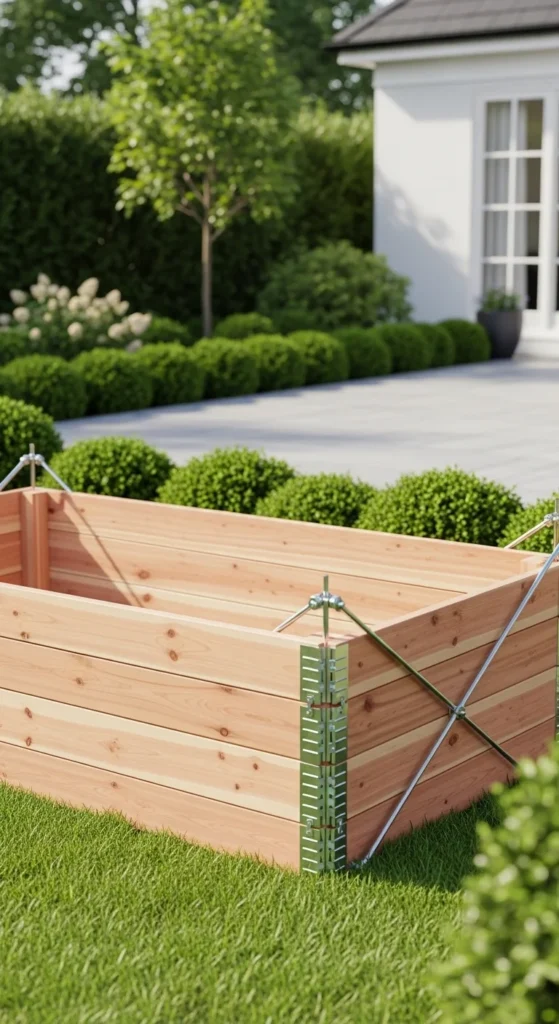
Rod-and-pin systems are popular because they assemble quickly without complicated joinery. Many DIY gardeners replicate this method with simple hardware.
- Connection: metal rods through corner boards
- Assembly: slide boards into place
- Strength: tight vertical locking
Budget tip:
- Use threaded rods from the hardware store instead of specialty kits.
Practical benefit:
- Easy to disassemble and move if garden layout changes.
This style keeps the natural wood appearance while simplifying the build process.
6. Back-Friendly Elevated Wooden Bed
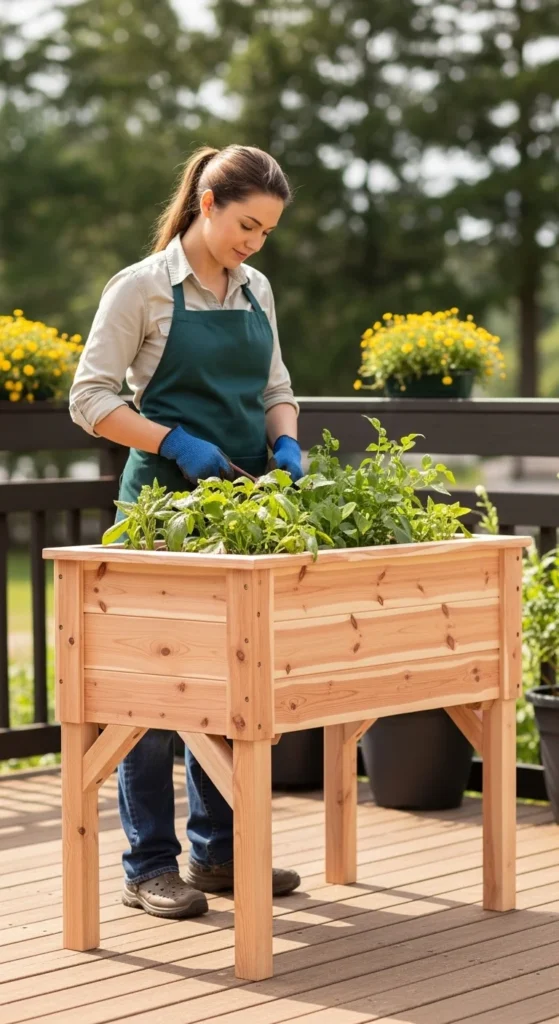
Elevated wooden beds reduce bending and make daily care easier. They are especially useful on patios and paved areas.
- Height: around 30 inches
- Legs: heavy 4×4 posts
- Base support: cross braces underneath
Budget tip:
- Build a smaller elevated bed to keep lumber costs under control.
Maintenance tip:
- Check soil moisture more often because raised legs dry faster.
This design works well for herbs, greens, and compact vegetables while keeping gardening comfortable.
7. Open Bottom Native Soil Plan
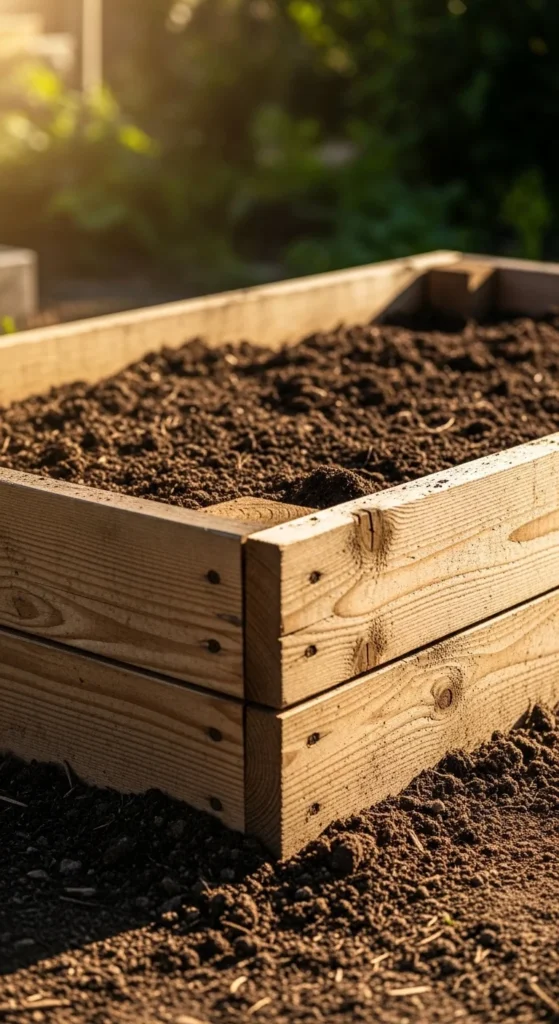
An open-bottom bed allows plant roots to grow into the native soil below. This improves drainage and root depth.
- Bottom: no solid base
- Prep: loosen soil underneath before placing frame
- Barrier: optional hardware cloth for pest areas
Budget tip:
- Skip expensive liners unless weeds are a serious problem.
This simple setup works well for most backyard gardens and keeps construction straightforward.
8. Rust-Free Hardware Build
Outdoor beds last longer when you choose the right fasteners. Rust can weaken joints over time.
- Best choice: exterior or stainless screws
- Avoid: basic indoor drywall screws
- Check yearly: tighten loose corners
Budget tip:
- Buy exterior screws in bulk boxes for better pricing.
This small decision can extend the life of your wooden raised bed significantly.
9. Ultra-Budget Fence Picket Build
Fence pickets are one of the cheapest ways to build a wooden bed. They are thinner but still useful for shallow gardens.
- Material: cedar fence pickets
- Best height: 8–10 inches
- Support: add interior corner blocks
Budget tip:
- Double-layer pickets if you want extra strength.
This plan works well for lettuce, herbs, and quick seasonal crops while keeping costs low.
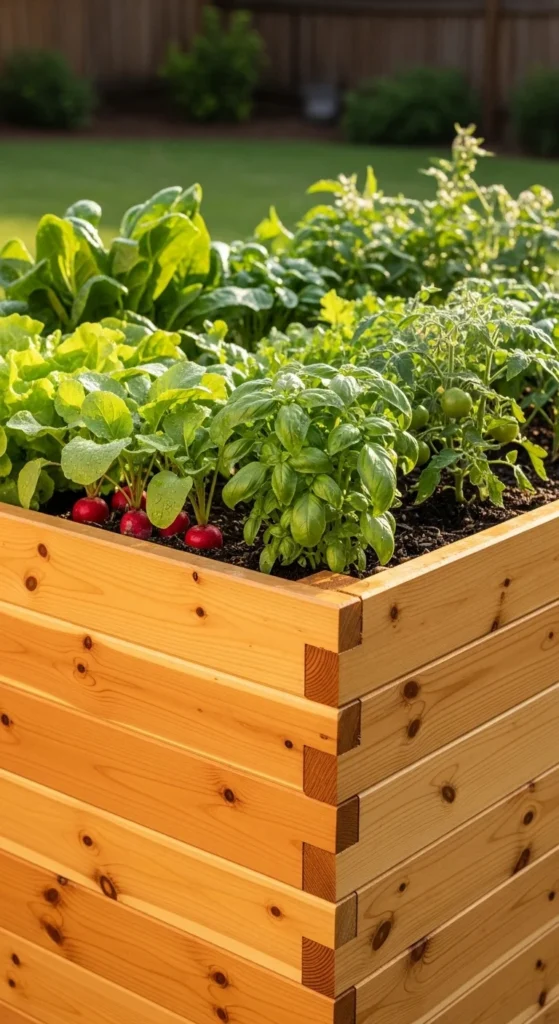
10. Half-Lapped Corner Durability Plan
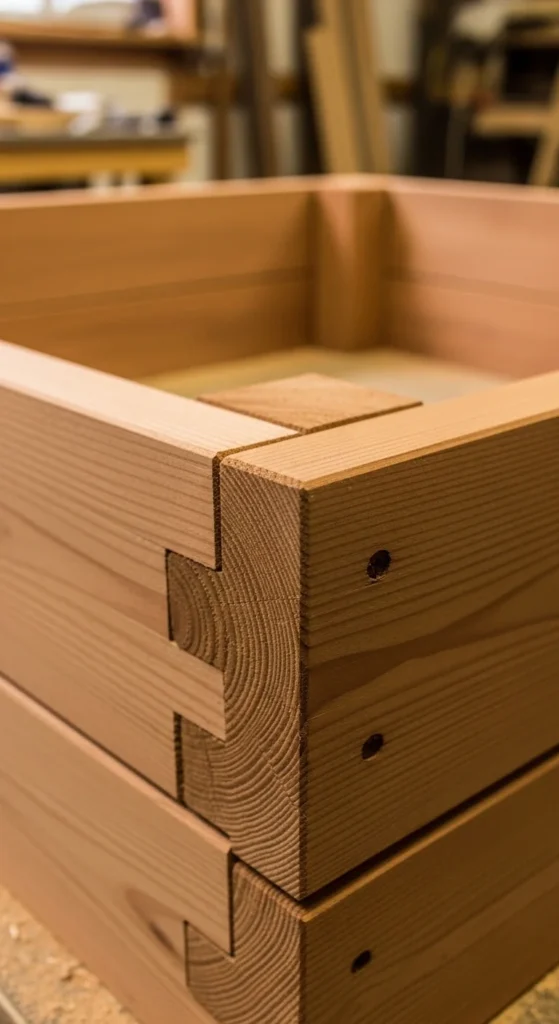
Half-lap joints create tight wooden corners that resist movement over time. This method is popular in long-term builds.
- Joint style: overlapping board ends
- Fastening: screws or exterior bolts
- Result: cleaner, stronger corners
Budget tip:
- Practice cuts on scrap wood first.
This approach takes more effort but rewards you with a very solid frame.
11. Kiln-Dried Straight Board Plan
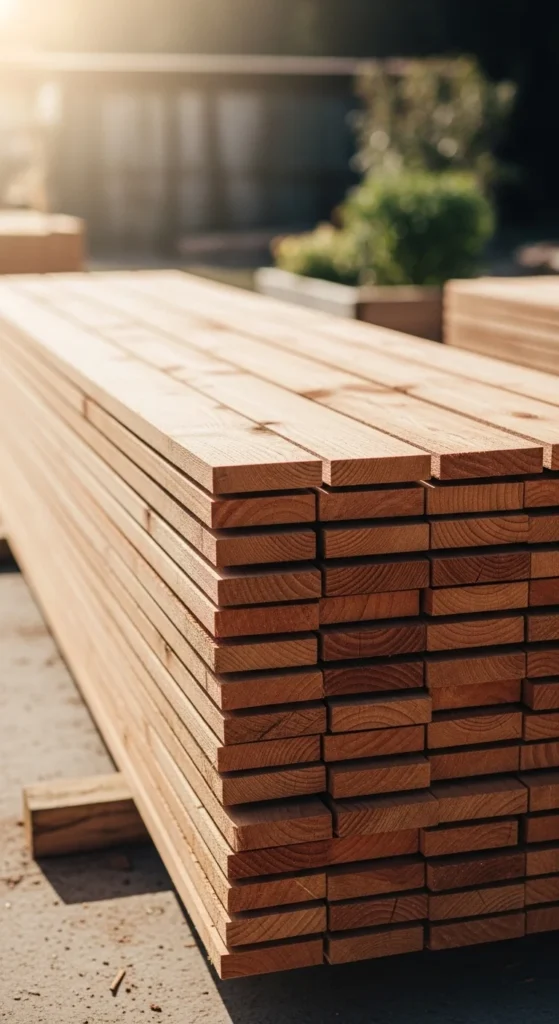
Kiln-dried cedar boards stay straighter over time. This reduces warping and keeps beds looking tidy.
- Benefit: fewer twists
- Fit: cleaner corners
- Longevity: improved board stability
Budget tip:
- Use kiln-dried boards for visible outer faces only.
This plan is helpful if appearance matters in your garden layout.
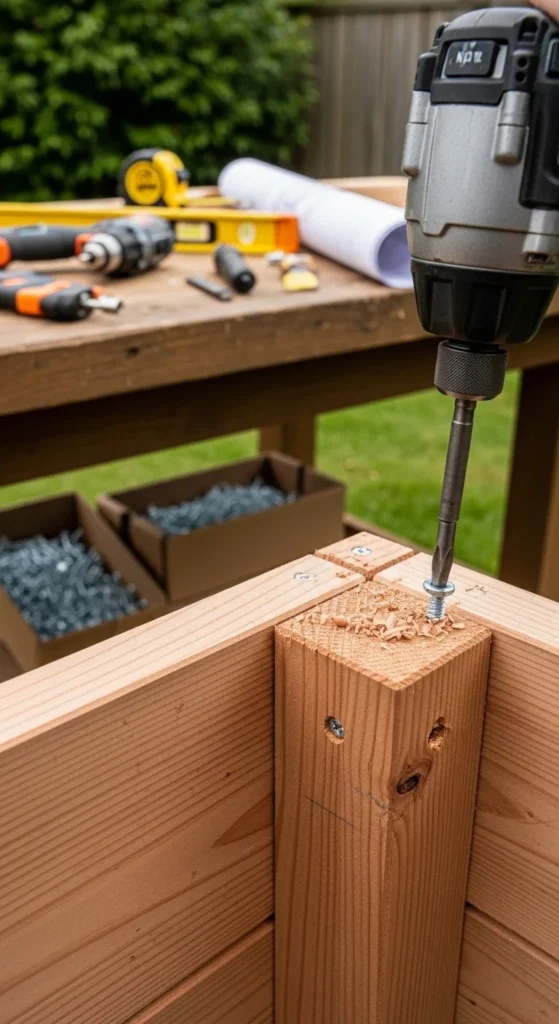
12. Pre-Drilled Panel Weekend Plan

Pre-drilled panels speed up the build. Many DIY gardeners copy this method by marking and drilling boards before final assembly.
- Prep work: drill all pilot holes first
- Layout: stack boards in order
- Assembly: screw together quickly on site
Budget tip:
- Create a simple cardboard template to mark repeat hole positions.
This saves time during weekend builds. It also reduces splitting, which is common when screws go in without pilot holes.
Helpful steps:
- Keep boards clamped while drilling
- Use exterior screws only
- Check corner alignment before tightening fully
This plan works well when building multiple beds at once. The extra prep up front leads to faster final assembly and cleaner results.
13. 4×4 Corner Post Classic Frame
This traditional frame uses solid posts at each corner. It remains one of the most reliable wooden bed styles.
- Posts: untreated 4×4 lumber
- Walls: 2×6 or 2×12 cedar boards
- Fastening: screws driven through side boards into posts
Budget tip:
- Cut longer posts into multiple shorter supports to reduce waste.
Helpful steps:
- Pre-drill pilot holes
- Keep the frame square during assembly
- Level ground before placing the bed
This design holds heavy soil well. It is a smart pick for medium to large vegetable gardens where stability matters over many seasons.
14. Cedar Board and Steel Rod Frame

Steel rod joinery creates tight vertical pressure that keeps boards aligned. Many kit designs use this concept.
- Connection: threaded steel rods
- Assembly: slide boards down the rods
- Strength: strong vertical hold
Budget tip:
- Buy threaded rod from the hardware store instead of specialty garden kits.
Helpful steps:
- Pre-drill clean holes
- Add washers at contact points
- Tighten evenly on all corners
This system allows easy disassembly later. It works well for gardeners who move beds or rearrange layouts often.
15. Rustic Rough-Cut Timber Bed
Rough-cut boards create a farmhouse garden look. They cost less than smooth premium lumber.
- Appearance: natural rustic texture
- Cost: usually lower than surfaced boards
- Strength: thick material holds shape well
Budget tip:
- Lightly sand only the top edges where hands will touch.
Helpful steps:
- Check boards for warping before buying
- Seal exterior lightly if desired
- Keep interior untreated
This style works well in country-style yards and cottage gardens while keeping material costs reasonable.
16. Decorative Cap Rail Wooden Bed
A cap rail gives the bed a finished appearance and creates a comfortable resting edge.
- Top board: usually 2×6 or 2×8
- Attachment: screw from inside the frame
- Bonus: protects wall boards from rain exposure
Budget tip:
- Use lower-cost lumber for the cap while keeping cedar for side walls.
Helpful steps:
- Sand the top rail smooth
- Round sharp edges slightly
- Check for level before fastening
This upgrade improves comfort during planting and gives the bed a polished garden look without major extra cost.
17. Compact 3×6 Urban Garden Bed
The 3×6 size fits many suburban yards while still producing a good harvest.
- Footprint: smaller than 4×8
- Reach: easy access from both sides
- Material use: fewer boards required
Budget tip:
- Build two 3×6 beds instead of one oversized bed for better crop rotation.
Helpful steps:
- Place beds with walking space between
- Add mulch paths to reduce mud
- Install drip line if watering by hand becomes tiring
This layout works well for families who want steady vegetable production without committing to very large frames.
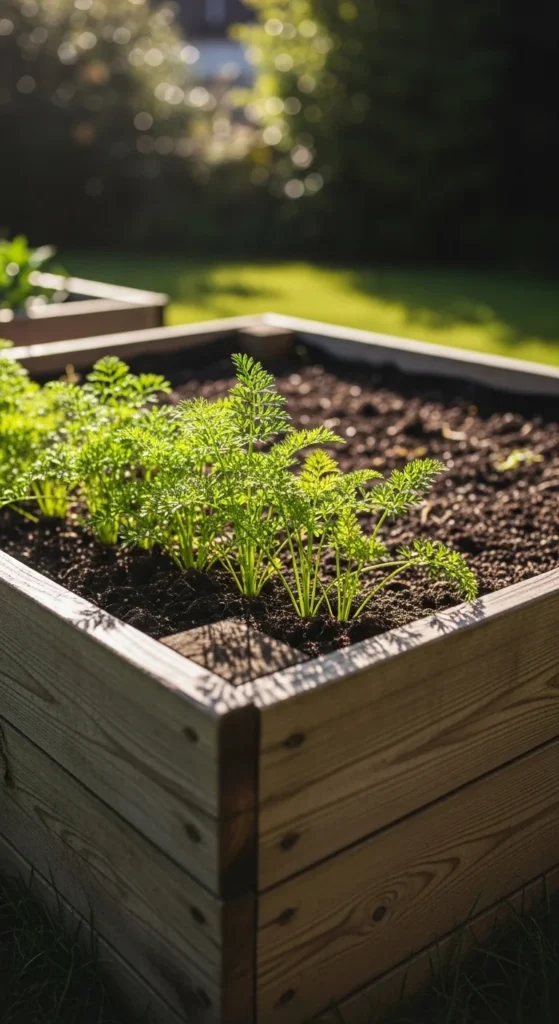
18. Extra-Deep Root Vegetable Bed
Root crops grow better in deeper soil. This wooden plan uses stacked boards for added depth.
- Depth target: 16–22 inches
- Frame: two or three board layers
- Soil: loose mix with compost
Budget tip:
- Fill the lower portion with sticks and leaves to reduce soil cost.
Helpful steps:
- Water slowly after filling
- Allow soil to settle for a day
- Top off with additional mix if needed
This design works well for carrots, beets, potatoes, and parsnips. Deeper soil often leads to straighter, cleaner roots.
19. Braced Long-Span Wooden Bed
Long beds can bow outward from soil pressure. Adding a center brace keeps walls straight.
- Brace type: interior cross support
- Placement: midpoint of long side
- Material: scrap cedar or pressure-safe wood
Budget tip:
- Use leftover lumber pieces for the brace.
Helpful steps:
- Install brace before filling soil
- Check wall alignment
- Tighten screws after first watering
This simple reinforcement helps large wooden beds hold shape much longer.
20. Natural Oiled Cedar Finish Bed
A light exterior oil finish keeps cedar looking warm while still remaining food safe.
- Finish area: outside only
- Product: natural plant-safe oil
- Benefit: slows surface weathering
Budget tip:
- Apply oil once every season instead of using expensive coatings.
Helpful steps:
- Clean wood before application
- Wipe off excess oil
- Allow to dry fully
This keeps the rustic look while helping the wood age more evenly over time.
21. Simple Weekend Hex-Screw Build
Hex screws and basic framing angles create a fast weekend project.
- Hardware: hex head exterior screws
- Corners: metal angle brackets
- Tools: basic drill driver
Budget tip:
- Buy screws in contractor packs for lower cost per piece.
Helpful steps:
- Clamp boards before driving screws
- Tighten gradually
- Recheck square corners
This approach keeps the build beginner friendly while producing a strong wooden bed.
22. Classic Rustic Garden Collection Layout
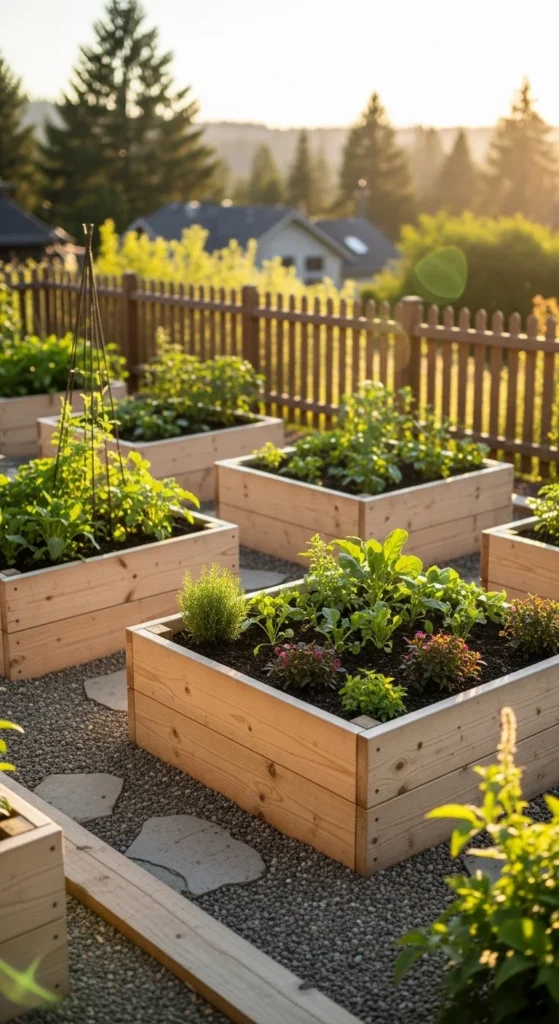
Instead of one large bed, many gardeners build a small collection of matching wooden beds.
- Layout: spaced evenly with walking paths
- Material: consistent cedar boards
- Benefit: easier crop rotation
Budget tip:
- Build one bed at a time across several weekends.
Helpful steps:
- Plan path spacing first
- Keep bed heights consistent
- Add mulch between beds
This layout creates a tidy garden appearance and makes seasonal planting much easier to manage.
Conclusion
Classic wooden raised garden beds remain a smart choice for gardeners who want durability and natural style. Cedar boards, solid corner support, and rust-resistant hardware make the biggest difference in long-term performance. Start with one simple bed, then expand your layout as your garden grows. With careful material choices and basic tools, you can build a wooden garden setup that produces reliable harvests for many seasons.

Leave a Reply