
Raised garden beds remain one of the fastest ways to grow vegetables at home. They warm up quicker in spring, keep weeds manageable, and make harvesting easier on your back. With wood prices shifting and small-space gardening rising in 2026, smart DIY builds are more valuable than ever. The ideas below focus on budget-friendly materials, simple tools, and realistic weekend builds. Whether you have a big yard or a small patio, these raised bed projects help you grow more food without overspending.
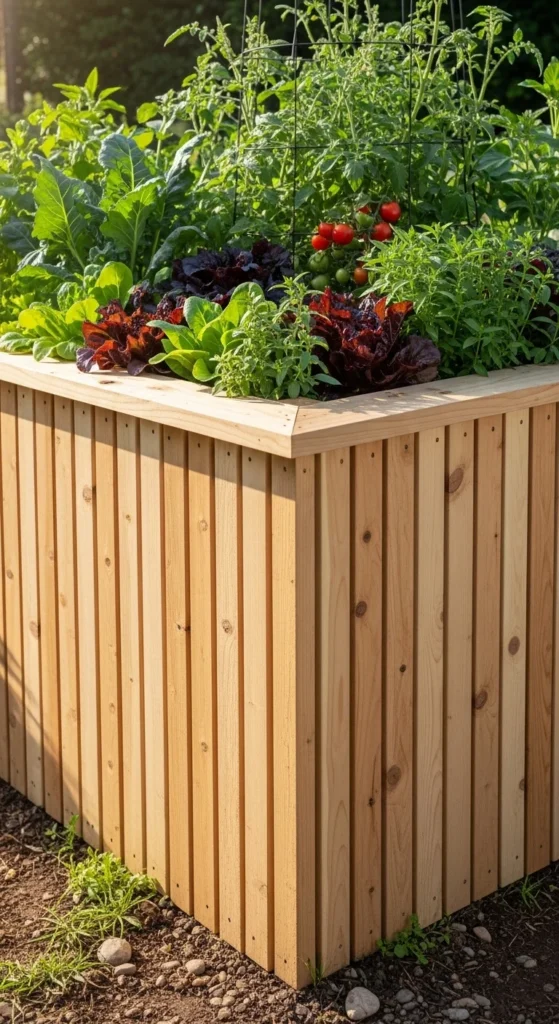
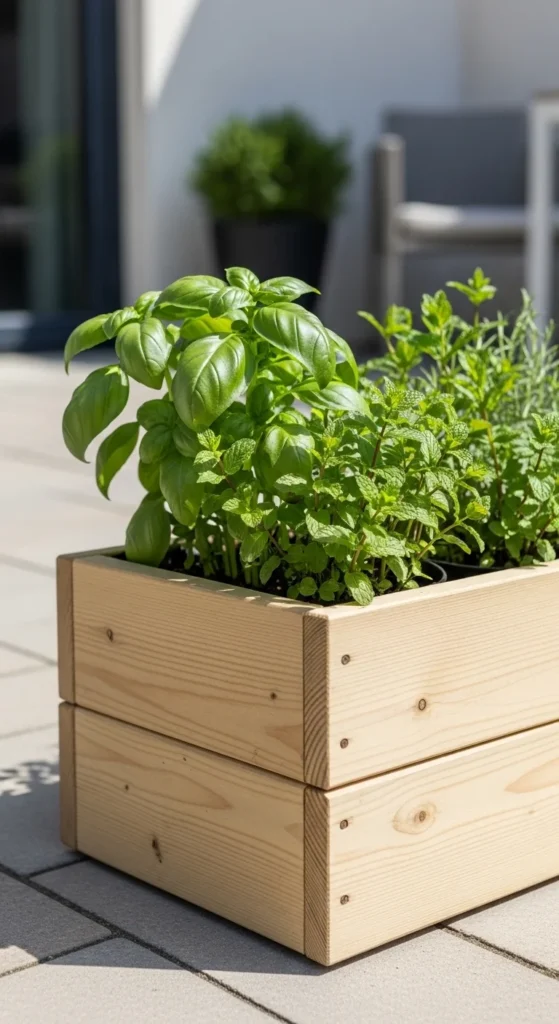
1. Classic Cedar Box Bed
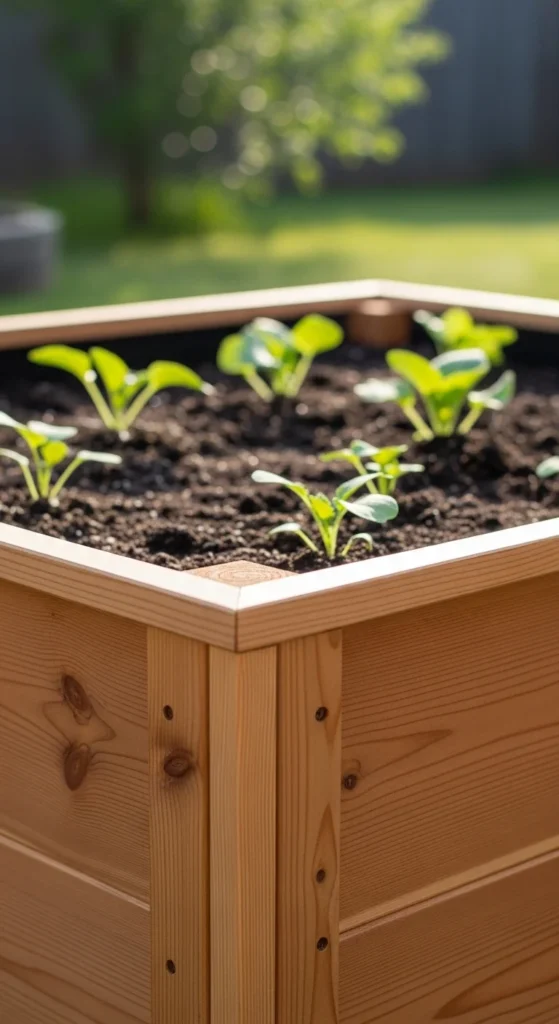
The classic cedar box remains a favorite for good reason. Cedar naturally resists rot and insects, which means your bed can last 10+ years with minimal care. Most gardeners start with a simple 4×4 or 4×8 frame, which fits standard lumber sizes and keeps cuts minimal.
- Use 2×6 cedar boards for beginner-friendly height
- Pre-drill pilot holes to prevent splitting
- Secure corners with exterior wood screws
If cedar feels expensive, check local fence pickets. Many DIY gardeners build full beds for under $120 using this trick. Keep the depth around 10–12 inches for mixed vegetables.
Place your bed where it gets 6–8 hours of sun. Add cardboard underneath to block weeds before filling with soil. This simple design works in almost any backyard and gives beginners a reliable starting point.
2. $100 Budget Starter Bed
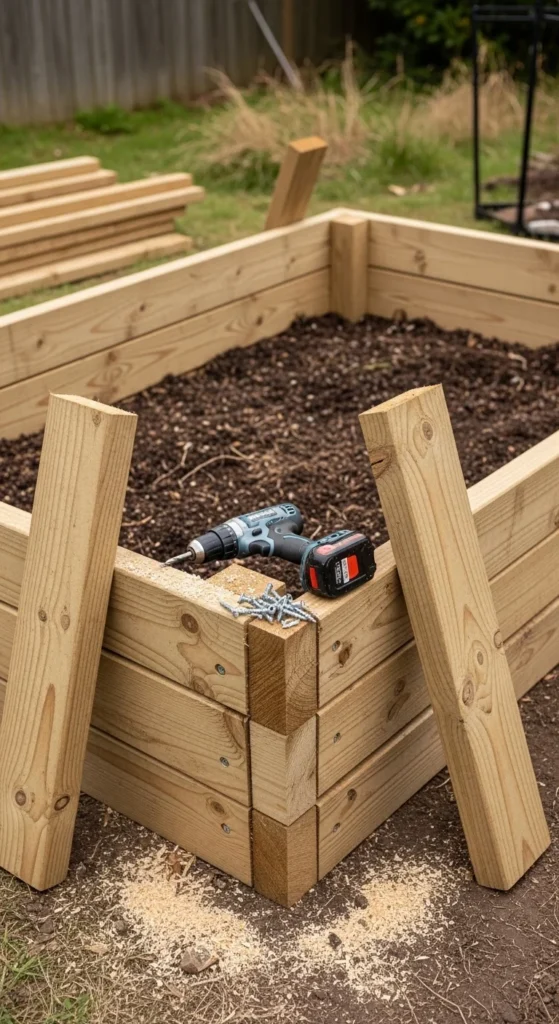
You don’t need fancy lumber to start gardening. A tight budget build can still perform well if you focus on smart cuts and simple hardware. Many gardeners complete a starter bed for around $100 using standard boards and basic screws.
- Choose untreated pine or budget cedar
- Rip scrap 2x4s into corner posts
- Use clamps to hold boards square while drilling
Keep the bed small at first. A 4×4 layout reduces soil costs and fits in tight spaces. Line the bottom with cardboard or landscape fabric to slow weeds.
To stretch your budget further, fill the bottom third with sticks or dry leaves before adding soil mix. This reduces how much soil you need to buy.
This project works well for first-time builders who want quick results without a big upfront spend.
3. Waist-High Standing Garden Bed
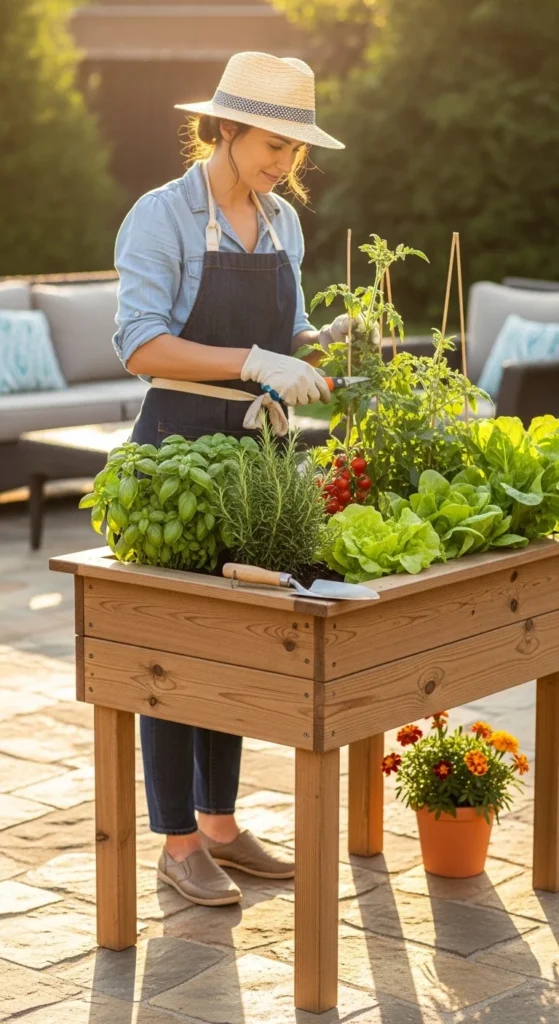
Back-friendly gardening continues to grow in popularity. A waist-high bed removes most bending and makes daily care easier. It’s especially helpful for older gardeners or anyone with mobility concerns.
- Build the frame first
- Attach sturdy 4×4 legs at each corner
- Add cross supports underneath for weight
Aim for a finished height between 30–36 inches. That range works well for most adults. Use thicker boards for the base so the soil weight stays supported.
Because elevated beds dry faster, mix in compost and water-retaining soil. Some gardeners also add simple drip lines to reduce watering chores.
Place this style near a patio or walkway for easy access. It turns gardening into a comfortable daily routine rather than a back-straining task.
4. Cinder Block Quick Build Bed
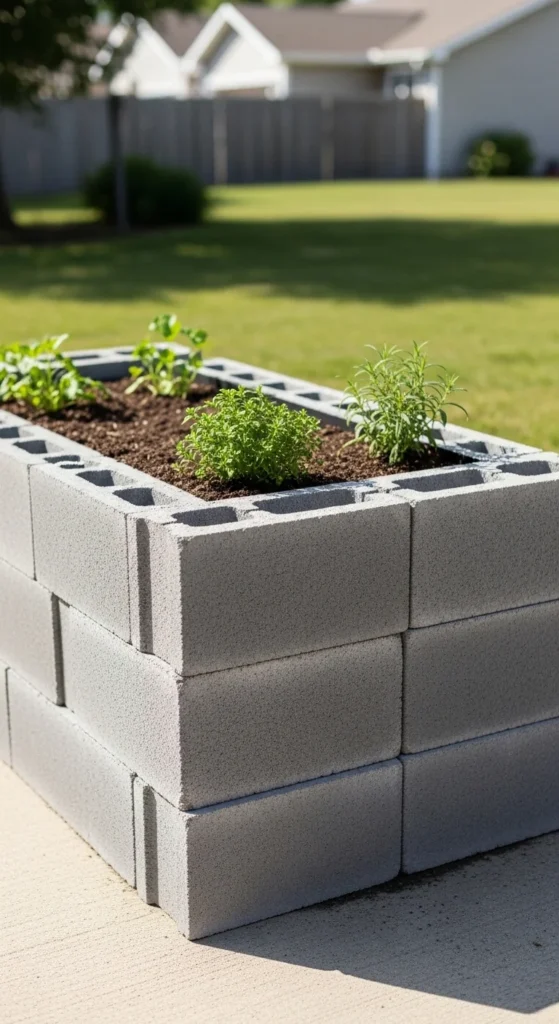
If you want zero cutting, cinder blocks offer one of the fastest builds. You simply level the ground and stack the blocks into shape. The hollow centers can even hold herbs or flowers.
- Lay blocks on leveled soil
- Check corners with a square
- Fill holes with soil for bonus planting spots
This style works well for renters because it’s fully removable. Costs often stay under wood builds, especially if blocks are sourced locally.
Add cardboard or hardware cloth underneath if burrowing pests are common in your area. For appearance, many gardeners paint the blocks or add wood caps on top.
It’s not fancy, but it’s reliable and beginner friendly.
5. No-Saw Fence Picket Bed
Fence pickets are one of the best money-saving materials available. They are thinner than standard boards but much cheaper. With careful spacing, they still hold soil well.
- Use cedar fence pickets when possible
- Attach to simple corner posts
- Double-layer the walls for strength
Many DIY gardeners complete this build for under $80. That makes it perfect for multi-bed gardens on a tight budget.
Because the boards are thinner, avoid very tall beds. Keep height around 8–10 inches for best durability.
Seal the outside with food-safe oil if you want longer life. This simple hack stretches your gardening budget much further.
6. L-Shaped Corner Garden Bed
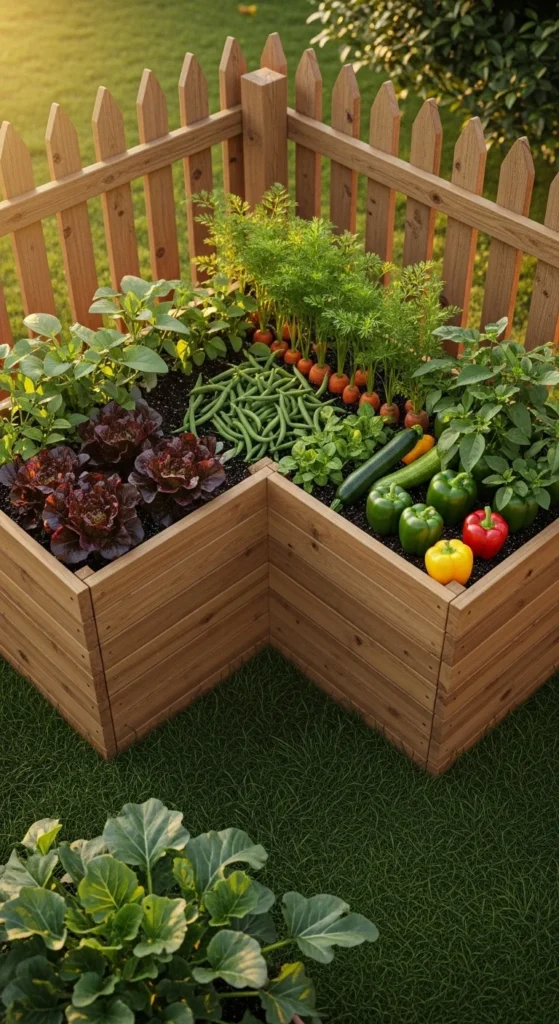
Corner spaces often go unused. An L-shaped bed turns that wasted area into productive growing space. It also creates a clean, built-in look along fences.
- Build two rectangular frames
- Join them with shared corner posts
- Level carefully before filling
This layout works well for herbs on one side and vegetables on the other. It also improves garden flow by keeping pathways open.
Stick with 2×6 boards for easy assembly. Many builders complete this in a single weekend.
If space is tight, keep each arm about 3 feet wide so you can reach the center without stepping inside the bed.
7. Narrow Side-Yard Bed
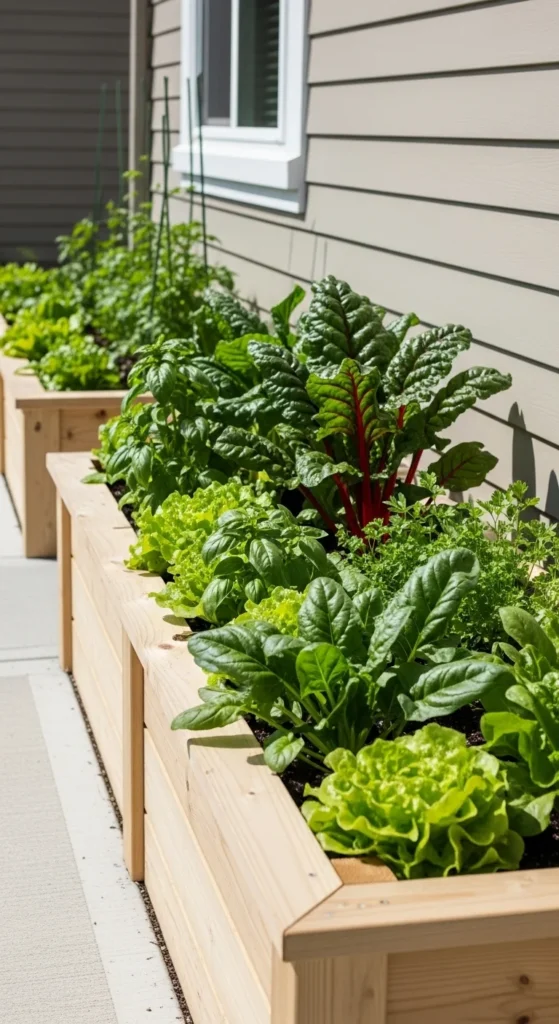
Side yards often receive good sunlight but get ignored. A narrow raised bed fits perfectly in these spaces and adds surprising growing capacity.
- Width: 18–24 inches
- Length: whatever space allows
- Height: 10–12 inches works well
Because the bed is slim, you can reach everything from one side. That keeps maintenance simple.
Use this layout for lettuce, spinach, green onions, and herbs. Deep-root crops may feel cramped in very narrow beds.
Add drip irrigation if the area gets hot. Side yards can dry out faster due to reflected heat from walls.
8. Hardware Cloth Pest-Proof Bed
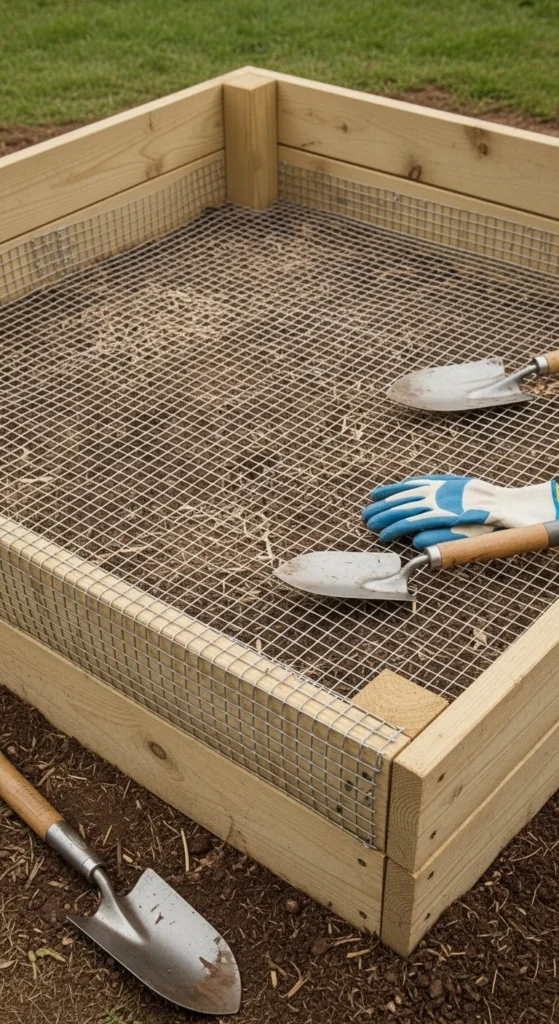
Burrowing pests ruin many gardens. Adding hardware cloth to the bottom creates a strong barrier while still allowing drainage.
- Staple ½-inch hardware cloth to the base
- Fold edges upward inside the frame
- Place bed on leveled soil
This step adds a small cost but saves crops from voles and gophers. It’s especially helpful in rural areas.
Wear gloves while handling the mesh. The edges can be sharp.
Once installed, cover the mesh with cardboard or landscape fabric before adding soil. This keeps soil from washing through while maintaining protection.
9. Self-Watering Raised Bed
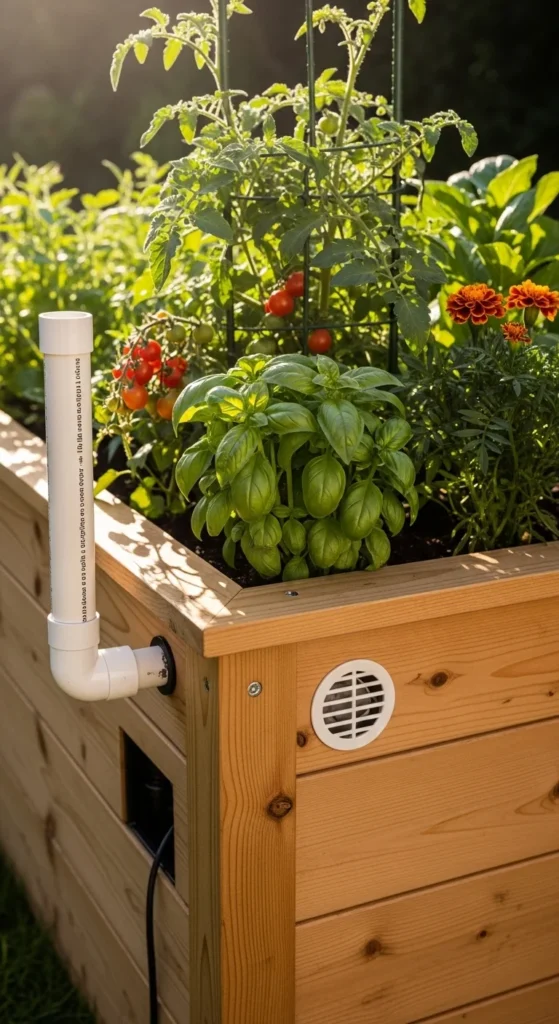
Self-watering beds reduce daily maintenance. They use a water reservoir below the soil that slowly feeds plant roots.
- Add perforated pipe or water chamber
- Include overflow hole on the side
- Use moisture-retaining soil mix
This setup works well for hot climates or busy schedules. Plants receive steady moisture without constant hand watering.
Costs run slightly higher upfront but save time later. Many gardeners retrofit existing beds with simple reservoir kits.
Keep the fill pipe accessible from the top corner for easy refilling.
10. Portable Wheeled Garden Bed
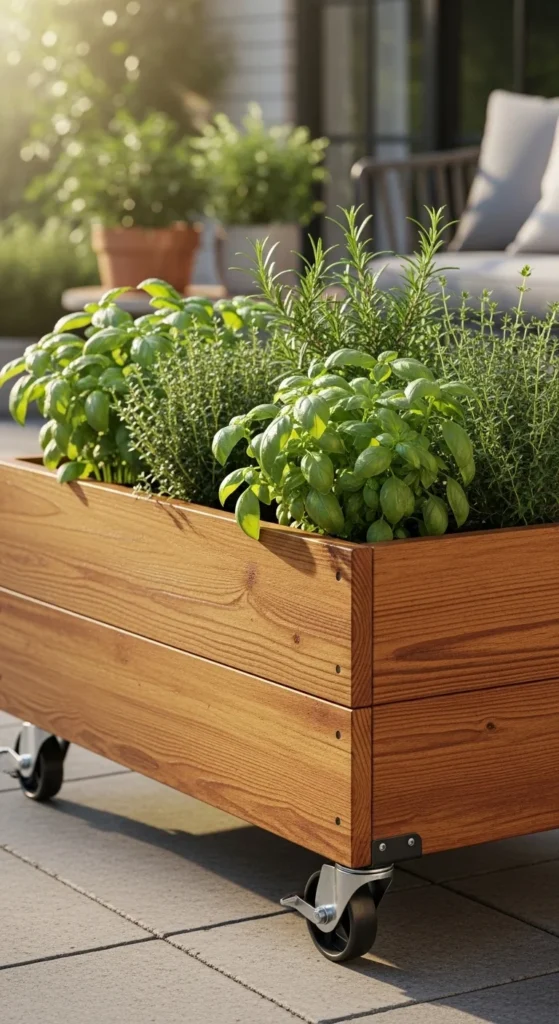
Mobility adds flexibility to small gardens. A wheeled raised bed lets you move plants to follow sunlight or clear space when needed.
- Attach heavy-duty locking casters
- Reinforce the base frame
- Keep soil depth moderate
This design works well on patios, decks, or rental homes. Locking wheels prevent unwanted movement.
Because wheels carry weight, avoid oversized beds. Smaller boxes last longer and roll more smoothly.
Use lightweight soil mixes to reduce strain on the frame.
11. Tiered Stair-Step Garden Bed
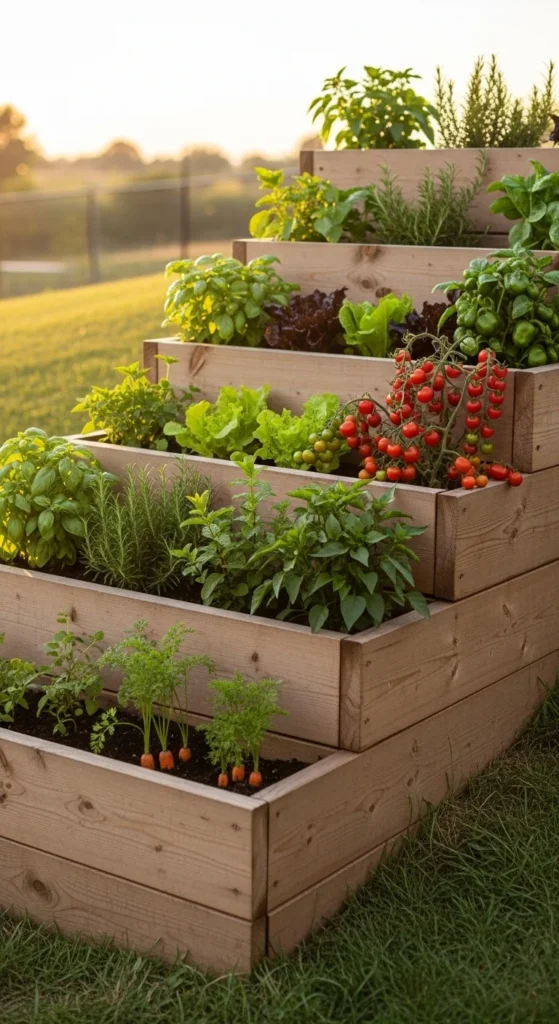
Sloped yards can be tricky. A stair-step bed turns uneven ground into organized planting space.
- Build stacked rectangular frames
- Secure each level firmly
- Fill from bottom upward
This layout improves drainage and creates a layered garden look. It also keeps soil from washing downhill during heavy rain.
Use lower tiers for larger plants and upper tiers for herbs or greens.
12. Metal Corner Bracket Bed
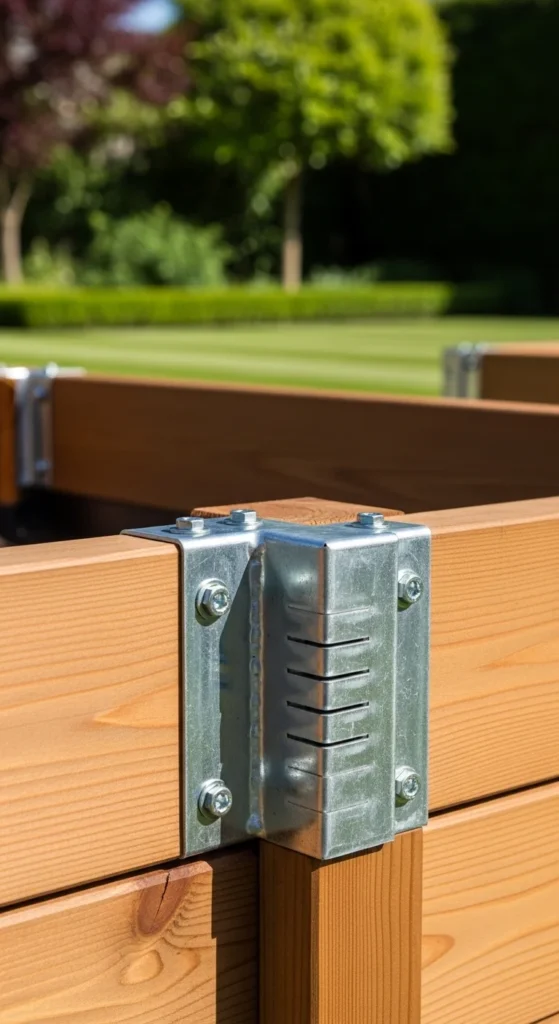
Metal brackets simplify construction. They hold corners square and reduce measuring mistakes.
- Use pre-made garden bed brackets
- Slide boards into place
- Tighten with exterior screws
This is ideal for beginners who want straight corners without complex cuts. Assembly is fast and repeatable.
The hardware costs a bit more but saves time and frustration.
13. Shallow Salad Garden Bed
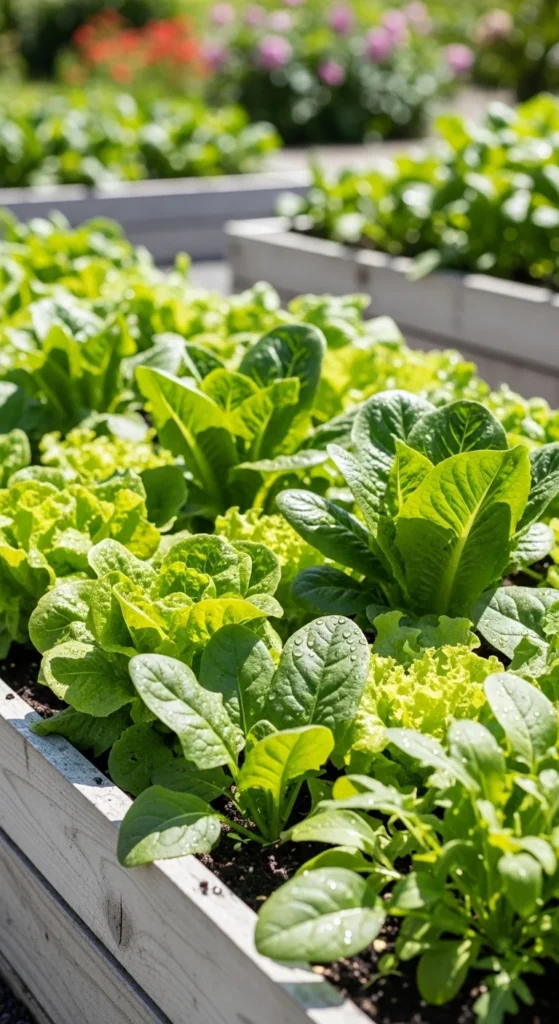
Not every bed needs deep soil. Leafy greens thrive in shallower builds, which cuts soil costs nearly in half.
- Depth: 6–8 inches
- Great for lettuce and herbs
- Faster to fill and cheaper
This is perfect for quick spring gardens. It also warms up faster in cooler weather.
Avoid root crops like carrots in shallow beds.
14. Raised Bed With Trellis Wall
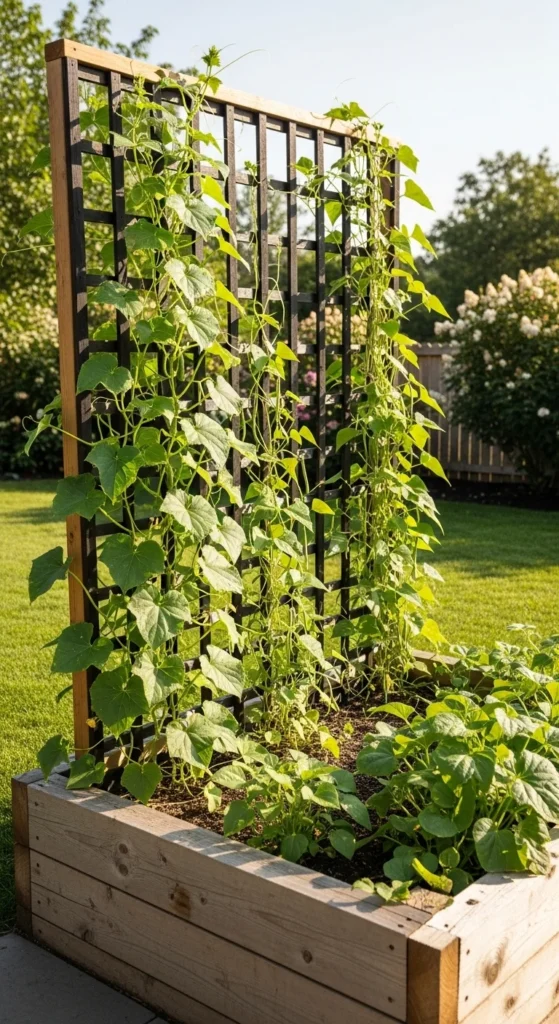
Adding a trellis expands growing space upward. It’s perfect for cucumbers, beans, and peas.
- Attach trellis to back frame
- Anchor firmly into corner posts
- Place on north side of bed
Vertical growth saves ground space and improves airflow.
15. Reclaimed Wood Garden Bed
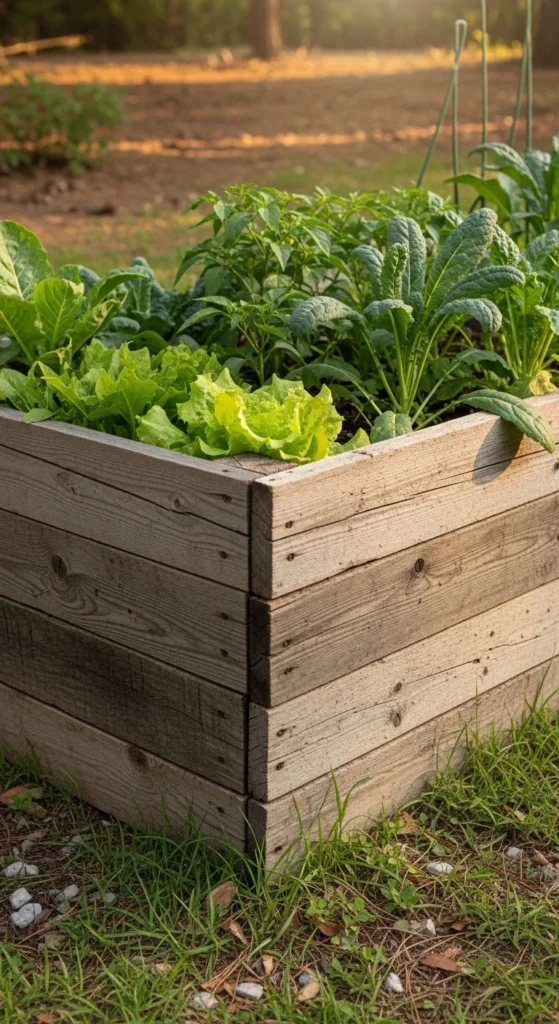
Using reclaimed wood cuts costs and reduces waste. Old pallets or barn wood can work well when selected carefully.
- Use heat-treated pallets only
- Avoid chemically treated wood
- Sand rough edges
This approach creates a rustic look while staying budget friendly.
16. U-Shaped Accessible Garden Bed
A U-shaped layout allows you to stand in the middle and reach all sides easily.
- Keep inner walkway about 2 feet wide
- Build three connected beds
- Level carefully
This design works great for intensive vegetable gardens.
17. Brick Border Raised Bed
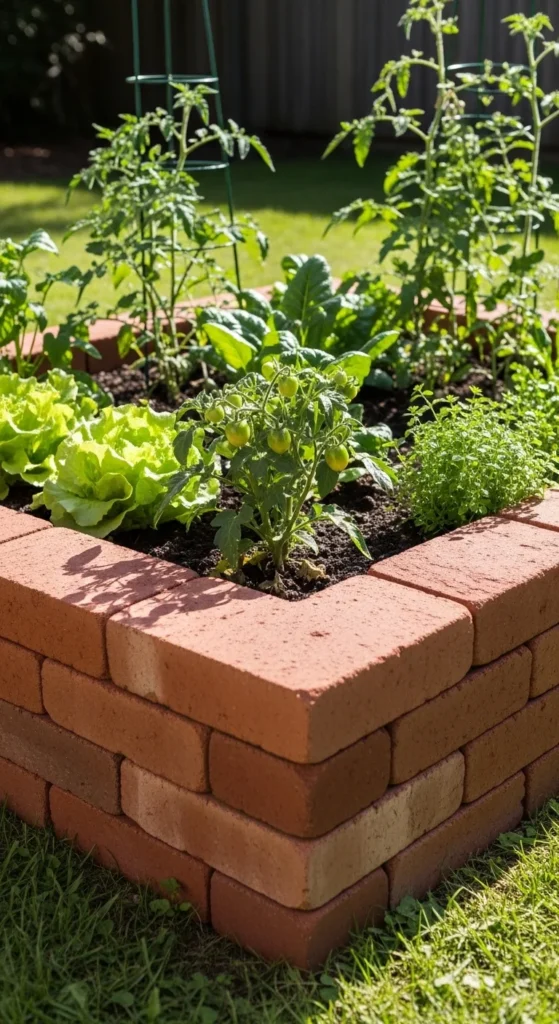
Brick beds require little maintenance and offer a clean look.
- Lay bricks on compacted soil
- Use landscape adhesive if stacking
- Add weed barrier underneath
They take longer to build but last many years.
18. Hoop House Raised Bed
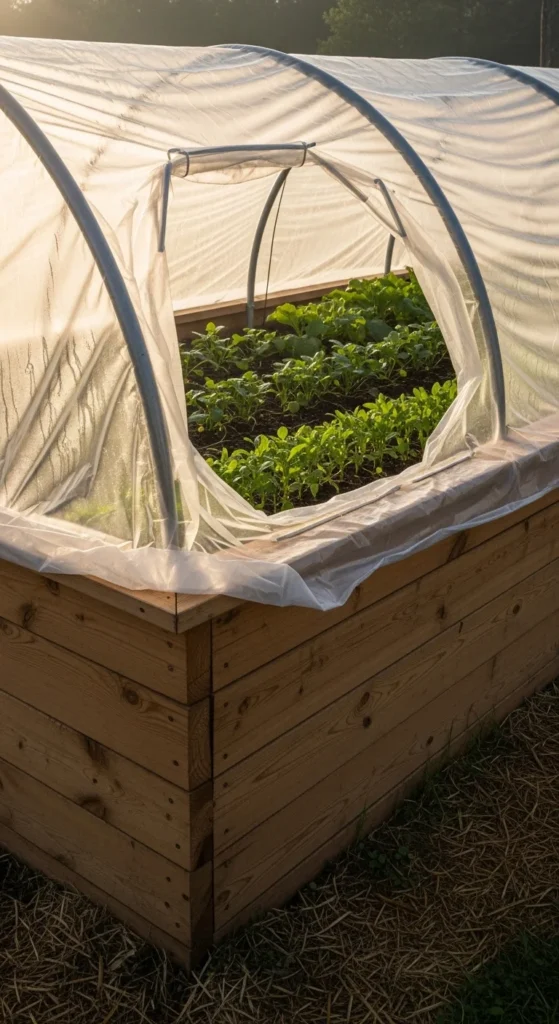
Adding hoops extends the growing season.
- Use PVC or metal hoops
- Cover with garden fabric
- Secure edges tightly
This helps protect plants from frost and pests.
19. Keyhole Compost Garden Bed
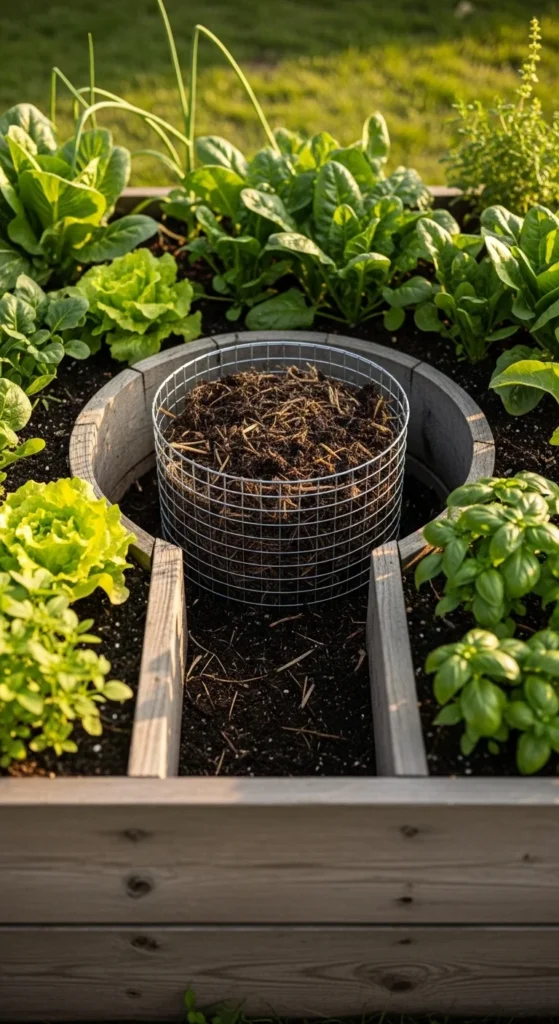
The keyhole design feeds plants from the center compost basket.
- Circular outer bed
- Wire compost column
- Water from the middle
It reduces fertilizer needs over time.
20. Raised Bed With Seating Edge
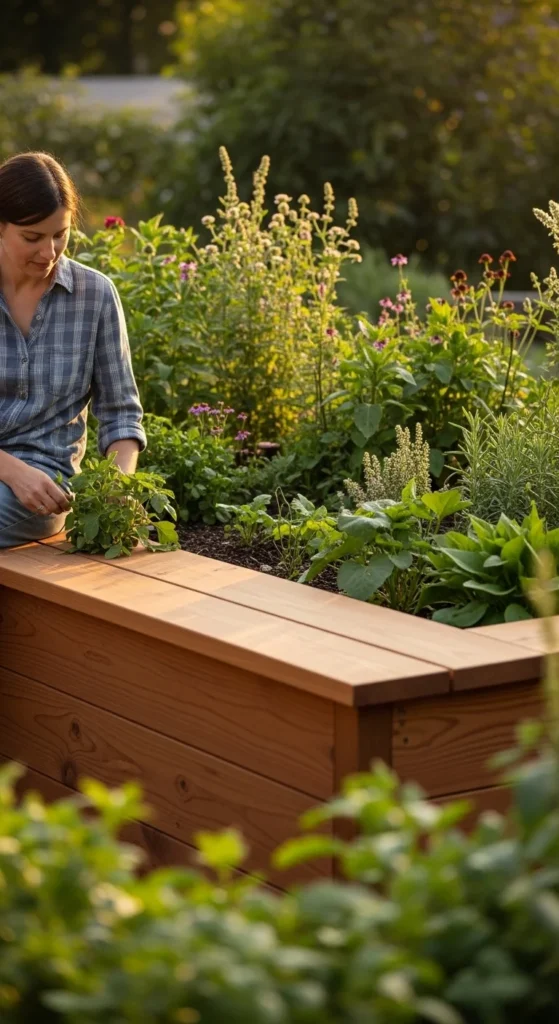
A wide top board creates a built-in sitting edge.
- Add 2×8 cap boards
- Sand edges smooth
- Secure from inside frame
This adds comfort during planting and harvesting.
21. Mini Patio Herb Bed
Small patios can still grow plenty of herbs.
- Size: 2×3 feet
- Use lightweight soil
- Place near kitchen door
This makes daily harvesting easy and practical.
22. Double-Height Root Crop Bed
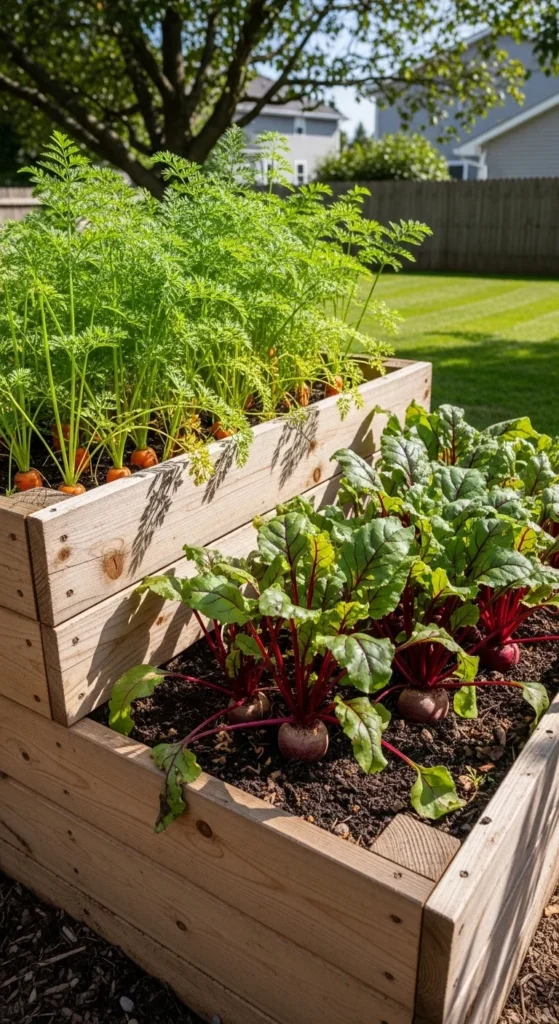
Root vegetables need deeper soil.
- Stack two board layers
- Depth: 12–18 inches
- Fill with loose soil mix
Perfect for carrots, potatoes, and beets.
23. Decorative Trim Designer Bed
Small design touches can upgrade the whole garden look.
- Add corner trim boards
- Paint exterior if desired
- Keep interior untreated
This style works well near patios and front yards where appearance matters.
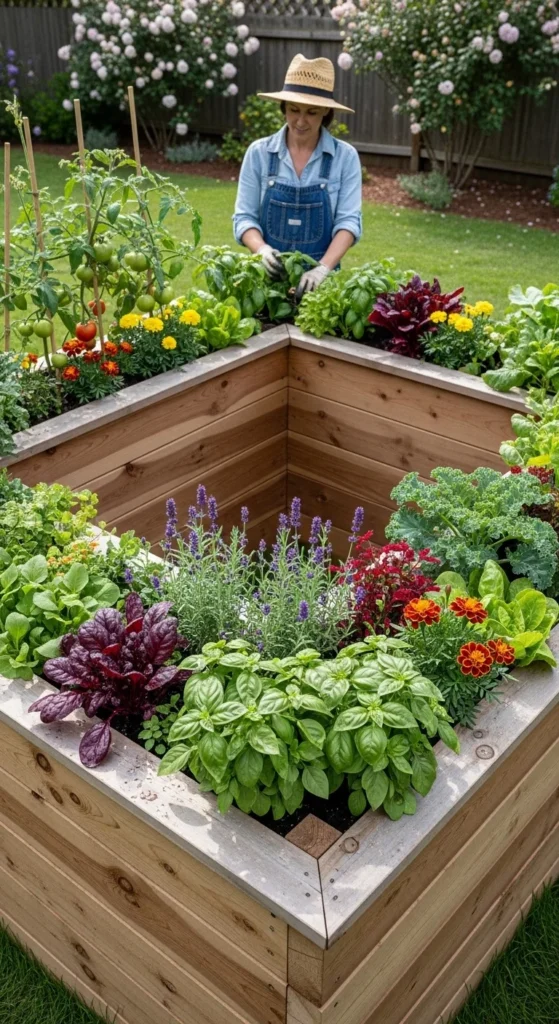
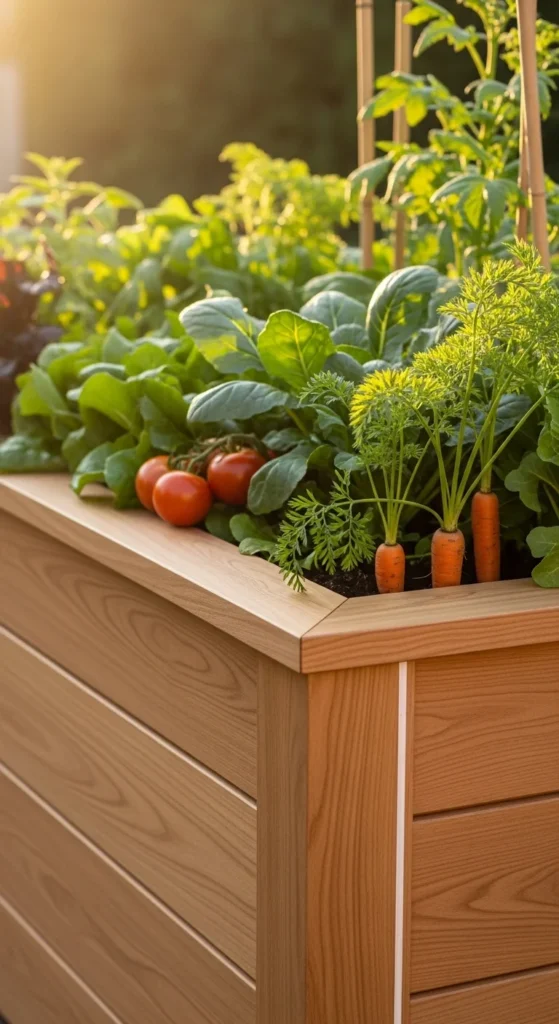
Conclusion
DIY raised garden beds give you full control over cost, size, and layout. Start simple with a basic cedar box or budget build, then expand as your garden grows. Focus on good sunlight, solid corners, and the right soil depth for your crops. Even one well-built bed can produce a steady supply of herbs and vegetables. Pick one idea above, gather your materials this weekend, and get your first bed in the ground.

Leave a Reply