
Ever tried a pocket garden… only to watch it sag, leak, or spill soil everywhere?
Yeah — the “floppy wall planter” struggle is real.
The secret to a fabric vertical garden that actually works long-term isn’t just pockets. It’s structure, waterproof layers, and smart drainage.
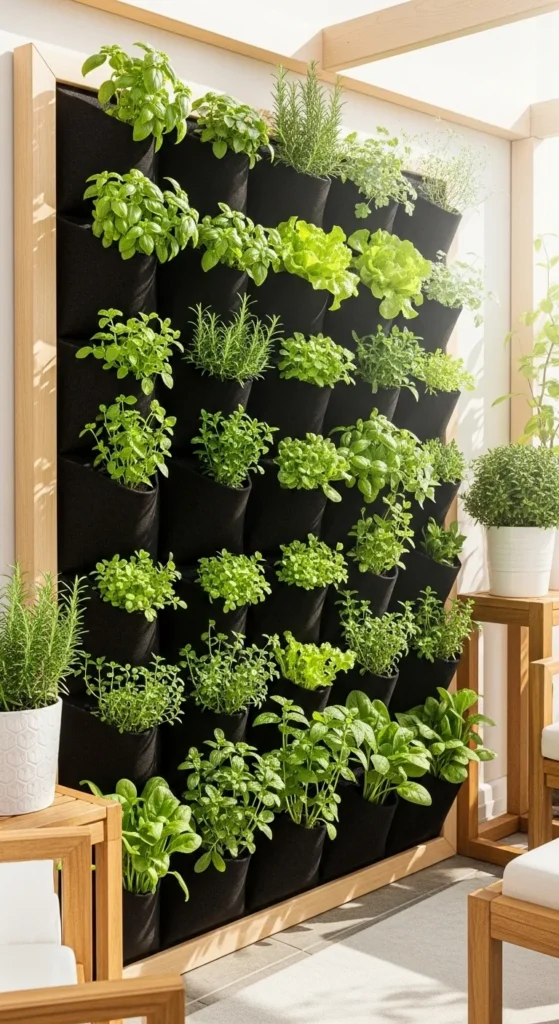
When done right, a fabric green wall looks lush, modern, and incredibly satisfying — like a living tapestry of herbs and greenery.
And the best part? It still fits on the smallest wall or balcony.
Let’s build one that stays strong, doesn’t sag, and keeps plants happy.
Why Fabric Vertical Gardens Work So Well
Fabric pockets are different from pots or bottles.
They’re:
- Lightweight
- Breathable for roots
- Space-saving
- Flexible
- Perfect for shallow plants
- Easy to scale bigger or smaller
But here’s the catch:
Wet soil gets heavy.
Without support, pockets stretch and droop.
So we’ll build this one the right way — sturdy first, plants second.
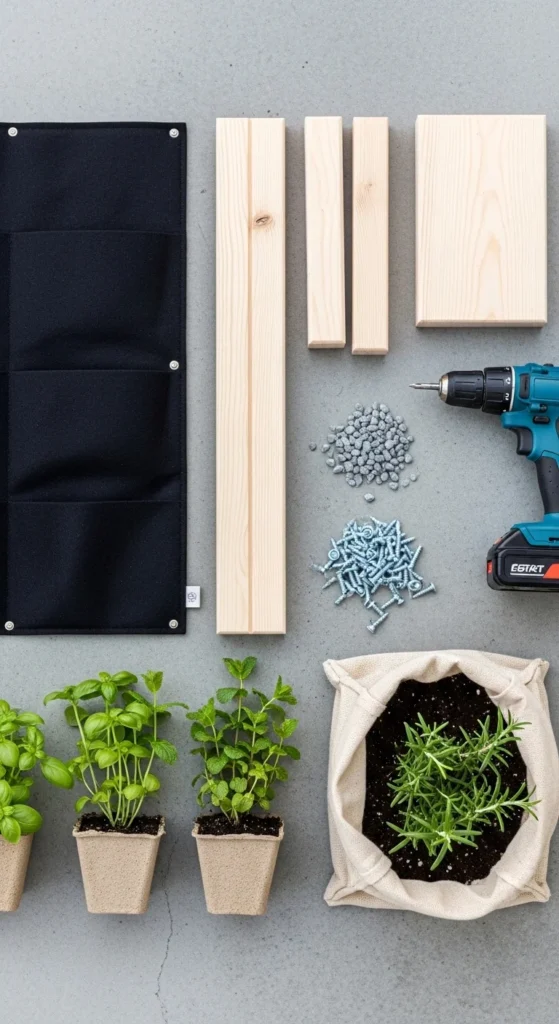
What You’ll Need
A few extra materials make all the difference in durability.
Core supplies:
- Heavy-duty geotextile felt or thick fabric pockets
- Wooden or aluminum frame
- Waterproof plastic panel or liner
- Drill + screws + washers
- Heavy-duty staples
- Potting mix + compost
- Gravel or pebbles (for drainage)
Optional (highly recommended):
- Drip irrigation tubing
- Fishing line or strong thread (for reinforcing seams)
- Level
Think of this like building a house: frame → protection → pockets → plants.
Step 1: Build a Strong Support Frame
This step prevents 90% of sagging issues.
You need a rigid base.
Simple DIY frame:
- Two vertical 2×4 posts
- Two or three horizontal runners (2×6 boards work great)
- Rectangle shape sized to your wall
Attach everything with lag bolts or sturdy screws.
Why runners?
Because soil weight can exceed 50+ pounds when wet. Runners distribute that weight evenly.
If you want something rust-proof outdoors, aluminum profiles work beautifully too.
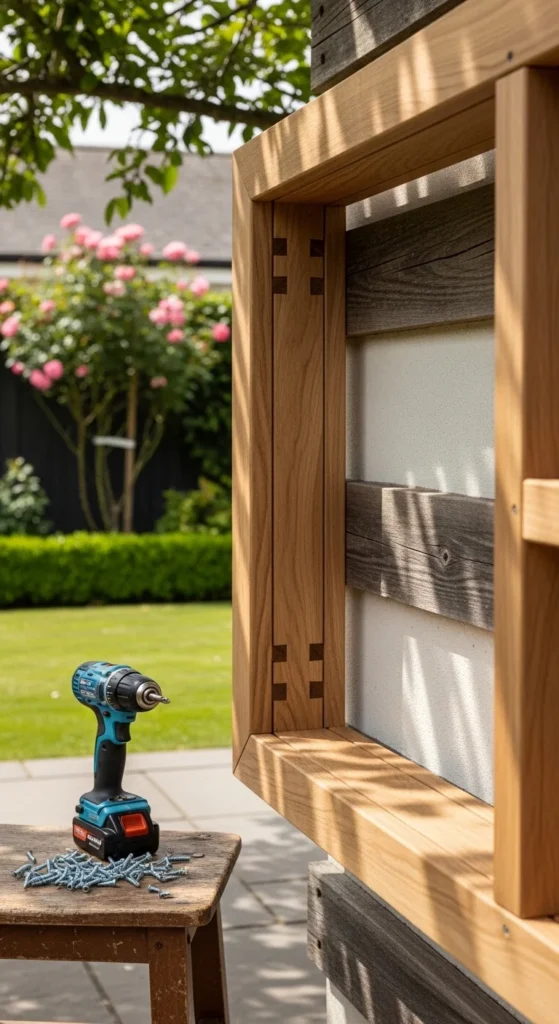
Before moving on — make sure it’s level.
Crooked frames = crooked green walls.
Step 2: Add a Waterproof Barrier (Super Important)
Never mount fabric directly on walls.
Water WILL seep through.
Layer it like this:
- Wall
- Air gap/frame
- Waterproof plastic panel or liner
- Fabric pockets
Staple the plastic liner tightly to the frame.
Seal edges with silicone if installing indoors.
This keeps:
- Walls dry
- Mold away
- Wood from rotting
It’s boring… but essential.
Step 3: Attach the Fabric Pockets Securely
Now comes the planting surface.
Use heavy-duty felt or geotextile fabric — thin fabric stretches too fast.
Mounting tips:
- Use screws + washers through grommets
- Or staple every few inches
- Attach tightly (no slack)
- Space supports every 18–22 inches
If you’re sewing your own pockets:
- Reinforce seams with fishing line (surprisingly strong and weatherproof)
Fishing line adds serious durability without bulk.
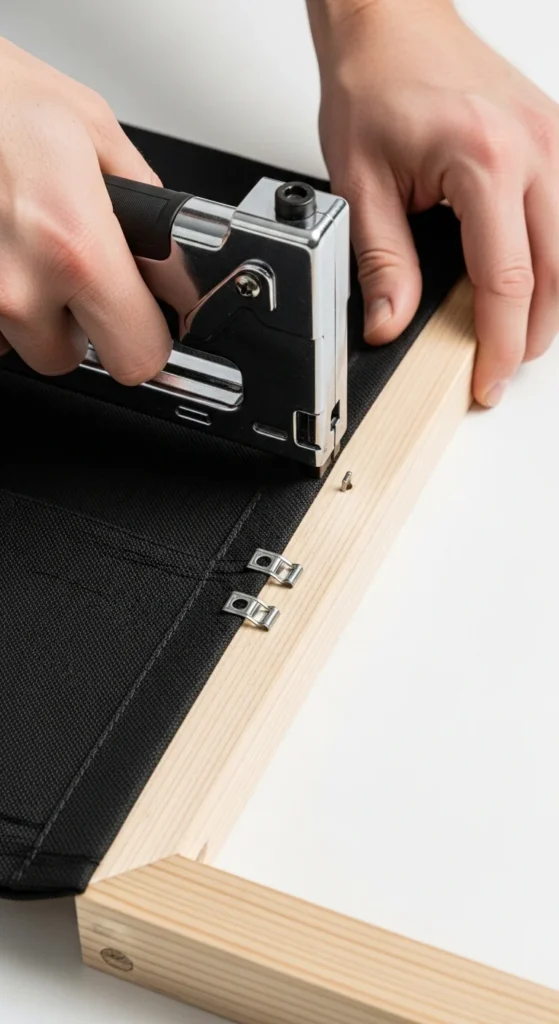
At this point, it should already feel firm — not floppy.
Step 4: Build Drainage Into Each Pocket
Drainage is the difference between thriving plants and root rot.
Inside each pocket:
- Add gravel or pebbles to fill 1/4–1/3 of the bottom
- Then add potting soil mix
This keeps roots above standing water.
Ideal soil mix:
- 70% light potting soil
- 30% compost
Avoid heavy garden soil — too dense and retains too much water.
Good drainage = no sag + healthier roots.
Step 5: Plant Densely (for That Lush Look)
Fabric walls look best when full.
Rule of thumb:
👉 2–3 plants per pocket
They’ll fill out fast and create that “green wall” effect.
Best plants for fabric pockets:
🌿 Herbs
- Basil
- Mint
- Parsley
- Thyme
🥬 Leafy greens
- Lettuce
- Spinach
- Arugula
🌵 Low-maintenance
- Succulents
- Pothos
- Ferns
Avoid large/heavy plants like tomatoes or peppers.
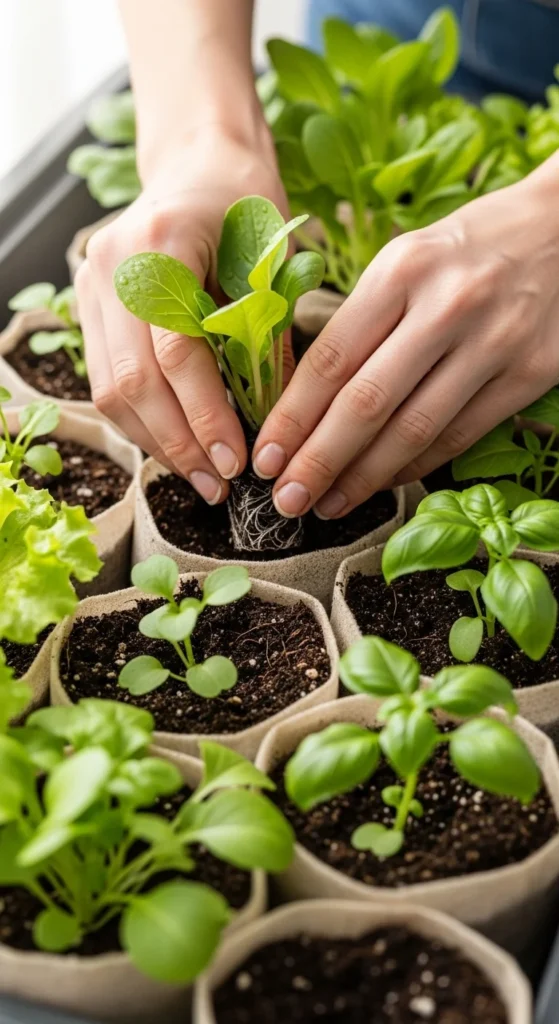
Bare-rooting plants slightly helps them fit snugly inside pockets.
Step 6: Add Drip Irrigation (Optional but Game-Changing)
Watering vertical gardens evenly can be tricky.
Top dries fast. Bottom stays wet.
A simple drip line fixes everything.
Easy setup:
- Run thin tubing across the top row
- Poke tiny holes above each column
- Let gravity water downward
Even moisture = healthier plants + less daily effort.
Perfect for busy schedules.
Easy Maintenance Tips
Fabric gardens need small but regular care.
Water
- Slow soak from the top
- Check daily in hot weather
Feed
- Liquid fertilizer every 2–3 weeks
Prune
- Trim often to avoid overcrowding
Check seams
- Tighten staples or threads yearly
Small maintenance = years of use.
Style It Like a Pro
Want your wall to look designer-level?
Try:
- Black felt for a modern look
- White or cedar frame for contrast
- Mixed herbs + trailing vines
- Add small labels
- Install warm string lights
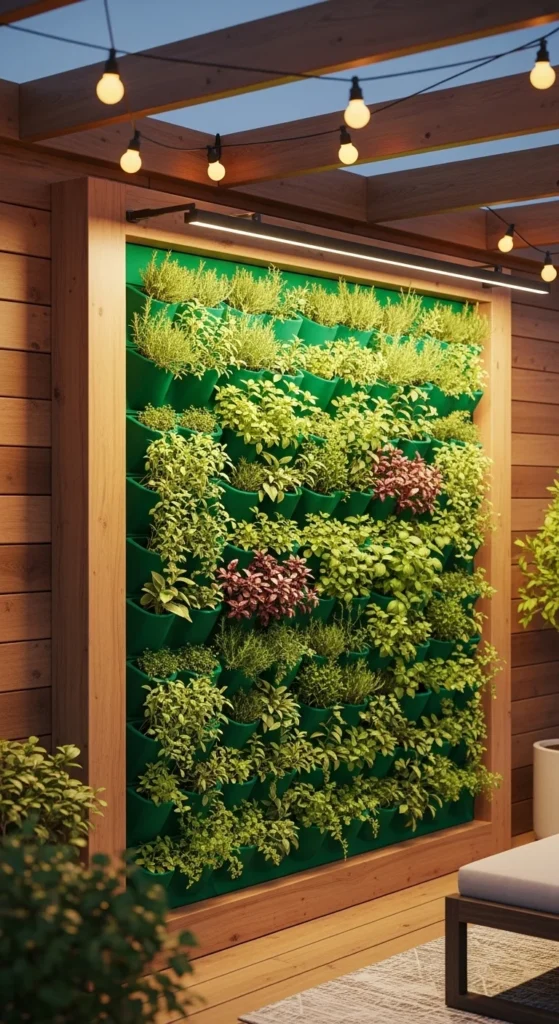
It becomes living décor — not just a garden.
Final Thoughts
A fabric vertical garden doesn’t have to sag or fail.
With:
Strong frame
Waterproof backing
Thick fabric
Proper drainage
…it becomes a sturdy, long-lasting green wall that looks amazing year-round.
Fresh herbs, cleaner air, and zero wasted space.
Save this guide and build your own fabric green wall this weekend. 🌿

Leave a Reply