
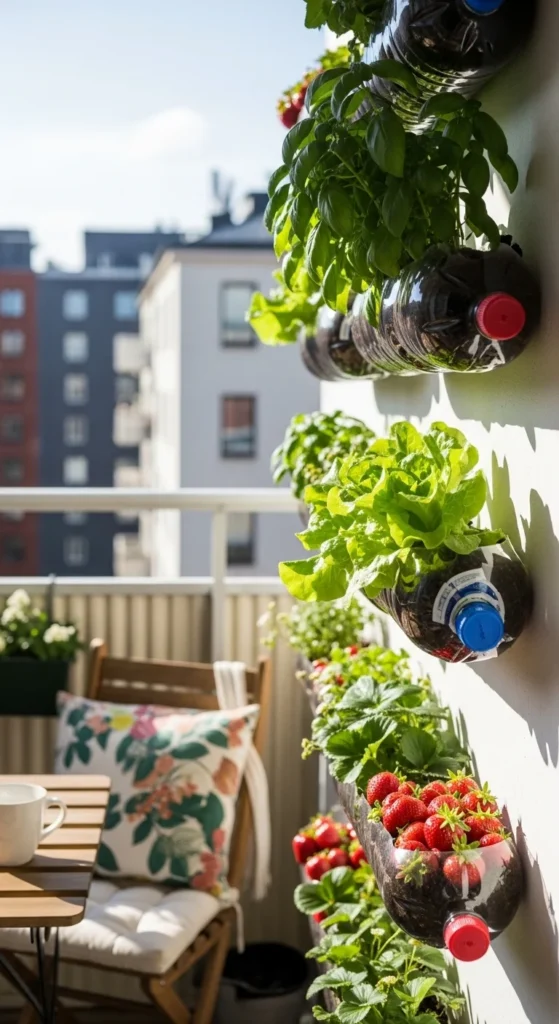
What if the empty soda bottles in your recycling bin could turn into a lush, living wall of herbs and strawberries?
Instead of tossing them out, you can upcycle plastic bottles into a beautiful vertical garden that fits perfectly on balconies, fences, or tiny patios. It’s budget-friendly, beginner-friendly, and surprisingly productive.
No fancy tools. No expensive planters. Just bottles, soil, and a little creativity.
Let’s build your own step-by-step.
Why Bottle Gardens Are So Popular
Bottle vertical gardens are trending for a reason:
- Practically free materials
- Zero-waste and eco-friendly
- Perfect for small spaces
- Lightweight and easy to hang
- Beginner DIY project
- Great for herbs and leafy greens
Plus, there’s something satisfying about turning “trash” into a thriving garden.
It’s sustainable gardening at its best.
Gather Your Supplies
You probably already have most of this at home.
Basic materials:
- 2L plastic bottles (10–20+ depending on size)
- Wire, twine, or strong string
- Scissors or cutter
- Nail or drill (for holes)
- Stapler or hooks (for mounting)
- Soil + compost mix
- Seeds or seedlings
Optional upgrades:
- Wooden trellis or frame
- Paint for decoration
- PVC pipe for drip irrigation
Step 1: Prep the Bottles
This is the foundation of your garden.
Start clean:
- Remove labels
- Wash thoroughly
- Let dry
Then convert each bottle into a planter.
How:
- Cut off the bottom (creates opening for soil)
- Punch 2–4 small drainage holes in the cap
- Make two holes on opposite sides for hanging wire
Pro tip:
Heat a nail and melt holes for smoother, crack-free openings.
Good drainage prevents root rot and mold — don’t skip this.

Step 2: Create Hanging Chains or Rows
Now turn those bottles into a vertical system.
There are a few easy setups:
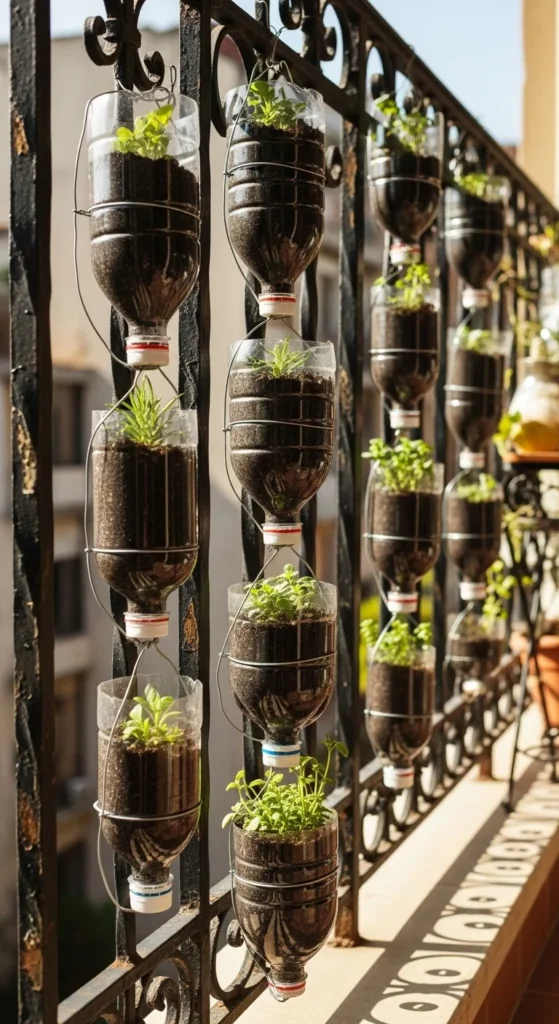
Option 1: Hanging chains (most popular)
- Thread wire or twine through side holes
- Stack bottles vertically
- Leave space between each for sunlight
Option 2: Trellis wall
- Staple bottles to a wooden frame
- Arrange in rows or grids
Option 3: Nesting drip stack
- Insert each bottle’s neck into the next bottle below
- Water drips down naturally
Hanging chains work great for balconies, while frames are perfect for fences or patios.
Make sure everything is tight and secure — wind can shift loose bottles.
Step 3: Fill with Soil and Compost
Use a light, fluffy mix.
Avoid heavy garden soil — it compacts too easily.
Ideal blend:
- 60% potting soil
- 40% compost
This keeps roots happy and well-fed.
Fill each bottle about ¾ full, leaving room for watering.
Press gently, but don’t pack too tight.
Healthy airflow = healthy roots.
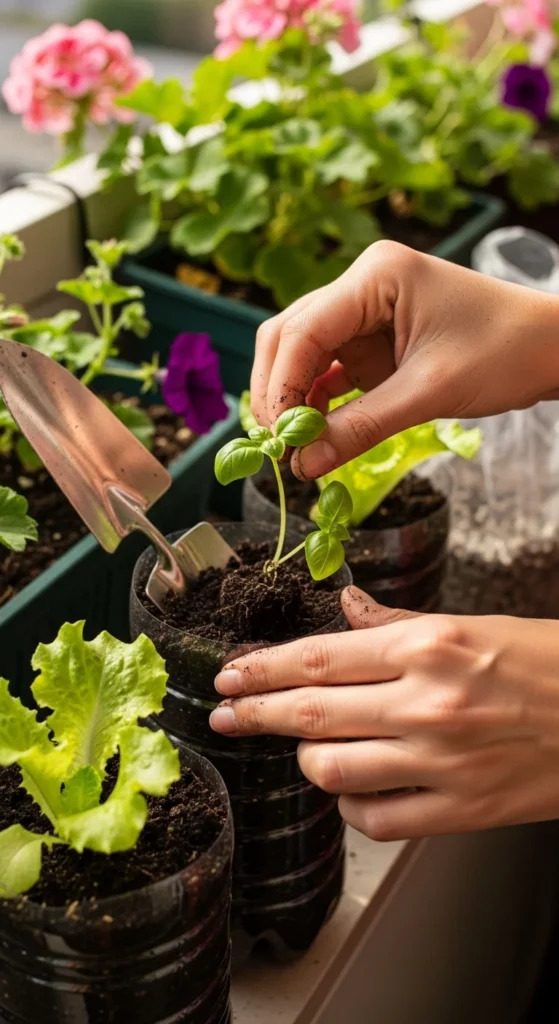
Step 4: Choose the Best Plants
Bottle planters are shallow, so choose smart.
Best crops:
🌿 Herbs
- Basil
- Mint
- Parsley
- Spinach
🥬 Leafy greens
- Lettuce
- Arugula
- Kale
🍓 Fruits
- Strawberries
🌱 Climbers
- Beans (use wire support)
Avoid deep-root vegetables like carrots or potatoes.
Think compact, light, and quick-growing.
Step 5: Add a Simple Watering System
Vertical gardens dry out faster than regular pots.
Watering from the top works, but here are upgrades:
Easy options:
- Drip from a watering can slowly
- Add small holes in upper bottles for trickle flow
- Insert a thin PVC pipe with tiny holes down the center
- Use a bucket or bottle reservoir at the top
Water flows downward naturally, keeping all levels moist.
Gravity does the work for you.
Step 6: Mount Safely
Once planted, secure everything.
Attach to:
- Balcony railings
- Fences
- Trellises
- Wall hooks
Tips:
- Keep weight balanced
- Double-knot wires
- Avoid strong wind zones
Remember: wet soil is heavier than dry soil.
Safety first.
Easy Care Tips
Bottle gardens are low effort — but consistent care helps them thrive.
Water
- Check daily in hot weather
- Top plants dry fastest
Feed
- Liquid fertilizer every 2–3 weeks
Sunlight
- 4–6 hours for herbs
- 6+ hours for greens and strawberries
Rotate
Turn chains occasionally so all sides get sunlight.
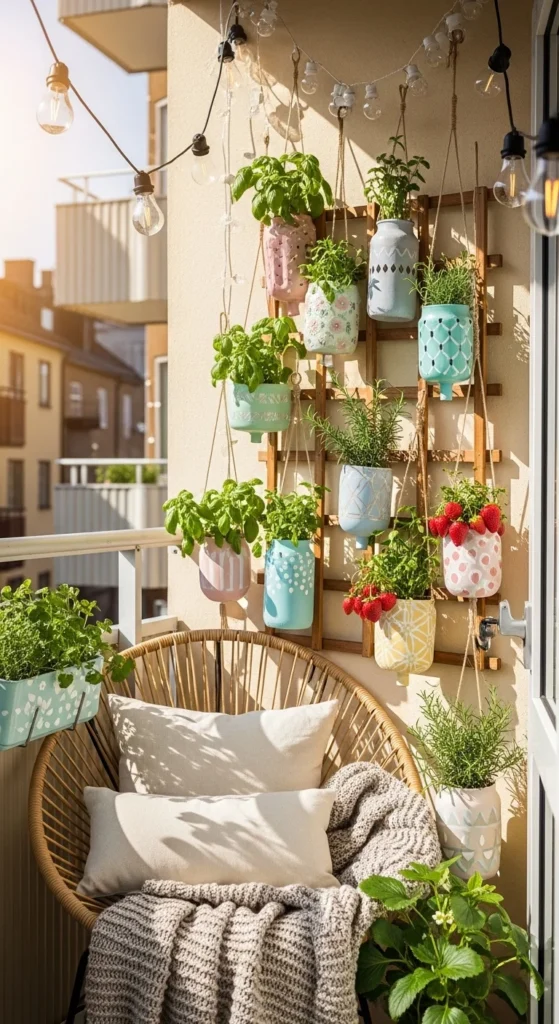
Make It Pinterest-Pretty
Want your garden to look extra aesthetic?
Try:
- Painting bottles pastel or white
- Color-coding herbs
- Adding plant labels
- Creating rainbow patterns
- Mixing flowers with edibles
- Using fairy lights at night
Upcycled doesn’t have to look messy — it can look stunning.
Final Thoughts
A vertical bottle garden proves you don’t need money or space to grow fresh food.
Just:
Bottles.
Soil.
Sunlight.
And a little creativity.
It’s sustainable, practical, and surprisingly beautiful.
Give those bottles a second life — and turn your wall into a living garden.
Save this idea for later and start collecting bottles today! 🌿

Leave a Reply