
If you’ve ever dreamed of growing fresh vegetables or flowers without fighting hard soil, weeds, or poor drainage, a raised garden bed is your best friend. The good news? You don’t need advanced tools, carpentry skills, or a big budget to build one. With a little planning and a few simple steps, you can create a raised garden bed that looks great and grows even better 🌱
Let’s break it down step by step so you can build your raised garden bed easily—and confidently.
Why Raised Garden Beds Are So Popular
Raised garden beds make gardening simpler and more productive, especially for beginners.
Here’s why people love them:
- Better soil control and drainage
- Fewer weeds and pests
- Easier on your back and knees
- Earlier planting in spring
- Cleaner, more organized garden look
If your yard has poor soil or limited space, raised beds can completely change your gardening experience.
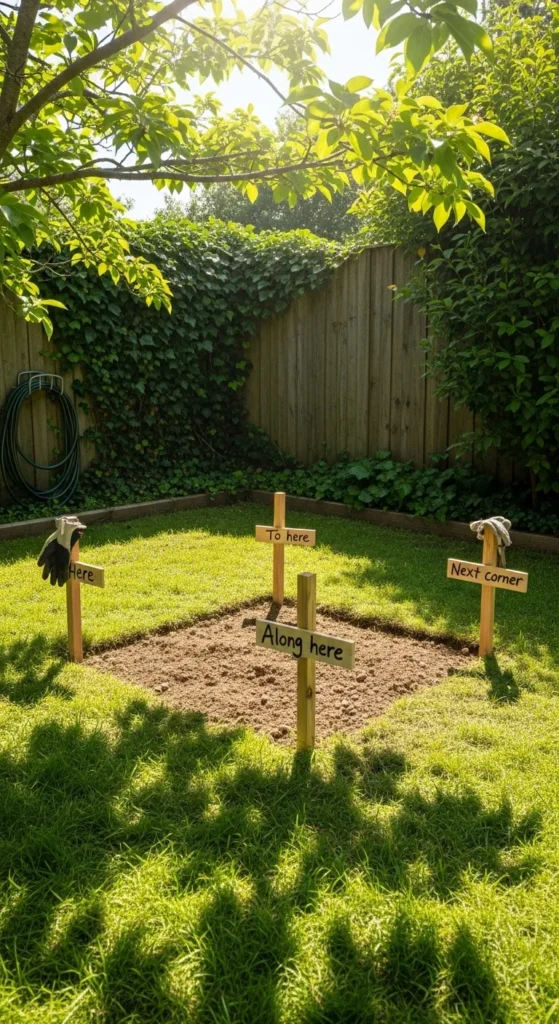
Step 1: Choose the Right Location
Before building anything, decide where your raised garden bed will go.
Look for a spot that:
- Gets 6–8 hours of sunlight daily
- Is fairly level
- Has easy access to water
- Isn’t under large trees (roots compete for nutrients)
Take a day to observe how the sun moves across your yard. This small step can make a big difference in plant growth.
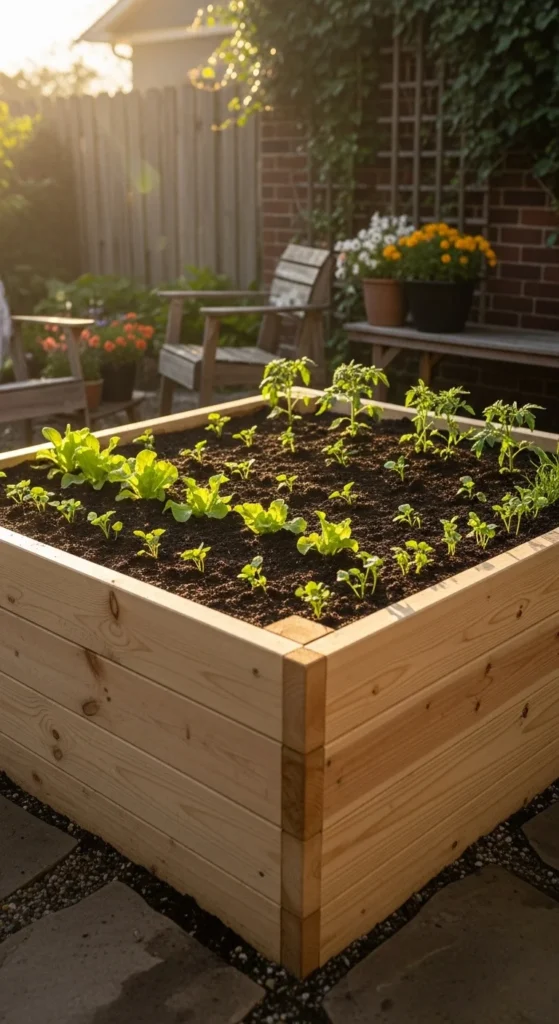
Step 2: Pick a Simple Size and Height
You don’t need anything complicated. A basic size works best for most gardens.
Popular beginner-friendly dimensions:
- Width: 3–4 feet (easy to reach the center)
- Length: 6–8 feet (adjust based on space)
- Height: 10–12 inches for vegetables
- 18–24 inches if you want less bending
Keep it manageable. You can always add more beds later once you’re comfortable.
Step 3: Gather Easy, Budget-Friendly Materials
Raised beds can be made from many materials, but wood is the most beginner-friendly.
Common options:
- Untreated cedar or pine boards
- Screws or nails
- A drill or screwdriver
- Cardboard or landscape fabric (optional)
Avoid pressure-treated wood if you’re growing food. Natural wood is safer and still lasts several seasons.

Step 4: Assemble the Raised Garden Bed
This step sounds harder than it is—but it’s surprisingly simple.
Basic assembly steps:
- Cut boards to size (or buy pre-cut)
- Arrange them into a rectangle
- Screw the corners together
- Place the frame in your chosen spot
No fancy cuts needed. Even slightly uneven boards work fine—plants won’t judge 😉
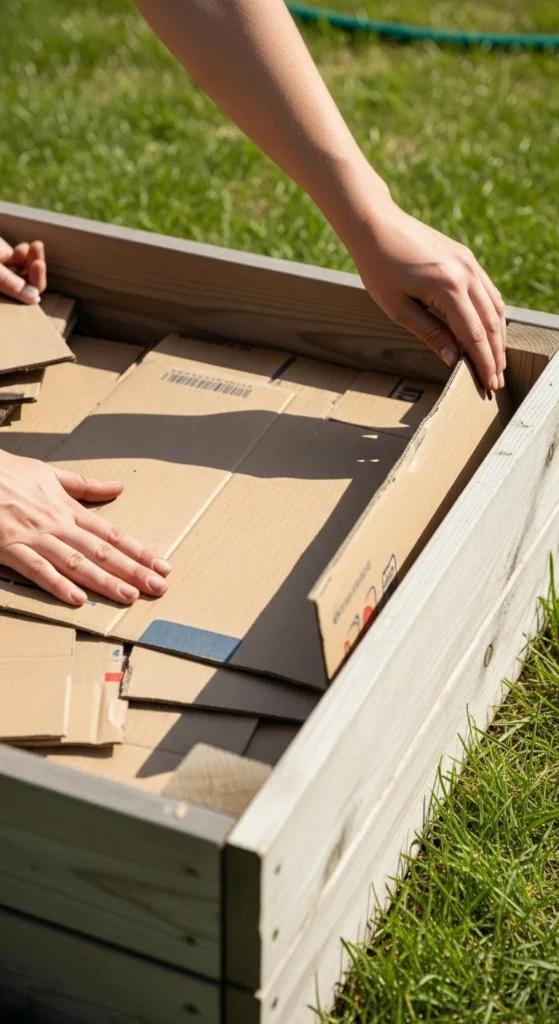
Step 5: Prepare the Ground Underneath
Before filling the bed, prep what’s underneath to prevent weeds.
Do this:
- Remove grass or large weeds
- Lay cardboard or newspaper flat
- Water it lightly to help it settle
This layer breaks down naturally and blocks weeds without chemicals.
Step 6: Fill the Bed With Healthy Soil
Good soil is the secret to a successful raised garden bed.
A simple soil mix:
- 50% garden soil or topsoil
- 30% compost
- 20% coarse material (like coco coir or aged bark)
Mix lightly as you fill the bed. Don’t pack it down—roots need air to grow.
If buying soil bags, look for “raised bed soil” or “garden blend” to save time.
Step 7: Plant Smart for Easy Success
Now comes the fun part—planting 🌼
Beginner-friendly choices:
- Lettuce and spinach
- Tomatoes and peppers
- Herbs like basil and mint
- Marigolds for pest control
Follow spacing instructions on seed packets or plant tags. Overcrowding is one of the most common beginner mistakes.
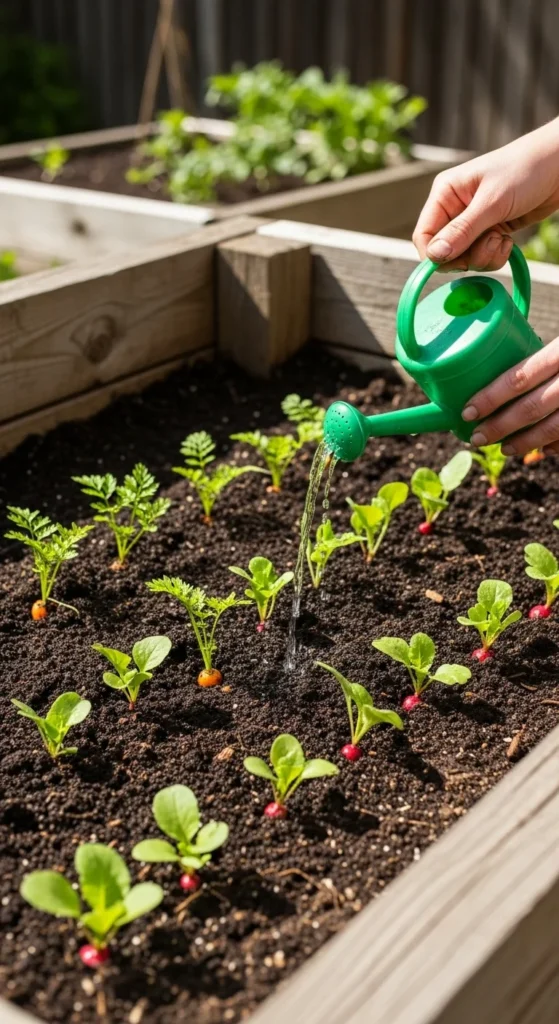
Step 8: Water, Mulch, and Maintain
Raised beds dry out faster than ground soil, so consistent care matters.
Simple maintenance tips:
- Water deeply 2–3 times per week
- Add mulch to retain moisture
- Check plants regularly for pests
- Refresh compost each season
The better your setup, the less work you’ll need later.
Final Takeaway
Creating a raised garden bed doesn’t have to be expensive or complicated. With a sunny spot, simple materials, and good soil, you can build a productive garden bed in just one afternoon. Start small, learn as you go, and enjoy the process.
🌿 Save this guide and build your first raised garden bed this weekend!

Leave a Reply