
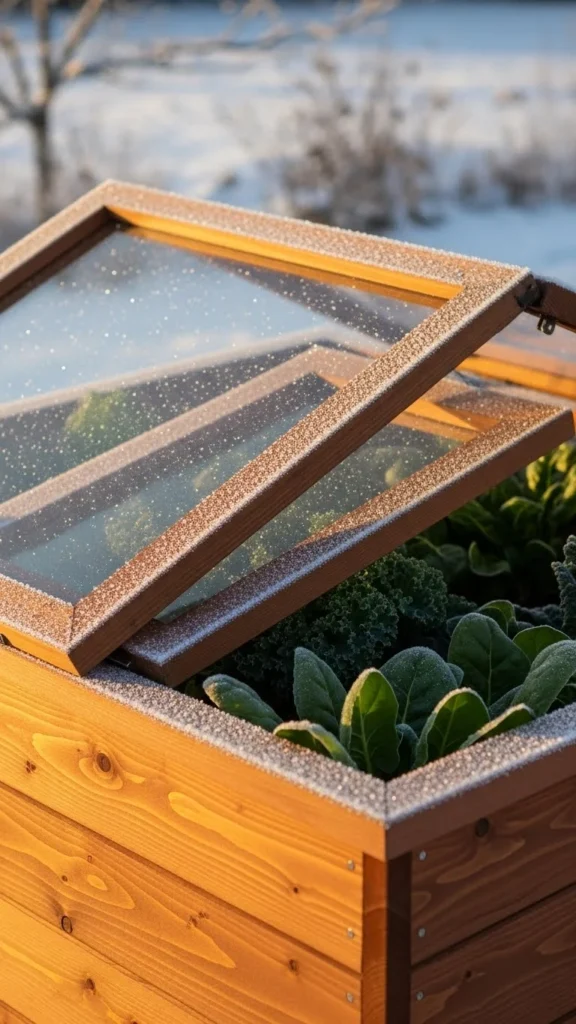
Cold frames give gardeners a simple way to stretch growing time through winter. These low structures trap daytime warmth, block harsh winds, and create a calm pocket of soil where plants stay active longer. Many winter crops—like spinach, lettuce, carrots, and herbs—respond well to this steady environment. Even small yards or patios can support one. With the right setup, a cold frame turns frosty months into an active season, helping gardeners harvest food or maintain seedlings long before spring arrives.
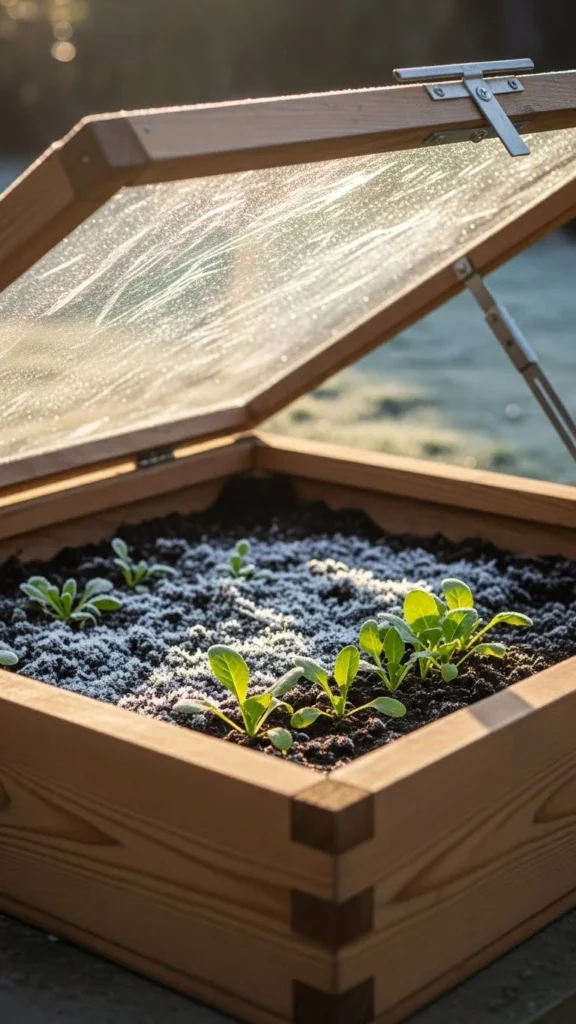
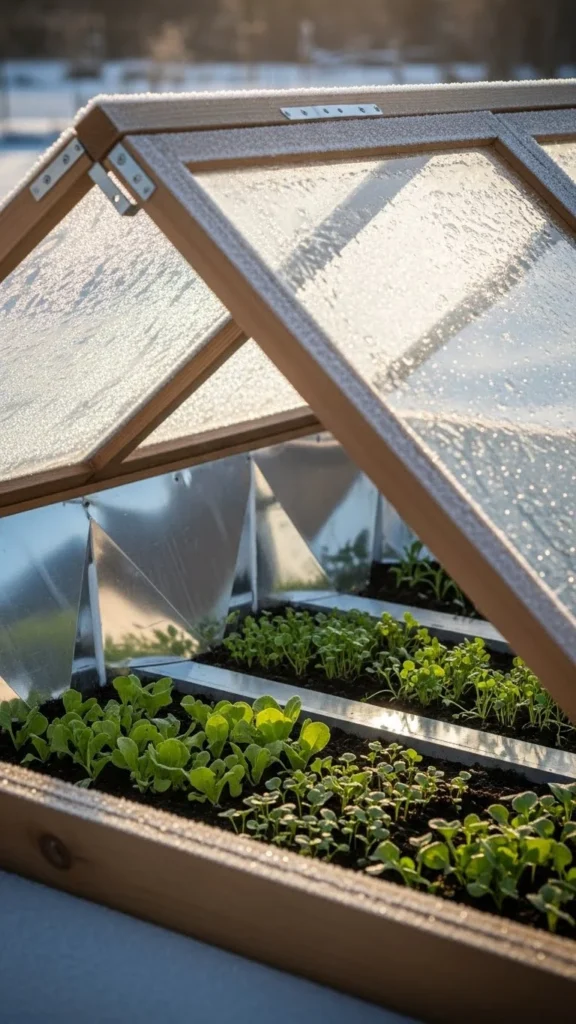
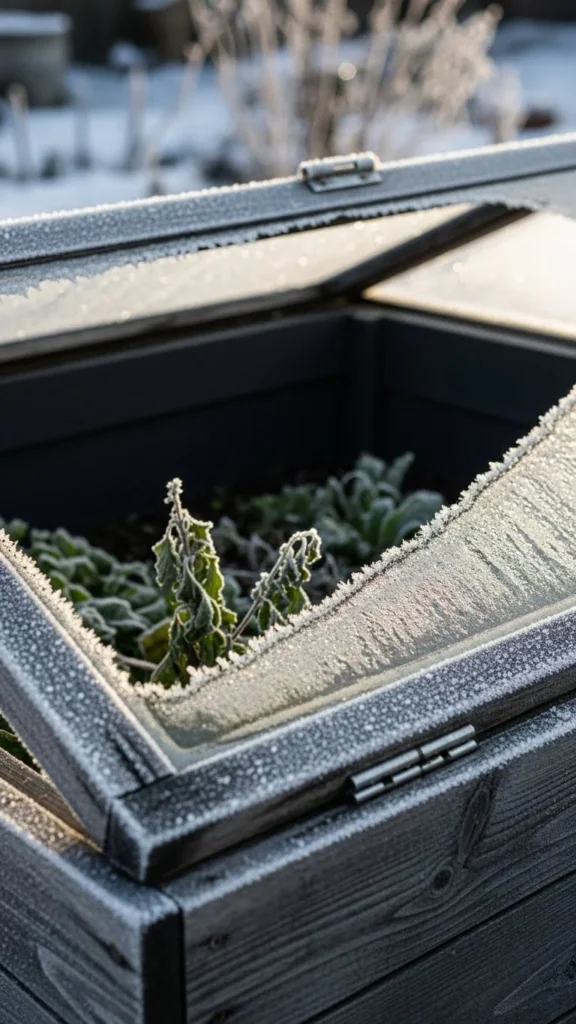
1. Classic Wooden Cold Frame with a Clear Lid
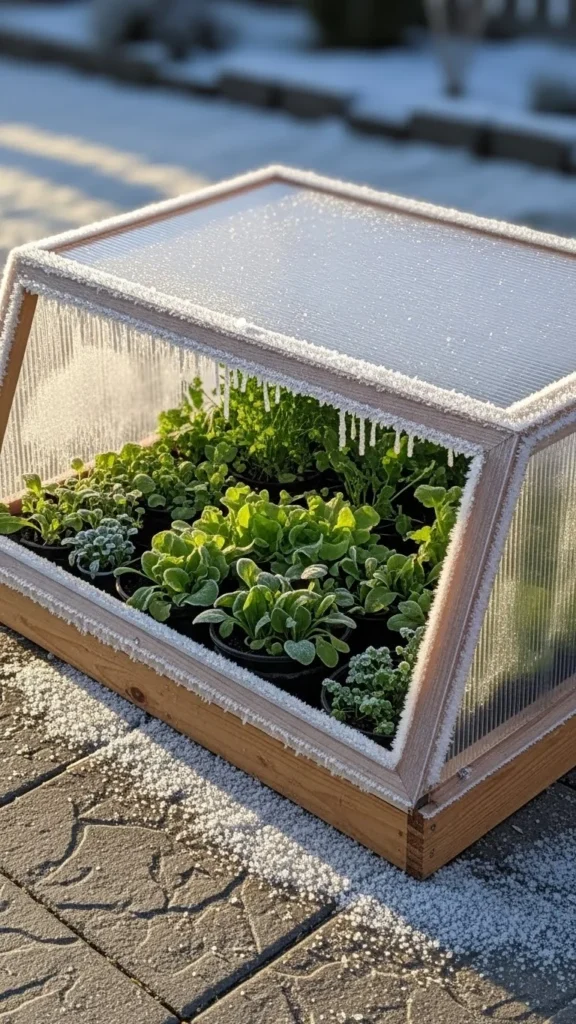
A simple wooden cold frame is one of the most practical ways to stretch winter growth. Build a shallow box from scrap lumber and attach a clear lid made from old windows or polycarbonate sheets. Set it facing south so sunlight reaches the interior all day. The soil stays slightly warmer, which keeps greens active even during frosty weeks. If the frame sits directly on the ground, loosen the soil before planting to improve root movement. Add compost for a softer texture. Water lightly every few days during dry spells. Keep a brick under the lid so you can prop it open on warm afternoons and release excess heat. This helps plants avoid sudden temperature jumps. Leafy greens grow well in this environment, and small roots like radishes respond quickly too. If you have limited space, build two smaller frames instead of one large one.
2. Upcycled Window Frame Cold Box
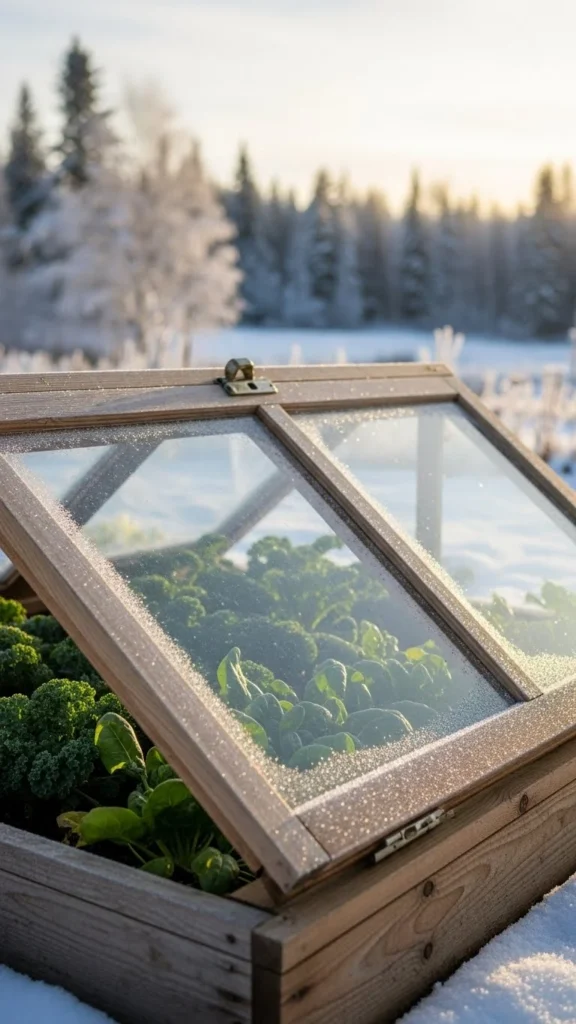
Reusing old window frames is a low-cost way to start cold-frame gardening. Set the window on a simple wooden or brick base. The glass traps sunlight extremely well, keeping interior temperatures calm during long cold spells. Paint the wood or frame to protect it from moisture. If the window is heavy, attach a hinge so lifting is easier. Add straw around the outside edges for insulation. Grow compact crops first so you can monitor how the setup behaves during temperature swings. Lettuce, spinach, and cilantro usually adapt well. Check condensation levels since glass tends to fog quickly. Lift the frame daily for airflow. If your yard faces strong winter winds, place bricks around the outer rim to keep the frame steady.
3. Cold Frame Filled with Raised-Bed Soil
Raised soil warms faster, which supports winter crops. Build a cold frame directly on a raised bed and fill it with loose soil rich in compost. This setup gives roots more oxygen and keeps the interior drier than ground-level beds. Add a thin mulch layer around the edges to reduce heat loss. Winter lettuce and arugula grow quickly in raised cold frames because their roots stay active in the warmer soil mass. If your space is tight, create a half-size raised frame using reclaimed boards. Water lightly but consistently. Raised soil dries quicker, so monitor moisture without overdoing it. When early spring arrives, remove the lid gradually so plants adapt to outdoor light.
4. Brick-Sided Cold Frame for Heat Retention
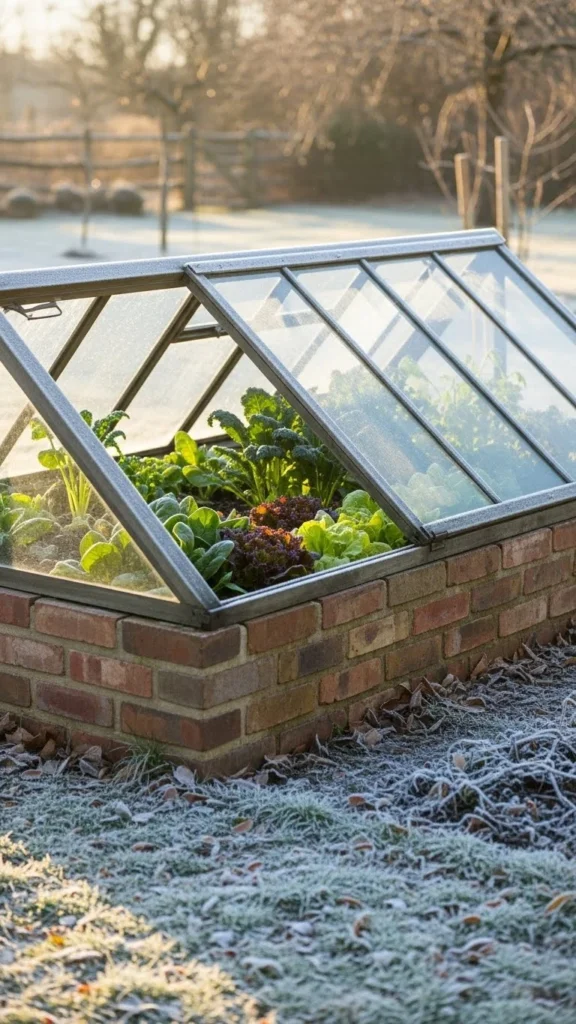
Brick holds warmth well. Building your cold frame with brick sides gives your winter crops added heat during long nights. Set a clear lid on top and angle it to catch sun. The bricks slowly release stored warmth after sunset, helping plants stay active. Grow winter herbs, small cabbages, or hardy greens. If buying bricks feels costly, use reclaimed ones from past projects. Make sure the inside soil stays loose since brick structures tend to compress the area. Water lightly and keep the lid slightly open on warm days. This design works especially well in windy yards because the sturdy sides keep temperatures calm.
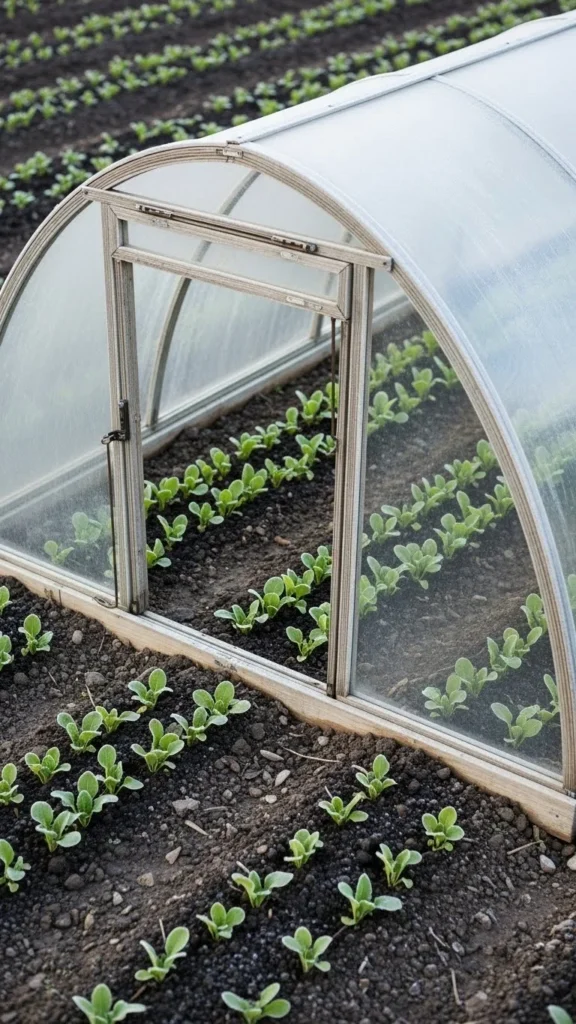
5. Plastic Low Tunnel with Cold-Frame Ends
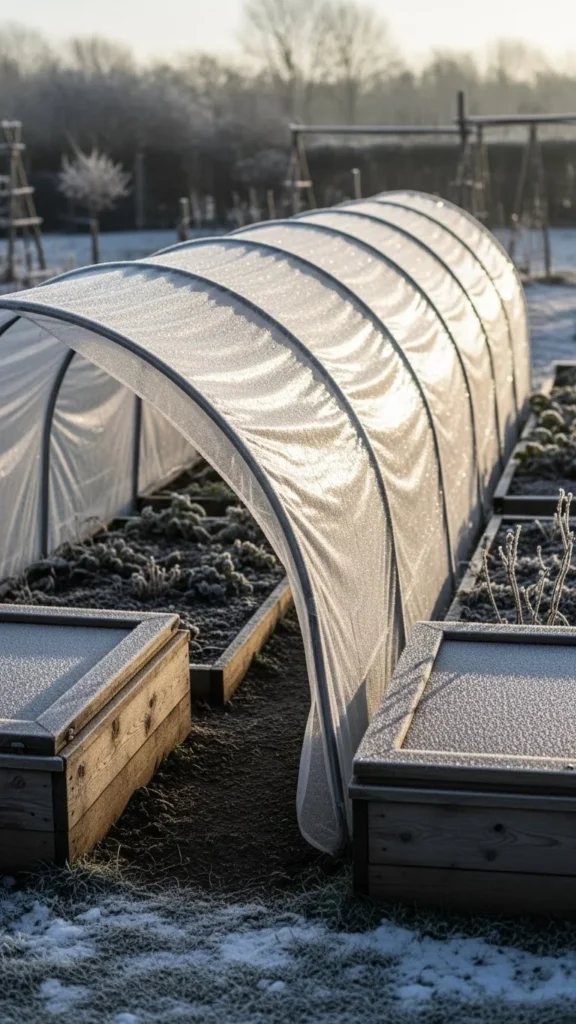
Combining a low tunnel with cold-frame ends creates a longer protected zone. Stretch clear plastic over hoops and anchor it tightly. Attach wooden ends with hinged lids for airflow control. This system works well for gardeners who want a longer bed without building separate frames. Add compost down the center for root crops. Water lightly before sunset so moisture settles evenly. If the plastic collects snow, brush it off to keep sunlight reaching plants. This design suits spinach, carrots, and hardy herbs. It also helps seedlings grow steadily before spring planting.
6. Straw-Bale Cold Frame
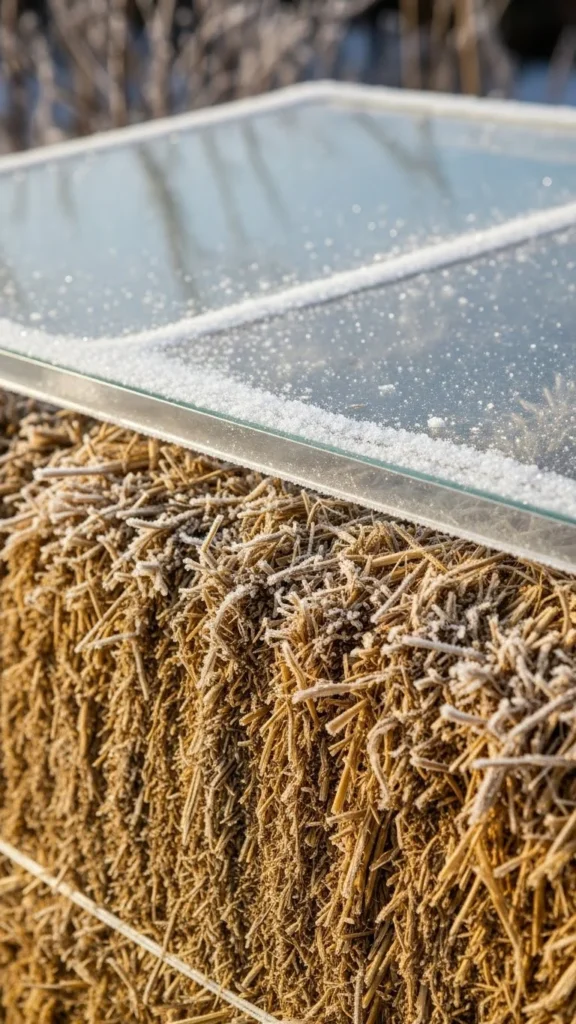
Straw bales are great insulators. Arrange bales in a rectangle and place a clear lid on top. The thick sides trap warmth effectively and protect crops from wind. This setup works well for gardeners who prefer seasonal structures that can be removed easily. Fill the inside with loose soil or set pots directly on the ground. Leafy greens and young herbs grow well here. Replace bales yearly as they break down. This makes the design both practical and budget-friendly. Check for rodents occasionally, as straw can attract them. Add a wire mesh at the base if needed.
7. Roof-Slope Cold Frame for Extra Sun
Placing a cold frame at the base of a south-facing roof gives you stronger light exposure. Sun reflects off the roof and warms the interior. Build a simple box and set it snug against the structure. Add compost-rich soil inside. This method helps greens grow even during darker winter days. If water drips from the roof, install a small gutter to prevent soil erosion. The ground near buildings also stays slightly warmer, giving crops a head start. Radishes, lettuce, and hardy herbs grow nicely in this placement. Monitor humidity since the reflected warmth may create faster condensation.
8. Portable Cold Frame for Balcony or Patio
Portable cold frames help gardeners with limited space. Build or buy a lightweight box with a clear lid and place pots inside. Move the frame during the day to catch more sunlight. This works well for apartment balconies or rented homes. Use smaller pots so airflow inside the frame stays balanced. Add compost to each pot for better root growth. Water lightly every few days. When temperatures drop sharply, move the entire frame closer to the wall for extra protection. This setup helps herbs like parsley, chives, and mint stay active longer.
9. Cold Frame with Reflective Interior Panels
Reflective panels increase the light inside a cold frame. Line the inner back wall with aluminum sheets or reflective foil insulation. This directs more sunlight onto winter crops, helping them stay active despite shorter days. Install the panels carefully so they stay dry. Grow light-loving greens like arugula or mustard. Reflective interiors also help seedlings grow evenly. If you use foil, secure it tightly so it doesn’t flap during windy days. This is a simple and low-cost improvement that can be added anytime.
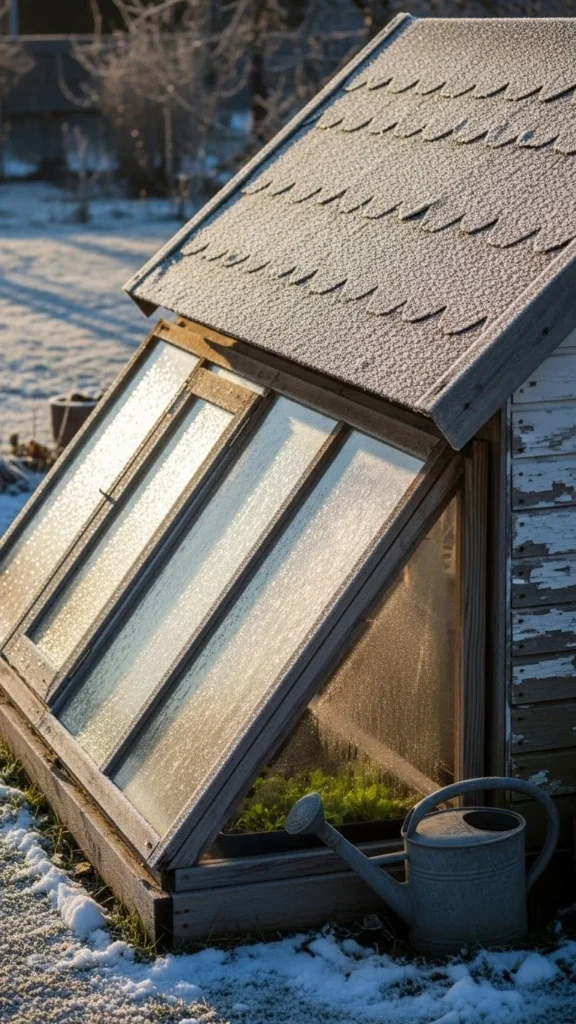
10. Cold Frame Attached to a Greenhouse Wall
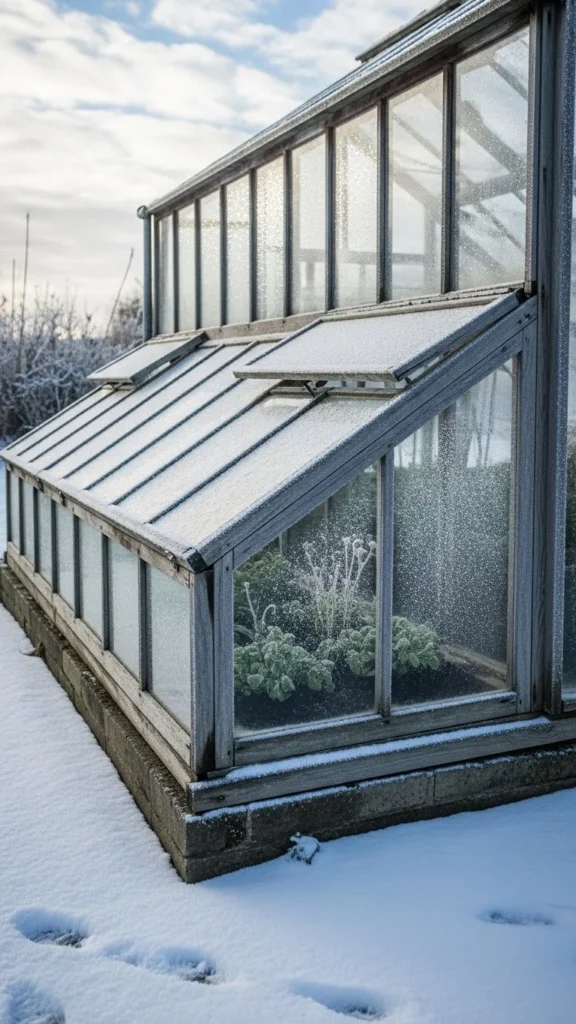
Attaching a cold frame to a greenhouse wall creates a warmer environment than a stand-alone box. The greenhouse radiates heat, keeping the cold frame a few degrees warmer. Plant winter greens, carrots, or starter seedlings here. Build the structure snugly so heat doesn’t escape. Add compost to help maintain soil quality. Keep the lid cracked on warm days to avoid overheating. This setup is useful if you want to extend your planting area without expanding the greenhouse itself. It also gives you an easy way to harden off plants before spring.
11. Deep-Soil Cold Frame for Root Crops
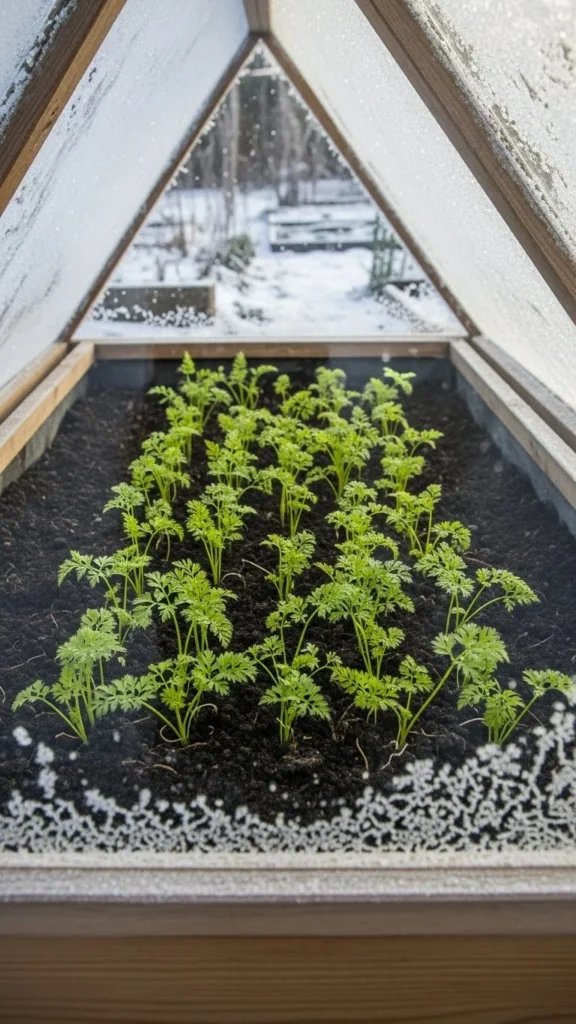
A deep cold frame is perfect for root crops like carrots and parsnips. Build taller sides and fill with deep soil. Roots stay protected from frost, and the enclosed environment helps them grow steadily. Add compost and sand for smoother soil. Water lightly so moisture moves evenly through the depth. Cover the lid on cold nights and leave it slightly open during warmer afternoons. This setup helps gardeners harvest small batches of roots throughout winter.
12. Double-Lid Cold Frame for Extra Airflow Control
A double-lid setup gives gardeners more control over winter airflow. Use a clear lid as the main cover and add a wooden panel beneath it. Lift the clear lid for sunlight while using the wooden lid to block strong winds. Open both on warmer days. This method suits winter greens that prefer steady temperatures. Build the lids with hinges so adjustments are easy. Add silicone around edges if drafts sneak in. This approach works well in regions where temperatures swing rapidly.
13. Cold Frame with Heat-Absorbing Black Interior
Painting the inner walls black helps the cold frame absorb more heat. The darker surface warms during the day and releases the warmth slowly at night. Use weather-safe paint and allow it to dry fully before planting. Grow fast greens and winter herbs here for quick harvests. Water lightly since warmer interiors dry soil faster. Monitor airflow by propping the lid slightly open on sunny afternoons. If temperatures drop suddenly, add a thin compost layer to protect roots.
14. Multi-Section Cold Frame for Crop Rotation
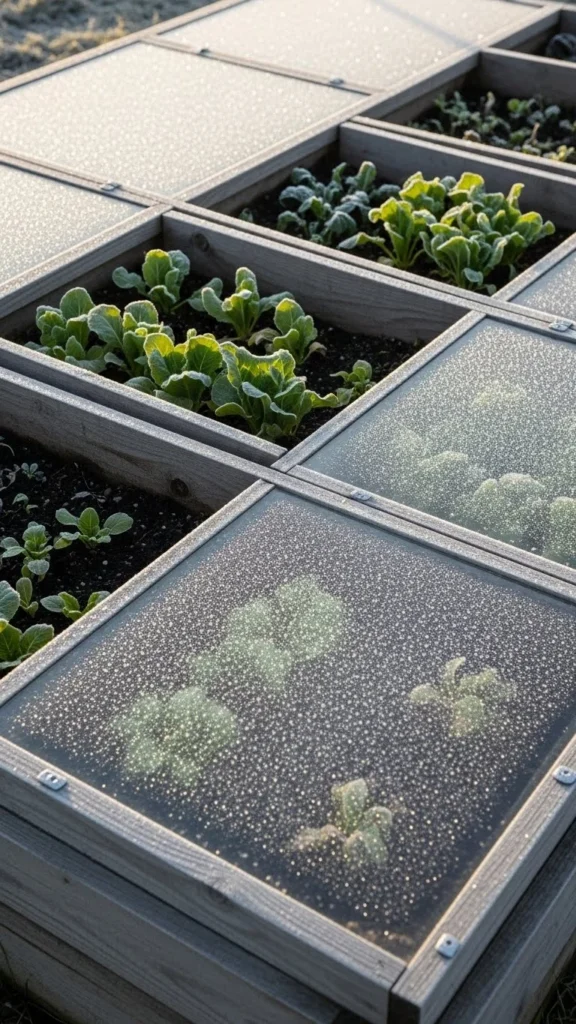
A multi-section frame helps you organize winter crops. Add simple wooden dividers to create separate planting zones. Grow greens in one area, herbs in another, and seedlings in the third. This keeps plants from shading each other. It also lets you manage watering more accurately. Use recycled boards for the dividers. Add compost to each section. Since some crops dry faster than others, monitor soil moisture individually. This setup helps small gardens feel more structured without adding more beds.
15. Cold Frame Positioned Over Existing Garden Rows
Instead of building a new bed, place a cold frame directly over an existing row. Loosen the soil lightly before covering it. This method keeps your garden active through winter without extra construction. It works especially well for rows of lettuce, spinach, or small roots. Add compost to the row before placing the frame. Keep the lid tilted on warm days. This placement also protects soil structure during wet winter periods, giving your rows a cleaner start for early spring planting.
16. Cold Frame Placed on Pavers for Container Growing
If your garden space is paved, build a cold frame for container growing. Place pots inside and let the frame act as a shield from wind and frost. Use lightweight containers so they warm quickly. Add compost-rich soil to each pot. This method works well for patios, balconies, and courtyards. You can rearrange pots as they grow. Water lightly since pots dry faster than ground beds. Add a strip of weatherstripping along the frame base to block drafts.
17. Cold Frame with Solar-Powered Vent Opener
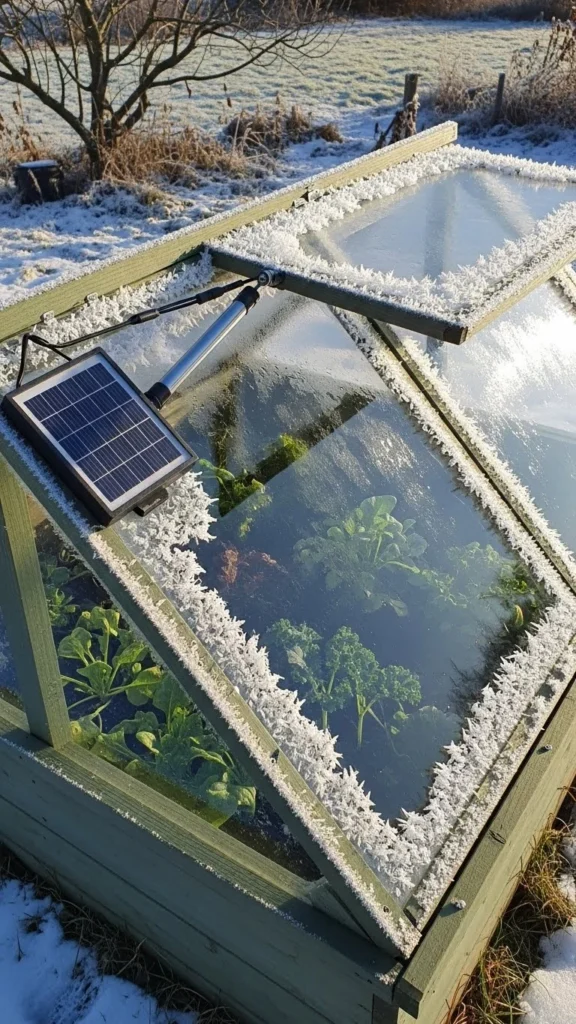
A solar-powered opener lifts the lid automatically when temperatures climb. This prevents plants from overheating while saving you daily adjustments. Install the opener on a hinged lid. Grow greens that respond quickly to airflow changes, such as arugula or chard. Water lightly and check the opener occasionally to confirm movement. This setup is helpful if you travel often or prefer hands-off airflow management. It works for both wooden and metal-framed cold boxes.
18. Insulated Cold Frame for Harsh Winters
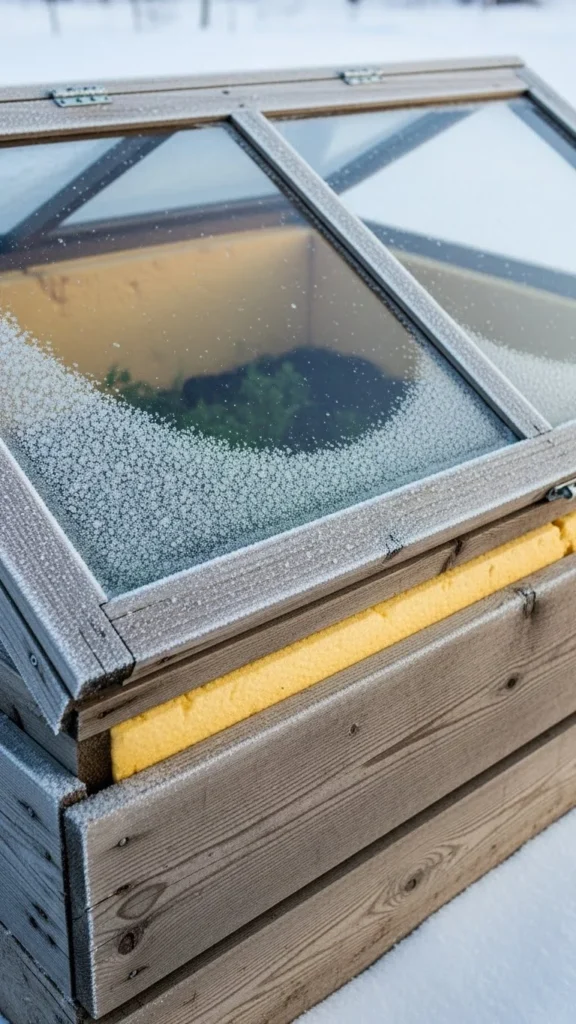
Adding insulation to the walls helps your cold frame stay warm during the coldest nights. Use foam insulation panels or recycled packing insulation. Line the inner sides carefully, keeping the floor and lid clear. This design supports plants even when outside temperatures drop sharply. Grow hardy greens or seedlings that appreciate the steady warmth. Check soil moisture since insulated frames may trap humidity. Add straw around the outer edges for added protection.
19. Cold Frame with Built-In Water Storage Jugs
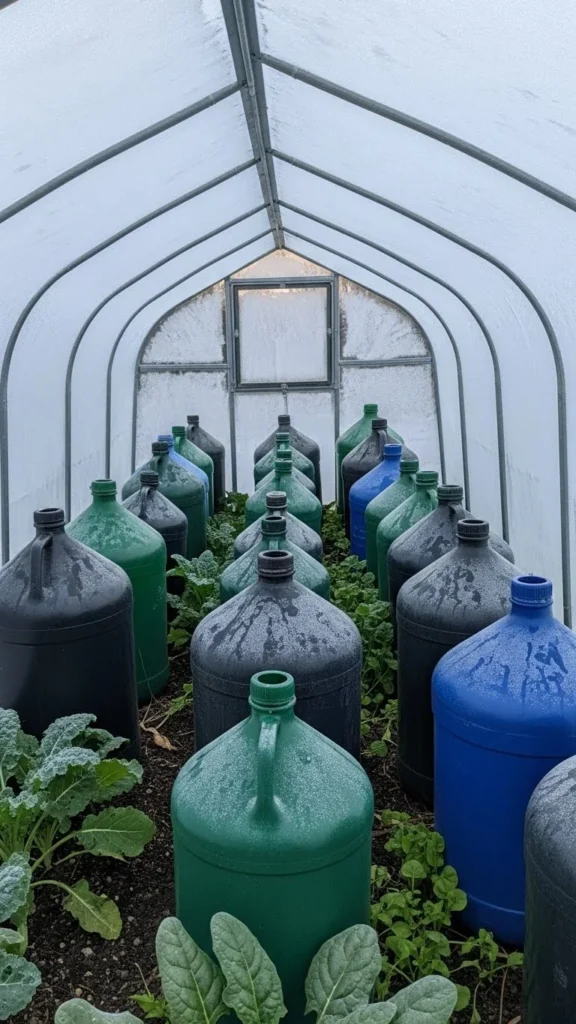
Water jugs absorb heat during the day and release it slowly at night. Paint the jugs black if possible. Place them along the back wall of your cold frame. This simple method stabilizes nighttime temperatures. You can use recycled jugs or buckets. Grow hardy greens, herbs, or starter seedlings. Keep the lid slightly open on sunny afternoons. Replace the water in the jugs occasionally to keep them clean. This method is inexpensive and reliable for colder regions.
20. Cold Frame for Starting Early Spring Vegetables
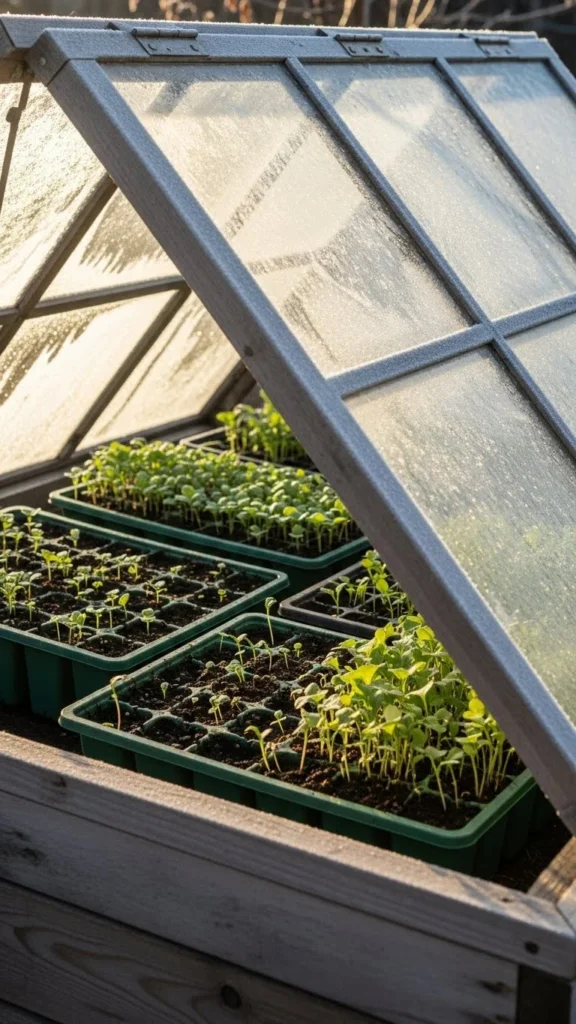
Cold frames make excellent seed-starting stations. Place trays inside and monitor moisture carefully. They warm faster than outdoor beds, so seedlings gain strength early. Use compost-rich soil or potting mix. Keep the lid slightly open for airflow on bright days. This setup helps gardeners start cabbage, broccoli, spinach, and other cool-season crops weeks before standard planting time. Once seedlings grow sturdy, remove the lid for part of the day to help them adapt gradually.
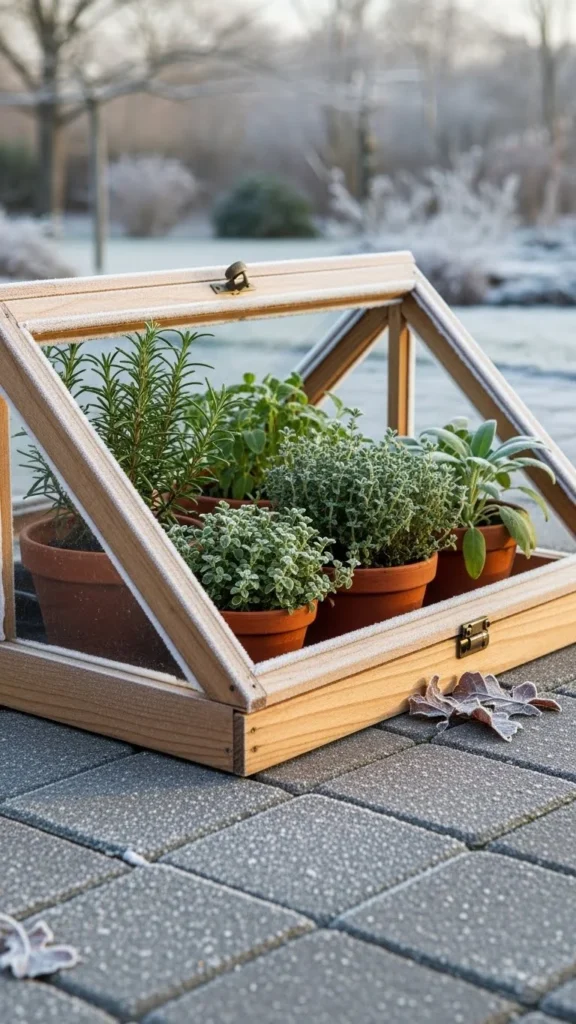
21. Cold Frame for Overwintering Tender Herbs
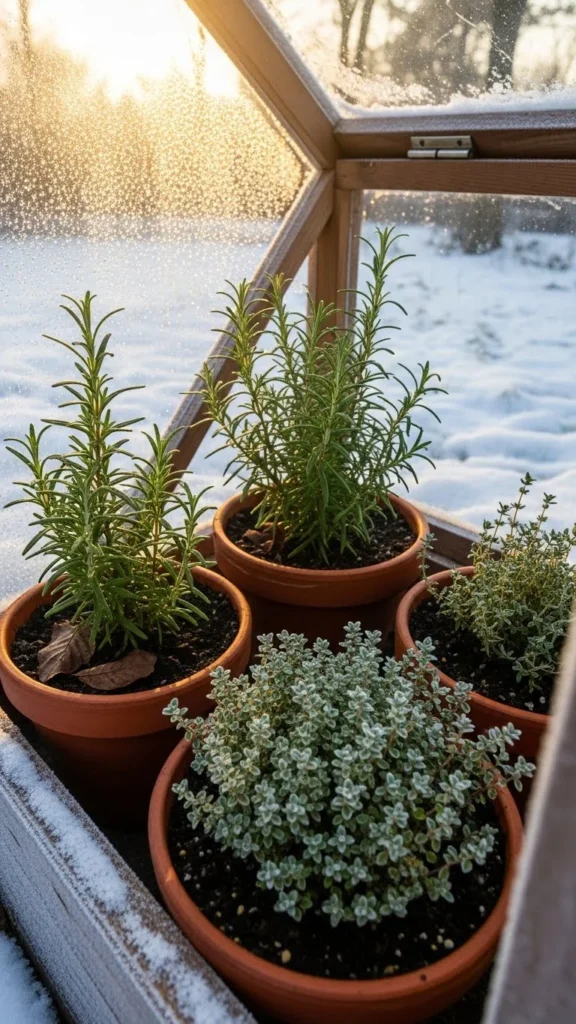
Some herbs struggle outdoors during winter, but a cold frame offers them a calmer home. Place potted rosemary, thyme, oregano, or sage inside. The frame protects them from harsh wind and frost while still giving them natural cold exposure. Fill pots with compost-rich soil. Water lightly since herbs dislike wet roots. On warmer days, open the lid to release trapped humidity. This method extends herb life well into winter and gives you a steady supply for cooking.
Conclusion
Cold frames offer gardeners a practical way to grow food, maintain herbs, and start seedlings even when winter temperatures stay low. Each method above helps create a calmer environment where plants stay active longer. Whether you garden in a yard, on a patio, or in a tight urban space, these ideas help you shape a steady winter growing routine. Try one or two designs this season and enjoy a stronger early start when spring arrives.

Leave a Reply