
Winter transplanting helps you slide into spring with a head start instead of a frantic rush.
Cold-tolerant seedlings tucked into well-prepared beds can root quietly while daylight is short.
By the time warmer days arrive, those plants already sit in place, settled and ready to grow faster than new direct sowings.
This guide focuses on simple winter transplant steps: choosing the right crops, hardening them carefully, timing planting windows, and protecting roots and foliage with low-cost tools like row covers, mulch, and recycled materials.
Everything here aims at practical, repeatable actions that home growers can fit into real schedules and small budgets.
1. Choose Cold-Hardy Transplants That Actually Cope With Winter
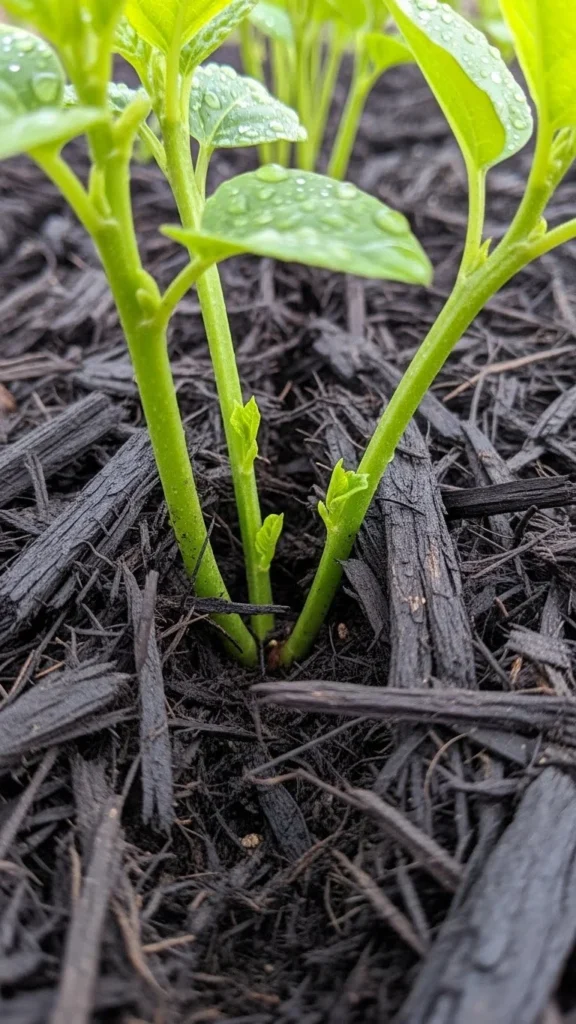
Start by picking vegetables that genuinely handle winter chill.
Think kale, spinach, winter lettuce, Asian greens, garlic, onions, leeks, and cabbage family crops.
These tolerate frost far better than tomatoes or peppers ever will.
Check local planting charts or talk with nearby gardeners to see which varieties survive in your climate.
Look for words like “winter,” “frost tolerant,” or “cold-hardy” on seed packets.
This filters out delicate options that would struggle outdoors.
If you buy seedlings, choose stocky plants with thick stems and deep green leaves.
Avoid pale, stretched, or floppy trays.
Ask the grower whether seedlings already spent time in cooler air or if they came straight from heated space.
Starting with the right crops and sturdy plants cuts the risk of losing trays in the first cold snap.
It also means your limited winter bed space carries vegetables that actually reward the effort.
2. Time Transplants Around Your Local Frost Pattern
Winter transplanting runs on temperature and daylight, not just calendar dates.
Look up your average first and last frost dates and keep them where you can see them.
Use those as a rough frame rather than strict rules.
For late autumn and early winter, plant cold-hardy seedlings a few weeks before sustained hard freezes.
This gives roots a chance to settle while the soil still feels workable.
In late winter, tuck in transplants as soil thaws but before early heat hits.
Keep an eye on forecasts.
If a sharp cold snap looms, delay planting by a few days or plan extra protection with row covers and mulch.
A cheap outdoor thermometer in the garden helps you track actual lows instead of guessing from phone apps.
This simple timing habit stops you from planting too early or too late and keeps transplants aligned with real weather, not just the month name.
3. Harden Off Seedlings Slowly in Cool, Sheltered Spots
Seedlings raised indoors or in a warm tunnel must adjust gently to outdoor winter conditions.
This process, called hardening off, can make or break them.
Start by placing trays outside in a sheltered corner for just an hour or two on mild days.
Keep them out of direct midday sun and strong wind at first.
Bring them back under cover at night.
Increase outdoor time across a week or two, gradually introducing more light and cooler air.
On calm days, set trays closer to their future beds so they experience that exact microclimate.
If a cold front arrives, pause the process for a day rather than pushing through.
You can use simple crates or cardboard screens as windbreaks.
These cost almost nothing yet protect tender leaves while they learn to handle real weather.
By the time you transplant, seedlings already “know” the garden, so the shift into soil feels far less shocking.
4. Pre-Warm Planting Spots With Covers or Black Plastic
Cold soil slows root growth even if air feels mild.
You can help by pre-warming transplant areas a week or two before planting.
Lay black plastic, dark landscape fabric, or even old dark towels over beds you plan to use.
Secure edges with stones or boards.
On sunny days, dark surfaces absorb heat and gently warm the top layer of soil.
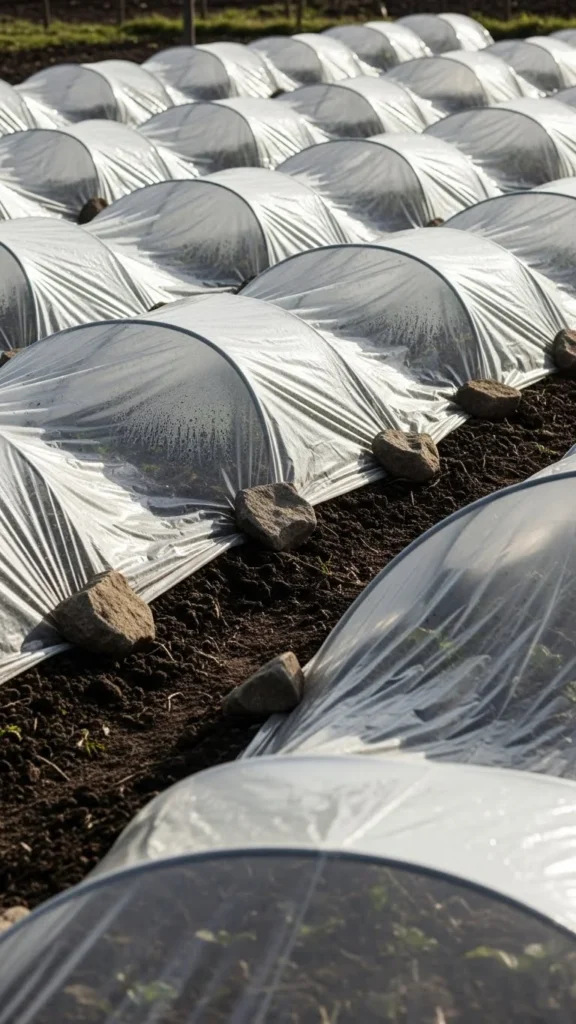
Another option is to set low hoops and cover them with clear plastic or row fabric.
This traps warmth and blocks icy wind.
Lift covers briefly on bright afternoons for air movement so moisture does not stagnate.
You don’t need to treat the whole garden.
Focus on strips where winter transplants will go and leave the rest under mulch.
When it is time to plant, peel back covers and you will often find softer, more workable soil that welcomes roots instead of shocking them.
5. Water Seedlings Deeply Before Transplant Day
Dry plugs fall apart and shock roots during transplanting.
To avoid that, give seedlings a thorough watering a few hours before you plant.
Water until you see moisture drain from the bottom of each cell or pot.
Then let trays sit so excess water drains away.
This makes root balls moist, cohesive, and easier to handle.
Avoid watering heavily right at the moment of transplant.
Waterlogged plugs can tear or turn to mush when you squeeze them.
Aim for soil that feels cool and damp but not dripping.
If you use bottom-watering trays, fill them and let seedlings drink for 20–30 minutes, then drain the tray.
This encourages roots to reach downward and creates compact plugs.
Arriving at the garden with well-hydrated seedlings gives them a calmer move into their winter bed.
6. Choose a Cloudy, Calm Planting Window

Harsh sun and strong wind can stress winter transplants, even when air feels cold.
Aim to plant on a cloudy, still day, or in the late afternoon when light softens.
Check the forecast for a 2–3 day stretch without extreme lows or big storms.
You want gentle conditions as seedlings settle in.
If that perfect window does not appear, pick the mildest day and plan extra protection with covers.
Avoid transplanting just before a heavy freeze or intense wind event.
Waiting a day can save many plants.
Keep trays in a sheltered place until weather calms a bit.
By matching transplant time with kinder conditions, you reduce wilting, leaf burn, and root shock.
It also makes the work more pleasant for you, which matters when you are outside handling cold soil and water.
7. Dig Holes That Match the Plug, Not Your Habit
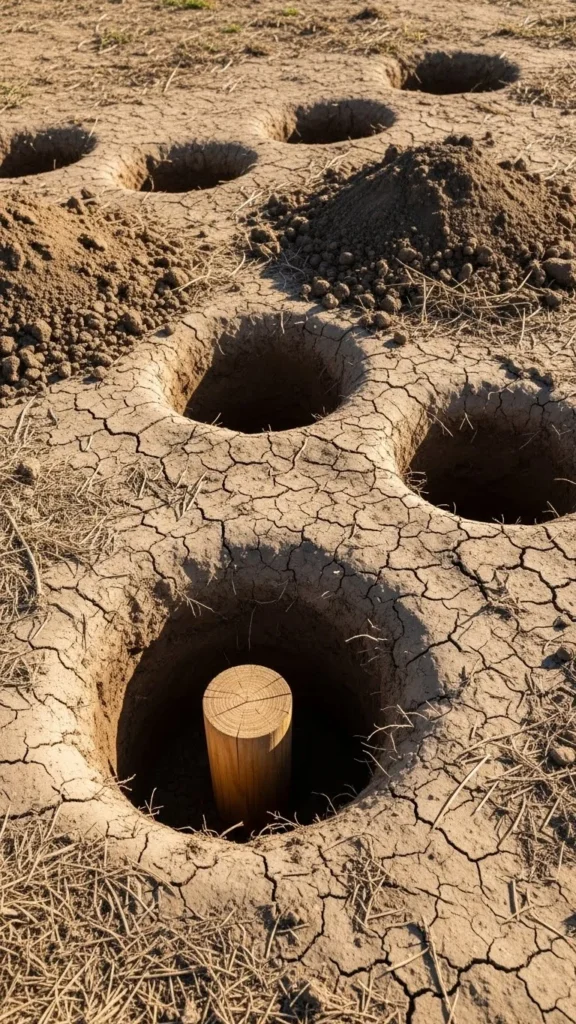
Many gardeners dig by habit rather than by root size.
For winter transplanting, shape holes to fit the plug exactly.
Use a trowel, narrow hand hoe, or even a dibber to create holes just slightly deeper and wider than the root ball.
This lets roots slip in without bending or folding.
Avoid giant holes that fill with cold water and chill roots.
If soil is clumpy, crumble the sides gently with your fingers.
You want contact between plug and surrounding earth, not air gaps.
Set the plug so the soil line matches the original height in the pot, except for brassicas, which can sit a bit deeper for stem support.
Taking an extra second with each hole creates a snug “socket” for the plant.
This small adjustment limits stress and helps roots start exploring nearby soil quickly, even in winter conditions.
8. Handle Seedlings by Leaves, Not Stems

Thin stems are the plant’s lifeline.
Pinching or crushing them can quietly kill a transplant even if it looks fine at first.
When lifting seedlings from trays, hold them by their leaves, not by the stem.
Leaves recover from small tears; stems rarely do.
Support the plug from below with a finger or pencil while you ease it free.
If plugs stick, squeeze the sides of flexible cells or push gently from the drainage hole instead of tugging upward.
Work slowly, especially when fingers feel numb in cold weather.
Have a small tray or shallow box nearby to carry seedlings to the bed so you are not juggling them one by one.
This reduces dropping and damage.
Treating seedlings gently at this stage pays off in winter, when plants have less energy to recover from injury.
9. Water Each Plant In at the Root Zone
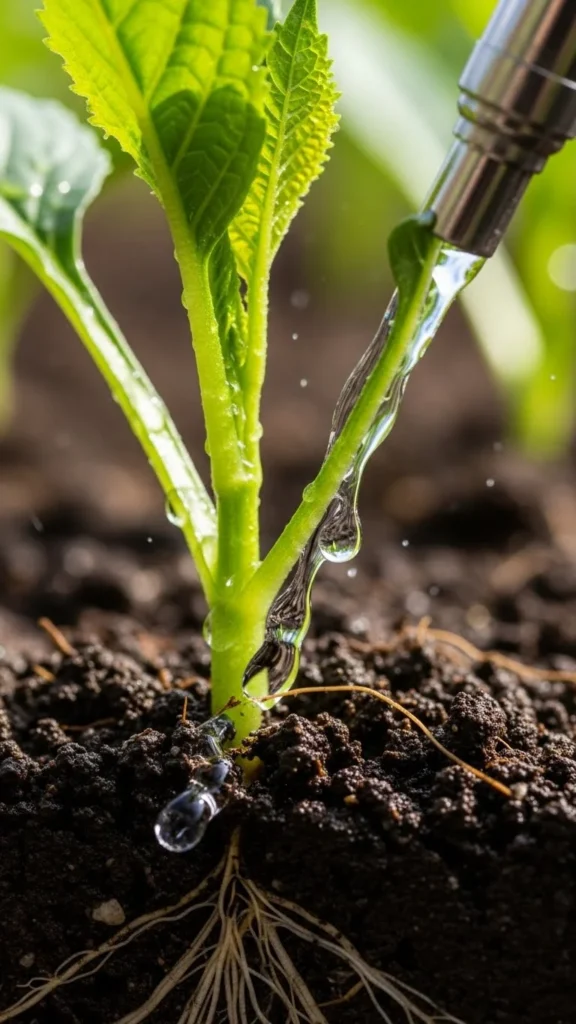
Once transplants are in the ground, they need immediate contact between roots and surrounding soil.
A targeted drink helps remove air pockets and settles soil snugly.
Use a watering can with a narrow spout or hose wand set to a gentle flow.
Give each plant a small, direct pour at the base, rather than flooding the entire bed.
Aim to moisten soil about 10–15 cm deep.
Avoid spraying cold water over leaves in freezing conditions.
Focus on the root zone instead.
If your climate is extremely cold, use water that has rested indoors for a few hours so it is slightly less icy.
For larger plantings, mix a mild compost tea or seaweed solution as a one-time transplant drink.
This is optional but can support stress recovery.
After this first watering, let soil surface dry slightly before watering again, especially in wet winters.
10. Mulch Around, Not Over, Young Stems
Mulch protects winter soil, but heavy layers piled against stems can trap moisture and invite rot.
After watering in, add a ring of straw, leaf mold, or shredded leaves around each transplant.
Leave a small, clear circle right at the stem base.
This lets air move and keeps crowns dry.
Think of mulch as a soft collar, not a blanket over the plant.
In very cold regions, you can create slightly thicker rings, especially for hardy brassicas and leeks.
Just maintain that bare circle at the center.
Check after storms; mulch may slide and bury small seedlings.
Use what you have on hand: raked leaves, half-rotted wood chips away from stems, or chopped stems from summer crops.
This careful mulching pattern insulates roots, steadies moisture, and avoids smothering tender transplants.
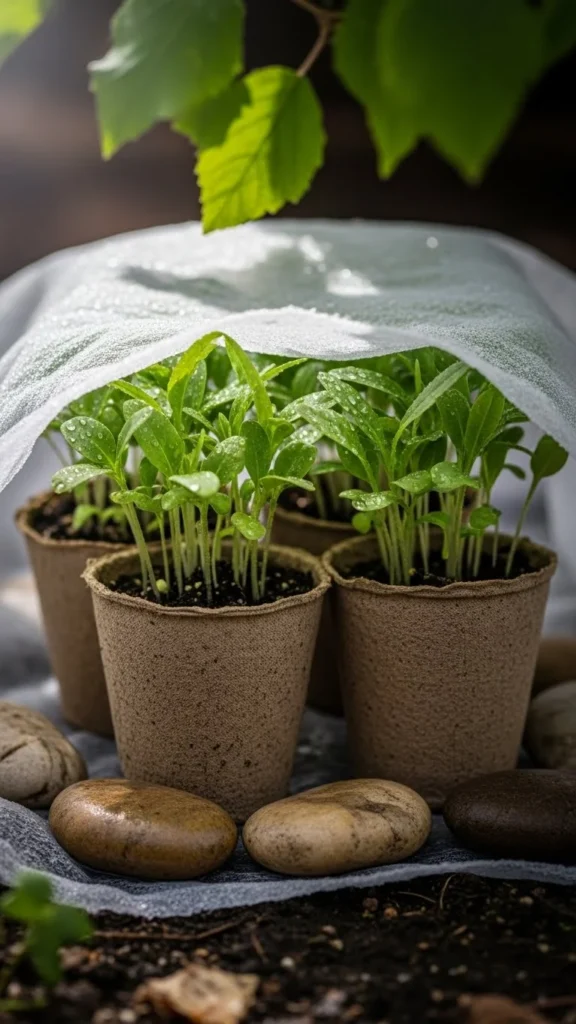
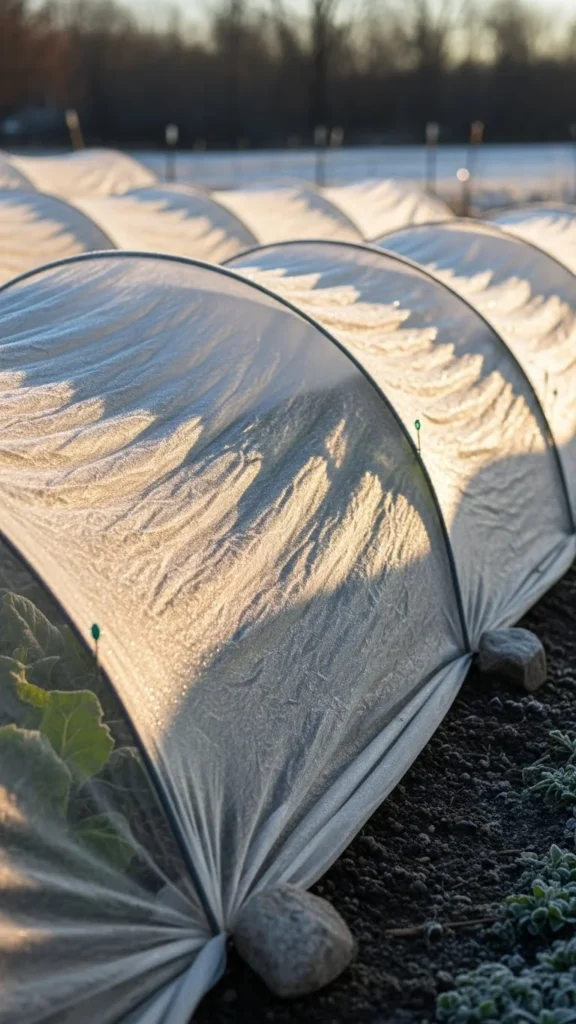
11. Use Simple Row Covers as a Winter Safety Net
Row covers turn an exposed bed into a gentler microclimate.
After transplanting, stretch lightweight fabric or plastic over hoops or simple stakes.
Secure edges with rocks, boards, or soil.
Leave enough slack so the cover can rise as plants grow.
This barrier softens wind, light frost, and sudden temperature drops.
On warmer days, open one side to prevent excess humidity and give plants a bit of airflow.
Close it again before evening cold arrives.
In very bright climates, choose white fabric that diffuses light instead of clear plastic that can overheat on rare sunny winter days.
You can reuse row covers for many seasons if you fold and store them dry.
Even a single long piece can protect a main bed of salad greens or brassicas and significantly cut winter losses from harsh weather.
12. Cluster Plants for Shared Warmth and Wind Shelter

Wide spacing works in summer, but winter transplants often benefit from slightly tighter planting.
Clusters create a small “canopy” that holds a little warmth and reduces wind sweep.
Plant cold-hardy crops like spinach, mache, and Asian greens in blocks rather than long single rows.
Leave enough room for air to move, but avoid big empty gaps between plants.
This pattern helps foliage shield neighboring plants from wind and frost.
Use closer spacing for quick-cut salad beds and slightly wider spacing for cabbages and kale.
You can always thin by harvesting outer leaves or entire plants as they grow.
This compact layout works especially well under row covers or in raised beds.
Each plant supports the microclimate of the others, giving you dense, productive winter patches without using extra fabric or hardware.
13. Mix Transplants With Direct-Sown Winter Seeds
You do not have to choose between transplants and seeds; combining both gives a nice rhythm.
Tuck sturdy transplants of kale, lettuce, or onions into the bed, then sow quick greens between them.
Use a fine seed mix of arugula, mustards, or microgreens in the spaces around each plant.
These sprout in cooler soil and give early harvests while the larger transplants slowly expand.
Mark a simple grid so you remember where transplant roots spread, and keep seed sowing slightly shallow.
As winter passes, you can cut salad from between rows, then let the bigger plants take over that space.
This layered approach uses every part of the bed.
It also gives a clear stagger: leaves from direct-sown patches arrive early, while transplanted crops become your later winter or early spring meals.
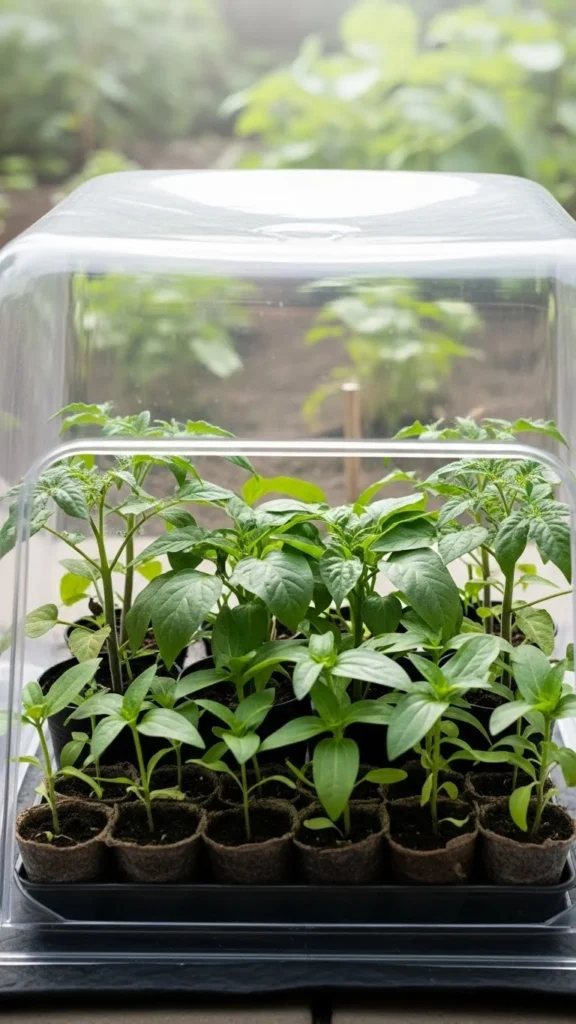
14. Protect Roots With Recycled Bottles as Mini Cloches
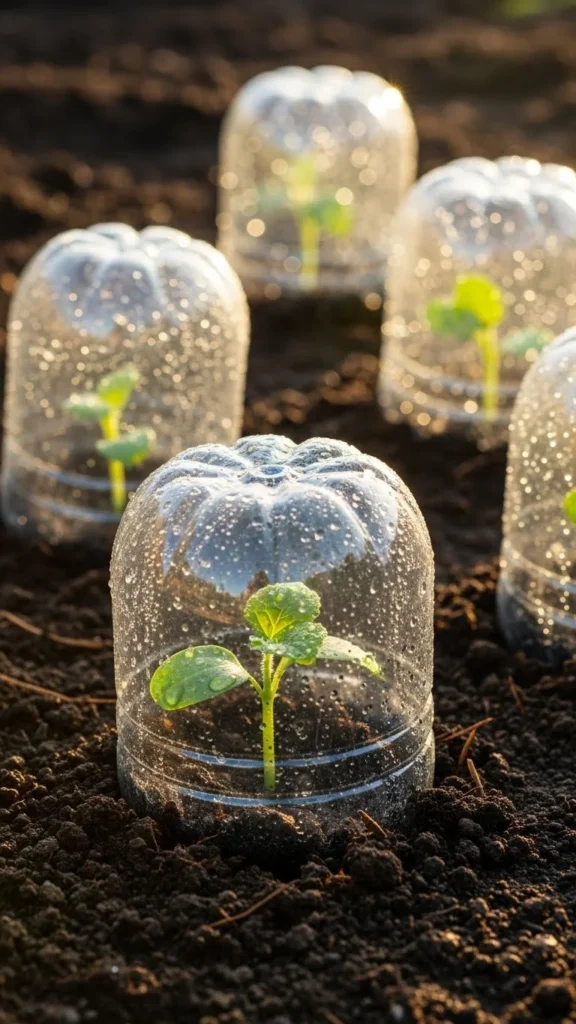
You can create quick mini greenhouses around individual plants using clear bottles.
Cut the bottoms off 2-liter plastic bottles and set them over transplants like small domes.
Push the cut edge a little into the soil to stop wind from lifting them.
Unscrew caps during warmer days to let heat escape and allow some airflow.
Replace caps again when frost threatens overnight.
These mini cloches trap warmth and protect tiny plants from harsh wind and sleet.
They are especially handy for the earliest transplants or for small, slow-growing lettuces.
Collect bottles from your own recycling or ask neighbors to save a few.
Label them so you reuse them each season.
This simple trick costs almost nothing and adds another protective layer on top of row covers or mulch.
15. Keep a Simple Rotation Map Beside Your Beds

Winter transplants can fit smoothly into crop rotation instead of creating confusion later.
Draw a quick sketch of your beds and mark which families you are planting where.
Label zones with words like “brassicas,” “alliums,” “roots,” and “legumes.”
Tape a laminated copy to a fence post or inside a shed door.
This keeps the plan visible while you stand in the garden with trays in hand.
As you transplant winter brassicas into one bed, you already know that spot will host a different family next season.
That helps limit disease buildup and makes soil planning easier.
Update the map whenever you add a new patch or shift bed use.
A cheap plastic sleeve protects it from rain.
This simple visual guide links winter transplant decisions to your longer rotation rhythm without complicated charts.
16. Use Simple Markers to Track Varieties and Dates
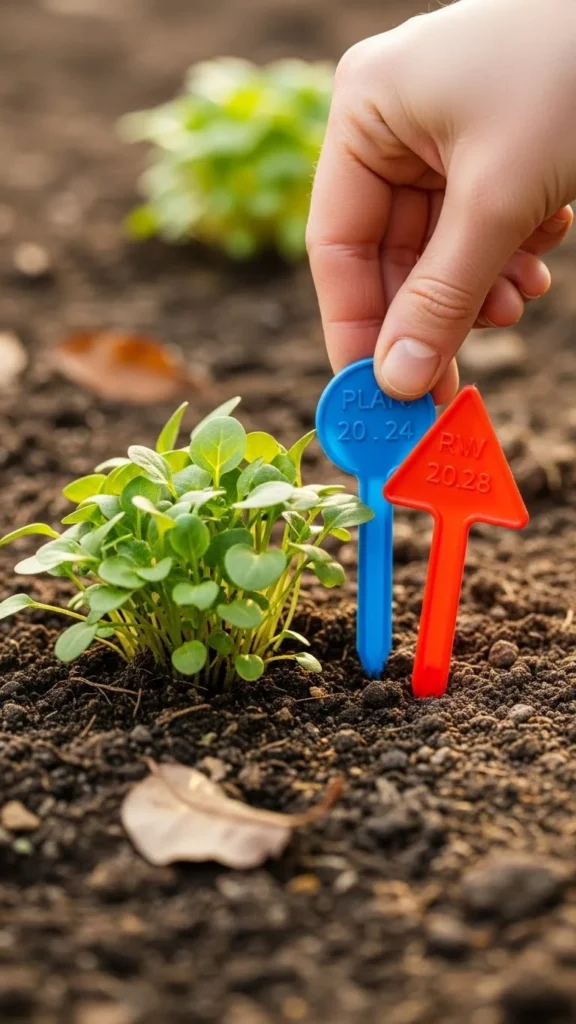
In winter, many greens look similar.
Without labels, it becomes easy to forget which variety went where or when you planted it.
Use weatherproof plant markers to note variety name and transplant date.
You can cut them from old yogurt lids, blinds, or wooden stakes.
Write with a paint pen or pencil that resists rain fading.
Place markers at row ends instead of in the middle, where tools might knock them out.
If you grow several types of lettuce or kale, this helps you learn which ones truly handle your winter better.
Later, when you plan spring planting or order seed again, you can lean on that small record.
Simple labels turn the winter garden into a quiet trial bed that teaches you which varieties earn a permanent spot.
17. Prune Damaged Leaves Early to Focus Energy
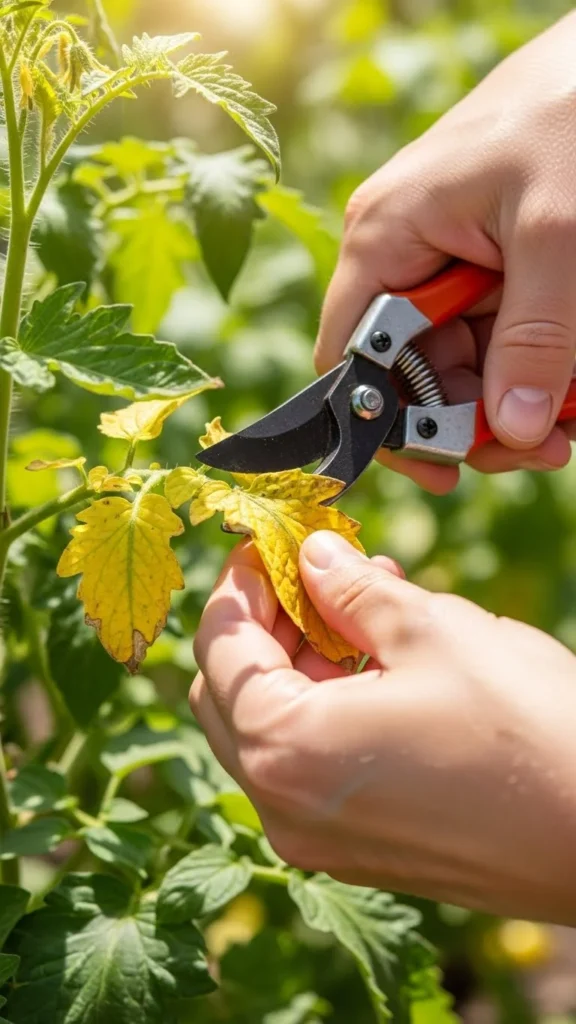
Transplanting always causes a little stress.
Some leaves may wilt, tear, or show minor damage after planting.
A day or two later, inspect each plant.
Snip off badly wilted or yellowing leaves with sharp scissors.
Leave any healthy green growth intact.
Removing damaged leaves helps the plant focus on new roots and fresh foliage rather than trying to maintain weak parts.
It also improves airflow around the crown, which matters in damp winter weather.
Collect trimmed leaves and compost them away from the bed.
Avoid letting them sit on mulch by the stem.
This small, quick grooming round makes winter transplants look cleaner and often bounce back more quickly.
18. Check Soil Moisture With Your Fingers, Not Guesswork

Winter watering can feel tricky because evaporation slows.
Guessing from the surface alone often leads to soggy or bone-dry roots.
Every few days, slide a finger into the soil near a transplant down to about 5 cm.
If it feels cool and slightly damp, hold off on watering.
If it feels dry and crumbly, give that area a gentle drink.
Check more than one spot; edge beds might dry faster than center beds.
Make a simple habit: inspect first, then water only where truly needed.
This finger-test costs nothing, works in any climate, and avoids stressing winter vegetables with constant swings between flood and drought.
Your roots settle faster when moisture stays steady, not extreme.
19. Keep Spare Seedlings as Insurance in a Protected Spot
Even with careful work, winter may claim a few plants.
Plan for this by raising extra seedlings and keeping them in a sheltered spot.
After transplanting the main bed, hold back a tray or two inside a cold frame, greenhouse shelf, or bright window.
Water them lightly and give them regular air circulation.
If a row in the garden thins out due to weather or pests, you have instant replacements.
No need to start seeds from scratch in the darkest months.
Once winter passes and you no longer need backups, those extra seedlings can fill containers, share with neighbors, or extend harvest into another bed.
This simple insurance habit keeps your winter layout full even after surprises.
20. Use Low-Cost Lights Indoors to Prepare the Next Wave
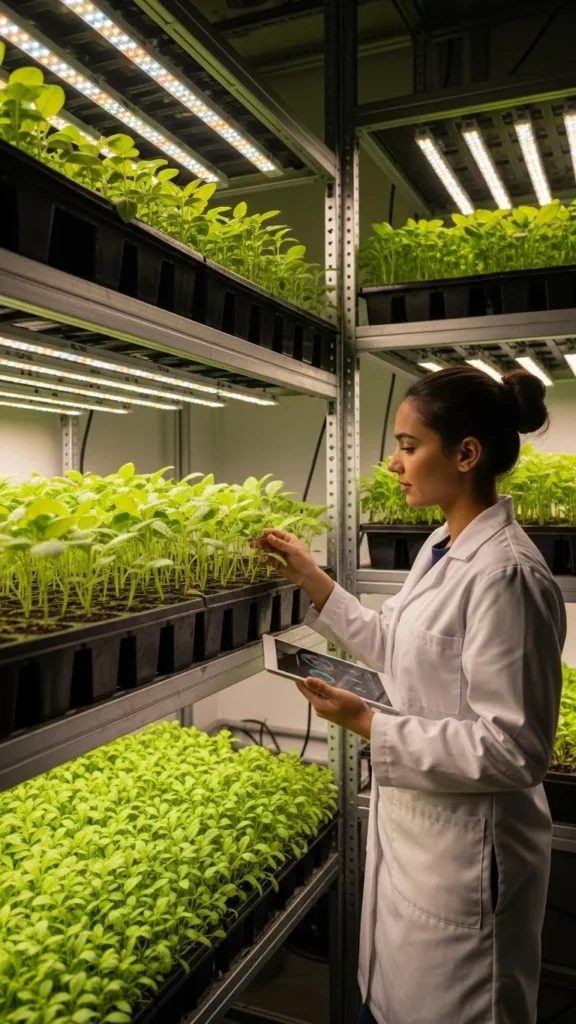
To stay ahead, start the next wave of transplants while the first batch goes into the garden.
Simple LED shop lights hung above indoor seed trays can support sturdy seedlings for late winter or early spring.
Position lights close to the plant tops, adjusting as they grow.
Run them 12–14 hours a day using a cheap timer.
Keep trays in a cool room so seedlings grow slow and strong, not tall and weak.
Use recycled containers with drainage holes set in larger trays.
Label each row to track varieties and sowing dates.
By the time space opens up outside, your next set of transplants sits ready, already hardened off in stages.
This layering of plantings keeps beds productive and avoids long empty periods between winter and spring crops.
21. Walk the Garden After Storms and Fix Small Problems Fast
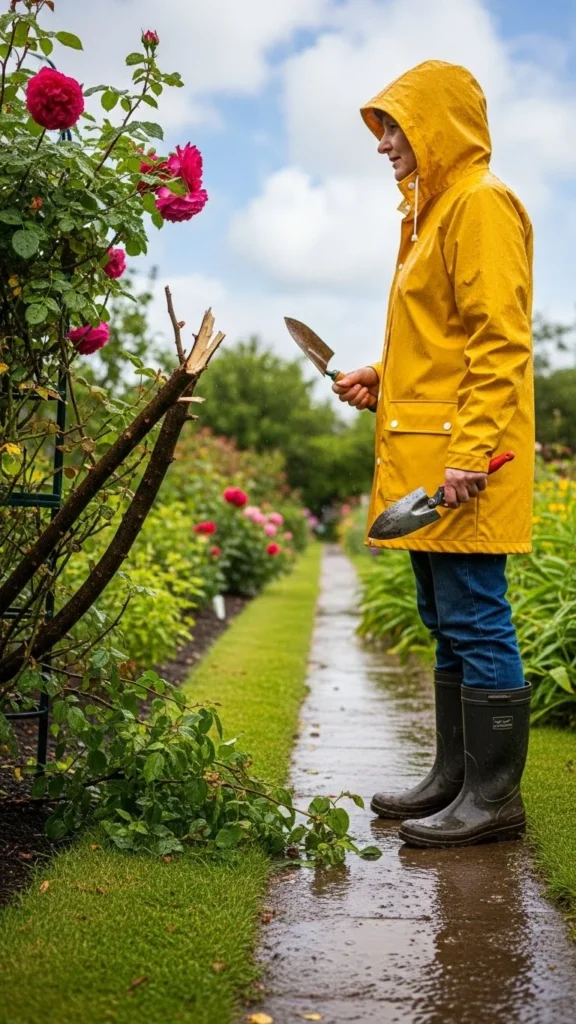
Winter storms move mulch, lift covers, and tilt young plants.
Make a habit of short garden walks after rough weather.
Carry a small kit: gloves, trowel, scissors, and a handful of spare pegs or stones.
Straighten any leaning seedlings by firming soil around their base.
Pull mulch back from buried leaves and re-anchor row covers.
Check for pooling water and gently open small channels to help it drain away from roots.
Look for slug or pest damage near plant crowns and clear hiding spots like boards pressed right against stems.
Quick fixes right after storms prevent minor issues from turning into plant losses.
These walks also help you learn how your microclimates behave through winter, guiding future transplant choices and protection methods.
22. Keep Notes on What Worked So You Can Repeat It

A simple notebook or digital log turns your winter garden into a teacher.
Record dates of transplanting, varieties, protection used, and weather patterns.
Jot down which beds stayed healthiest, which covers held up best, and which crops sulked.
Include quick comments like “kale under fabric looked strong” or “spinach in open bed stalled.”
You do not need long paragraphs.
Short lines and bullet points are enough.
At the start of next season, review those notes before starting seeds and planning beds.
This record keeps you from repeating avoidable mistakes and highlights tactics that gave the smoothest winter transplant experience.
Over a few seasons, your personal data shapes a winter transplant routine that feels almost automatic, grounded in your own garden, not just general advice.
Conclusion
Winter vegetable transplanting is less about heroics and more about steady, thoughtful steps.
Choosing hardy crops, timing plant-outs with real weather, protecting roots and leaves with simple covers, and paying attention to soil and spacing all help your garden stay active when many beds sit empty.
Start with a small section of your plot, try a few of these winter transplant steps, and keep notes on how they perform.
Each cold season will feel smoother as you refine your approach, giving you earlier harvests and beds that roll into spring already full of life instead of bare soil waiting for seed.

Leave a Reply