
If your garden space is tight but your love for plants keeps growing, a DIY vertical planter tower is the perfect solution. It’s stylish, space-saving, and incredibly rewarding to build with just a few simple tools. Whether you’re planting herbs, flowers, or strawberries, this project lets you turn even a tiny balcony or patio into a lush, living wall of greenery.
You don’t need fancy carpentry skills or expensive materials—just creativity and a few hours on the weekend. Let’s walk through how to make your very own vertical planter tower from scratch!
Step 1: Choose Your Design
Before you grab your tools, decide what type of tower you want. There are a few easy options for beginners:
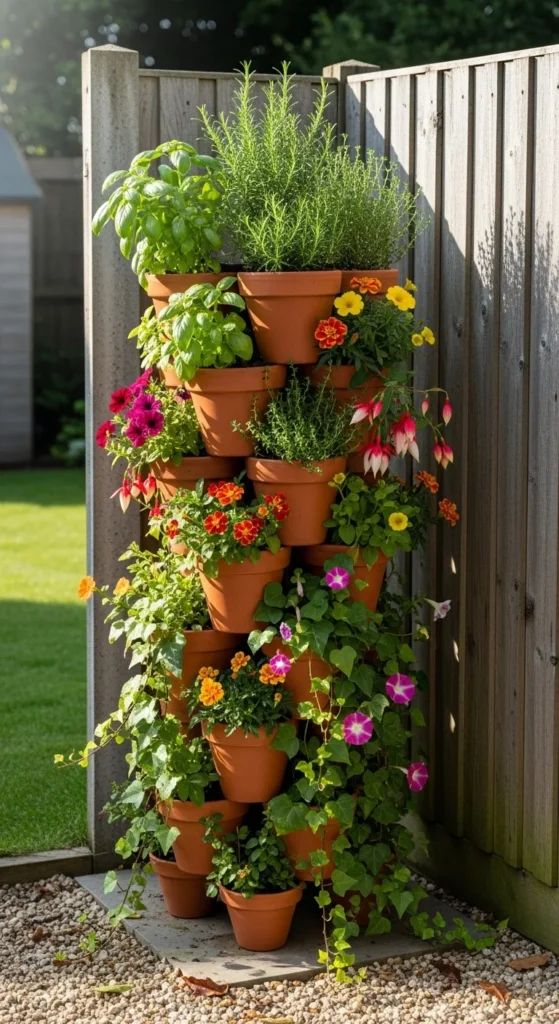
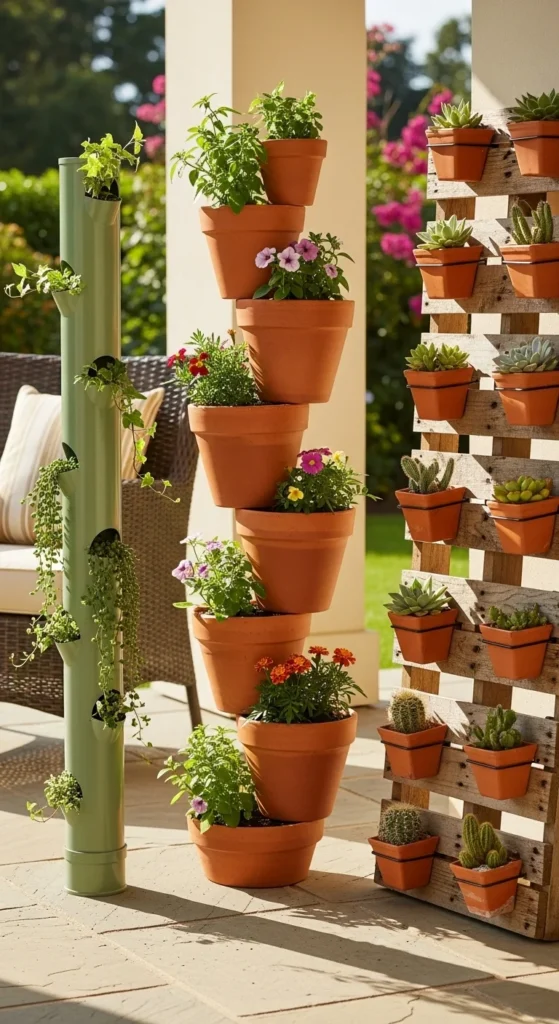
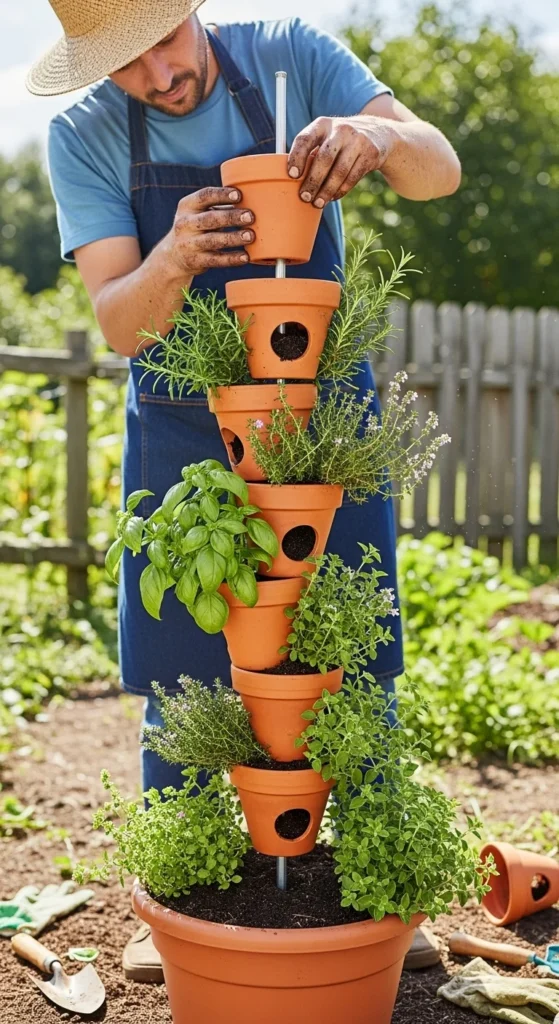
- Stacked Pot Tower: Great for herbs and flowers. Uses different-sized pots balanced on a center rod.
- PVC Pipe Tower: Perfect for leafy greens or strawberries. Features holes cut into a standing PVC pipe filled with soil.
- Wooden Frame Tower: Ideal for succulents or small veggies. Offers a clean, modern look.
Each style saves ground space while giving plants room to grow vertically.
Pro Tip: Start with a stacked pot design if this is your first time—it’s beginner-friendly and looks gorgeous.
Step 2: Gather Your Materials
The beauty of this project is that it’s fully customizable. You can make it as big or small as you like.
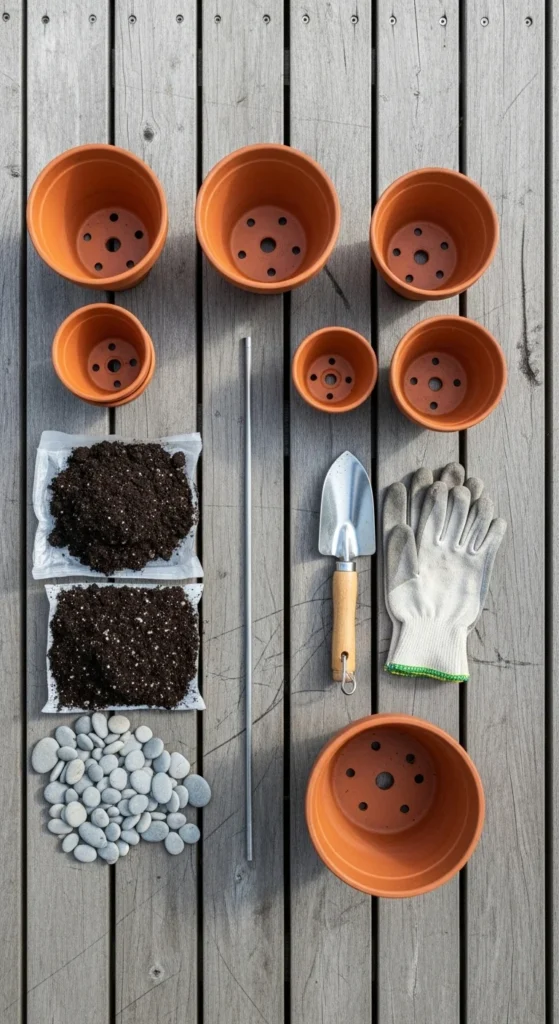
For a stacked pot tower, you’ll need:
- 3–5 terracotta or plastic pots (each slightly smaller than the one below)
- 1 metal or wooden rod (at least 3–4 feet tall)
- Potting soil
- Plants or seedlings of your choice
- Small rocks or gravel (for drainage)
Optional: Spray paint, sealant, or stencils if you want to decorate your pots.
Pro Tip: If you’re using lightweight plastic pots, add small stones to the bottom to make the base more stable.
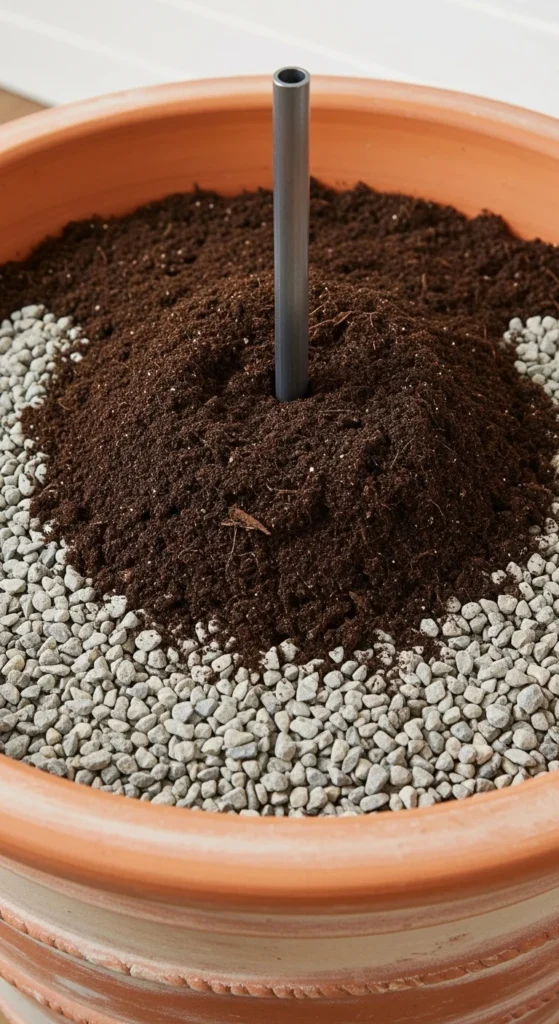
Step 3: Build the Base
The foundation of your tower needs to be sturdy enough to handle the weight of stacked pots.
- Choose the largest pot for the bottom.
- Fill it one-third full with gravel or stones for drainage.
- Insert the rod or pole into the center before filling with soil. Make sure it’s upright and secure.
- Fill the rest of the pot with soil, leaving a few inches at the top.
This pot will anchor your entire tower, so take a moment to make sure it’s balanced and steady.
Step 4: Stack and Plant
Now comes the fun part—building your vertical garden!
- Slide the next pot down the rod at a slight tilt so it rests on the edge of the pot below.
- Fill it with soil and add your plants.
- Continue stacking, alternating directions as you go for a spiral effect.
- Finish with the smallest pot on top and your final plant choice—like a trailing ivy or colorful flower.
Each level should have enough room for roots to grow, so avoid packing too tightly.
Plant ideas:
- Herbs: Basil, thyme, mint, parsley
- Flowers: Petunias, pansies, marigolds
- Edibles: Strawberries, lettuce, spinach
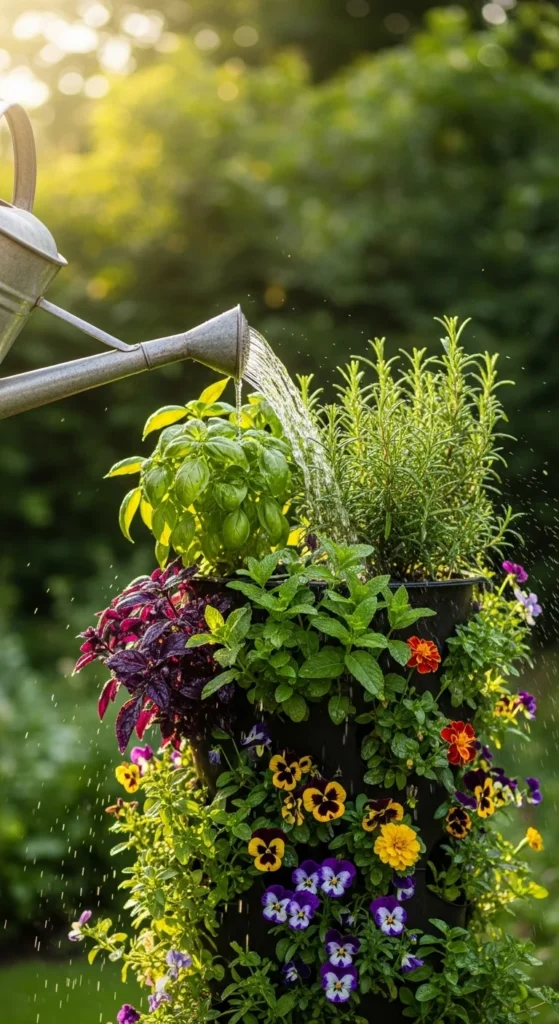
Step 5: Water and Maintain
Vertical planters dry out faster than regular pots, so watering is key.
Tips to keep your plants happy:
- Water from the top and let it trickle down naturally.
- Check moisture daily, especially during hot weather.
- Use a slow-release fertilizer or compost tea every 2–3 weeks.
- Rotate your tower occasionally so all sides get sunlight evenly.
If you live in a windy area, place your tower near a wall or fence for extra support.
Step 6: Decorate and Personalize
Your vertical planter tower doesn’t just have to be practical—it can also be a beautiful focal point.
Creative ideas:
- Paint your pots in ombré shades or add stenciled designs.
- Wrap the base with jute rope for a rustic look.
- Add small solar lights between layers for evening glow.
These small touches turn your DIY project into a garden centerpiece that’s both functional and decorative.
Final Thoughts
Building a DIY vertical planter tower is one of the most satisfying weekend garden projects you can take on. It’s budget-friendly, customizable, and instantly transforms even the smallest outdoor (or indoor) spaces into something lush and alive.

Leave a Reply