
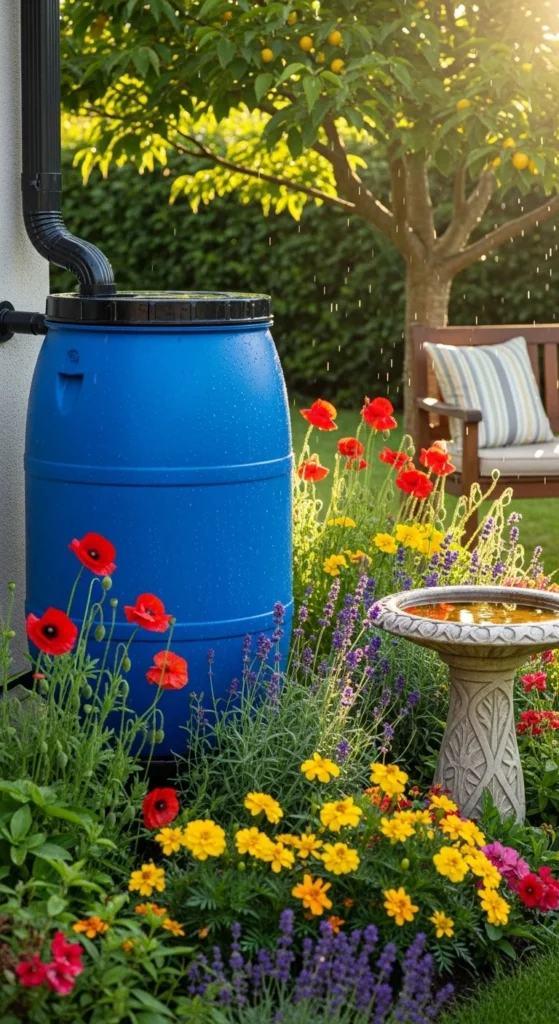
Imagine watering your garden with fresh, natural rainwater — no hoses, no extra bills, and no guilt. A rain barrel makes that dream a reality. It’s simple, eco-friendly, and can save you gallons of water every month. Best of all, you can build one in a single afternoon using inexpensive or recycled materials.
Why Collect Rainwater?
Rainwater harvesting is one of the easiest ways to make your home more sustainable. Even a light shower can fill your barrel fast — one inch of rain on a 1,000-square-foot roof can collect over 600 gallons of water!
Benefits of Using a Rain Barrel:
- Free water for gardens, lawns, and outdoor cleaning.
- Reduced runoff that can carry chemicals into storm drains.
- Better for plants — rainwater is chlorine-free and naturally soft.
- Saves money on your utility bill.
Whether you live in a dry region or just love greener living, building a rain barrel is one DIY project that pays off right away.
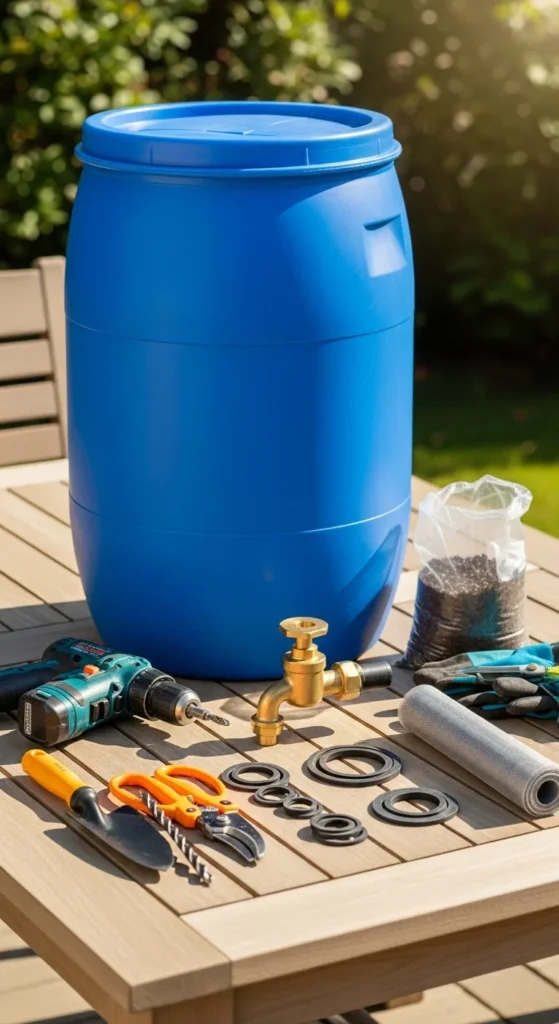
Step 1: Gather Your Materials
You don’t need fancy tools or expensive parts to make your rain barrel. Most of what you need can be found at a hardware store — or even recycled from around your home.
Materials:
- A large plastic barrel (40–60 gallons) — food-grade if possible.
- Spigot (½-inch brass or plastic).
- Rubber washer and nut for sealing the spigot.
- Hose adapter (optional for connecting to a garden hose).
- Screen or mesh fabric to keep out debris and mosquitoes.
- Downspout elbow or flexible gutter extension.
Tools:
- Drill with hole saw bit
- Utility knife or jigsaw
- Adjustable wrench
- Tape measure
Step 2: Prepare the Barrel
Before you start drilling, give your barrel a good cleaning — especially if it was previously used for food or liquids.
- Rinse it thoroughly with warm, soapy water.
- Avoid barrels that once held chemicals or oils.
- Once dry, flip it upright to plan your layout.
Mark where you’ll install your spigot (near the bottom), overflow hole (near the top), and inlet hole (on top for the downspout).
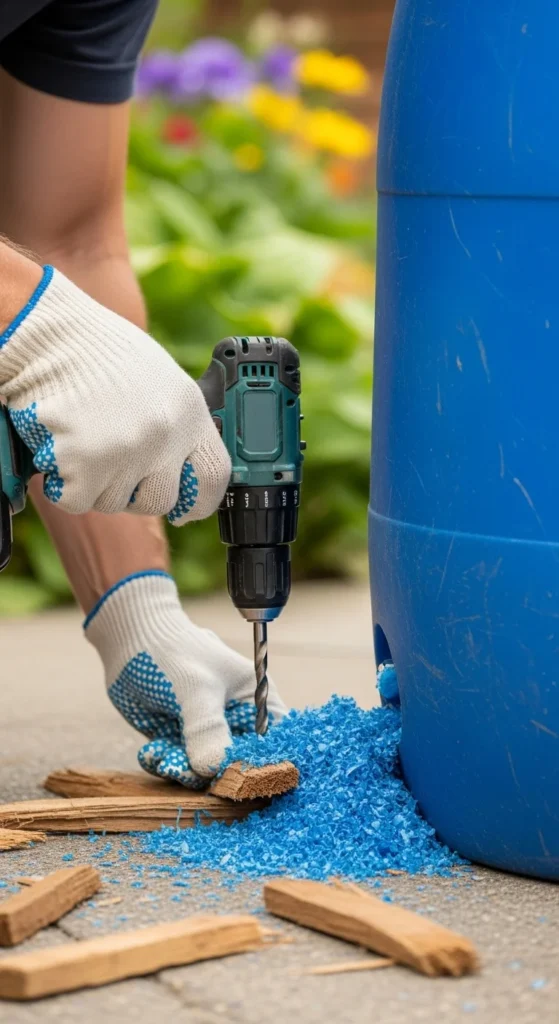
Step 3: Drill the Holes
Now it’s time to make space for your fittings.
- Spigot hole: Drill a ¾-inch hole about 2–3 inches above the bottom. This lets you fill watering cans easily while leaving room for sediment.
- Overflow hole: Drill another hole near the top to let excess water escape. You can attach a short hose here to direct overflow away from your house.
- Inlet hole: Cut or drill a hole on the lid large enough to fit your downspout elbow or extension.
Step 4: Install the Spigot and Screen
Once your holes are drilled, it’s time to assemble your barrel.
To install the spigot:
- Insert the spigot through the lower hole.
- Place a rubber washer on both sides to prevent leaks.
- Secure tightly with a nut and wrench.
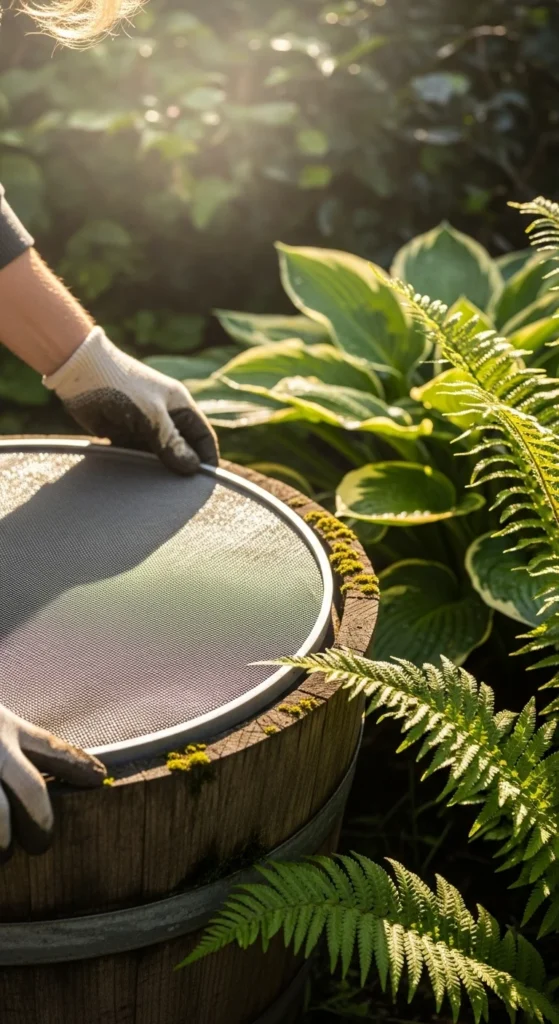
To add the screen:
- Cover the inlet hole on top with a fine mesh screen or window screen fabric.
- Secure it with duct tape, a bungee cord, or the barrel’s lid.
- This keeps out leaves, dirt, and mosquito larvae.
If you’re using a recycled barrel without a lid, you can staple or screw the mesh directly around the opening.
Step 5: Position and Connect the Barrel
Where you place your rain barrel makes all the difference.
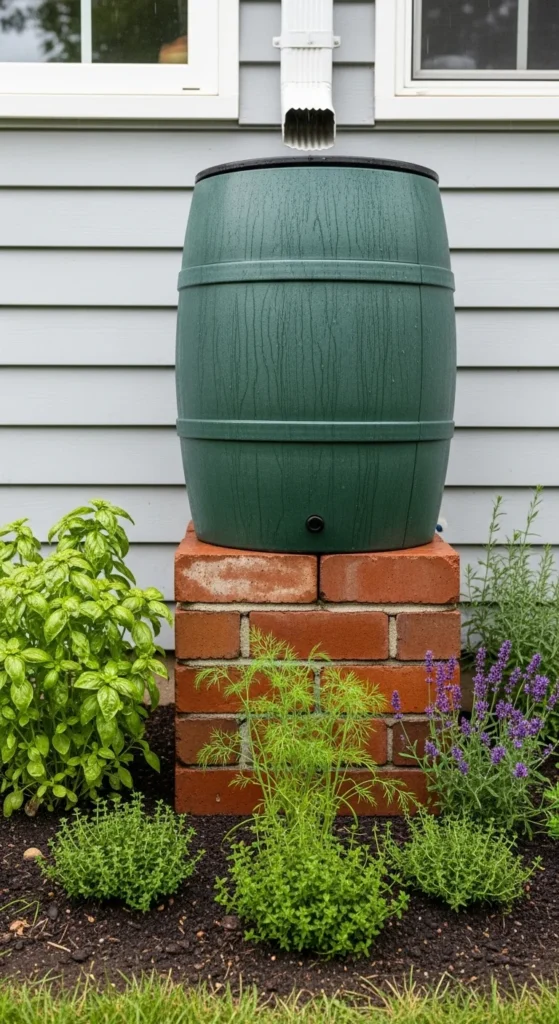
- Pick a flat, stable surface: Use concrete blocks or bricks to raise the barrel a foot or two off the ground. This improves water flow from the spigot.
- Position under a downspout: Align the barrel so the gutter drains directly into the inlet hole.
- Attach the downspout elbow: Use a flexible extension to direct rainwater straight into your barrel.
Don’t forget to place a watering can or bucket under the spigot to make collecting water easy.
Step 6: Maintain Your Rain Barrel
Your new rain barrel will serve you well for years with just a little maintenance.
- Empty it before winter in cold regions to prevent freezing or cracking.
- Clean the inside once or twice a year with mild soap and water.
- Check for leaks or clogged screens after heavy storms.
- Keep it covered to prevent algae growth and mosquitoes.
For an upgrade, you can even connect multiple barrels with hoses to create a bigger rain collection system.
Final Takeaway
Building a rain barrel is one of those rare projects that’s good for the planet, your garden, and your wallet. In just a few hours, you can turn rainfall into a renewable resource — all while reducing runoff and supporting healthier plants.

Leave a Reply