
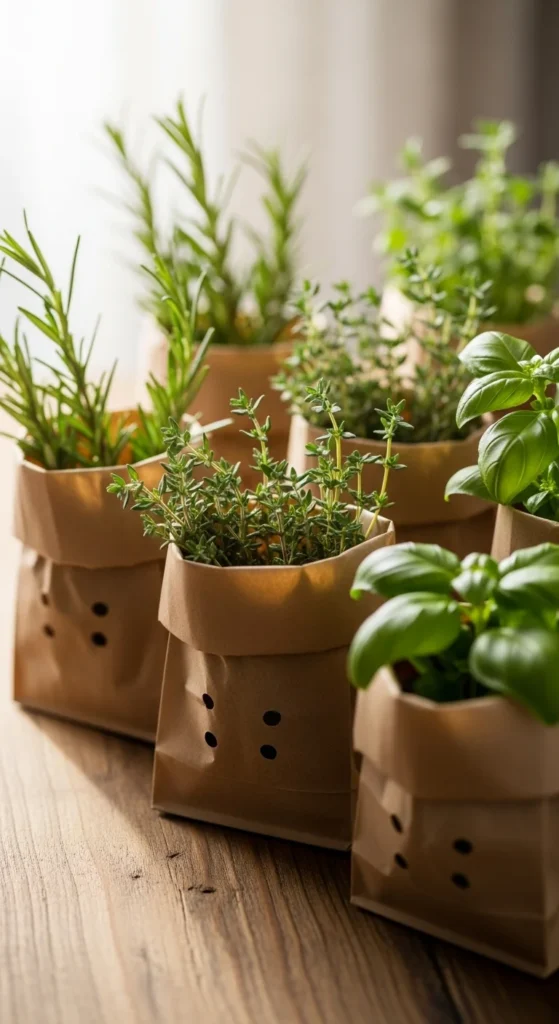
Drying and storing herbs indoors lets you keep strong flavors available long after harvest. Many home growers look for simple ways to preserve basil, mint, thyme, and other favorites without losing aroma. This list helps you dry herbs efficiently and organize them neatly using practical tools, warm airflow, and storage containers that protect flavor. Each idea works well in apartments, kitchens, small homes, and cold-weather seasons when outdoor drying isn’t possible.
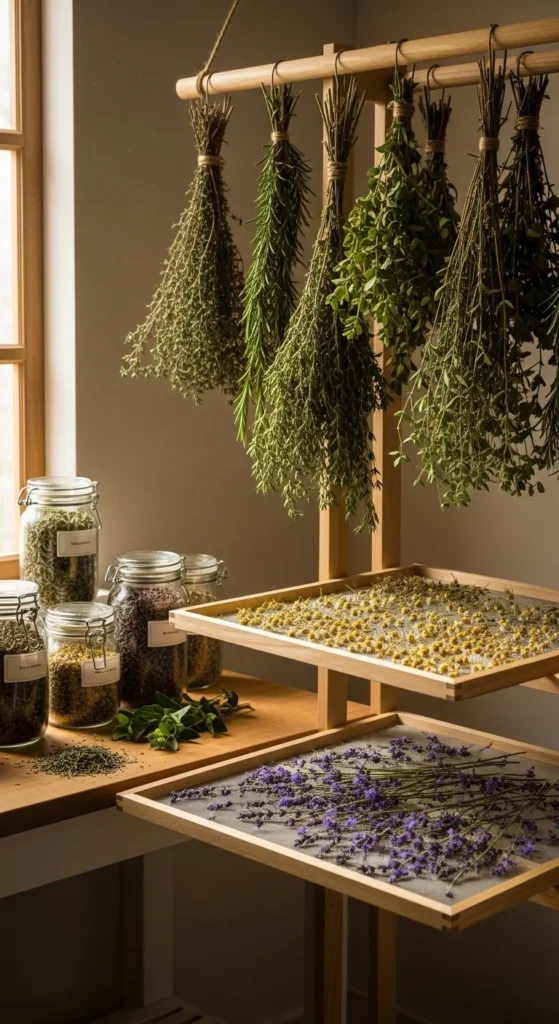
1. Hanging Bundles Near a Warm Window
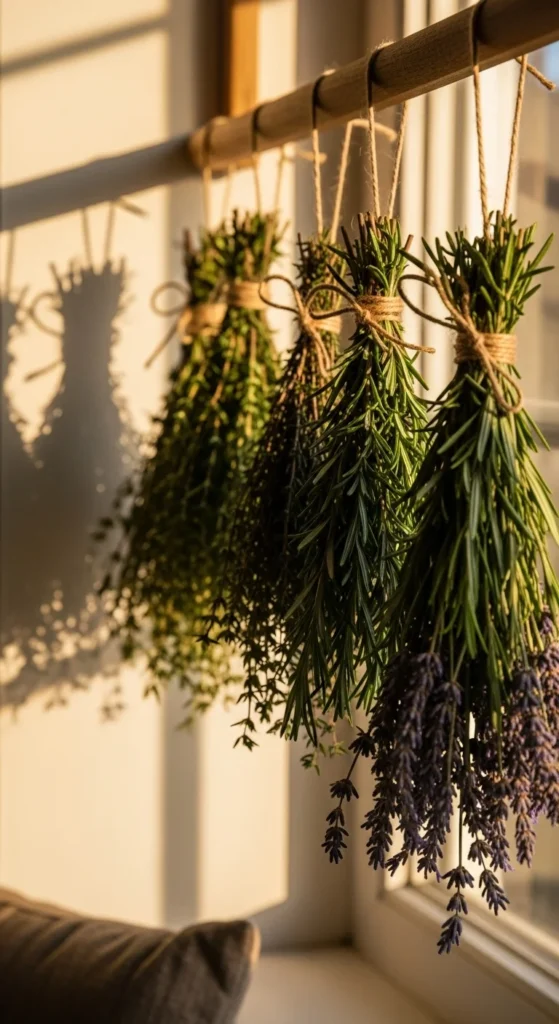
Hanging herbs in small bundles is a classic indoor method. Tie stems with twine and hang them upside down near a warm, dry window. Leave enough space between bundles for airflow. Use herbs with woody stems like thyme, rosemary, or sage for best results. Keep the bundles away from direct heat so the leaves don’t dry unevenly. After a week or two, the leaves will feel crisp. Strip them gently and store them in airtight containers.
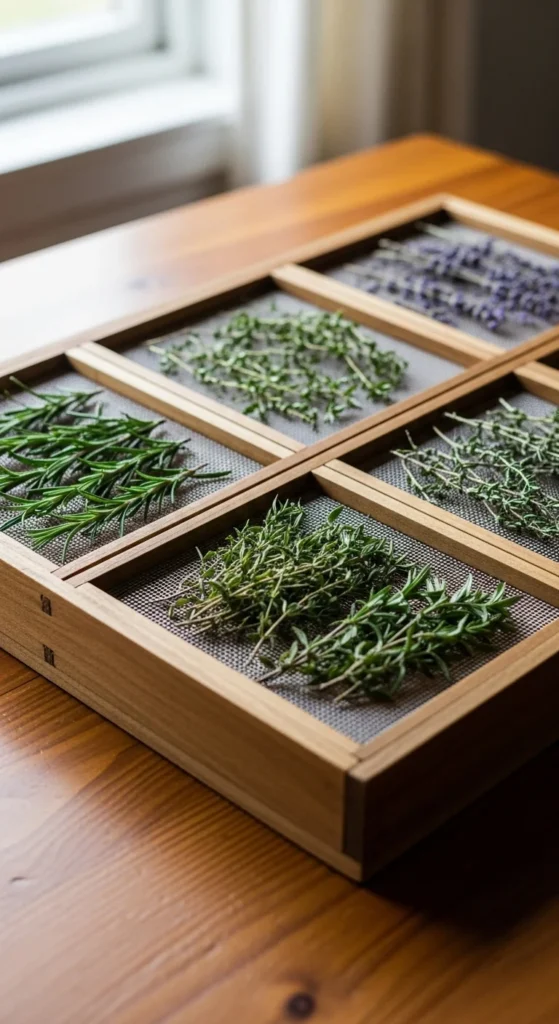
2. Using a Mesh Drying Rack
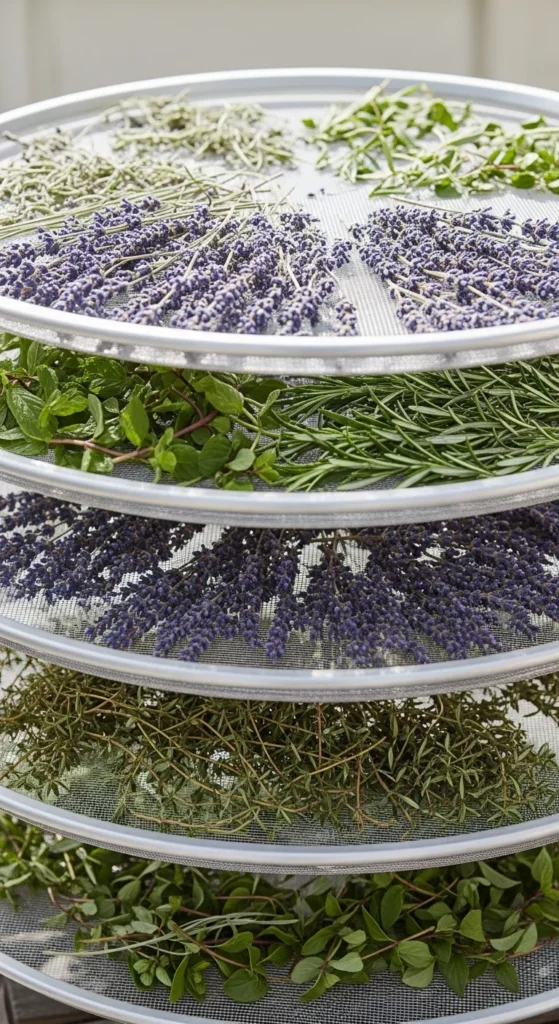
Mesh drying racks give you multiple tiers for different herbs. Spread leaves evenly without stacking. Place the rack in a warm corner with good airflow. Flip herbs lightly every few days for even drying. This setup is perfect when you harvest many types at once. Once dry, gather the leaves carefully and transfer them into labeled jars. Keep the rack collapsed when not in use to save space.
3. Paper Bag Drying for Delicate Leaves
Paper bag drying helps shield delicate herbs from light and dust. Punch small holes in the sides of a paper bag. Place herbs inside and tie gently at the top. Hang the bag near a warm spot. Shake it lightly every few days so herbs dry evenly. Once leaves feel crisp, remove them gently and store them in small tins or jars. This method works well for mint, lemon balm, and basil.
4. Countertop Dehydrator for Quick Drying
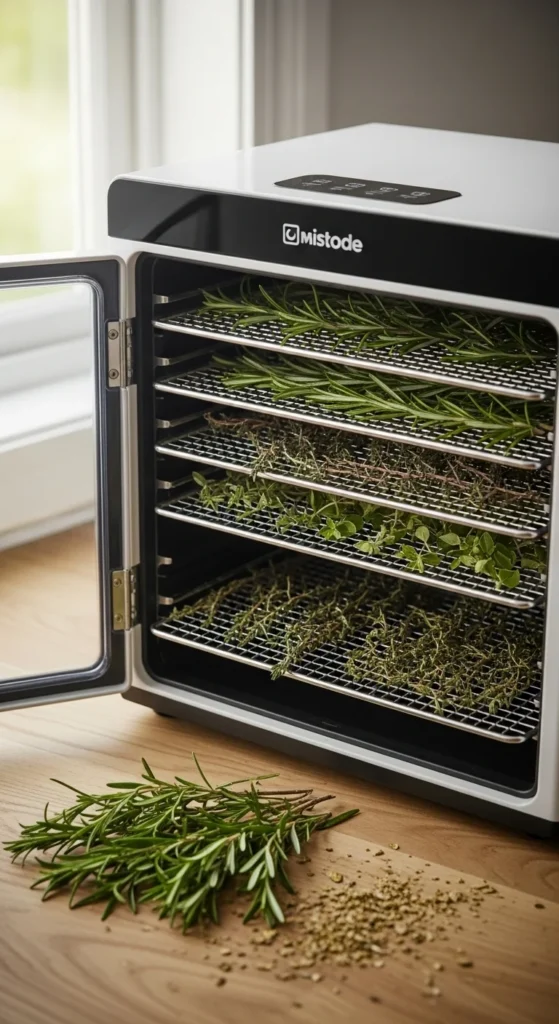
A countertop dehydrator gives quick, reliable results. Spread herbs thinly across trays. Set the temperature low so the leaves don’t lose aroma. Check them every hour to avoid over-drying. Once crisp, remove them carefully and let them cool before storage. A dehydrator is handy for large batches during winter or harvest season. Label each jar clearly with the herb name and date.
5. Oven Drying on Low Heat
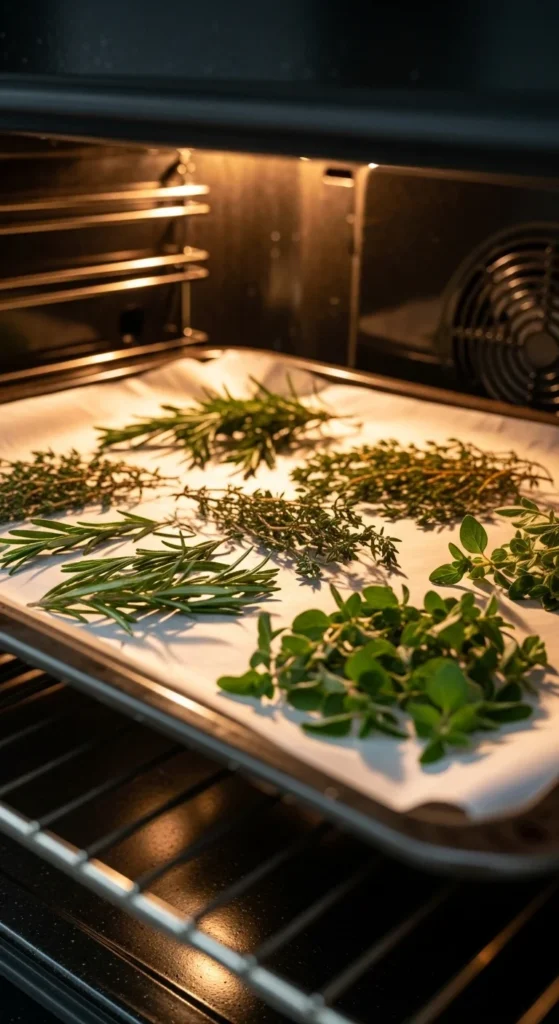
Dry herbs in the oven when time is short. Set the temperature extremely low. Spread leaves on a tray lined with parchment. Leave the oven door slightly open to create gentle airflow. Check the leaves often. Remove them as soon as they feel crisp. This method works well for oregano, thyme, and rosemary. After cooling, store them in airtight containers and place them in a dark cabinet.
6. Microwave Drying for Small Batches
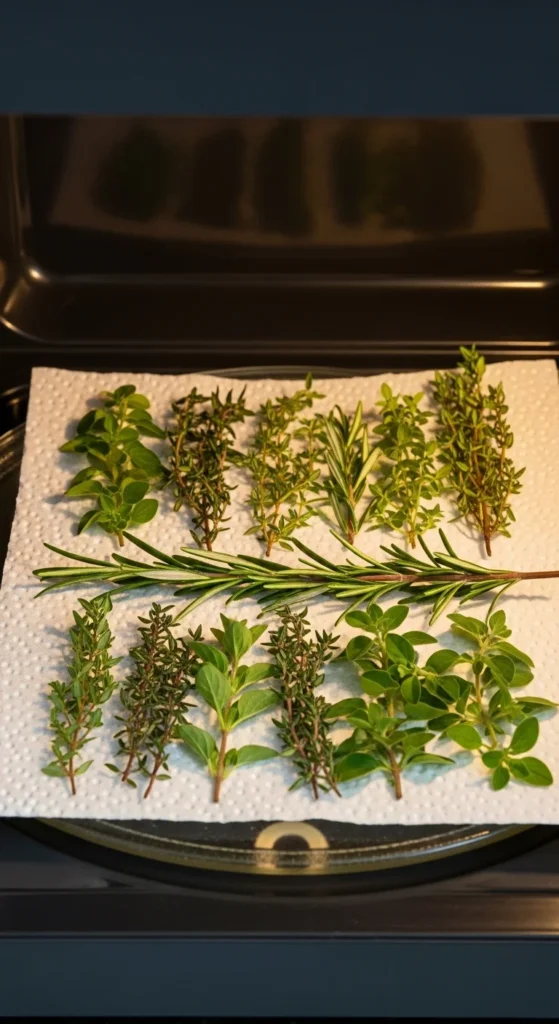
Microwave drying helps when you only have a small batch. Place herbs between two dry paper towels. Heat for a few seconds and check often. Repeat until crisp. Handle leaves carefully, as they can crumble easily. Once done, cool them before storing. This method is great for quick weeknight cooking or emergency drying when your supply runs low.
7. Herb Screens Made From Old Frames
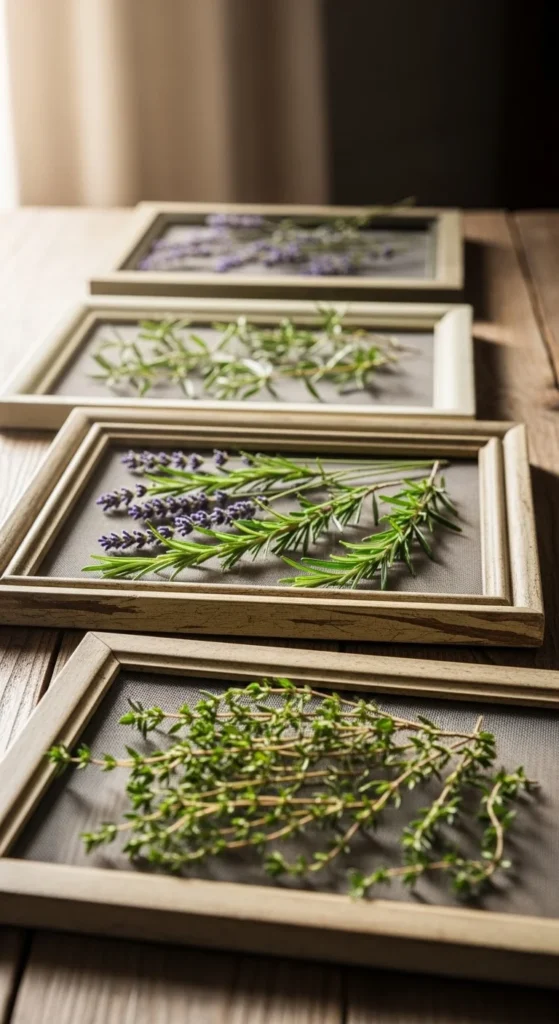
Turn old picture frames into drying screens. Replace glass with mesh or netting. Lay herbs across the surface in thin layers. Place the frame on small blocks to let air flow underneath. Keep it in a warm, dry room. This DIY method is budget-friendly and helps you dry multiple herbs at once. When finished, slide dried leaves into jars using a sheet of paper as a funnel.
8. Clothespin Rope System
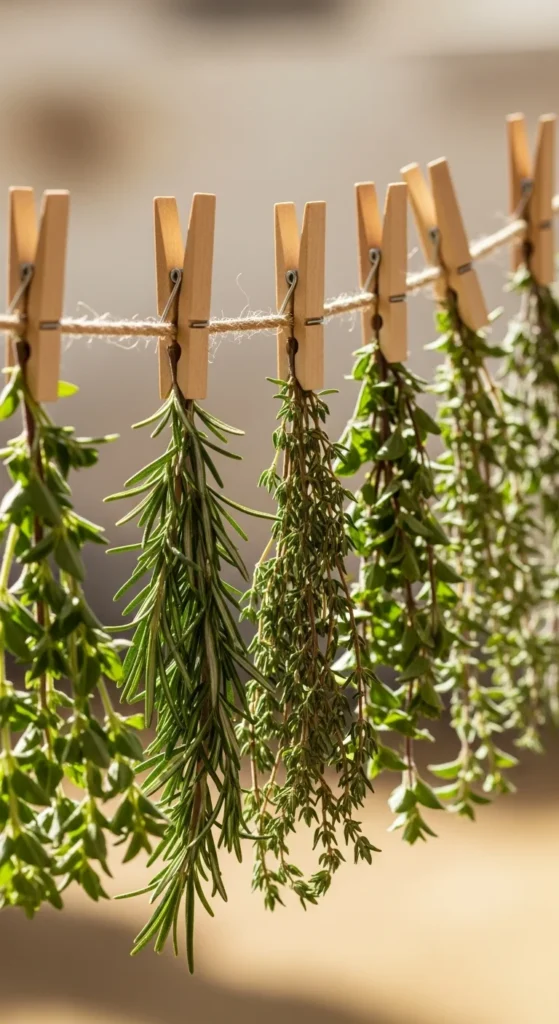
A simple rope and clothespins create a small indoor drying line. Hang the rope along a hallway, laundry room, or warm kitchen wall. Clip herb bundles in evenly spaced rows. Keep the area dry and slightly warm. This setup works well for large stems that need airflow. Once dry, crumble leaves gently and transfer them into small spice jars.
9. Drying Herbs Over a Radiator Shelf
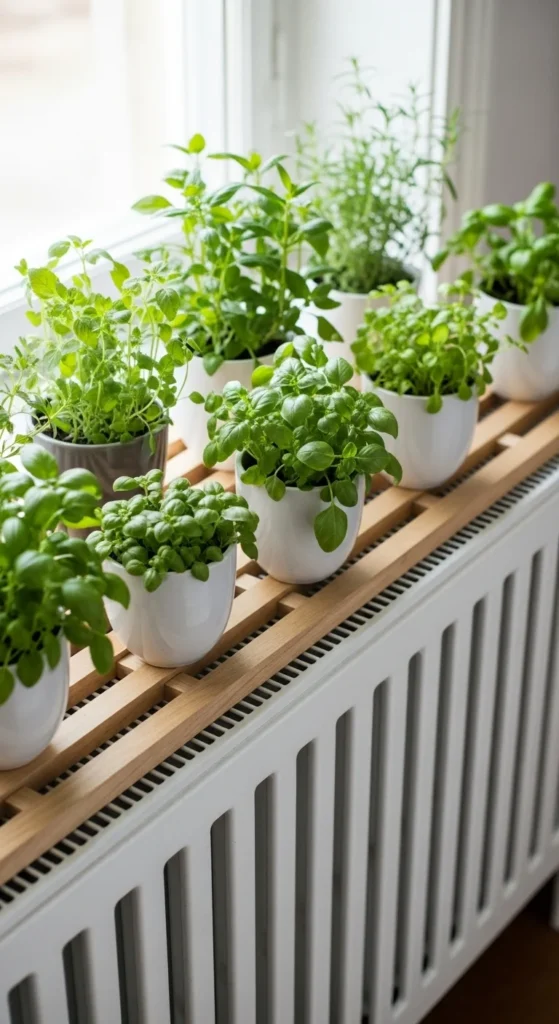
Place a slotted shelf above a radiator and lay herbs across it. The gentle warmth helps leaves dry quickly. Keep herbs far enough from the direct heat source so they don’t lose aroma. Spread them thinly and turn them often. This method works well during cold months when radiators run daily. Store herbs in small airtight tins once crisp.
10. Using Cooling Racks for Airflow
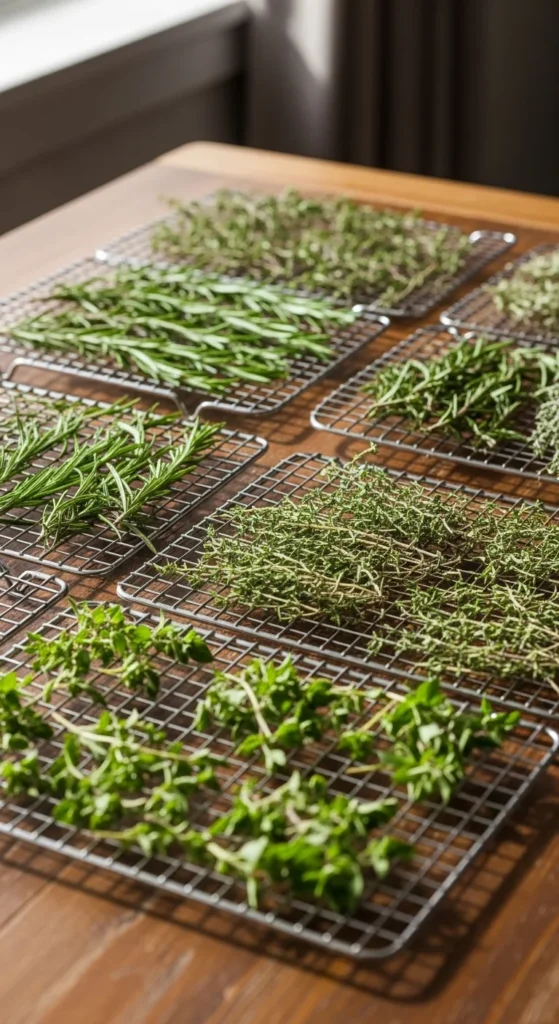
Cooling racks offer steady airflow from all sides. Set them on a counter or table in a warm corner. Spread herbs in single layers. Flip leaves lightly every day. Use racks for herbs that dry quickly like thyme or oregano. Store dried leaves in small spice jars and label them clearly. Cooling racks are easy to clean and stack when not in use.
11. String Drying Above the Kitchen Sink
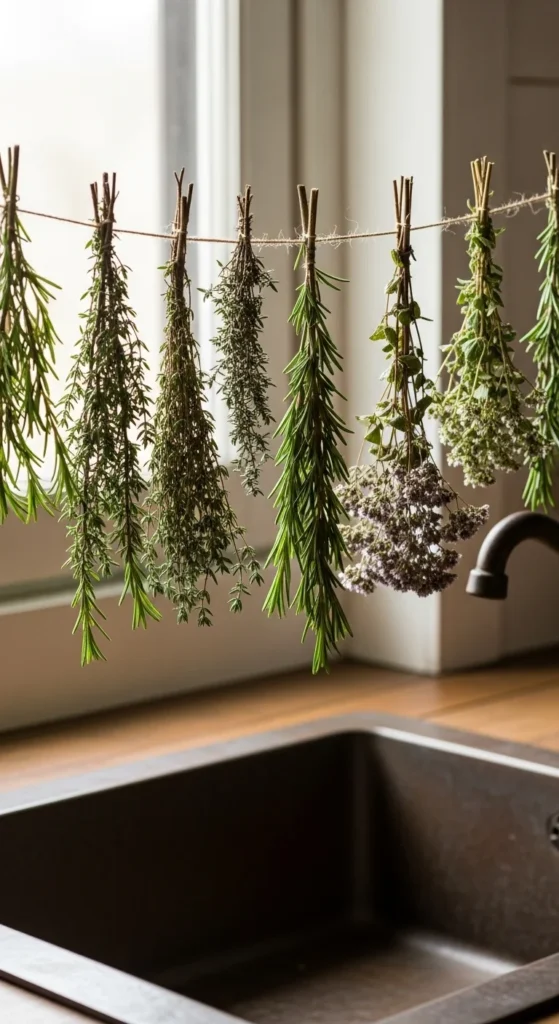
Stretch a string above your kitchen sink and hang herb bundles from it. This spot stays dry thanks to air circulation. Tie small bundles with twine and leave space between them. This method works well for everyday herbs like parsley or dill. After drying, strip leaves into jars and keep them in a dark cabinet away from heat.
12. Drying Herbs in a Pantry Corner
A pantry corner can be an ideal drying space. It’s dark, dry, and protected. Hang bundles from hooks along the wall. Keep herbs grouped by type so flavors don’t mix. Check them weekly. Once crisp, pull off leaves gently and store them in sealed tins or jars. The pantry keeps herb colors rich and prevents dust from settling.
13. Small Tabletop Herb Rack
A tabletop rack gives you a compact drying station for kitchens or apartments. Use trays with mesh bottoms for airflow. Set the rack near a warm window. Turn herbs every few days. This setup works well for small batches like sage, tarragon, or mint. When leaves dry, crumble them with your fingers and store them in jars labeled with harvest dates.
14. Herb Drying Above a Warm Stove
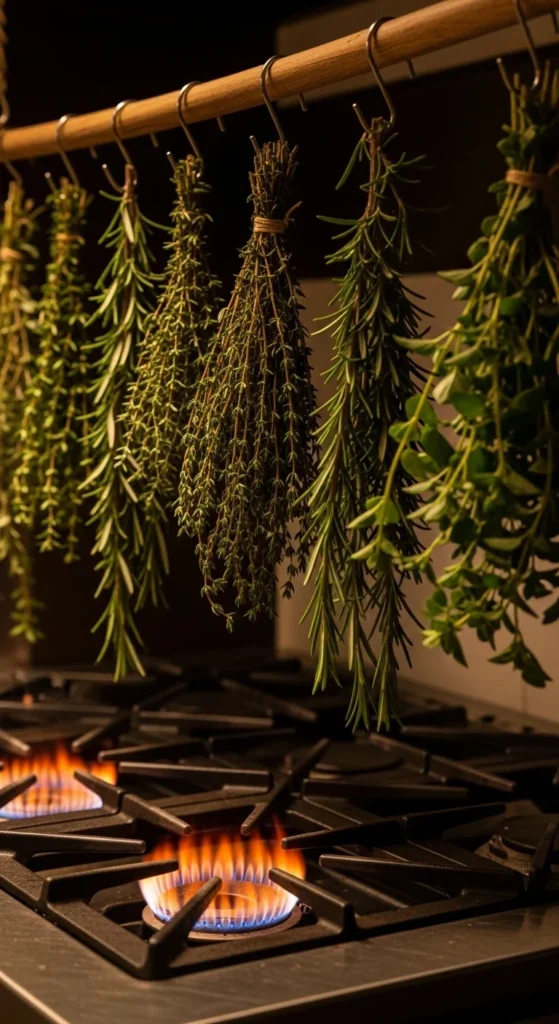
Hanging herbs above a warm stove helps them dry gradually. Install a rod or hook system a safe distance above the cooking area. Steam from cooking should not reach them, so keep the herbs far enough away. This method works with woody herbs that tolerate gentle warmth. Once dried, store them in small airtight jars.
15. Automatic Drying Box DIY Setup
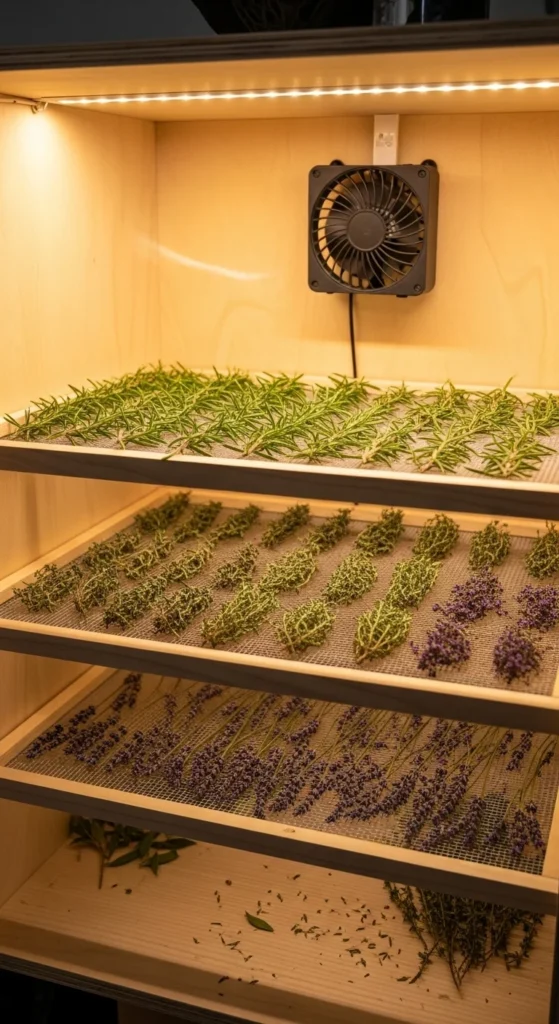
Create a drying box using a cardboard or wooden box with small vents. Add a small fan at the back for airflow. Place herbs on shallow trays or screens. Keep the box in a warm room. This setup helps speed up drying while keeping herbs protected. Once crisp, transfer leaves into jars and store the box for future use.
16. Magnetic Spice Jars for Storage
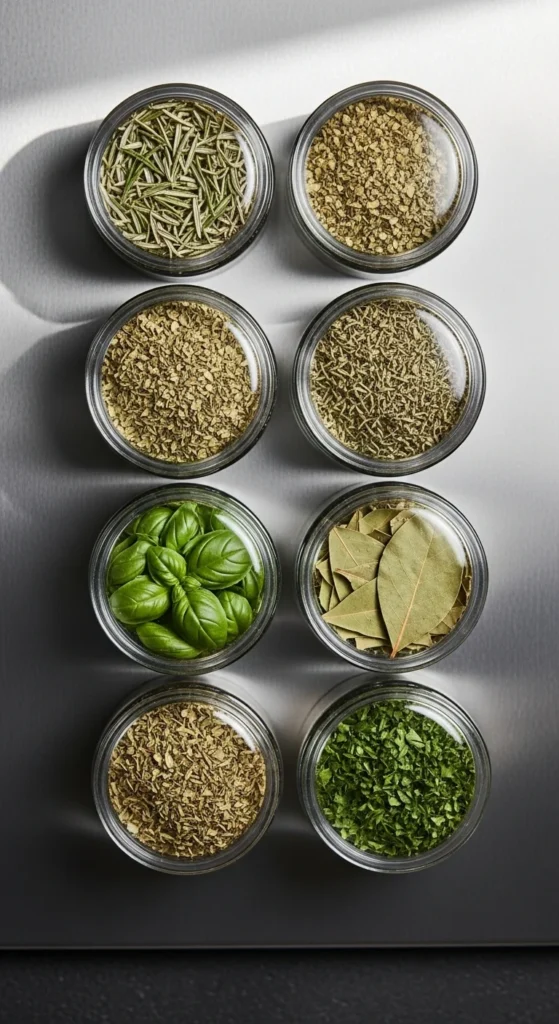
Magnetic jars keep herbs visible and easy to grab. Attach them to a metal board or the side of a fridge. Fill each jar with dried herbs and label the lids. Keep them away from direct sunlight to protect flavor. This system saves counter space while keeping herbs organized. Refill jars easily when you dry new batches.
17. Vacuum-Sealed Herb Packets

Vacuum sealing protects dried herbs from moisture and air. Place leaves in small pouches and run them through a vacuum sealer. This method works well for long-term storage. Keep packets in a cool cabinet or freezer. When you need herbs, open one small packet at a time so the rest stay protected.
18. Glass Jar Storage With Chalk Labels
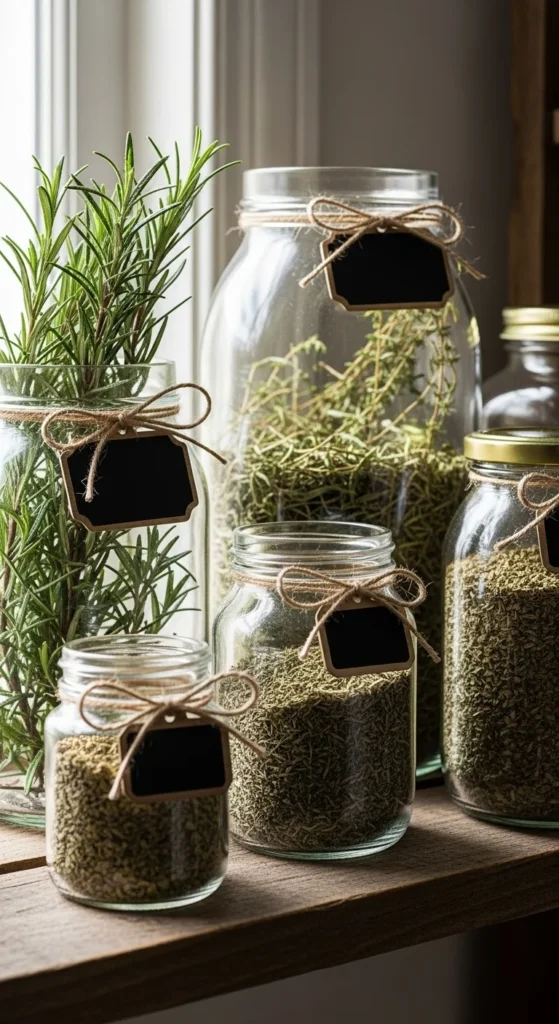
Glass jars show you exactly what’s inside and keep herbs dry. Add chalkboard labels so you can update names and dates easily. Store jars in a cabinet or drawer away from heat and light. Use small jars for daily-use herbs and larger ones for herbs you dry in bulk. This method keeps your storage area organized and clean.
19. Using Resealable Pouches for Bulk Herbs
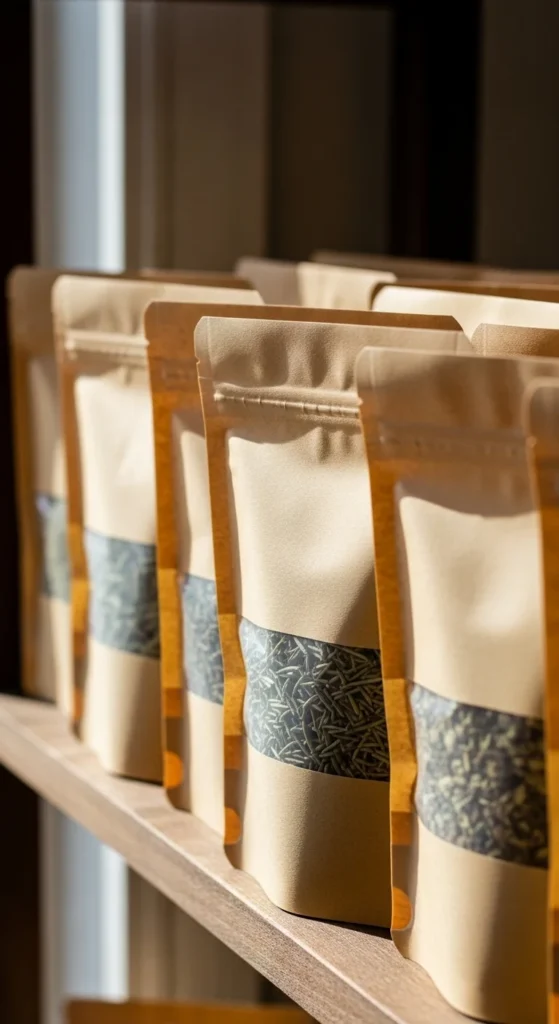
Resealable pouches offer a lightweight way to store herbs in bigger amounts. Choose kraft or foil-lined versions to protect aroma. Fill the bags halfway and press out excess air before sealing. Keep pouches in a dark cabinet. Use this method for herbs like basil or mint that you dry in large quantities.
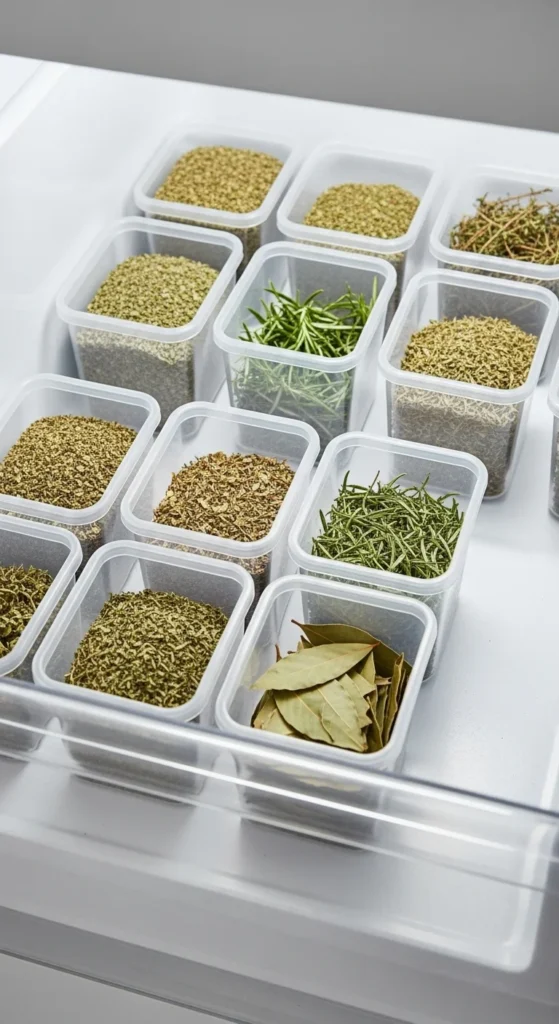
20. Spice Drawer Inserts for Neat Organization
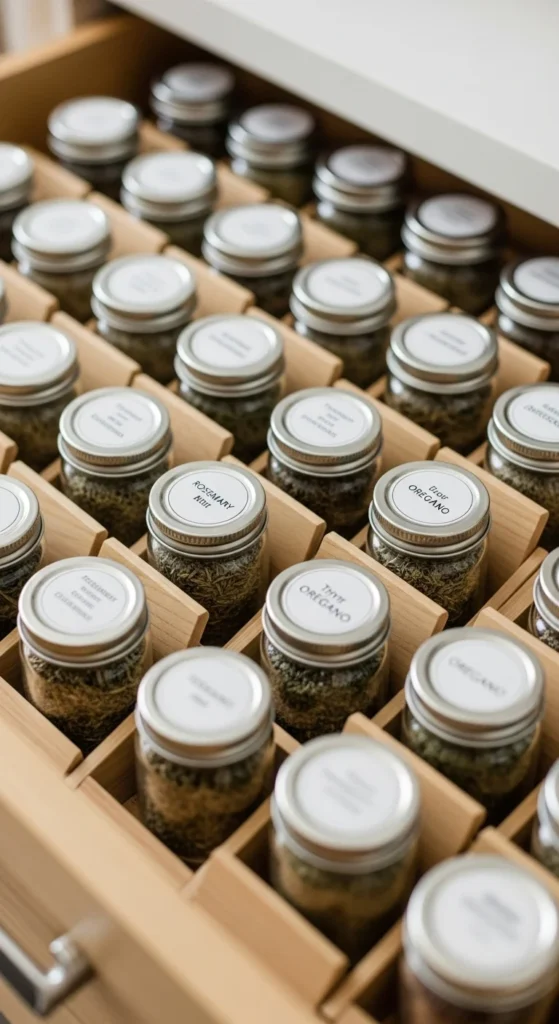
Spice drawer inserts keep dried herbs arranged neatly. Place small jars in angled slots so you can read labels quickly. Store jars with airtight lids to protect flavor. This method works well in kitchens with limited counter space. Refill jars easily after drying new batches. Keep the drawer near your cooking area for convenience.
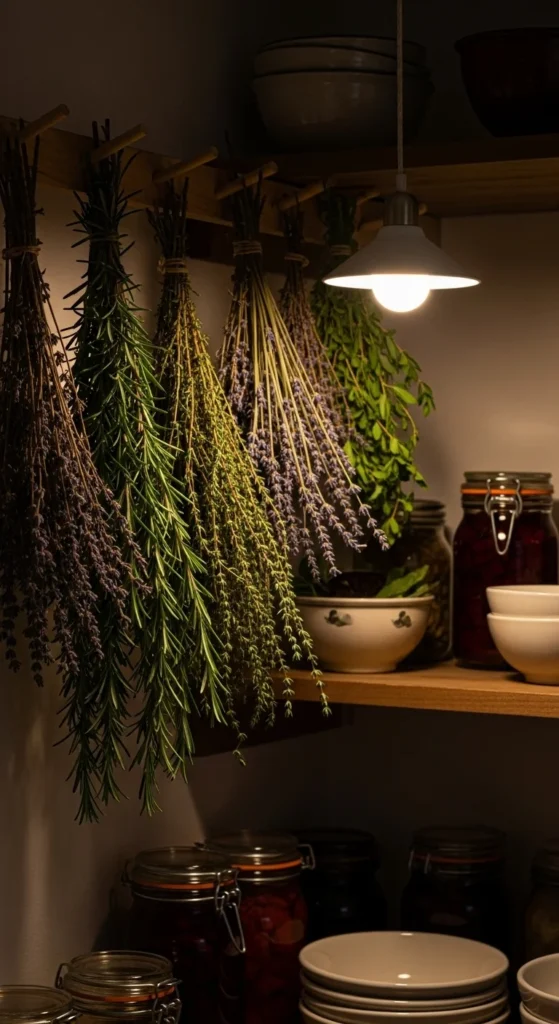
21. Combining Drying and Storage in Wall Shelves
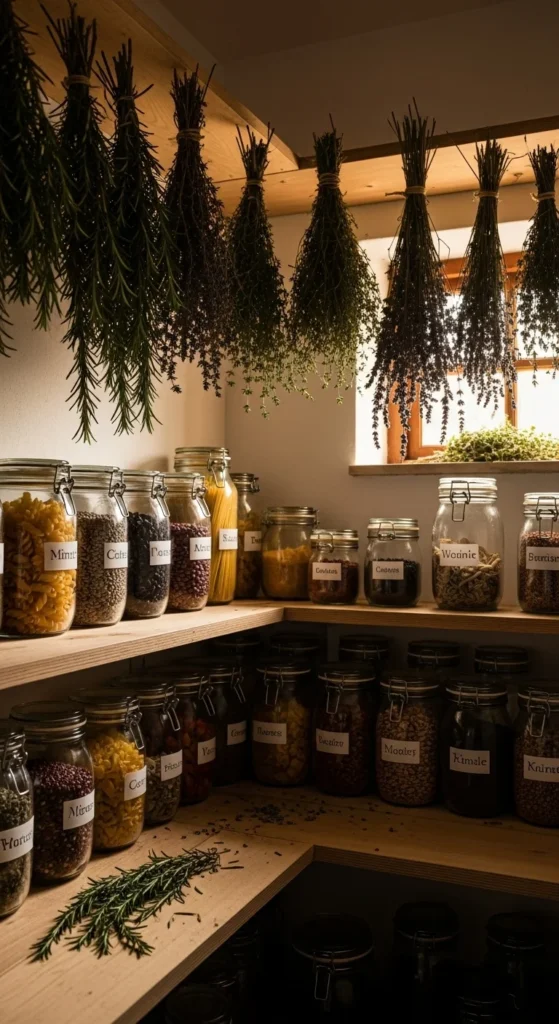
Wall shelves let you dry and store herbs in the same area. Hang small bundles from hooks on the upper shelf. Place jars and tins on the lower shelves. The setup looks tidy and keeps everything within reach. Use the warmest wall in your kitchen or pantry. Once herbs dry, crumble them and store them immediately on the lower shelf.
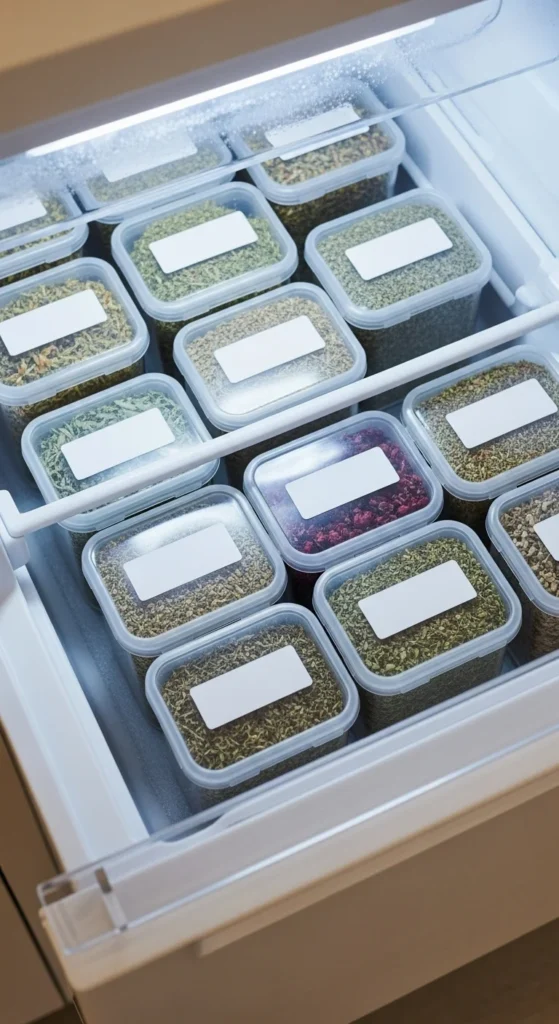
22. Freezer Storage for Long-Term Aromas
Freezing dried herbs helps them last longer. Store them in freezer-safe containers or small vacuum-sealed packets. Keep the containers small so you can open only what you need. Freezing works especially well for herbs with delicate essential oils. Place the containers at the back of the freezer for steady temperature.
23. Mixing Herb Blends Before Storing
Create your own herb blends before storing. Mix thyme, oregano, sage, basil, or rosemary based on your cooking style. Use small jars and label each blend clearly. This saves time during cooking and keeps your storage system organized. Keep blends in a drawer or cabinet away from light. Refresh blends every season with new dried herbs.
Conclusion
Drying and storing herbs indoors helps you keep flavor ready for year-round meals. From hanging bundles to vacuum-sealed packets, each method gives you a simple way to preserve aroma and color. Choose the drying setup that fits your space, pick containers that protect herbs from air and light, and label everythin

Leave a Reply