
If you want your garden to look neat, stay healthy, and thrive with minimal effort — mulching is your secret weapon. Mulch doesn’t just make beds look tidy; it also locks in moisture, controls weeds, and feeds the soil as it breaks down. Think of it as a protective blanket that keeps your plants cozy year-round.
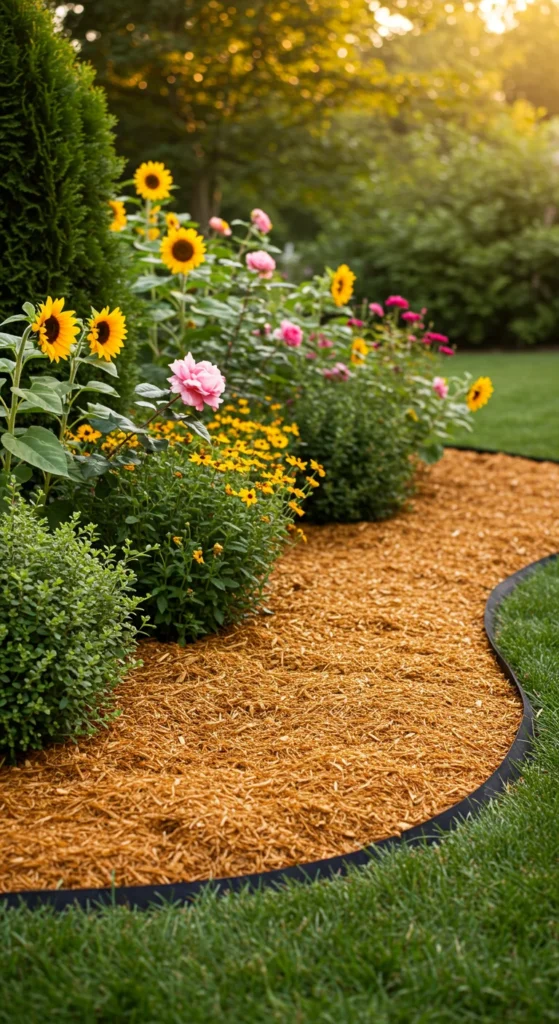
Let’s walk through how to mulch your garden beds the right way — so every scoop you spread pays off with lush, vibrant growth.
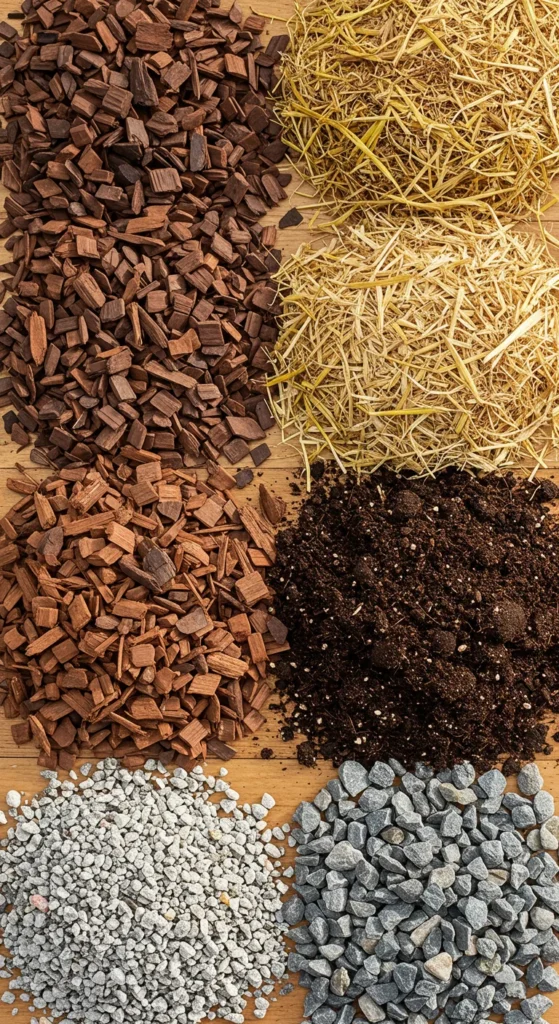
Choose the Right Type of Mulch
Not all mulch is created equal! The best type depends on what you’re growing and your climate.
Here are the main categories:
🌿 Organic Mulches (Break Down Over Time):
- Wood chips or bark – Long-lasting and great for shrubs and trees.
- Straw or hay – Excellent for vegetable beds; keeps soil cool and crumbly.
- Grass clippings or leaves – Free and nutrient-rich, but best used in thin layers.
- Compost – Adds nutrients and improves soil texture.
🌾 Inorganic Mulches (Don’t Decompose):
- Gravel or stones – Great for dry climates and around succulents.
- Landscape fabric or plastic – Blocks weeds but doesn’t enrich the soil.
Tip: For most home gardens, organic mulch is best. It feeds your soil while protecting it.
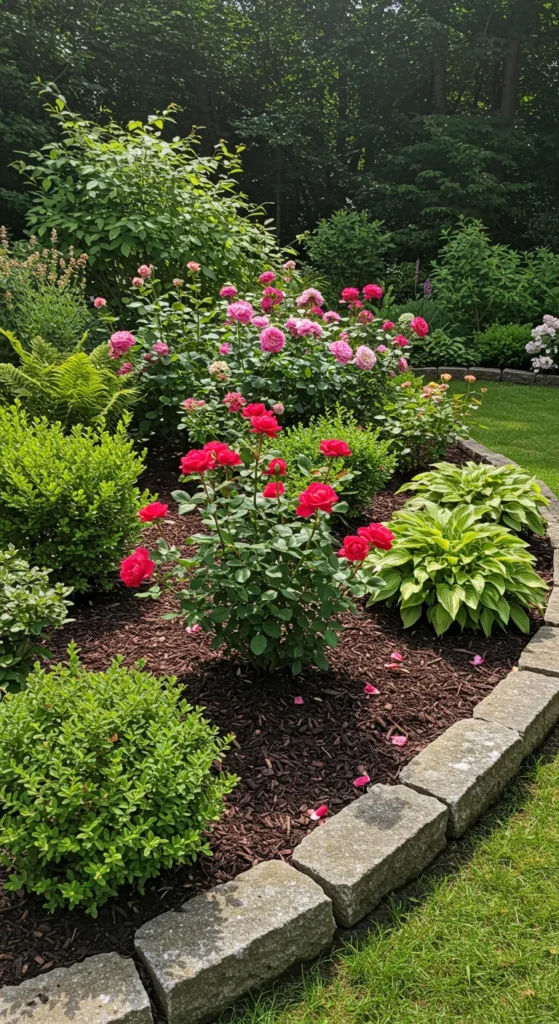
Prep the Bed Before You Mulch
Before spreading mulch, a little prep makes a big difference. You want the soil to be clean, hydrated, and ready to benefit from that new layer of protection.
Steps to prep:
- Pull weeds – Get rid of existing ones, roots and all.
- Water deeply – Moist soil helps mulch seal in hydration.
- Edge the bed – Use a shovel to create a crisp border so mulch stays neatly in place.
- Add compost – Sprinkle a thin layer before mulching for extra nutrients.
Think of this as giving your soil a spa day before wrapping it in a soft, nourishing blanket.
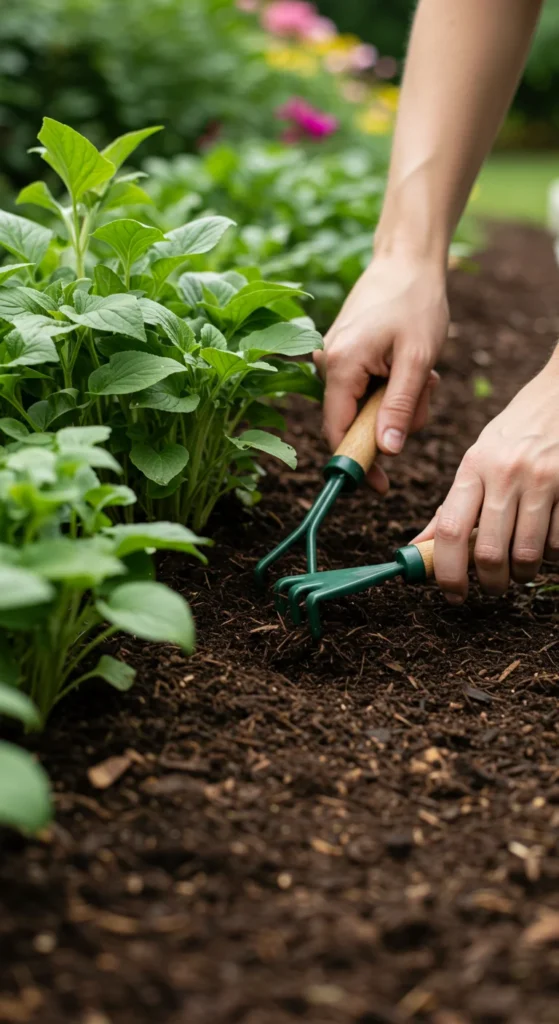
Spread Mulch the Right Way
Now for the fun part — spreading!
Depth matters:
- Vegetable gardens: 2–3 inches
- Flower beds: 2–4 inches
- Trees and shrubs: 3–5 inches (but keep it away from the trunk!)
Technique tips:
- Spread mulch evenly with your hands or a rake.
- Leave a 1–2 inch gap around plant stems to prevent rot.
- For trees, form a gentle “donut” shape around the base instead of a mulch volcano.

Maintain and Refresh
Mulching isn’t a one-and-done deal. Over time, organic mulches break down — and that’s a good thing! It means they’re improving your soil.
To keep things looking fresh:
- Fluff old mulch once or twice a season to allow air and water to pass through.
- Top up once a year (spring or fall) with a fresh layer.
- Watch for pests — thick, soggy mulch can attract slugs or mold.
Bonus tip: If your mulch starts looking faded or compacted, mix in a little new mulch instead of replacing it all. This saves time and money.
Common Mulching Mistakes to Avoid
Even seasoned gardeners can make a few missteps. Here’s what to watch out for:
- ❌ Too much mulch – Smothers roots and invites fungus.
- ❌ Mulch volcanoes – Piling around tree trunks can cause decay.
- ❌ Ignoring weeds first – They’ll grow right through the mulch layer.
- ❌ Using fresh wood chips – They can rob nitrogen from plants while decomposing.
Stick with aged mulch and smart layering — your plants will thank you with steady, healthy growth.
Why Mulching Works So Well
Mulch does more than beautify your garden — it’s science-backed garden magic.
Here’s what’s happening under the surface:
- Reduces evaporation: Keeps moisture where roots can use it.
- Regulates soil temperature: Cool in summer, warm in winter.
- Prevents erosion: Protects topsoil from heavy rain.
- Feeds beneficial organisms: Worms and microbes love mulch!
In short, it’s one of the simplest ways to grow healthier plants with less effort.
Final Takeaway
Mulching is one of those small tasks that delivers huge rewards. With the right material, proper depth, and a little yearly upkeep, your garden will stay healthy, hydrated, and weed-free.

Leave a Reply