
A beautiful garden doesn’t happen by accident. It happens on paper first.
Before you dig a single hole or buy a single plant, a smart garden layout can save you time, money, and frustration—and help your plants grow healthier and happier from day one.

If your past gardens felt messy, overcrowded, or underwhelming, this guide will show you how to plan a garden layout that actually works—and looks good doing it.
Step 1: Study Your Space Before You Plan
The biggest mistake new gardeners make is planning without observing.
Spend a few days watching your space. Notice:
- Where sunlight hits in the morning, midday, and evening
- Areas that stay shady or damp
- Windy corners or protected spots
Most vegetables and flowers need 6–8 hours of sun, but not all plants want the same conditions.
Quick tip:
Take photos at different times of day. This helps you see patterns you might miss.
Step 2: Decide What “Beautiful” Means to You
Before choosing plants, decide what kind of garden you actually want.
Ask yourself:
- Do I want neat and structured or wild and flowing?
- Is this mainly for food, flowers, or both?
- Do I want low-maintenance or am I happy tending daily?
Your answers shape everything—from plant spacing to pathways.
Popular layout styles include:
- Straight rows (great for vegetables)
- Raised beds
- Curved cottage-style gardens
- Container-based layouts for small spaces
There’s no wrong choice—only what fits your lifestyle.
Step 3: Sketch a Simple Garden Layout
You don’t need design software. A pencil and paper are enough.
Draw:
- The outline of your space
- Permanent features (fences, trees, patios)
- Where paths will go
- Where beds or containers will sit

Keep it loose. This is a planning tool, not a final blueprint.
Beginner-friendly rule:
Paths should be wide enough to walk comfortably without stepping on soil—about 18–24 inches.
Step 4: Place Plants by Height and Growth Habit
This step is key to both beauty and plant health.
General layout rules:
- Tall plants go at the back or center
- Medium plants in the middle
- Short plants at the front or edges
This prevents:
- Smaller plants getting shaded
- Airflow problems
- Visual clutter
Also consider how wide plants get—not just how tall.
Spacing matters.
Crowded gardens may look full at first, but they struggle long-term.
Step 5: Group Plants With Similar Needs
Plants are happier when their neighbors want the same things.
Group plants by:
- Water needs
- Sun requirements
- Soil preferences
This makes watering easier and reduces stress on plants.
For example:
- Herbs with herbs
- Drought-tolerant flowers together
- Leafy greens in one bed
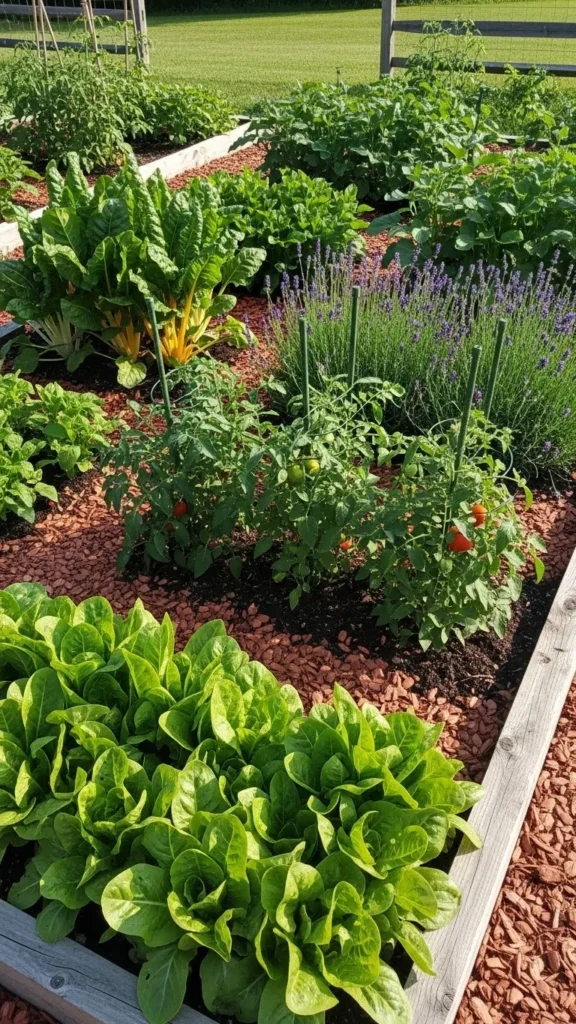
This approach also makes your garden look intentional instead of random.
Step 6: Plan for Access, Not Just Looks
A beautiful garden that’s hard to reach quickly becomes neglected.
Make sure you can:
- Reach the center of beds without stepping on soil
- Easily harvest vegetables
- Weed and water comfortably
Raised beds should be no wider than 4 feet so you can reach the middle from both sides.
Design tip:
Curved paths soften the look of a garden and guide the eye naturally.
Step 7: Add Visual Balance and Flow
Now comes the fun part—making it visually satisfying.
Use:
- Repeating plants or colors for unity
- Odd numbers (groups of 3 or 5 look natural)
- Focal points like a large plant, pot, or trellis
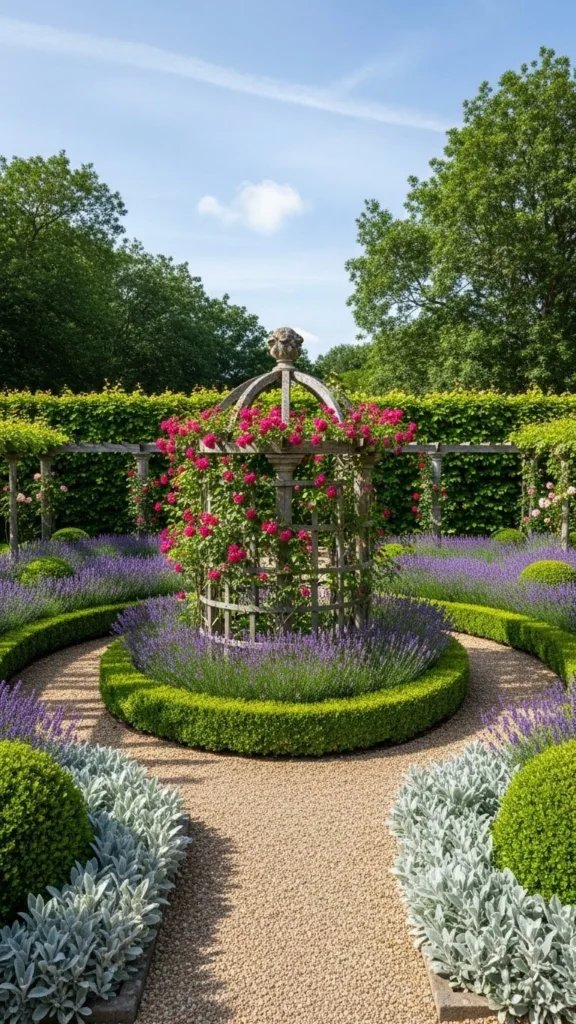
Balance doesn’t mean symmetry. It means the garden feels calm and complete when you look at it.
Step 8: Leave Room for Change and Growth
Gardens evolve. Your layout should allow flexibility.
Leave:
- Empty space for future plants
- Room for plants to mature
- Options to rotate crops next season
What looks sparse at planting time often fills in beautifully later.
Gardener mindset:
Your first layout is a starting point—not a final decision.
Final Thoughts: Plan Once, Enjoy All Season
A thoughtful garden layout makes everything easier—watering, weeding, harvesting, and enjoying the view.
When plants have space, sunlight, and the right neighbors, they thrive. And when your garden flows naturally, you’ll want to spend more time in it.

Leave a Reply