
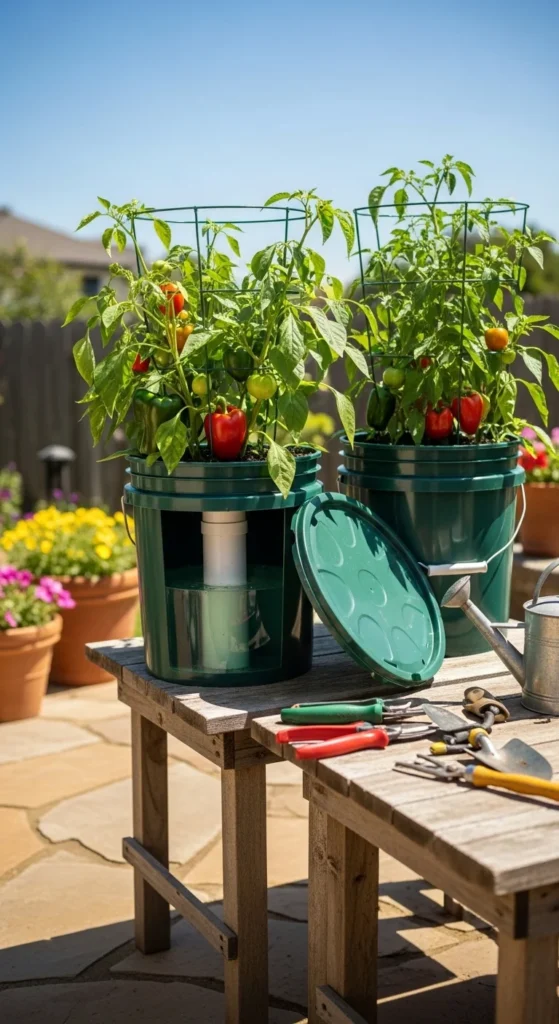
If you’ve ever gone from “my plants are thriving!” to “why is everything crispy?” in one hot week… you’re not alone. Container gardens dry out fast, especially on balconies and patios—and daily watering gets old real quick.
That’s why a wicking bucket planter is such a game-changer. It’s a cheap DIY build (hello, 5-gallon buckets!) that uses capillary action to pull water up from a bottom reservoir right to the roots. No pumps. No electricity. Just a smart setup that keeps veggies happier with way less effort.
How a Wicking Bucket Works (The 30-Second Explanation)
A wicking bucket planter is basically two zones in one container:
- Bottom reservoir: stores water
- Top growing zone: holds potting mix and the plant
- Wicking core (spacer pipe, perforated pot, or cord): connects them so water can travel upward
As the soil dries, it pulls water up through the wick. Roots stay evenly moist without sitting in swampy soil—especially if you include aeration holes and an overflow hole.
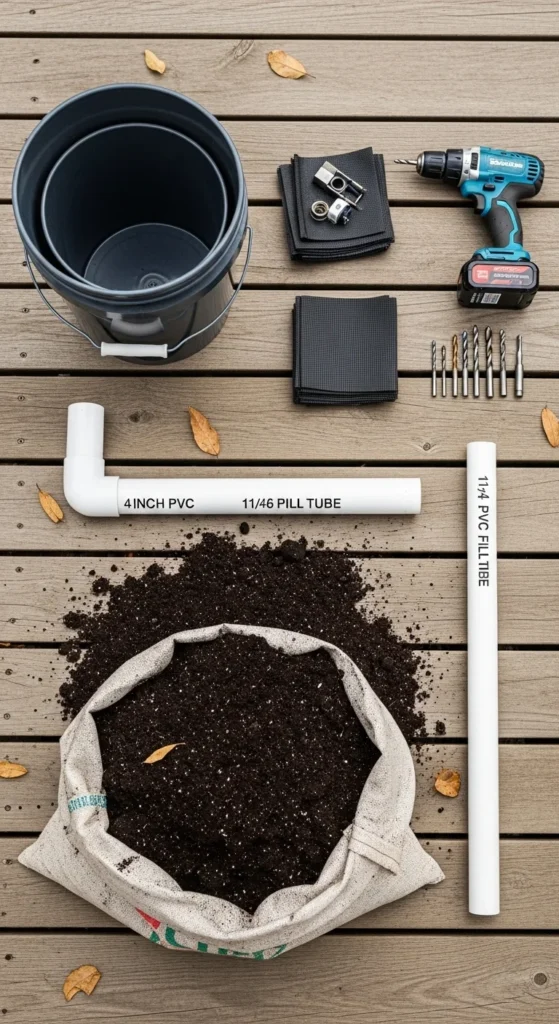
What You’ll Need (Cheap + Easy Materials)
You can build this with super basic supplies, and most are common in YouTube DIY versions.
Materials
- 2 food-safe 5-gallon buckets (or 1 bucket + an inner liner bucket)
- 4-inch PVC pipe (for a perforated spacer core) or a perforated pot/colander
- 1¼-inch PVC pipe (fill tube) + optional funnel
- Landscape fabric or geotextile fabric
- Drill + ¼-inch drill bit
- Utility knife or hole saw
- Potting mix (light, airy mix works best)
- Optional: wicking cord/rope (even shoelaces can work)
Step 1: Build the Reservoir and Add the Overflow Safety Hole
This is the part that prevents the #1 beginner mistake: flooding the soil zone.
What to do
- Decide reservoir height (usually 2–3 inches from the bottom).
- Drill an overflow hole/cutout at that height on the outer bucket.
- This sets the maximum water level—anything above drains out.
Why it matters: Without an overflow hole, your planter can become waterlogged after heavy watering or rain.
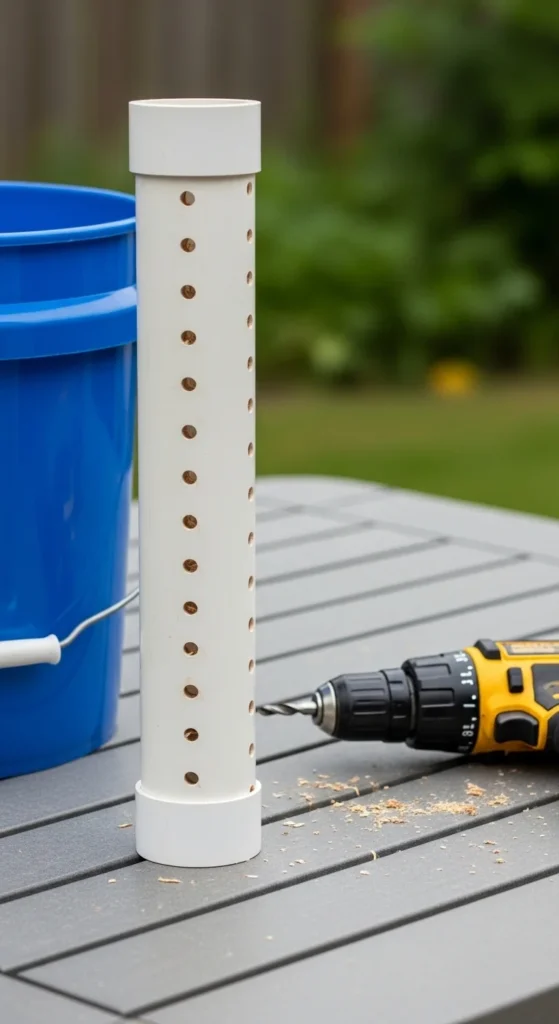
Step 2: Make the Spacer/Wicking Core (PVC Method)
This method is popular because it’s sturdy, repeatable, and easy to scale.
How to do it
- Cut a short section of 4-inch PVC (height depends on your reservoir size).
- Drill ¼-inch holes all around the PVC section.
- This creates:
- A spacer that separates soil from reservoir
- A wicking channel where moisture can travel upward
Some builders also add multiple ¼-inch holes in the bottom/inner base for airflow. That aeration helps prevent anaerobic roots and funky smells.
Step 3: Add Aeration Holes (Don’t Skip This)
Even moisture is great… but roots also need oxygen.
Quick aeration guide
- Drill several ¼-inch holes in the inner structure or base (depending on your design)
- Aim for a simple “pattern” rather than random holes:
- A ring around the lower sides
- A few in the bottom area (if your build includes an inner bucket)
Tip: More airflow = healthier roots, especially for peppers and cucumbers.
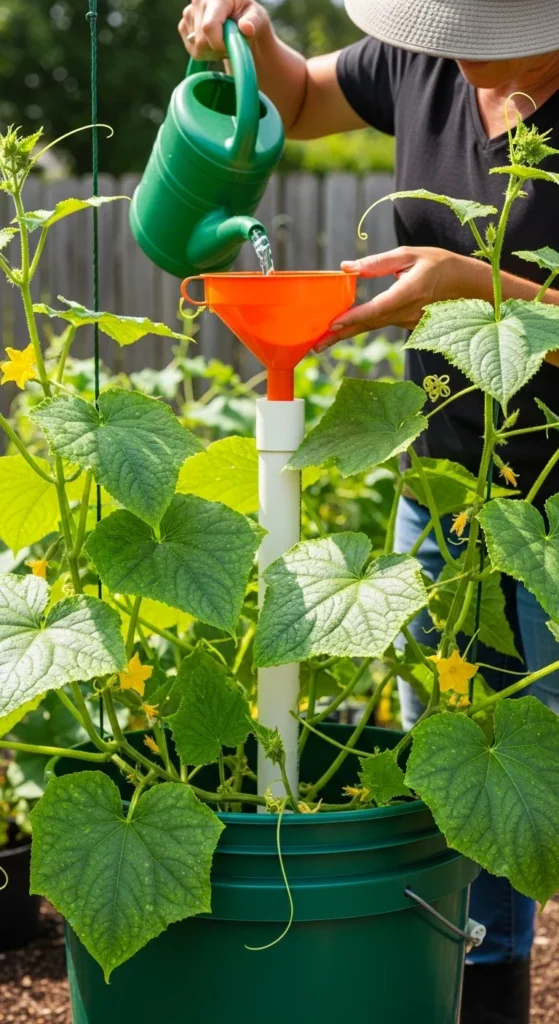
Step 4: Install the Fill Tube (No-Spill Watering)
The fill tube lets you water the reservoir directly—without soaking the top soil.
Setup
- Cut a 1¼-inch PVC pipe long enough to reach near the bottom reservoir.
- Angle the bottom end slightly so water flows smoothly.
- Place it in the bucket near the edge (not directly under the plant).
- Optional: add a small funnel for easy pouring.
Bonus upgrade: Add a bit of mesh or screen at the top to help with bug control.
Step 5: Fabric Barrier + Soil (This Prevents Clogs)
Soil falling into the reservoir = clogged wick = sad plants.
Do this instead
- Lay landscape fabric/geotextile over the spacer area
- Cut around the fill tube so it stays clear
- Keep the barrier snug, but not blocking airflow
Then add potting mix.
Soil tips for better wicking
- Use a light potting mix (not heavy garden soil)
- Mix in perlite if your blend feels dense
- Make sure your wick core is filled with moist soil at the start (it helps kick off capillary action immediately)
Step 6: Plant It + Add “Feed Smart” Fertilizer
This system can support heavy feeders (like tomatoes), but fertilizer placement matters.
Easy feeding options
- Top-dress fertilizer (simple and clean)
- Slow-release fertilizer (some builders place it lower so nutrients wick up)
If you experiment with “feed-from-below,” watch for algae buildup and adjust as needed.
Mosquito-Proofing + Maintenance Tips (So It Stays Low-Effort)
A reservoir is amazing—unless it becomes a bug hotel.
Keep it bug-free
- Add screen/mesh over fill tube openings
- Keep the overflow hole clear (no standing water above it)
Weekly routine
- Refill reservoir when it’s low (often every few days to once a week depending on heat)
- Check overflow hole after storms
- If wicking seems slow, loosen compacted soil or refresh the wick zone
Want “vacation mode”?
Some gardeners scale up to bucket + tub hybrids for a much larger reservoir that lasts longer between refills.
Best Plants for Wicking Buckets
Steady moisture makes a big difference for these:
- Peppers
- Cucumbers
- Tomatoes
- Eggplant
- Basil and herbs
For super tall plants (tomatoes!), add a stake or cage early so you don’t disturb the system later.
Final Takeaway
A wicking bucket planter is one of those DIY builds that feels almost too easy… until you see how well it works. With a spacer core, aeration holes, a fill tube, and an overflow safety hole, you get a self-watering setup that’s budget-friendly, beginner-proof, and perfect for growing veggies in small spaces.
Save this DIY for later, and build one bucket this weekend—your plants will thank you!

Leave a Reply