
There’s something magical about snipping fresh basil while your pasta boils or grabbing mint straight from the wall for lemonade. A vertical herb garden turns even the tiniest balcony, patio, or kitchen wall into a living pantry — fresh, fragrant, and always within arm’s reach.
And the best part? You don’t need a big yard or complicated tools. A few shelves, pockets, or a simple hanging setup can grow 12–18 herbs in the space of one chair.
Let’s build one step-by-step so you can cook with fresh herbs every day.
Step 1: Find the Sunniest Spot First
Herbs are sun lovers. Without enough light, they grow leggy and weak.
Light checklist
- Aim for 6+ hours of sun daily
- South- or west-facing balconies/windows work best
- Outdoors: patios, railings, fences
- Indoors: add a small LED grow light if needed
Quick test
Stand in your chosen spot at midday. If it feels bright and warm, your herbs will love it too.
Good light = bushier basil, stronger flavor, faster harvests.
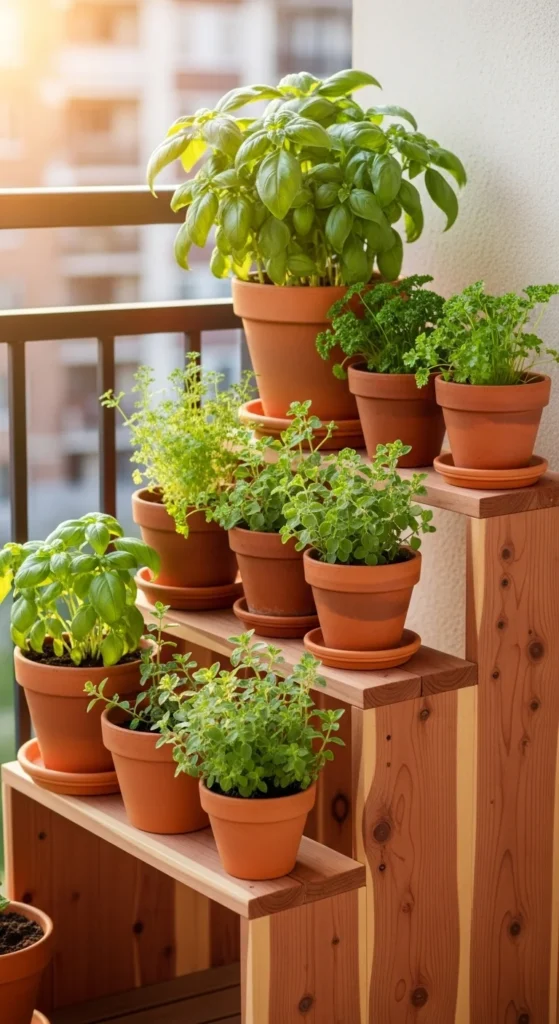
Step 2: Pick Your Vertical Style (Easy Options for Any Space)
Choose a structure based on how much room you have and whether you rent or own.
Beginner-friendly designs
- Tiered wood shelves – sturdy and beautiful
- Lattice wall + hanging pots – renter friendly
- Fabric/shoe pocket organizer – ultra budget
- Stackable tower planters – lots of herbs in small footprint
- Hanging rope boards – modern and space-saving
If you’re renting
Try:
- command strips
- lightweight lattice panels
- fabric pockets
- small self-watering pots
No drilling required.
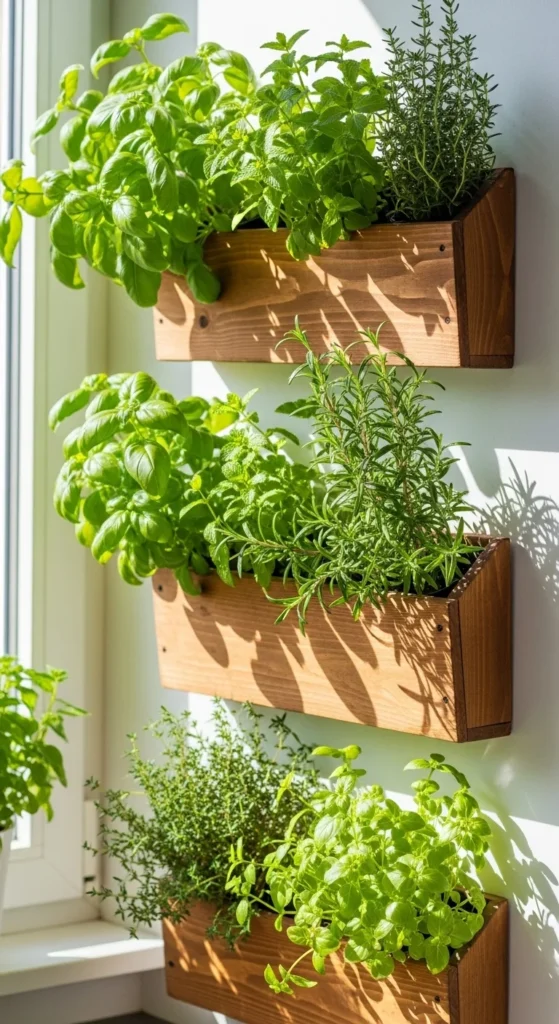
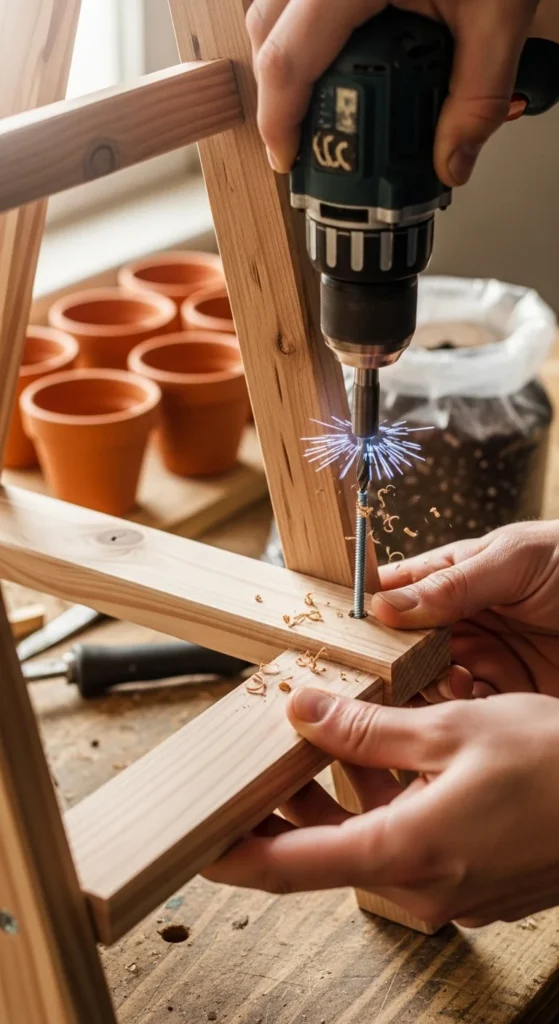
Step 3: Build a Simple Tiered Herb Shelf (Most Popular DIY)
A wooden tier shelf is the easiest “forever” solution and looks great on patios or balconies.
Basic materials
- 2×8 or 2×10 cedar boards
- 1¼” deck screws
- drill
- landscaping fabric (for lining)
- pots or planter boxes
- well-draining potting mix
Quick build steps
- Cut 4–6 shelves at equal lengths
- Screw sides together to create a ladder-style frame
- Slightly angle each shelf for drainage
- Line with landscaping fabric to prevent soil spills
- Set pots or fill planters
Tip: Cedar naturally resists moisture and weathers beautifully outdoors.
Don’t want to build? Pre-made plant ladders or metal racks work just as well.
Step 4: Use the Right Soil (This Is Where Most People Mess Up)
Garden soil is too heavy and traps water — a fast way to kill herbs.
Use this mix instead
- lightweight potting mix
- extra perlite for drainage
- optional compost for nutrients
Why it matters
Herbs hate soggy roots. Good drainage:
- prevents root rot
- keeps plants compact
- improves flavor
Also consider self-watering pots if you travel or forget to water.
Step 5: Arrange Herbs by Growth Habit
Smart placement makes your garden look fuller and easier to manage.
Layout formula that always works
- Top row: upright growers (basil, rosemary, parsley)
- Middle rows: medium herbs (cilantro, chives, thyme)
- Bottom/edges: trailing herbs (oregano, mint, creeping thyme)
This creates a cascading look and keeps sunlight reaching every plant.

Bonus tip
Group herbs with similar watering needs:
- Basil + chives = more moisture
- Rosemary + thyme = drier soil
This makes care much easier.
Step 6: Watering & Care Made Simple
Vertical gardens dry out faster than regular pots.
Easy care routine
- Water when top inch feels dry
- Add drip or soaker hose for multi-tier setups
- Pinch basil weekly for bushier growth
- Harvest often (it encourages more leaves)
Weekly 5-minute maintenance
- prune leggy stems
- check drainage
- rotate pots for even light
- trim yellow leaves
Regular harvesting = healthier plants + fresher meals.
Step 7: What to Plant for Everyday Cooking
Start with herbs you actually use.
Kitchen staples
- basil
- mint
- parsley
- thyme
- oregano
- chives
- cilantro
- rosemary
With 12–18 plants on one vertical shelf, you’ll rarely buy store herbs again.
Imagine pasta night, pizza night, soups, salads — all straight from your wall.
Final Thoughts
A vertical herb garden isn’t just decoration — it’s a mini grocery store at arm’s reach.
Start small:
- pick a sunny spot
- build or hang a simple structure
- use light soil
- plant your favorites
- prune and harvest often
Within weeks, you’ll have a green wall bursting with flavor.
🌿 Save this idea for later and start your own fresh cooking garden today!

Leave a Reply