
That old ladder collecting dust in a garage corner? It’s secretly the perfect vertical garden.
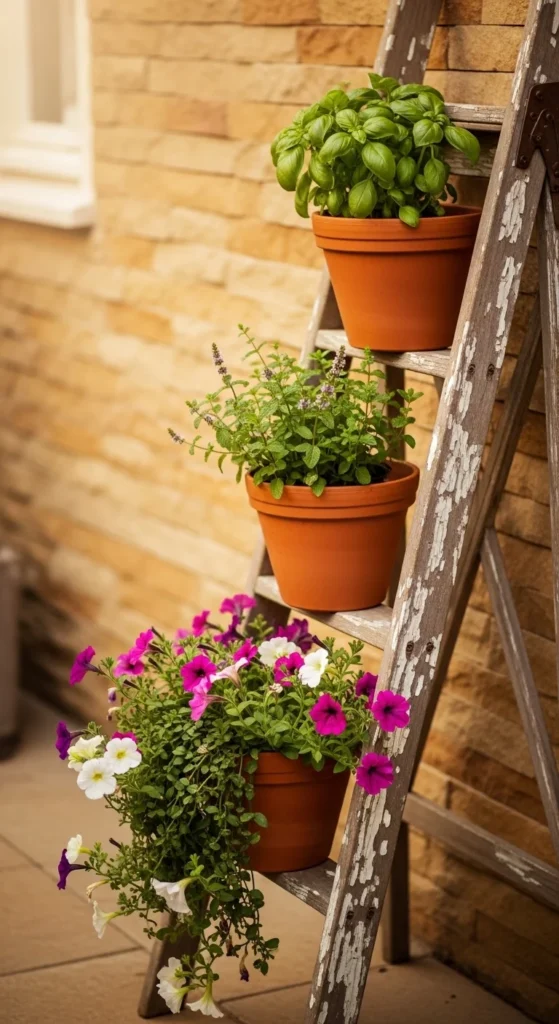
A ladder garden gives you instant height, built-in tiers, and that cozy rustic look that makes patios and balconies feel like a Pinterest dream. Add a few pots, some trailing flowers, and a handful of herbs—and suddenly you’ve got a showpiece that’s also practical.
Even better: most ladder vertical gardens don’t require heavy mounting. Many simply lean against a wall and look amazing.
Let’s turn your ladder into a vertical garden display step-by-step.
Pick Your Ladder Style (Upcycled or DIY)
First, choose your base.
Option 1: Upcycled ladder (fastest)
Perfect if you already have:
- An old wooden ladder
- A step ladder
- A decorative leaning ladder
You’ll just clean it, paint/stain if desired, and attach planters.
Option 2: DIY A-frame ladder planter (more “built-in”)
This style uses angled 2×4 sides and tiered planter boxes for a more polished, sturdy look—great if you want a permanent patio feature.
Quick rule:
- Upcycled ladder = quicker + more rustic
- Built A-frame = stronger + more structured
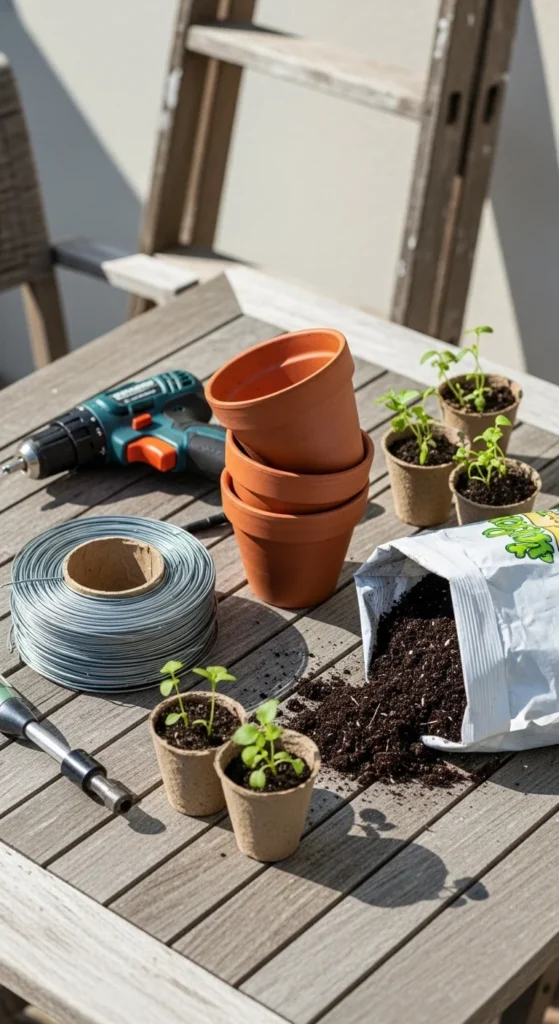
Supplies You’ll Need
Keep it simple. Most of these are already in a basic DIY toolkit.
For a simple ladder garden:
- Ladder (wood or metal)
- Terra cotta pots, small planters, or metal buckets
- Floral wire or S-hooks
- Drill + screws (optional)
- Potting mix + compost
- Plants (herbs/flowers/greens)
For extra stability & style:
- Spray paint or outdoor stain
- Chalkboard labels
- Landscape fabric (if you’re building planter boxes)
- Small stones for drainage
Step 1: Clean, Sand, and Weatherproof the Ladder
This part makes your garden look intentional (not “random ladder outdoors”).
- Wipe down dust and grime
- Lightly sand rough spots (especially on old wood)
- If using outdoors, add:
- Outdoor paint, or
- Clear weatherproof sealant, or
- Wood stain for a rustic finish
- Outdoor paint, or
If you love the aged look, you can keep it raw—just seal it so it doesn’t splinter or rot.
Step 2: Decide How Planters Will Attach
There are three easy methods—choose the one that fits your ladder and vibe.
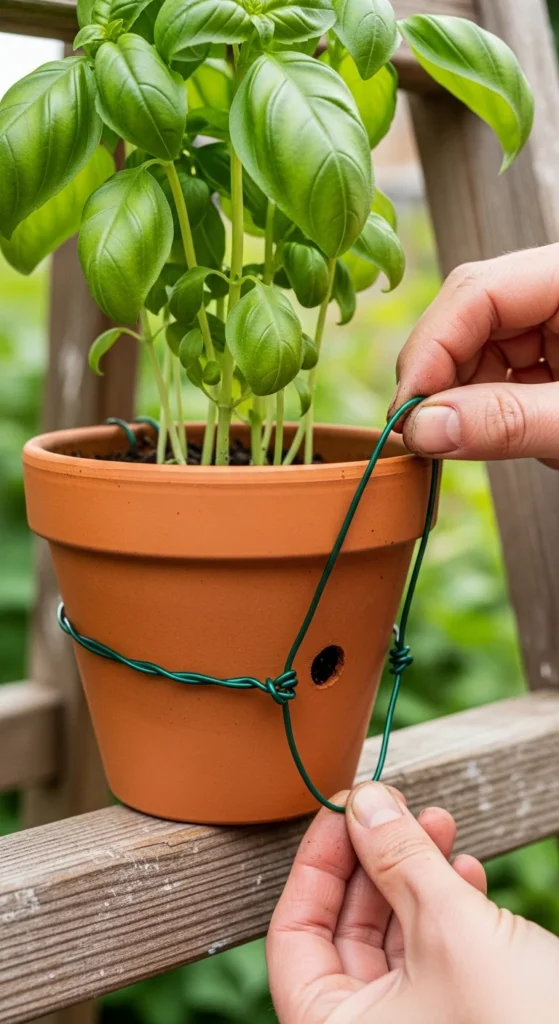
Method A: Wire terra cotta pots to the rungs (super rustic)
This is a classic look and very secure.
How:
- Wrap floral wire around the pot’s rim
- Twist wire into loops
- Tie the loops to the rung
- Tighten until it doesn’t wobble
Method B: Hang metal buckets with hooks (modern + sturdy)
- Drill drainage holes in the bucket bottom
- Add screw hooks or S-hooks
- Hang directly on rungs
Method C: Set planter boxes on each step (best for step ladders)
If you’re using a step ladder, you can simply place shallow planter boxes on the steps and secure with a screw if needed.
Tip: Keep heavier planters on the lower rungs for better balance.
Step 3: Add Drainage and Fill with Soil
Whether you’re using pots, buckets, or planter boxes—drainage is everything.
Quick drainage setup:
- Make sure each container has drainage holes
- Add a small layer of pebbles (optional)
- Use a light mix:
- 70% potting soil
- 30% compost
- 70% potting soil
If you’re building wooden planter boxes:
- Line the bottom with landscape fabric (keeps soil in, lets water out)
This prevents soggy roots and keeps the ladder display cleaner.
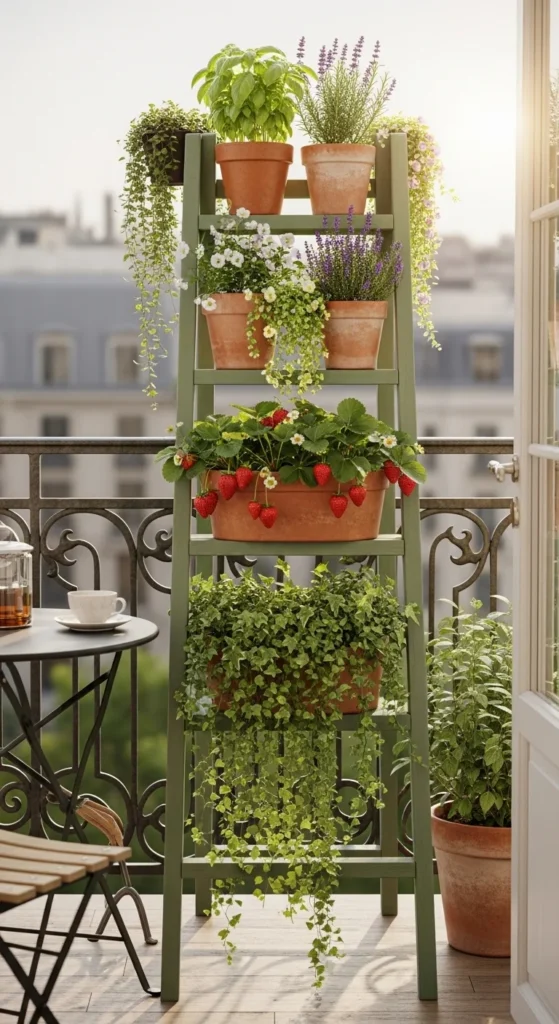
Step 4: Choose Plants That Look Great on Tiers
A ladder garden is half “growth” and half “design.”
Best picks:
For kitchen-friendly herbs
- Basil
- Mint (best in its own pot!)
- Parsley
- Thyme
- Rosemary
For trailing “wow” factor
- Petunias
- Sweet potato vine
- Ivy
- Creeping Jenny
For edible extras
- Strawberries
- Lettuce
- Spinach
Design tip:
- Put upright herbs in the middle tiers
- Add trailing flowers near the top so they cascade down
- Keep heavier pots on the bottom rung
Step 5: Position It Safely (So It Doesn’t Tip)
Most ladder gardens can lean against a wall with no mounting—just make it stable.
Stability checklist:
- Place ladder on a flat surface
- Angle it slightly into the wall
- Add weight at the base (heavier planters or a sandbag behind the bottom)
- In windy areas, secure the top with a small bracket or outdoor hook
If you’re on a balcony, keep it away from edges and rail gaps, especially if you have kids/pets.
Easy Care Tips for a Ladder Garden
Because it’s vertical, the top dries faster than the bottom.
- Water top pots first and let it drip down
- Check daily in hot weather
- Feed with liquid fertilizer every 2–3 weeks
- Rotate pots if one side gets more sun
Want less mess? Place a small tray or mat under the bottom rung to catch drips.
Add the “Pinterest Touch” (Optional but Cute)
Little upgrades make it feel like a styled display:
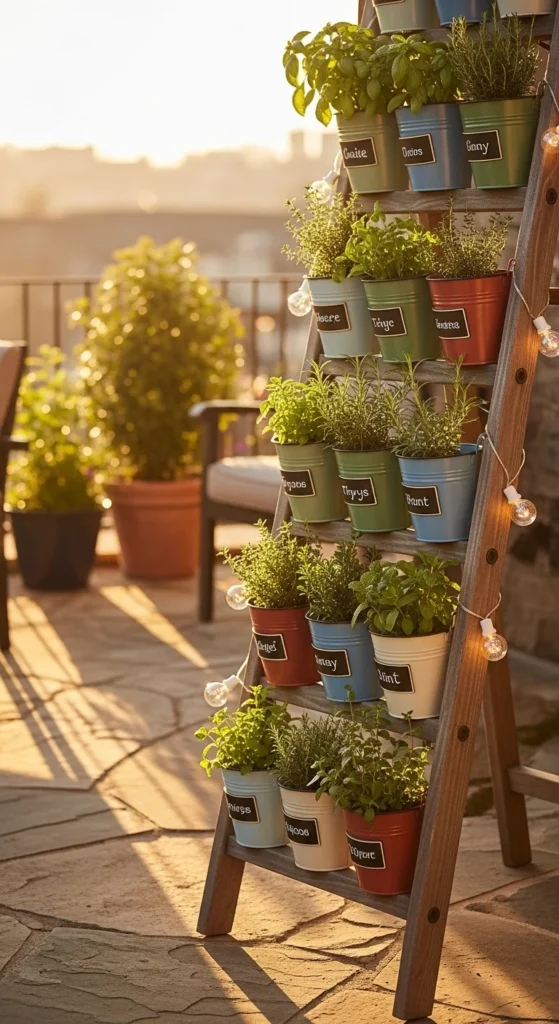
- Chalkboard labels for herbs
- Painted buckets in a color theme
- String lights wrapped around the ladder sides
- A small “Welcome” sign at the top
Final Thoughts
A ladder vertical garden is one of the easiest ways to create a big garden moment in a tiny space.
It’s practical, beautiful, and totally customizable—whether you go rustic with wired terra cotta pots or sleek with matching buckets.
Save this idea for later, grab an old ladder, and turn your wall into a garden display this weekend. 🌿

Leave a Reply