
Bucket gardening looks so easy on Pinterest… until your plants turn yellow, wilt, or sit there doing nothing. The good news? A thriving bucket garden isn’t about having a “green thumb”—it’s about getting a few key setup steps right (especially drainage and soil).
If you follow this beginner-proof method, your buckets can grow real, lush plants with less space, less mess, and fewer weeds.
Start Smart: Pick Safe Buckets + The Right Spot
Before you plant anything, set yourself up for success.
Bucket checklist:
- Use food-grade 5-gallon buckets if you’re growing edible plants (safer option).
- Avoid buckets that previously held chemicals.
- Light-colored buckets help reduce root overheating in hot sun.
Location checklist:
- Most veggies want 6–8 hours of sun.
- Put buckets where you can water easily (near a tap if possible).
- Windy balcony? Group buckets together for stability.
Tip: If you can’t get full sun, grow leafy greens and herbs—they’re more forgiving.
Step 1: Drainage That Works (Not “Hope”)
This is the #1 difference between a bucket garden that thrives and one that rots.
Do this:
- Drill 3–5 drainage holes in the bottom using a ½-inch bit.
- Space holes out so water can escape evenly.
Why it matters: Without proper drainage, water pools at the bottom and roots suffocate. That leads to sad plants fast.
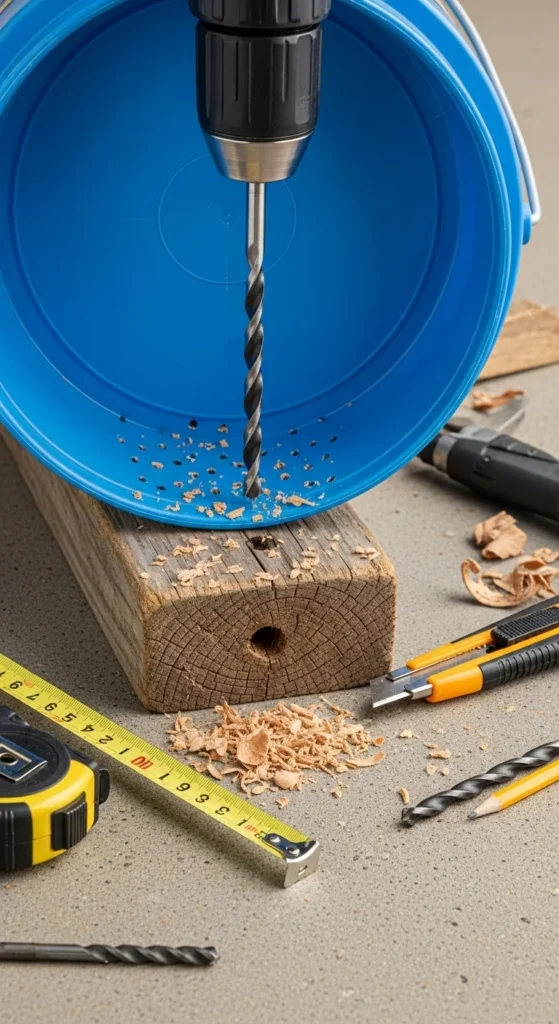
Quick tip: If your bucket sits directly on concrete, raise it slightly using:
- 2 small bricks, or
- a plant stand, or
- a simple wood slat base
This prevents the holes from getting blocked.
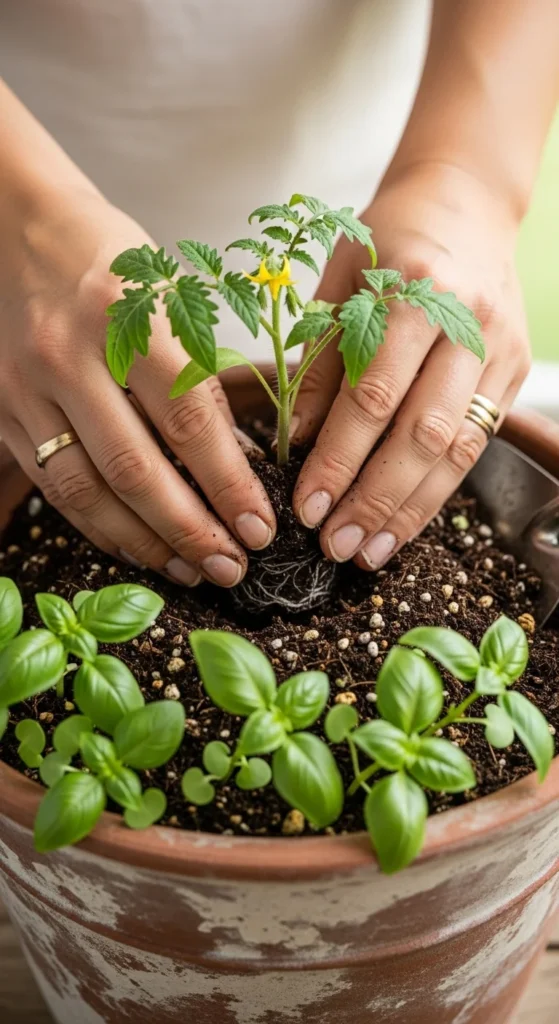
Step 2: Build a “Pro” Soil Blend (Light + Nutrient-Rich)
Buckets need a soil mix that drains well and holds enough moisture.
Easy winning mix:
- 50% potting soil
- 50% compost
This keeps the bucket lightweight, nutrient-rich, and less likely to compact.
Don’t skip this step: Avoid using garden soil straight from the ground—it compacts in containers and can choke roots.
One small trick that helps a lot:
Pre-moisten your soil mix before filling the bucket. Dry potting mixes can repel water at first, leaving “dry pockets.”

Step 3: The Layering Hack (So You Don’t Waste Soil)
Buckets are deep, and high-quality potting mix isn’t cheap. A simple bottom layer can improve airflow and reduce wasted soil.
Option A (simple):
- Add a small layer of sticks or chunky twigs at the bottom.
Option B (classic):
- Add a thin layer of rocks or gravel.
Keep it modest—just enough to help drainage and reduce how much mix you need. Then fill the rest with your soil blend.
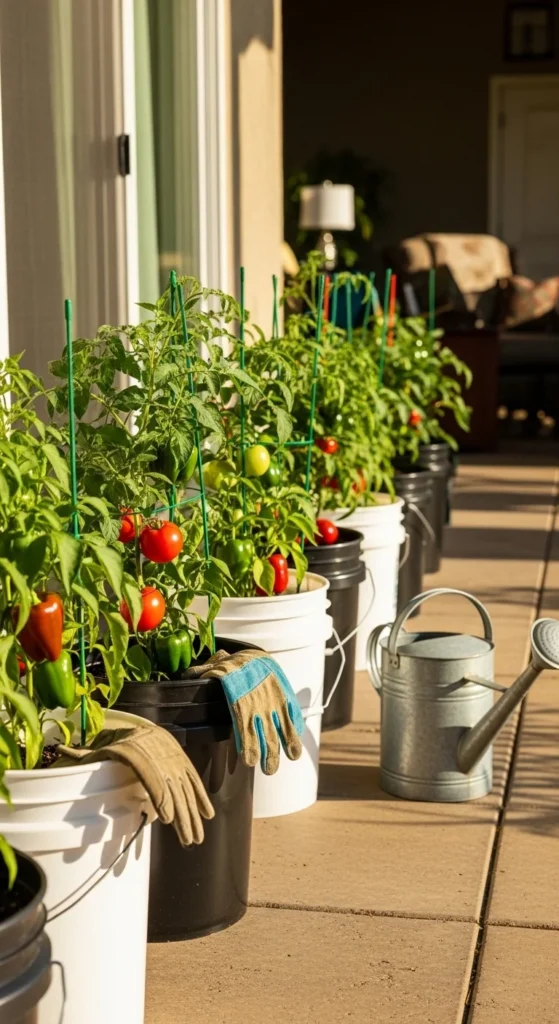
Step 4: Planting Rules That Keep Buckets Productive
Here’s the easiest formula for buckets that look full and grow well:
1 Feature + 2–3 Fillers
- Feature plant: the main crop (like tomato, pepper, cucumber)
- Fillers: smaller companions (like basil, lettuce, nasturtium, green onion)
This is great for both yield and aesthetics.
Examples that work well:
- Tomato + basil + green onion
- Pepper + lettuce + chives
- Cucumber (with trellis) + nasturtium + dill
After planting:
- Water thoroughly until it drains out the bottom (this settles the soil).
- Top with a little mulch (straw, wood chips, dry leaves) to reduce watering stress.
Step 5: Support + Stability (So Plants Don’t Collapse)
Some bucket plants grow tall or vine outward—support keeps them healthy and prevents snapped stems.
Add support for:
- Tomatoes (cage or stake)
- Cucumbers (trellis)
- Pole beans (vertical support)
Stability hacks (especially for balconies):
- Place heavier buckets on the outer corners.
- Use a small brick inside the bottom if wind is intense (not blocking drainage holes).
- Group buckets close together so they “shield” each other.
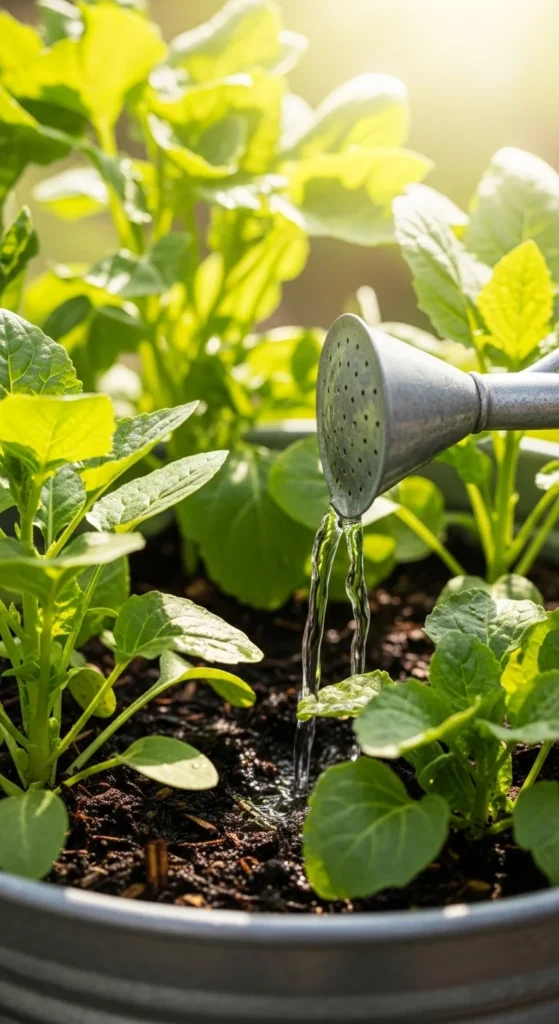
Step 6: Water Like a Pro (Without Overdoing It)
Buckets dry out faster than garden beds, but overwatering is still a common mistake.
Use the finger test:
- Stick your finger 1–2 inches into the soil.
- If it feels dry → water.
- If it feels damp → wait.
Watering best practices:
- Water at the soil level (not leaves).
- Water deeply until drainage runs out.
- Morning is best (reduces stress + disease risk).
Want the easiest upgrade? Try a self-watering bucket system (nested bucket / wicking setup) once you’re comfortable. It can reduce watering chores dramatically.
Step 7: Feed Your Plants (Because Buckets Run Out of Fuel)
Buckets don’t have endless nutrients like in-ground soil.
Easy routine:
- Add compost monthly, or
- Use a balanced fertilizer on a schedule that fits your product label.
Signs you need to feed:
- Pale leaves
- Slow growth
- Small harvests
Step 8: Weekly “1-Minute Check” to Prevent Problems
Bucket gardens are easier to monitor—use that advantage.
Once a week, check:
- Undersides of leaves for pests
- Yellowing or spots
- Soil moisture
- Wobbly supports
Catching issues early saves your whole season.
Final Takeaway
A bucket garden that thrives is built on three things: drainage, light soil, and consistent care. Get those right, and even a tiny patio can produce lush, healthy plants.
If you’re starting today, begin with 2–3 buckets, grow something easy, and build from there.
🌿 Save this guide for later—and pin it so you can follow the steps when you’re ready to plant!

Leave a Reply