
There’s nothing quite like the taste of fresh herbs. A sprinkle of basil on pasta, a handful of mint in lemonade, or a pinch of thyme in a stew can transform a meal. But what if you could keep that garden-fresh flavor all year long? Drying herbs is the simplest, most satisfying way to preserve them—and it only takes a few easy steps.

Whether you grow your own herbs or buy them fresh, drying locks in their aroma and taste while saving you money. You’ll always have the right flavor at your fingertips—without a trip to the grocery store.
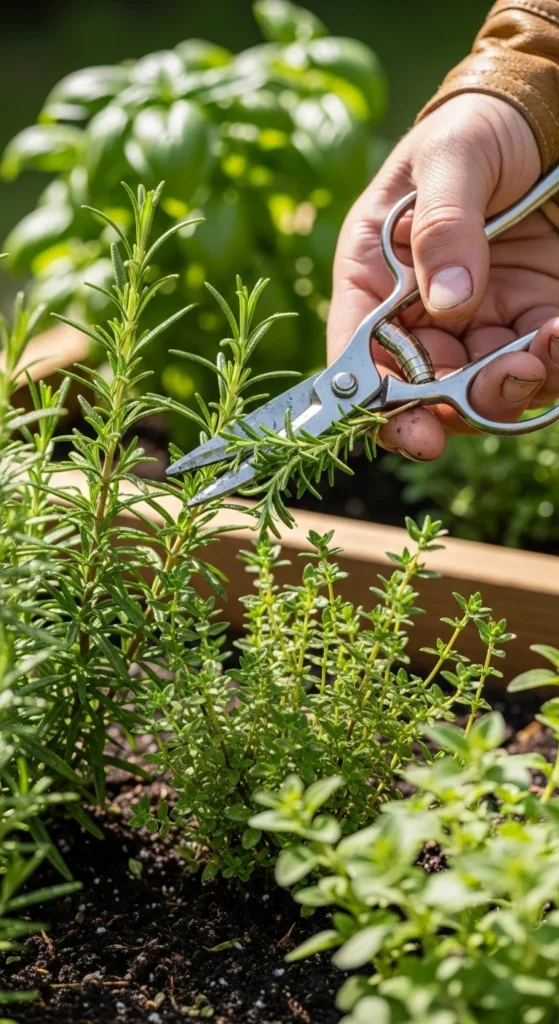
Step 1: Choose and Harvest Your Herbs
Timing makes all the difference when it comes to drying herbs. Harvest them in the morning after the dew has dried but before the sun gets too strong. That’s when their essential oils—and flavor—are at their peak.
Best herbs for drying:
- Thyme – earthy and fragrant
- Oregano – perfect for Italian dishes
- Sage – adds warmth to savory meals
- Mint – ideal for teas and desserts
- Rosemary – bold and aromatic
- Basil – great for pasta and sauces
Use clean, sharp scissors or garden shears to snip stems just above a leaf node. Avoid any yellowing or damaged leaves. Give them a gentle shake to remove dirt and insects, or rinse briefly and pat dry with a towel.
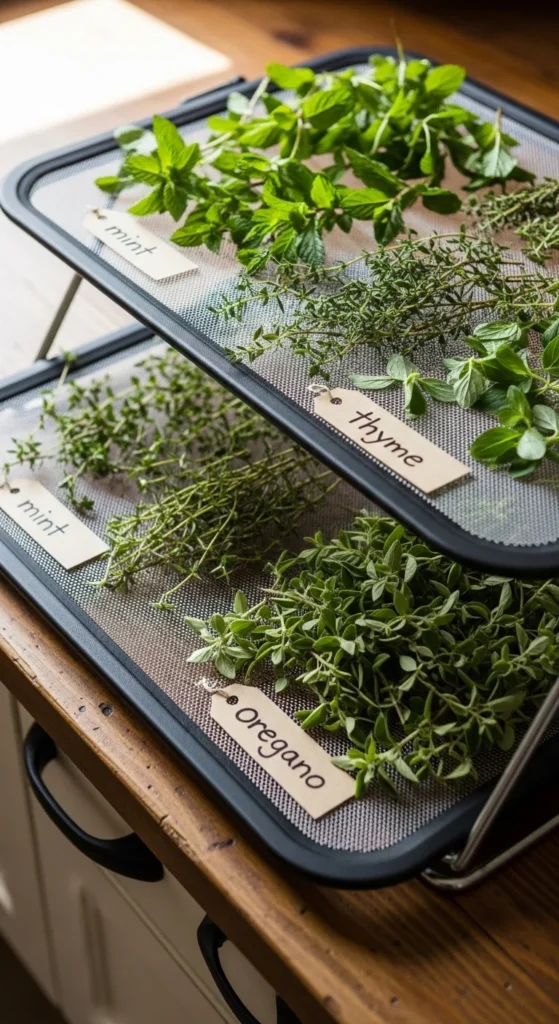
Step 2: Prep Herbs for Drying
Before drying, remove any dead or wilted leaves. You can keep herbs whole on their stems or strip the leaves—depending on your drying method.
If you plan to air-dry, keep them in small bunches tied with twine or string. Too many stems together can trap moisture, leading to mold.
For faster drying (like in an oven or dehydrator), pluck the leaves off stems and spread them out evenly. The thinner the layer, the better the air circulation.
Quick Tip:
Lay herbs on paper towels or mesh racks so air can flow underneath. Avoid metal trays that can discolor delicate leaves.
Step 3: Choose Your Drying Method
Drying herbs doesn’t need special equipment—you can do it naturally or with tools you already own.
🌿 Air Drying (Best for Hardy Herbs)
This old-fashioned method works beautifully for herbs like rosemary, sage, and thyme.
- Tie small bundles with twine.
- Hang them upside down in a warm, dry place away from sunlight.
- After 1–2 weeks, they should crumble easily when rubbed between your fingers.
Air drying is free, simple, and fills your home with a lovely aroma.
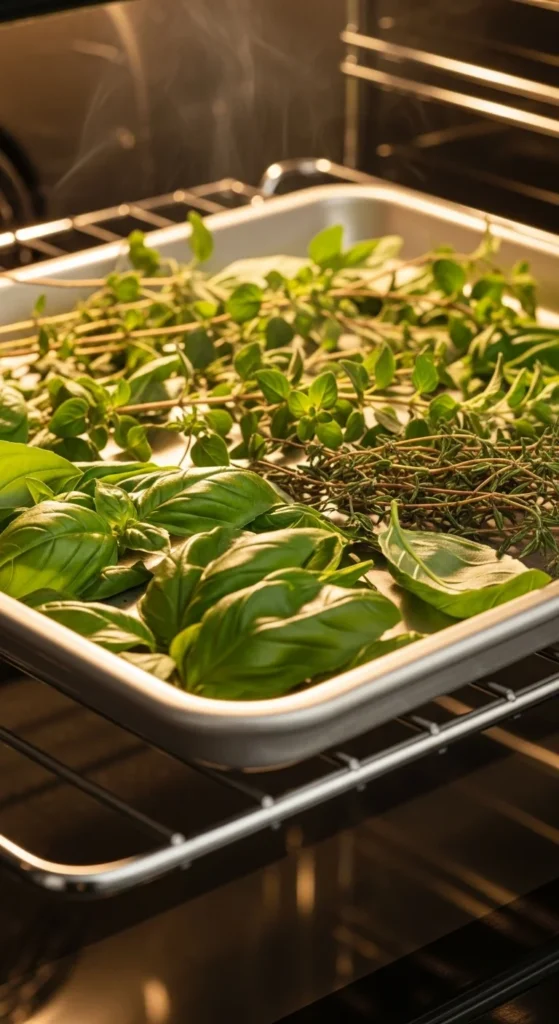
🔥 Oven Drying (Quick and Easy)
If you’re short on time, oven drying works well for softer herbs like basil or parsley.
- Preheat your oven to 170°F (75°C) or the lowest possible setting.
- Spread herbs on a parchment-lined tray.
- Keep the door slightly open to allow moisture to escape.
- Dry for 1–2 hours, checking every 20 minutes.
When herbs feel crisp but not burnt, they’re done!
⚙️ Dehydrator Method (For Precision Lovers)
A dehydrator offers even results, especially for mixed batches.
- Spread herbs on trays in a single layer.
- Set temperature to 95°F (35°C).
- Let them dry for 4–6 hours.
This method is consistent, especially if you dry herbs regularly or in large amounts.
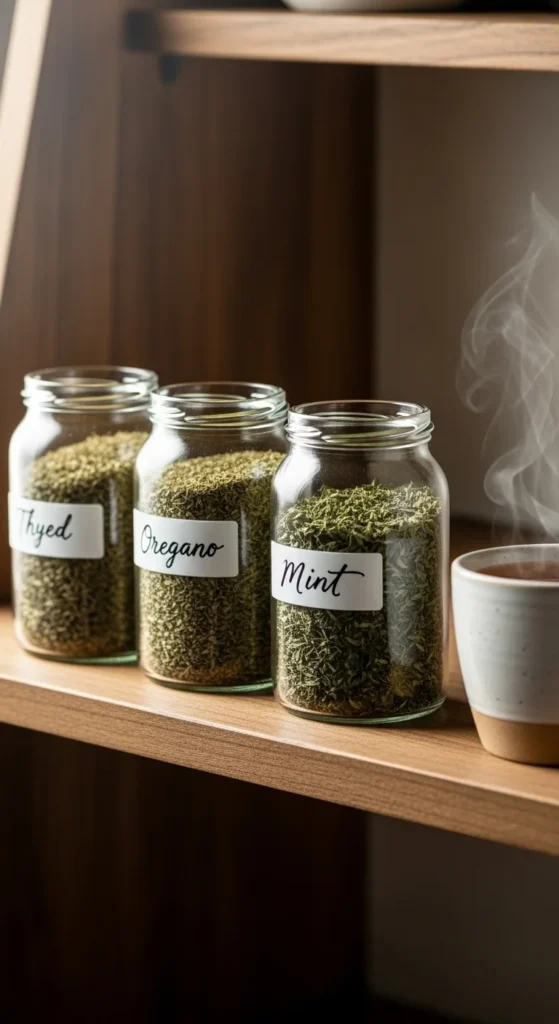
Step 4: Store Dried Herbs Properly
Once herbs are completely dry, remove leaves from stems (if you haven’t already). Crumble them gently with your hands or leave them whole for maximum flavor.
Storage Tips:
- Keep herbs in airtight glass jars or metal tins.
- Label with name and date.
- Store away from sunlight, heat, and humidity.
Avoid plastic bags—they trap moisture and dull flavor over time. Properly dried and stored herbs can last up to one year while retaining strong aroma and taste.
Step 5: Enjoy Your Homemade Dried Herbs
Now the fun part—using them! Dried herbs are perfect for seasoning soups, marinades, and roasted vegetables. They also make beautiful homemade gifts in labeled jars or sachets.
Quick Ideas:
- Mix your own Italian seasoning with dried basil, oregano, thyme, and rosemary.
- Add dried mint to hot chocolate or tea.
- Sprinkle dried sage on roast chicken or potatoes.
- Make herbal butter by blending dried parsley and chives with soft butter.
The flavor is concentrated, so start with one-third the amount you’d use for fresh herbs. A little goes a long way!

Final Takeaway
Drying herbs is one of the simplest ways to savor summer’s freshness long after the season ends. With just a few hours of effort, you can fill your pantry with jars of flavor that make every meal feel garden-fresh.
So next time your herbs are overflowing, don’t let them go to waste—hang them, dry them, and enjoy the taste of your garden all year long.

Leave a Reply