
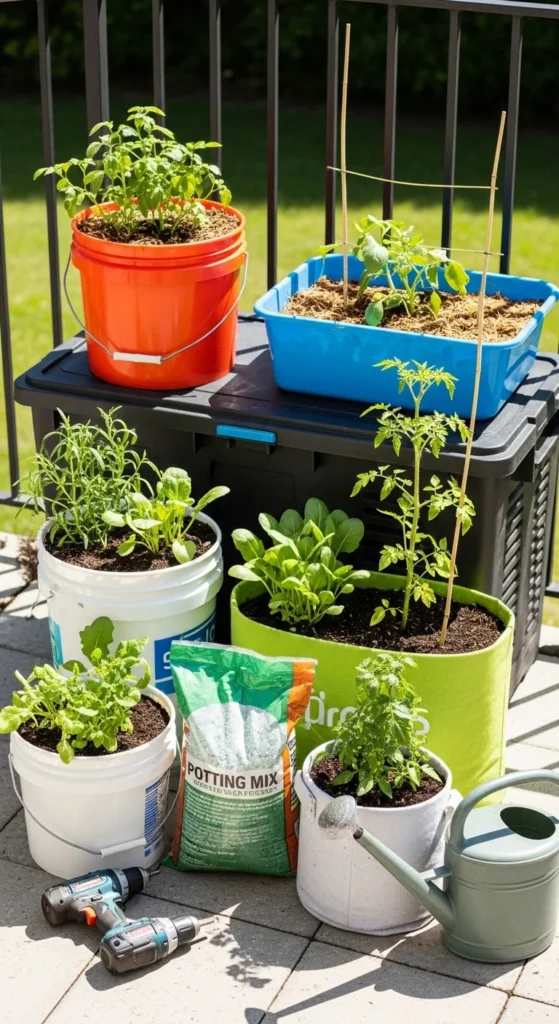
DIY container gardening is one of the easiest ways to grow food in small spaces. You don’t need a yard or expensive planters. You just need containers with drainage, a light potting mix that stays airy, and plants that match your sunlight. Once you learn a few simple builds—like drilled buckets, self-watering setups, and vertical stacks—you can grow herbs, greens, and compact veggies almost anywhere. These projects are beginner-friendly, budget-focused, and designed to start today with items you can find at home or locally.
1. 5-Gallon Bucket Herb Garden With Drainage Holes
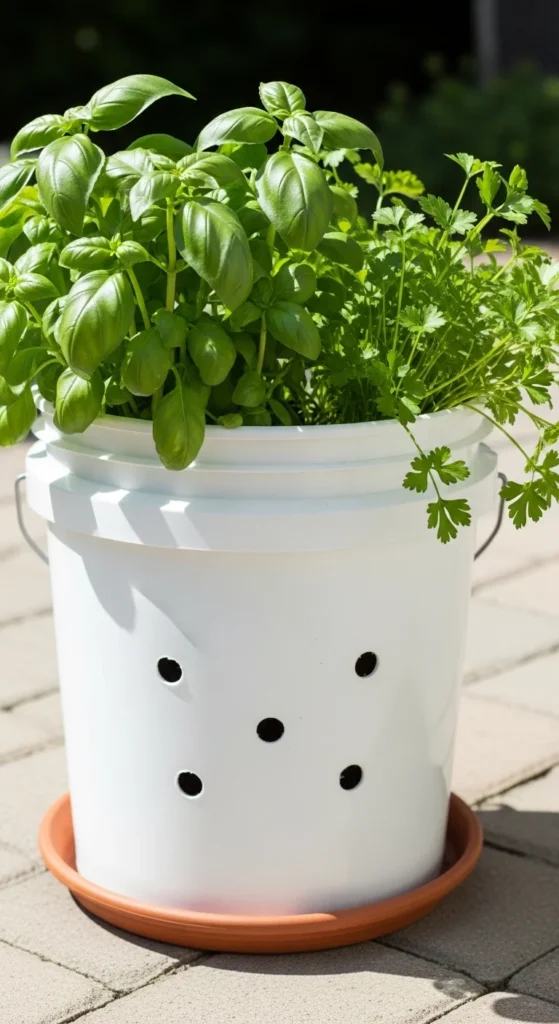
A 5-gallon bucket is a perfect starter container. It’s cheap, sturdy, and holds enough soil for strong growth. The key step is drainage holes. Drill 8–12 holes in the bottom. Space them out so water can exit fast. Set the bucket on a saucer so you don’t stain your floor.
Fill with potting mix, not yard soil. Potting mix stays light and doesn’t turn into a brick after a few waterings. For herbs, mix in a handful of compost. Plant basil and parsley together only if the bucket is big enough and you’ll keep them trimmed. If you’re unsure, do one herb per bucket.
Water in the morning. Stick your finger into the soil. If the top inch is dry, water until it runs out the bottom. Add a thin top layer of pebbles or mulch to slow drying.
Budget tip: ask local restaurants or bakeries for free food-grade buckets. Wash well and you’re ready to plant.
2. Storage Tote Lettuce Bed for Big Harvests
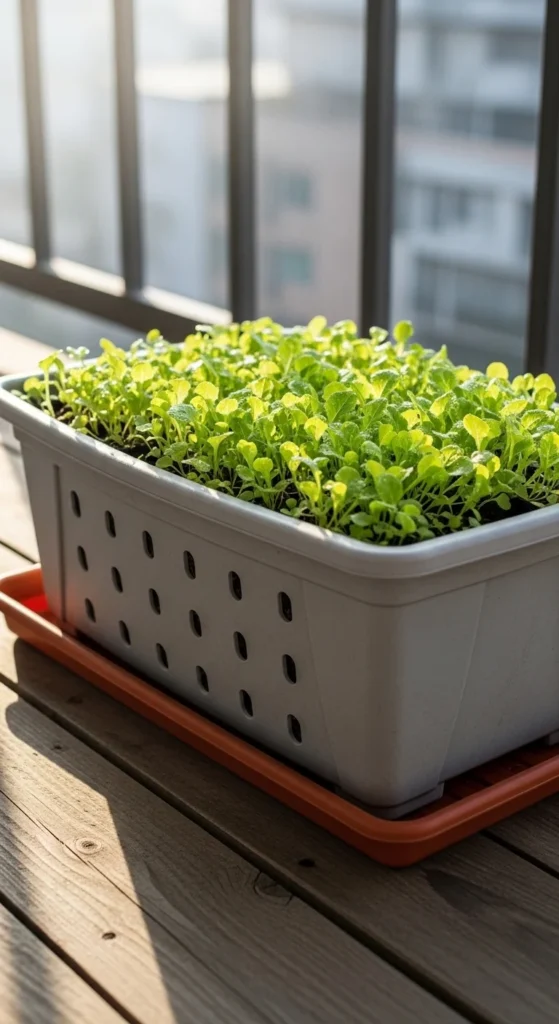
A storage tote turns into a mini raised bed for greens. Choose a low, wide tote so you get more surface area. Drill many drainage holes across the bottom. Don’t be shy. Greens hate soggy soil.
Use a lightweight potting mix and fill the tote at least 6–8 inches deep. Sprinkle lettuce or mixed greens seed thickly. Cover lightly with mix. Mist gently so seeds don’t float away. In a week or two, you’ll have a dense patch.
Harvest by cutting leaves when they reach hand length. Leave the base intact and it will regrow. This gives steady harvests from one tote.
Budget tip: use a second tote as a catch tray. It keeps water off your balcony. Empty it after heavy watering or rain so roots don’t sit in water.
Place the tote where it gets morning sun if possible. If your space gets hot, give greens afternoon shade. A tote salad garden is one of the fastest ways to feel “successful” as a beginner.
3. Upcycled Colander Planter for Quick-Drain Herbs

A colander is a ready-made drainage container. It’s perfect for herbs that prefer drier roots, like thyme and oregano. Line it with coconut coir, burlap, or a thin fabric so soil doesn’t wash out.
Fill with potting mix. Plant one or two herbs. Keep the colander on a plate to catch water. Because drainage is strong, you may water a little more often, but the risk of root rot is low.
Budget tip: thrift stores often have old colanders for cheap. Choose one with sturdy handles. You can also hang it with strong hooks if your space allows.
This project is great for beginners because it makes you focus on two basics: airy soil and fast drainage. Put it where you’ll see it daily, like near your kitchen door, so you remember to snip herbs often.
4. DIY Self-Watering Bottle Spike Pot
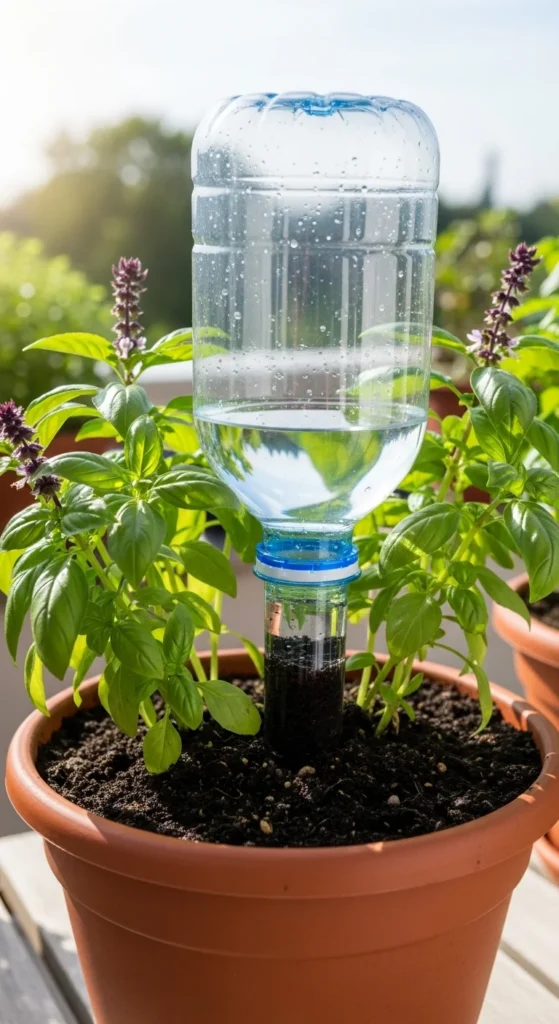
If you forget to water, a bottle reservoir can help. Take a plastic bottle, poke a tiny hole in the cap, fill with water, and invert it into the soil. The water releases slowly as the soil dries.
Use this in medium pots with herbs or greens. It’s also handy for hot balconies where pots dry fast. Keep drainage holes in the pot. A bottle doesn’t replace drainage.
Budget tip: start with one bottle per pot and adjust. If soil stays wet, make the cap hole smaller or remove the bottle earlier in the day.
This setup is not fancy, but it works. It also helps beginners learn a steady watering rhythm without daily stress.
5. Two-Bucket DIY Self-Watering Planter
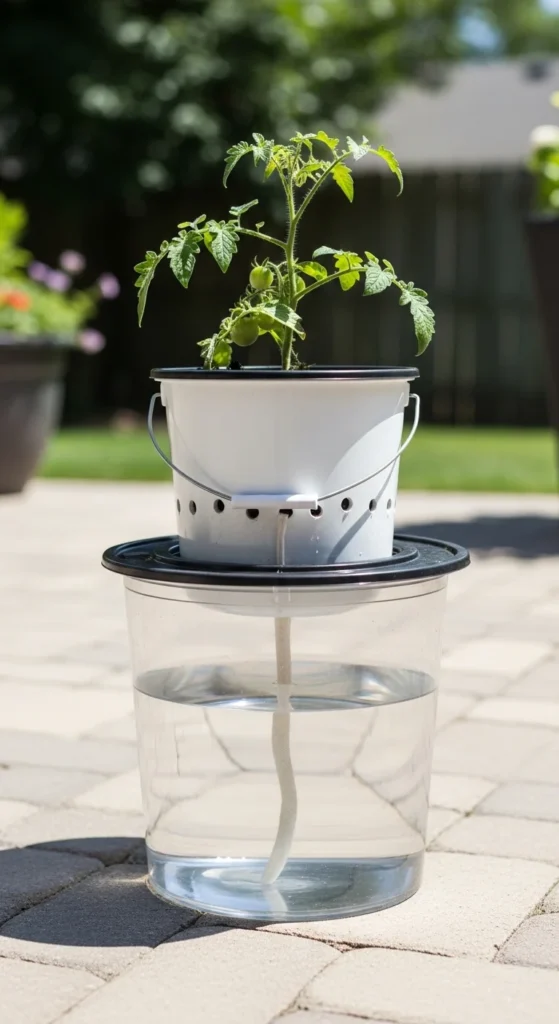
This is a simple homemade version of a reservoir planter. You use two buckets. The bottom bucket holds water. The top bucket holds soil and has holes for a wick.
Drill drainage holes in the top bucket’s bottom. Add a cotton rope wick through one hole so it hangs into the water reservoir. Fill the top bucket with potting mix. Plant a compact tomato or pepper if you have enough sun.
Check the reservoir every few days. Refill before it runs dry. Still top-water once at the start to settle soil.
Budget tip: use free buckets and an old cotton cloth strip as the wick. This project saves time and keeps moisture steady in hot, windy areas.
6. Milk Crate Vertical Stack Garden
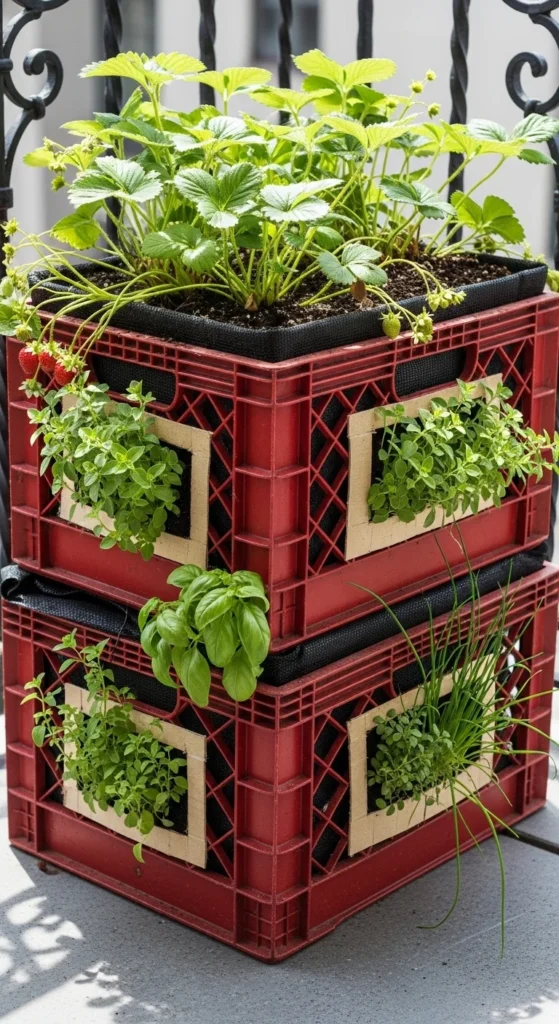
Milk crates are great for vertical container setups. Line the crate with landscape fabric or burlap. Fill with potting mix. Plant from the top and also tuck small plants into side openings.
Strawberries work well. So do trailing herbs like oregano. Keep the stack stable by putting a heavier crate at the bottom.
Budget tip: ask local shops for spare crates or use sturdy plastic crates you already have. If wind is strong, tie the stack to a railing.
Water slowly so mix doesn’t wash out. Add mulch on top to reduce drying. This project turns one small floor footprint into multiple planting spots.
7. Hanging Shoe Organizer Herb Wall
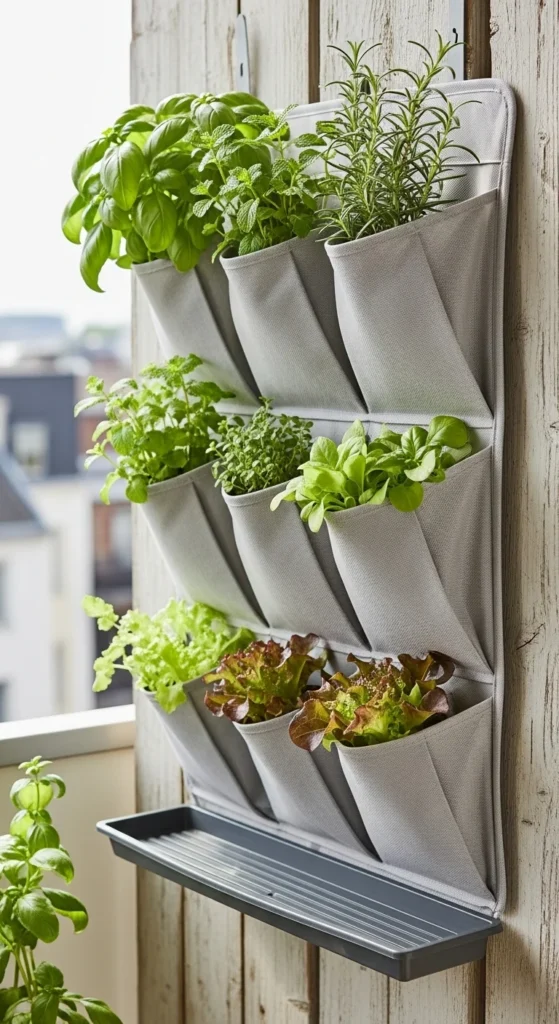
A hanging organizer can become a vertical garden. Use pockets for herbs and shallow-root greens. Add a plastic liner inside each pocket to protect fabric and hold soil. Keep drainage in mind. Excess water must drip out.
Place a tray below or hang it where dripping won’t cause problems. Water gently with a small spout watering can.
Budget tip: use a second-hand organizer. Reinforce the top hooks because wet soil is heavy.
This project works best for basil, cilantro, parsley, lettuce, and small flowers. Avoid large plants. Keep it simple and harvest often.
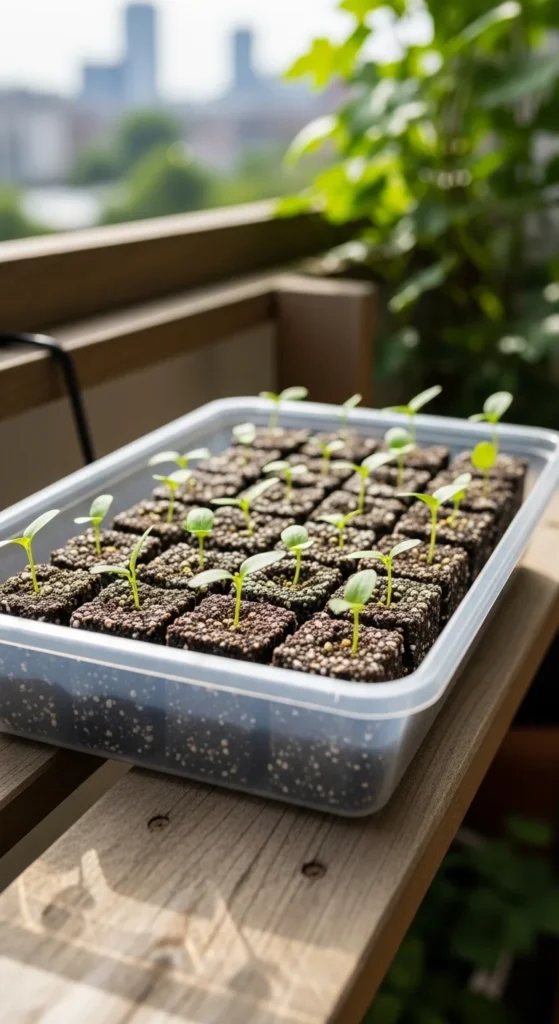
8. Coffee Tin Microgreen Starter Trays
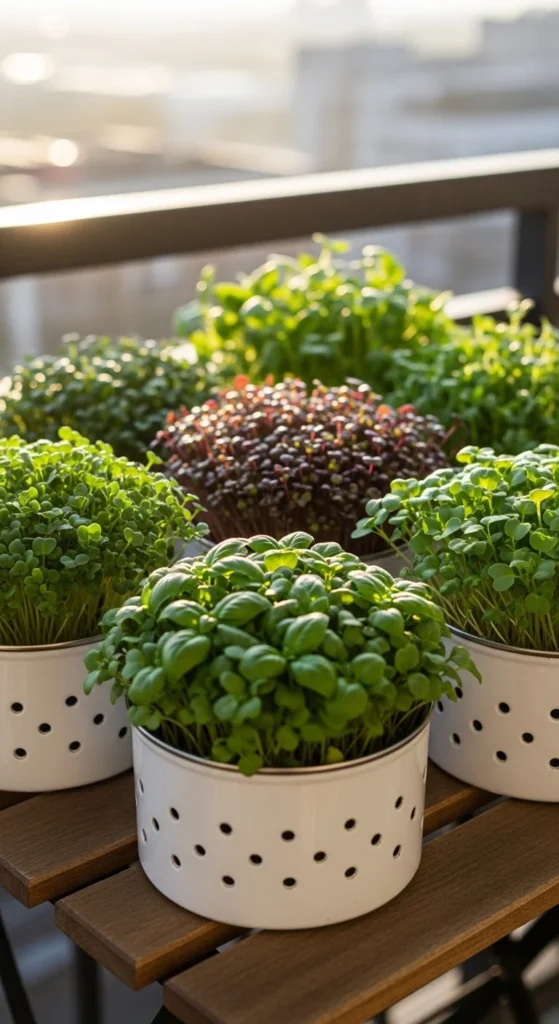
Microgreens are quick and forgiving. Punch drainage holes in the bottom of coffee tins. Fill with light mix. Sprinkle seeds thickly. Mist daily.
Harvest in 10–20 days depending on the seed. This is perfect for small spaces and low sun. Bright indirect light is enough.
Budget tip: reuse any food-safe tin or container. Just add holes. Microgreens give you fast results and help beginners build confidence.
9. Laundry Basket Potato Grow Planter
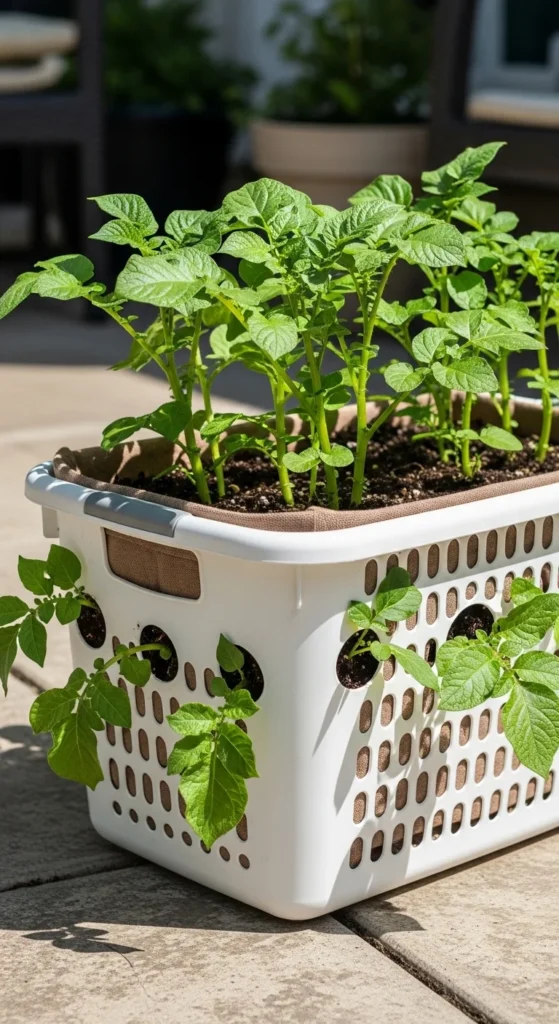
A laundry basket can grow potatoes because it’s tall and breathable. Line it with landscape fabric so soil stays inside. Drill extra holes in the bottom if needed.
Fill with mix, plant seed potatoes, then add more mix as stems grow. This “hilling” step increases yield.
Budget tip: use a cheap basket and reuse soil next season after refreshing with compost. Potatoes are fun in containers because harvesting is easy—just tip the basket and collect.
10. Mason Jar Herb Propagation Station
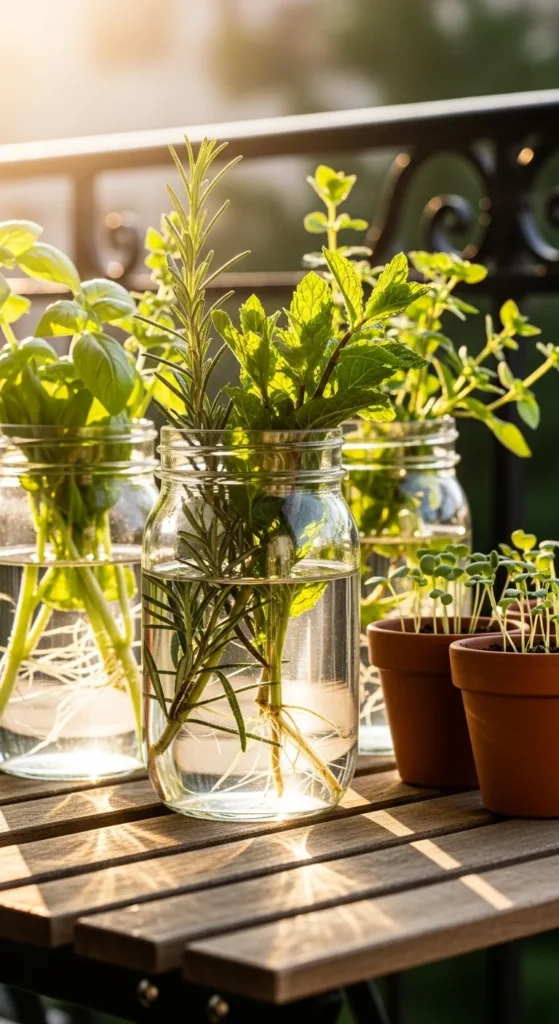
Propagating herbs saves money. Put mint, basil, or rosemary cuttings in jars of water. Keep in bright light. Change water every few days.
When roots form, plant into small pots with potting mix. Tease roots gently so they spread.
Budget tip: propagate from store-bought herb bunches if stems are healthy. This project builds your garden with almost no cost.
11. Window Box Made From a Cut Storage Bin
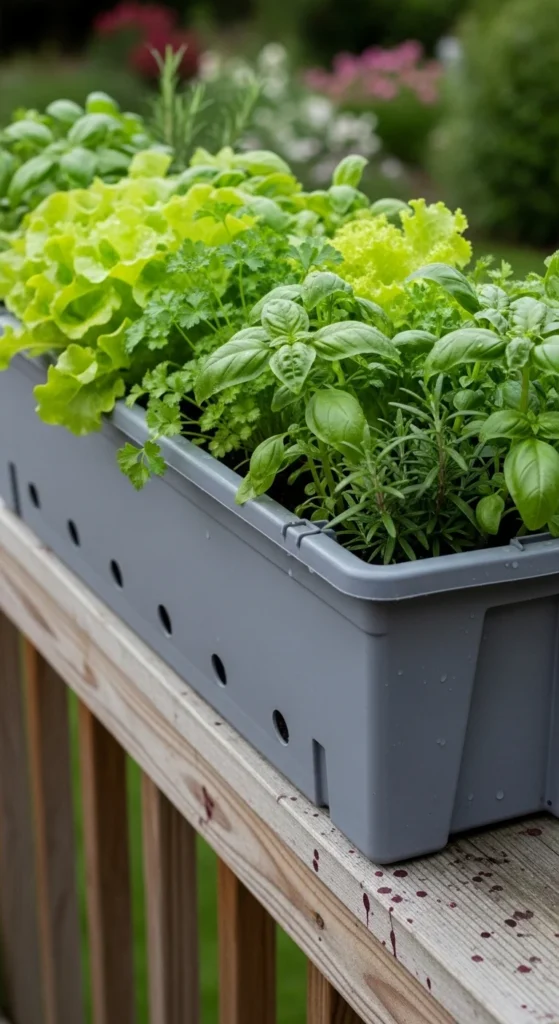
Cutting a storage bin into a long planter gives you a rail-style garden without buying one. Smooth edges with sandpaper. Drill drainage holes across the bottom.
Use for greens and herbs. Add a thin mulch layer. Water in the morning.
Budget tip: this is one of the cheapest ways to get a long planter for high-yield greens.
12. Repurposed Paint Tray Seedling Nursery
A paint tray can start seeds. Add holes if it doesn’t have them. Fill small cups or make soil blocks and set them inside. The tray catches water and keeps your setup tidy.
Budget tip: start seeds for basil, lettuce, and peppers. Then transplant into larger containers once roots fill out.
13. DIY Pebble Mulch Top for Water Savings
A pebble top layer slows moisture loss and keeps soil from splashing on leaves. It also looks clean.
Use small stones or coarse grit. Don’t block drainage holes—this is only for the surface.
Budget tip: buy one bag of pebbles and use it across several pots. It makes watering easier for beginners who miss a day now and then.
14. Rolling Plant Caddy for Sun Chasing
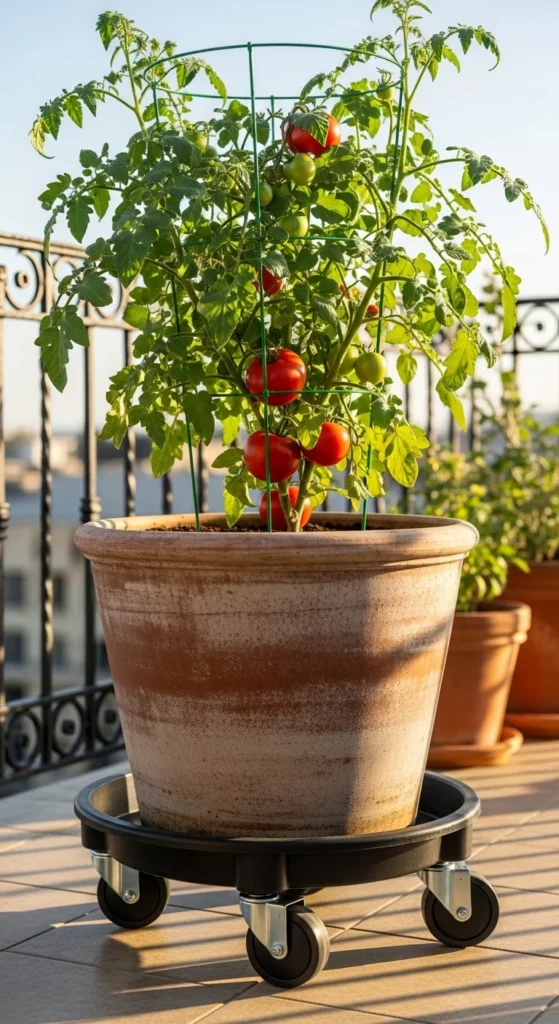
If your sun shifts across the day, put big containers on wheels. A rolling caddy lets you move pots into sun and back into shade.
Budget tip: DIY a caddy with a scrap wood square and four casters. This saves plants from scorching afternoons and helps fruiting plants get enough light.
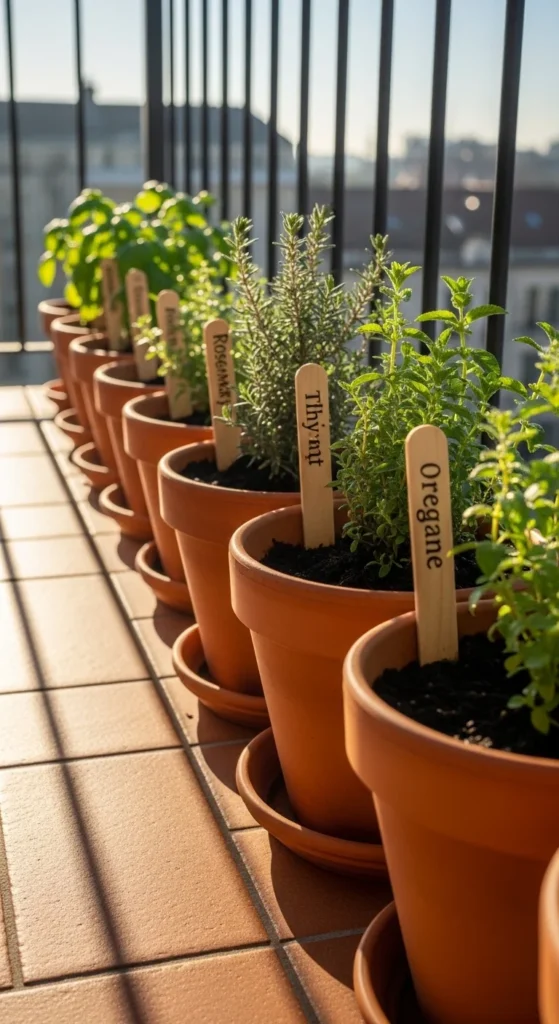
15. Fabric Grow Bag “Herb Ring” Layout

Small grow bags are light and easy. Arrange them in a ring so you can water quickly. Group herbs with similar water habits together.
Budget tip: buy a multi-pack of small bags. Plant one herb per bag. Label with small tags.
This keeps your garden organized and makes care simple.
16. DIY Trellis From Bamboo and Twine
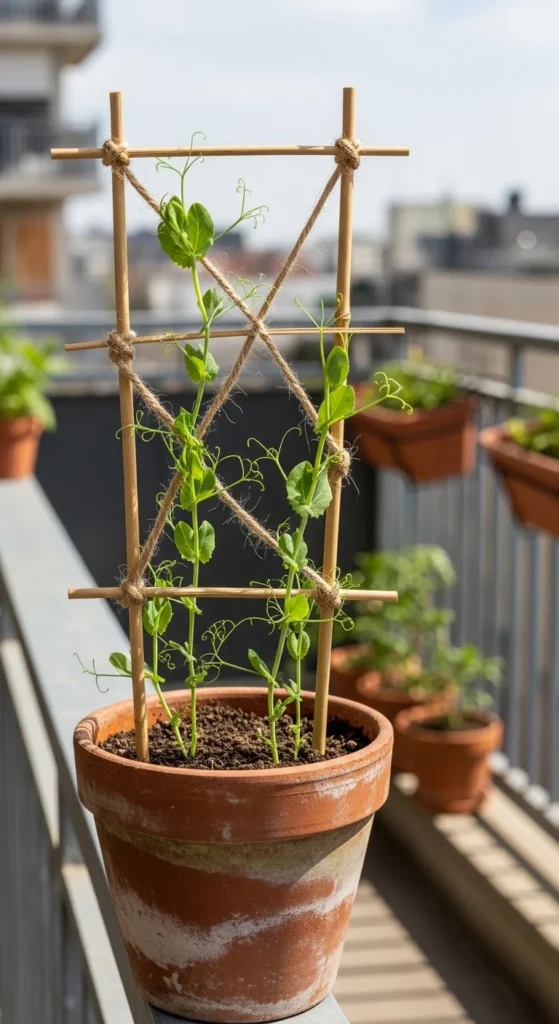
Vertical support helps small spaces. Bamboo stakes and twine can form a quick trellis. Use it for peas, cucumbers, or climbing beans.
Budget tip: use sticks from a local garden store or pruned branches. Tie firmly. Keep the pot heavy enough so it doesn’t tip.
17. Basil + Tomato Companion Pot Pair
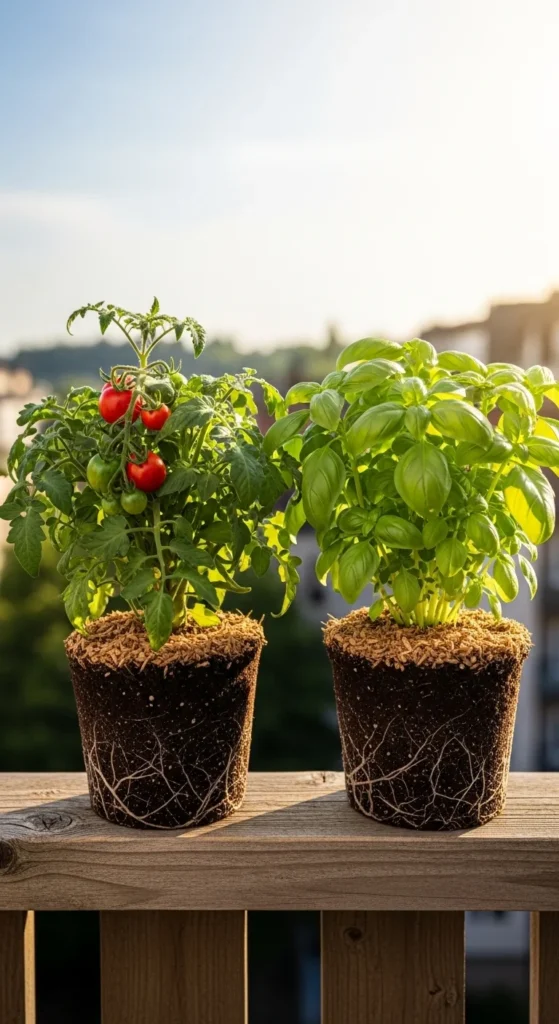
Companion planting works in containers too. Pair a tomato pot with a basil pot. Keep them close, but not crowded in the same container unless it’s very large.
Budget tip: one 5-gallon pot for a tomato, one small pot for basil. This combo is simple and beginner-friendly.
18. Tease-Root “Rescue Planting” Routine
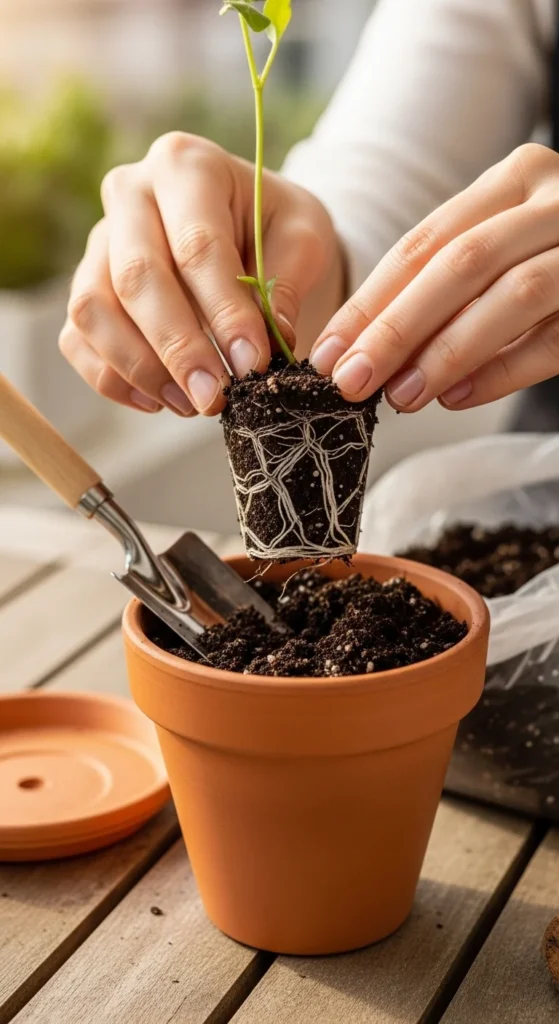
Many nursery plants are root-bound. Before planting, loosen the root ball gently with your fingers. This helps roots spread into the new soil.
Water after planting until it drains out. Add mulch on top.
Budget tip: this step costs nothing and improves success fast.
19. “One Plant Per Pot” Beginner Rule Setup
Overcrowding is a common beginner mistake. Start with one plant per container. This prevents stunting and reduces watering confusion.
Budget tip: fewer plants, bigger pots, better results. You can always add more containers later.
20. DIY Soil Mix Bucket Station
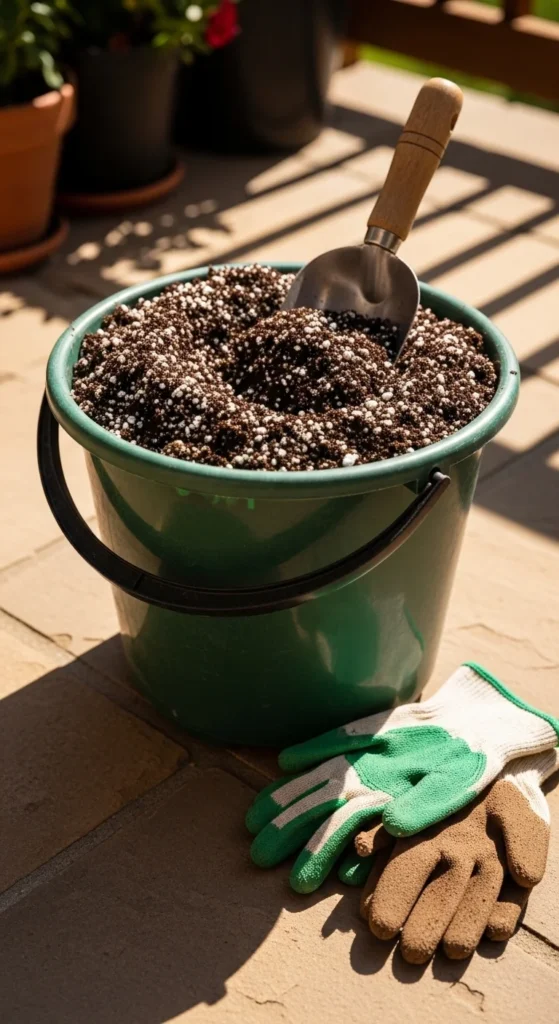
Set up a simple soil mixing station. Mix potting mix with compost and perlite for airflow. Keep extra mix in a sealed tote.
Budget tip: buying perlite once and using it across many containers is cheaper than constantly replacing soil.
21. Cold-Weather Pot Clustering for Winter
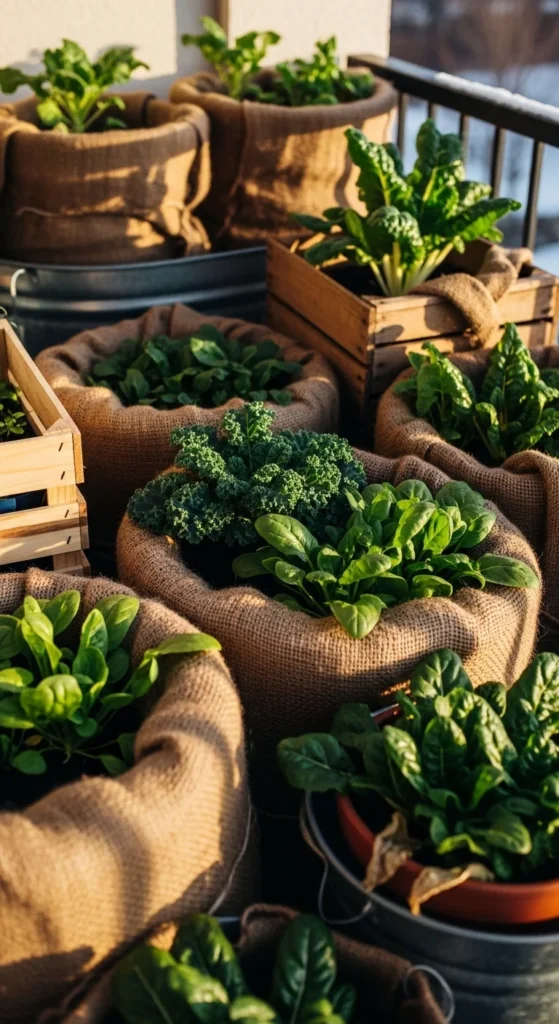
In cool months, group pots together. It reduces wind exposure and keeps roots warmer. Wrap pots with burlap or old fabric if temperatures drop.
Budget tip: reuse cardboard between pots as a wind break. Grow greens like spinach and lettuce for cool-season harvests.
22. “Drill, Fill, Mulch” Starter Kit Project
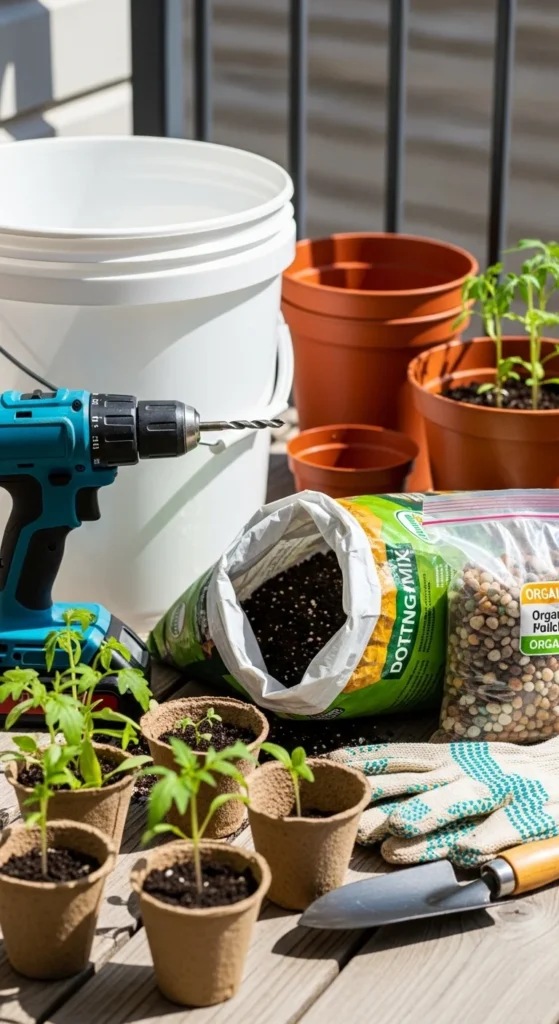
If you want one simple project to start today, follow three steps: drill holes, fill with potting mix, and mulch the top. Pick compact plants like basil, lettuce, or a dwarf tomato.
Use a 5-gallon container for fruiting plants. Use smaller pots for herbs. Water in the morning and feed lightly every two weeks.
Budget tip: start with three containers only. Master watering and light first. Then expand. This beginner kit-style approach keeps container gardening simple, cheap, and successful.
Conclusion
DIY container gardening works because it’s simple and flexible. With drainage holes, a light potting mix, and compact plants, you can grow edibles almost anywhere—balconies, patios, doorsteps, or small yards. Start with one or two easy projects like a drilled bucket herb pot or a storage tote salad bed. Add a self-watering hack if you miss watering. As you build confidence, stack vertically, trellis upward, and keep your garden organized by water zones. Small containers can produce big results when the basics are done right.

Leave a Reply