

Corner raised garden beds turn “dead” yard corners into planting gold. The shape tucks neatly where grass is awkward to mow and patio edges sit unused. You get better soil control, cleaner lines, and a layout that feels custom even in a tight space. Some options come from modular kits that slot together fast. Others are simple DIY builds with common boards and basic screws. Either way, corners can hold herbs, flowers, salad greens, and even compact veggies when you plan height, drainage, and access from day one.
1. L-Shaped Corner Bed for Fence-Line Growing
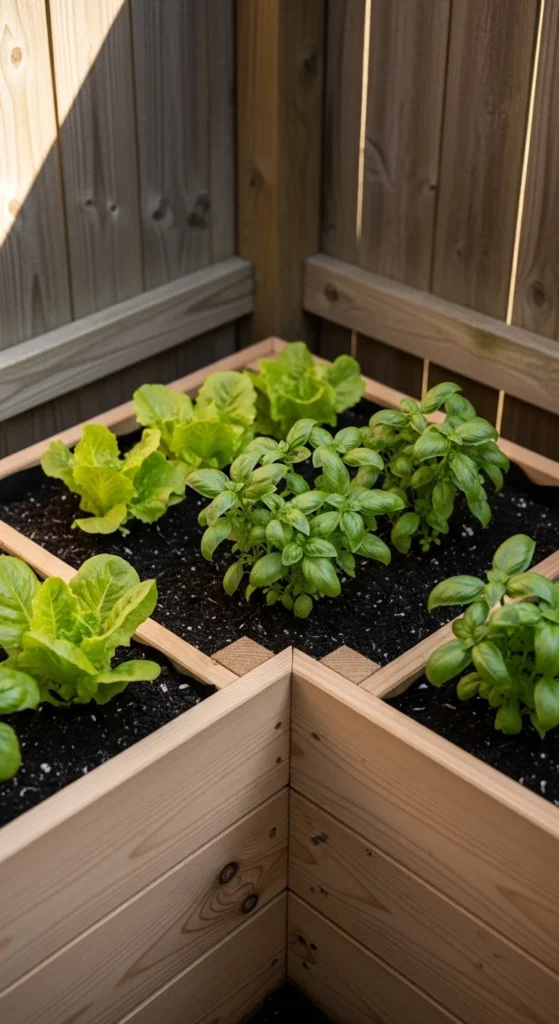
An L-shape is the classic “reclaim the corner” move. It hugs two sides at once, so you gain planting area without blocking the yard. Start by marking the bed footprint with string. Leave at least one side open for easy reach.
Use boards you can find locally, like cedar or heat-treated pine (not pressure-treated for food beds). Keep the width around 2 to 3 feet on each leg so you can reach the middle without stepping in. If the corner sits by a fence, add a simple trellis on the back edge for cucumbers or peas.
For budget soil fill, layer cardboard, dry leaves, and small sticks on the bottom. Then add a compost-and-topsoil mix on top. Mulch the surface to slow weeds and keep watering simple. This design works well for herbs on one leg and salad greens on the other, so you can harvest often without digging around.
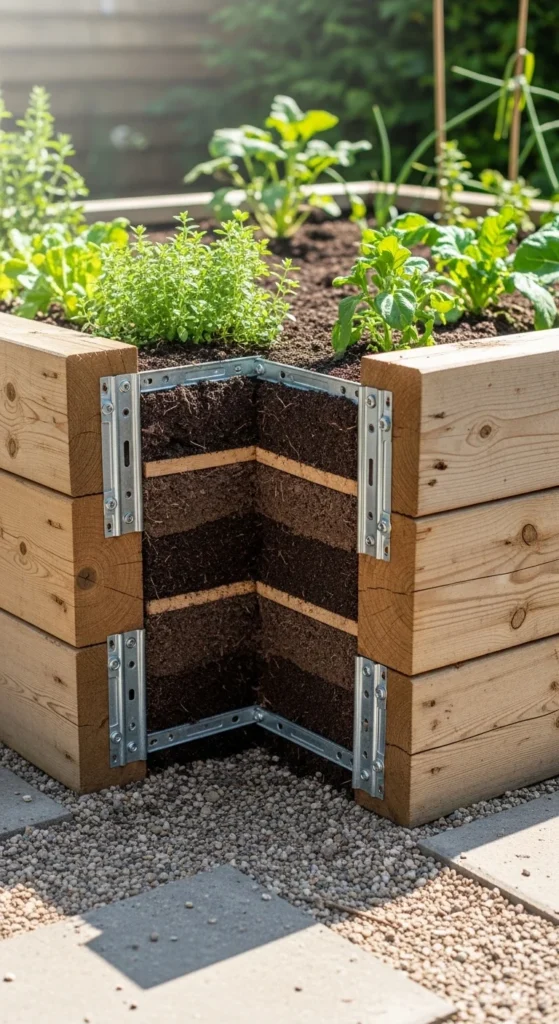
2. Modular Bracket Corner Kit with Slide-In Lumber
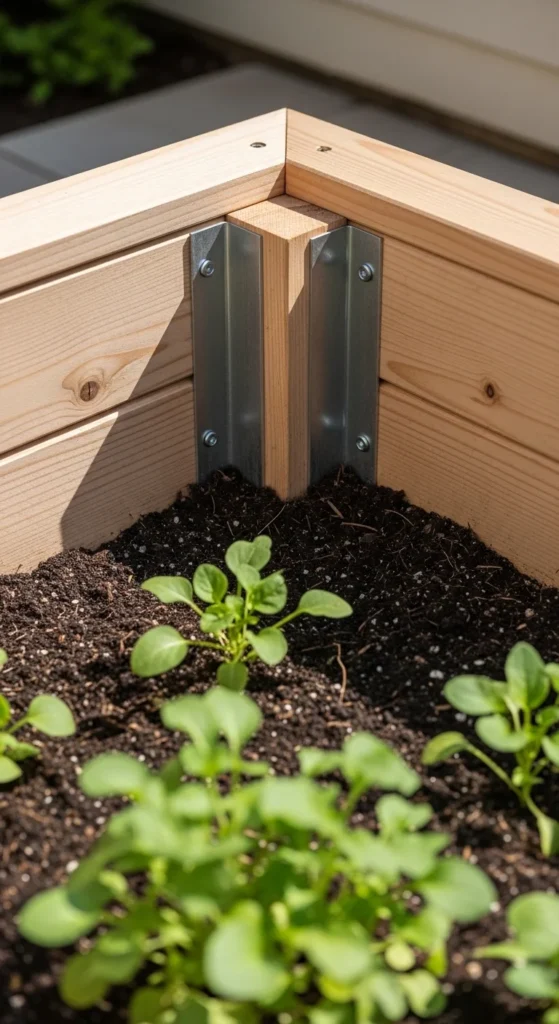
Corner bracket kits are a fast way to get a clean build without fancy cuts. The brackets hold standard boards, so you can pick lumber that matches your budget. You measure once, cut straight boards, and slide them into place.
This is great for renters or first-time builders who want a tidy look. Use 2×6 or 2×8 boards for a solid wall height. If you want deeper soil, stack another level of boards later instead of building tall from the start.
Place the bed on cardboard and add a thin layer of gravel only if your corner puddles after rain. On patios or hardscape corners, use a thick fabric barrier under the bed to catch stray soil while still letting water pass.
A smart DIY touch: add a cap board across the top edge. It gives a smooth place to rest your hands while planting. It also helps keep the boards aligned over time.
3. Triangular “Wedge Bed” for Tight Patio Corners
If your corner is tiny, a triangular bed fits better than an L-shape. It looks intentional and doesn’t crowd walkways. Use three sides: two that touch the corner walls and one front face that you can reach easily.
Keep the bed shallow if you’re planting herbs, strawberries, or lettuce. A 10 to 12 inch depth is enough for many quick crops. If you want carrots or beets, go deeper.
For a simple build, use three boards cut to length and join them with corner posts. If you want a cleaner look, miter the corners at a 45-degree angle. That sounds fancy, but it’s manageable with a basic miter saw or a local hardware store cut service.
Fill with a light soil mix that drains well. Patio corners often stay warmer, so add mulch to keep roots from drying out. This style is also perfect for a “pizza herb” corner: basil, oregano, thyme, and chives all in one compact spot.
4. Split-Level Corner Bed for Mixed Root Depths
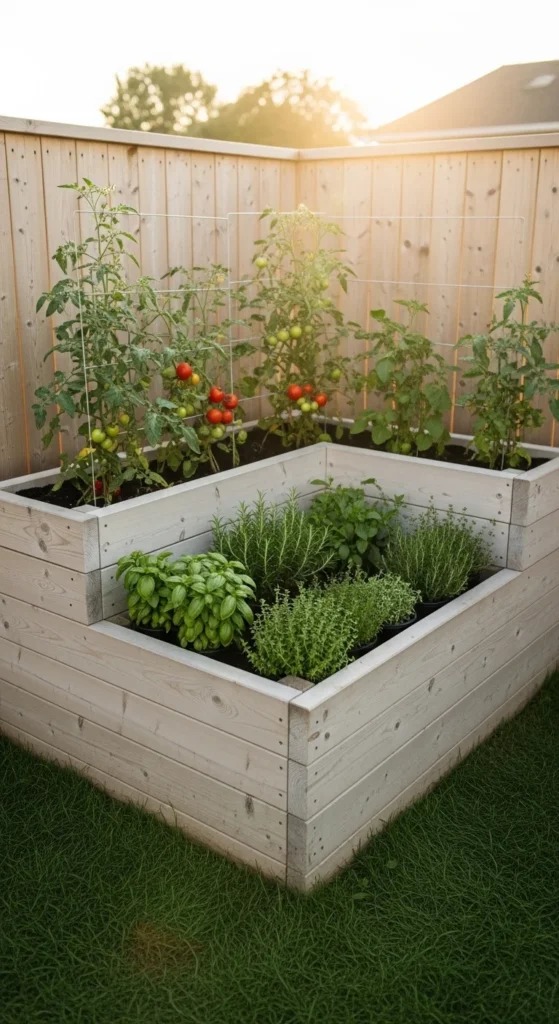
A split-level corner bed lets you plant more types of crops in one footprint. Put deeper-root crops in the tall side and shallow crops in the low side. It also looks like a built-in landscape feature.
Build the tall section on the back of the corner so it doesn’t block your view from the yard. Keep the lower section in front for easy picking. This layout makes watering easier too. Taller sections dry out faster, so you can water that zone a bit more without overwatering the lower zone.
Budget tip: use the same boards, but stack an extra layer only where you want height. Inside the tall section, add sticks and leaves at the bottom to reduce soil volume. Then top with compost-rich soil.
Try a simple crop mix. Tall zone: tomatoes, peppers, or pole beans with a trellis. Low zone: lettuce, cilantro, and green onions. You’ll use the space daily, which is the whole point of reclaiming a corner.
5. Corner Bed with 4×4 Posts for Rock-Solid Stability
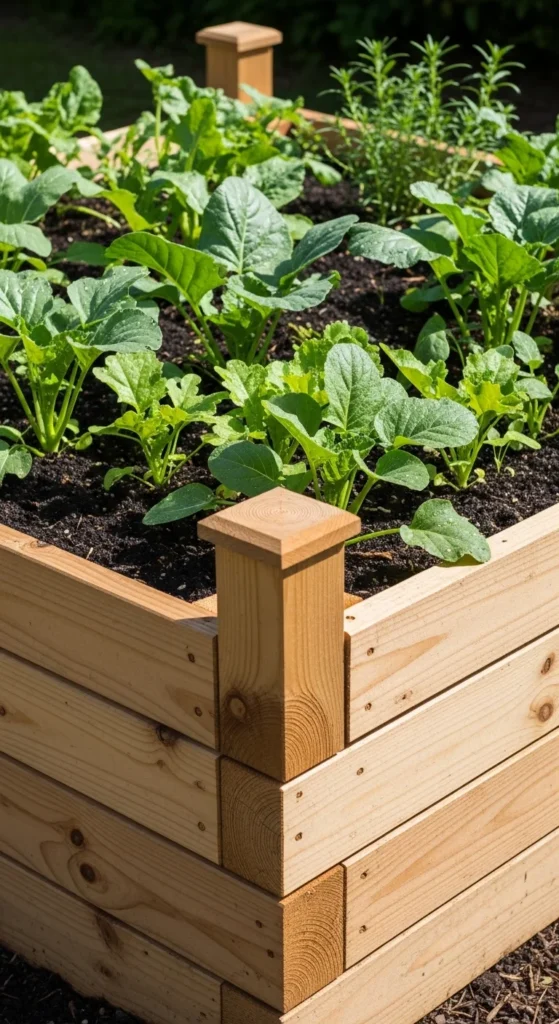
Corners can shift over time, especially if the bed is tall. Using 4×4 posts at the corners keeps the frame tight and steady. It’s a simple trick that makes a DIY build feel “pro.”
Set each post so it runs from the ground up past the top board. Screw boards into the post from the inside. This hides fasteners and keeps edges clean. If your soil is loose, drive the posts a little deeper or set them on compacted gravel for a firm base.
For rot control, leave tiny drainage gaps between stacked boards or use spacers. Water trapped against wood causes early failure. A small gap helps the bed dry after rain.
Top it off with cap boards to protect the end grain and create a smooth rim. Cap boards also give you a spot to set gloves, pruners, or seed packets while you work.
This design shines in corners where you want a tall bed for easier bending and long-term durability.
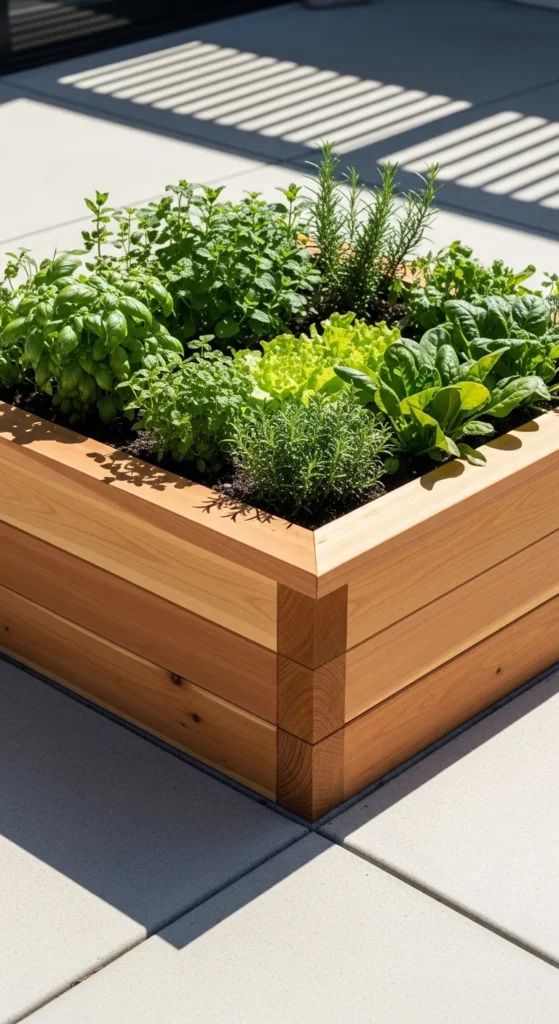
6. Composite Corner Kit for Low-Upkeep Gardening
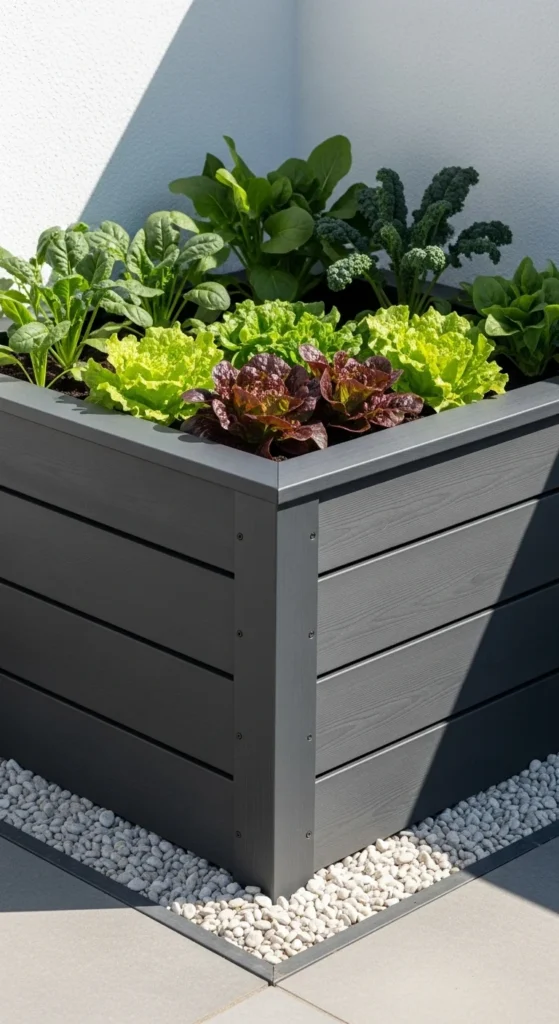
Composite corner kits are a good pick if you want low upkeep and straight lines. They resist rot and don’t splinter like wood. Many kits snap together quickly, which is helpful if you don’t want a weekend carpentry project.
Place the bed in a corner near a hose line or rain barrel. Corners often sit far from water access, so plan this early. If you’re on a budget, start with one corner unit and expand later with add-on panels.
Composite beds can warm up in full sun. Use mulch and add a little extra compost to help soil hold moisture. For hot climates, put taller plants on the sun side to shade lower greens.
Planting idea: keep it simple and high-use. Greens and herbs pay you back fast. Lettuce, spinach, basil, parsley, and chives are easy to harvest and replant. With a corner bed, you can build a “daily pick” spot that stays neat, tidy, and productive without constant repairs.
7. Narrow Corner Bed That Doubles as a Border
Some corners don’t need a big bed. A narrow border bed can still turn wasted space into planting space. Keep it 12 to 18 inches wide and run it along both corner edges like an L-shaped border.
This works well near patios, walkways, or the side of a shed. It also keeps plants close to where you walk, so you’ll actually harvest them.
Build with one or two board heights. Shallow depth is fine for herbs, strawberries, and many flowers. Add a little compost each season and you’re set.
Budget tip: use fewer boards and spend more on soil quality. A small bed filled with good soil beats a large bed filled with poor soil every time.
Planting idea: make it a pollinator strip. Mix basil with marigolds, calendula, and alyssum. You get herbs for the kitchen and flowers that bring beneficial insects close to your veggies.
8. Corner Bed with Trellis “Back Wall” for Vertical Crops
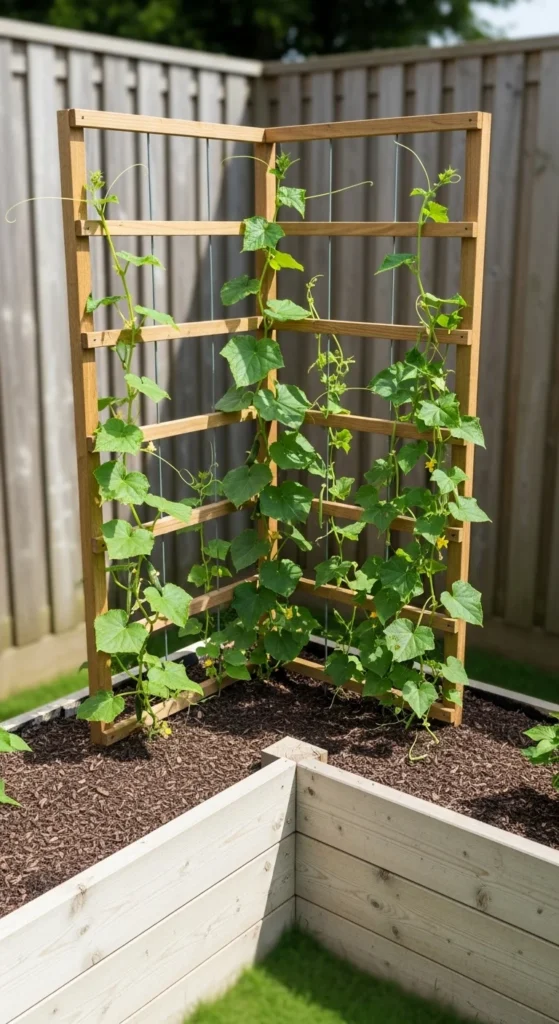
A corner is a natural place for a trellis. Two sides already give you structure, so adding a vertical back wall feels seamless. It also keeps vines off the ground and opens up the bed for lower crops.
Attach a trellis to the back edges of the bed. You can use cattle panel, garden netting, or simple wooden slats. Keep it secure so wind doesn’t pull it loose.
Plant climbers at the back: cucumbers, pole beans, peas, or small melons. Then plant quick crops in front: radishes, lettuce, or basil. That’s a smart way to stack harvests in a small area.
DIY tip: add a thin strip of wood across the top of the trellis to keep it from bowing. It’s cheap and adds strength.
A vertical corner bed is also easier to water. You can run drip lines along the base and keep foliage dry, which helps reduce plant problems.
9. Raised Corner Herb “Kitchen Garden” by the Door
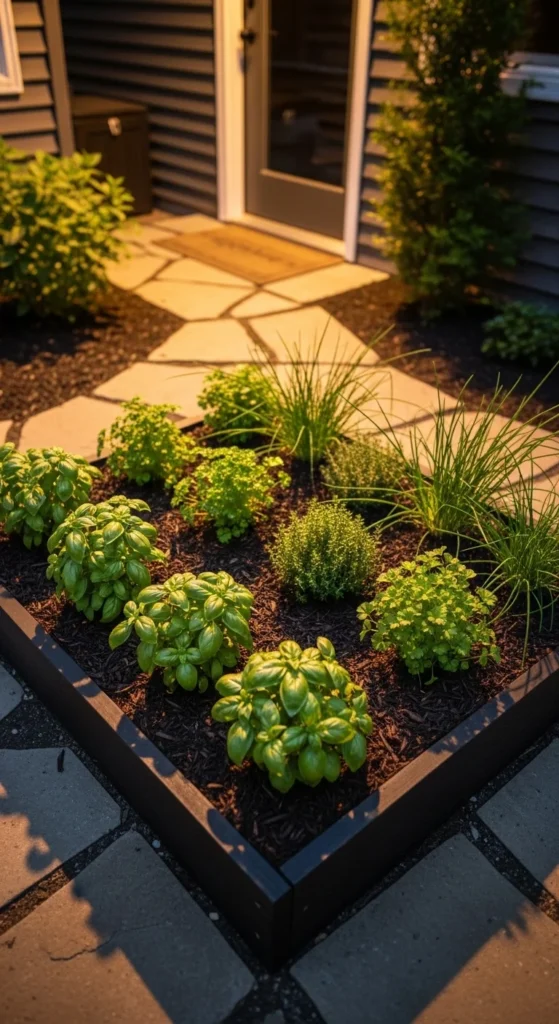
The best corner bed is the one you use every day. A kitchen herb corner near your door is high-value and low effort. You’ll harvest more because it’s close, not because it’s big.
Keep the bed compact. A 2×2 or small triangle is plenty. Use a soil mix that drains well. Herbs dislike soggy roots. Add a thin gravel strip around the outside to keep mud off shoes.
Plant herbs you actually cook with. Basil, parsley, thyme, oregano, mint (in a pot sunk into the bed), and chives are reliable. Mix in a few flowers like marigolds for color and insect activity.
Budget tip: start from seed for parsley and basil, and buy one small thyme plant to get a head start. Most herbs fill in fast with regular trimming.
Add a small label system with stakes if you want, but keep it simple. The goal is quick harvests and a corner that stays tidy year-round.
10. Corner Bed for Shade-Loving Greens Under Trees
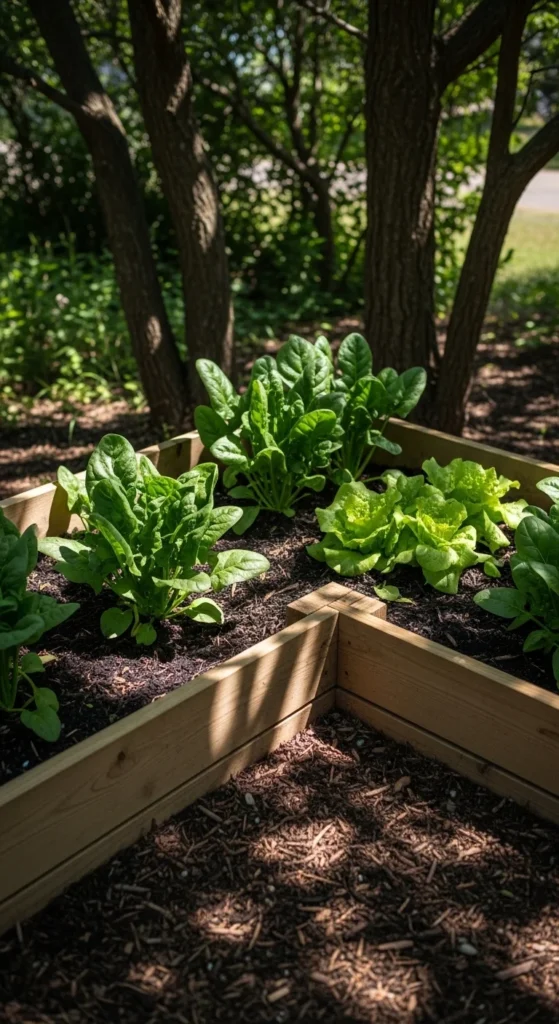
Not all corners get full sun. Some sit under trees or beside walls that cast shade. That’s still useful space if you grow the right crops.
Leafy greens handle partial shade well. Spinach, lettuce, arugula, and kale can produce nicely with a few hours of sun. A raised bed helps because the soil stays loose and drains better even in shady, damp areas.
Keep the bed shallow to save money. Add compost for fertility. Shade corners often stay cooler, so germination can be slower. Start seeds in small trays and transplant for better success.
Mulch helps keep weeds down, which matters in corners where lawn grass creeps in. Cardboard under the bed is a cheap barrier that also breaks down over time.
This corner style also pairs well with a small compost bin nearby. You can toss leaves and trimmings right where you garden, then top-dress the bed when you plant again.
11. Corner Bed That Wraps Around a Patio Post
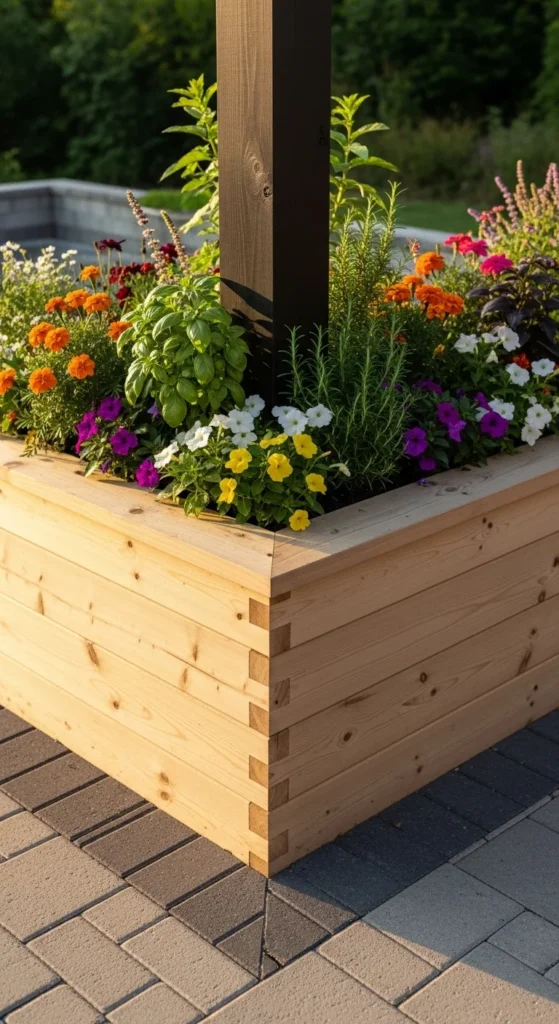
Patio corners often have posts, railings, or odd shapes that make standard beds awkward. A wrap-around bed solves that by building a notch into the frame so it fits cleanly.
Start by measuring the post clearance. Leave space so wood doesn’t press against it. Then build a U-notch into the bed’s back edge. You can do this with simple straight cuts and extra bracing at the notch corners.
Keep the bed low if it sits near seating areas. A lower rim feels less bulky and keeps sight lines open. Use cap boards for a smooth finish and a comfortable edge.
Planting idea: make it a sensory corner. Lavender, basil, rosemary (if your climate allows), and small flowers work well. Add trailing plants at the edge to soften the look.
Budget tip: use shorter boards and focus on neat construction. A smaller, well-built custom bed looks better than a big bed that feels jammed into place.
12. Corner Bed with Drainage Spacers Between Boards
Wood corners fail early when water gets trapped. A simple fix is adding tiny drainage gaps between stacked boards. Spacers create airflow, help boards dry after rain, and reduce soft spots over time.
Use thin strips of scrap wood as spacers when stacking boards. Keep the gap small so soil doesn’t spill. Inside the bed, add landscape fabric along the wall if you’re worried about soil leakage.
This detail is easy and cheap. It also makes a DIY corner bed last longer without extra products or coatings.
Pair this approach with cedar if you can afford it. If cedar is too pricey, use a budget wood and keep it protected with good drainage and mulch.
A corner bed often sits against a fence, which blocks airflow. That makes drying slower. So these gaps matter even more in corners than in open yard builds.
Finish with a cap board. It keeps rain from soaking the end grain and gives you a safer, smoother rim when you’re planting or harvesting.
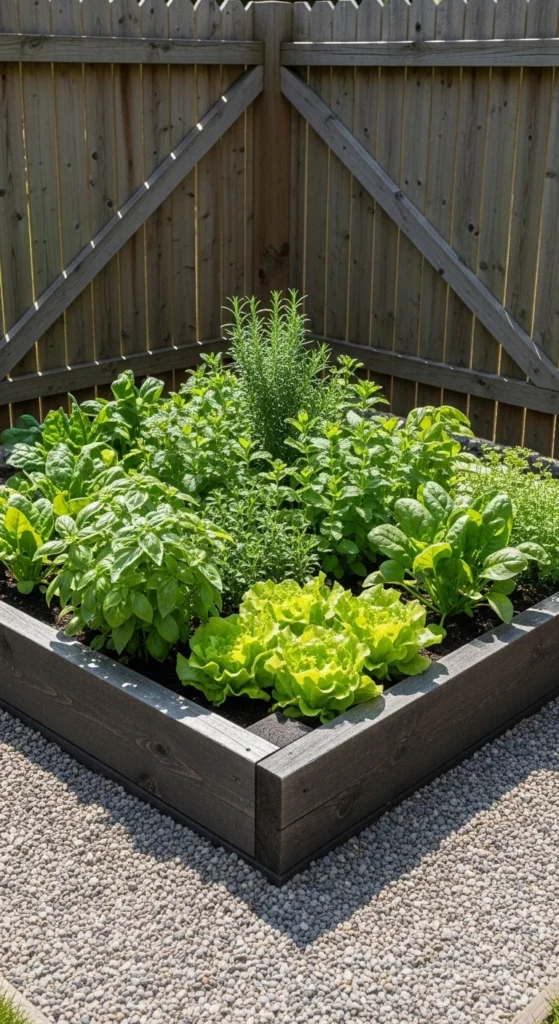
13. Mitered Corner Bed for a Clean, Built-In Look
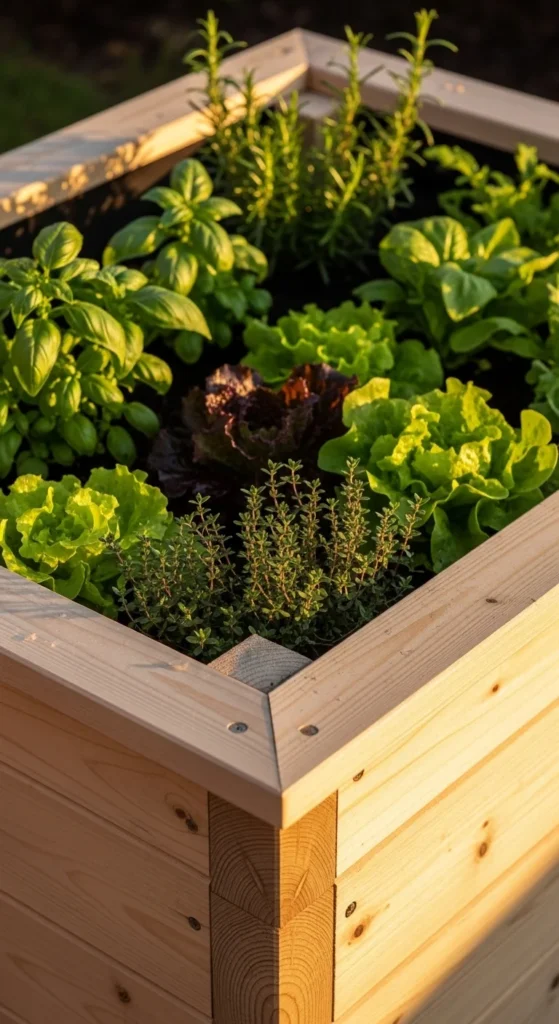
Mitered corners make a raised bed look like a custom fixture. The angled joints hide end grain and create a polished edge that fits well in visible patio corners.
You can do this with a miter saw, or ask the hardware store to cut angles for you. Use exterior screws and pre-drill holes to prevent splitting. Add a corner brace on the inside for strength.
A mitered bed doesn’t have to be expensive. Keep the size modest and focus on clean cuts. A small corner bed with neat joints becomes a focal point.
Planting idea: go with a mix of tidy plants. Head lettuce, green onions, basil, and compact flowers keep the bed looking organized. Avoid messy vines in this style unless you add a trellis.
For safety and comfort, add a cap board on top. It also hides any slight gaps and makes the bed look finished.
This is a strong option for front-yard corners where appearance matters as much as harvest.
14. Corner Bed with a Built-In Stepping Stone Access Point
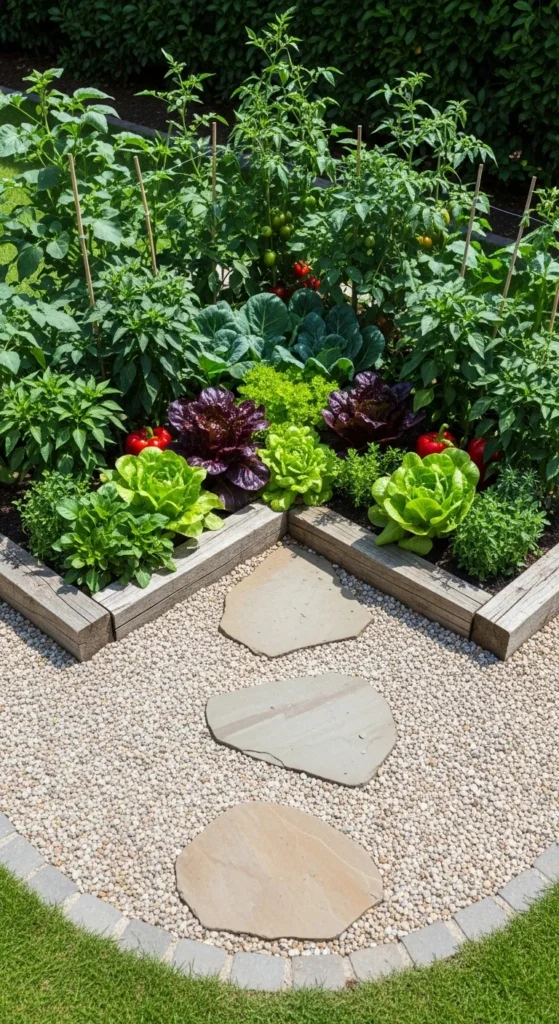
Corners get ignored when they’re hard to reach. A stepping stone access point fixes that. You create a small path that leads your feet and attention right to the bed.
Use leftover pavers, bricks, or flat stones. Set them into the grass so mowing stays easy. Add a small gravel strip around the bed to keep mud off the path.
This setup is great for corners behind sheds or near gate areas. You can walk in, harvest quickly, and walk out without trampling soil.
Budget tip: use reclaimed materials. Old pavers often show up cheap in local listings. Even broken concrete pieces can work as stepping stones if edges are smoothed.
Plant something you’ll check often. Salad greens, herbs, and cherry tomatoes keep you coming back. And that regular attention helps you catch problems early, like dry soil or pests.
A corner bed with good access stops being “that forgotten spot” and becomes part of your daily garden loop.
15. Corner Bed on Hardscape with a Hidden Liner
If your corner is concrete or pavers, you can still install a raised bed. The trick is using a liner that holds soil in place while letting excess water drain.
Use heavy landscape fabric or a bed liner rated for planters. Add small drainage holes or leave gaps at the edges so water can escape. Put a thin gravel layer inside the liner if pooling is common.
Keep the bed a bit smaller on hardscape. It’s easier to move, clean around, and maintain. A triangular or compact L-shape works well.
Budget tip: use a simple frame plus a quality soil mix. Because hardscape beds drain faster, add compost to help hold moisture. Mulch is your friend here too.
This style is perfect for patio gardeners who want herbs, greens, and peppers close to the house. It’s also a smart answer for renters if you build it as a free-standing box that can move later.
16. Corner Bed With a “Bench Cap” for Comfortable Gardening
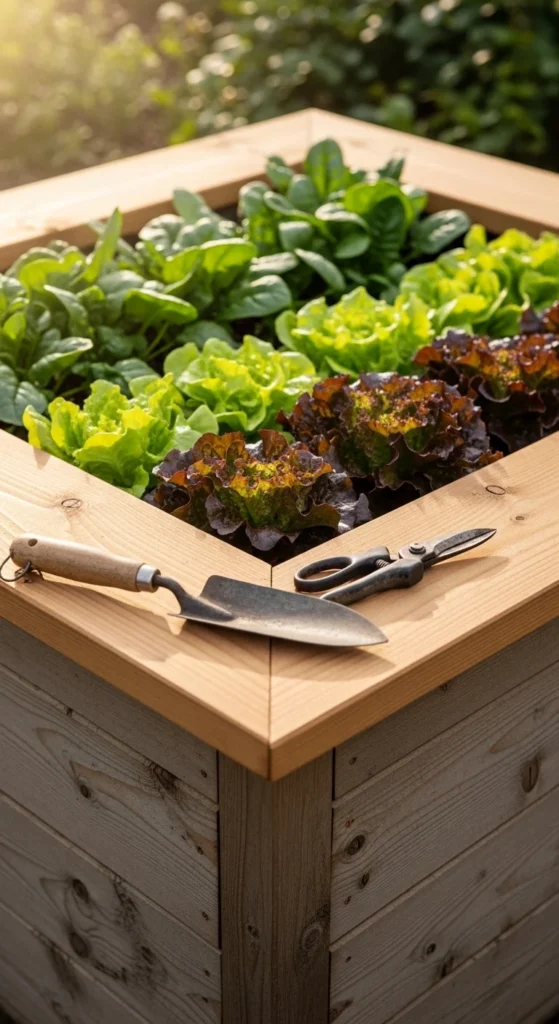
A wide cap board can turn your corner bed into a comfortable work zone. It gives you a place to sit briefly, rest tools, or lean while planting.
Use a 2×8 or 2×10 cap board. Sand it smooth. Screw it down securely. This also helps keep the bed square over time.
Corners are natural resting spots in yards. A bench cap makes the space feel inviting, not just functional. And when gardening feels easy, you do it more often.
Planting idea: keep the bed “pickable.” Herbs, strawberries, lettuce, and green onions are perfect. You can sit, harvest, and be done in minutes.
Budget tip: build a smaller bed but spend on the cap board. The comfort payoff is real. You can even use reclaimed wood for the cap if it’s sturdy and safe.
Add a small hook on the fence nearby for gloves or pruners. That tiny detail helps the corner feel like a mini garden station.
17. Corner Bed With Diagonal Front Face for Extra Walk Space
A square corner bed can stick out too far into the yard. A diagonal front face solves that. You still fill the corner, but you create more walking space in front.
This is also great near gates or narrow side yards. The diagonal edge prevents bumping into the bed while moving through the space.
Build it by connecting the two corner legs with a front board set at an angle. Add interior braces at both connection points. Cap the top for a smooth rim.
Planting idea: place taller plants in the back corner and lower plants along the diagonal front. That keeps light moving through the bed and makes harvest easy.
Budget tip: this shape can save lumber because the front face is shorter than a full rectangular extension. Less lumber, less soil, still productive.
Diagonal-front beds look intentional and solve traffic flow problems, which is a big deal in tight yards.
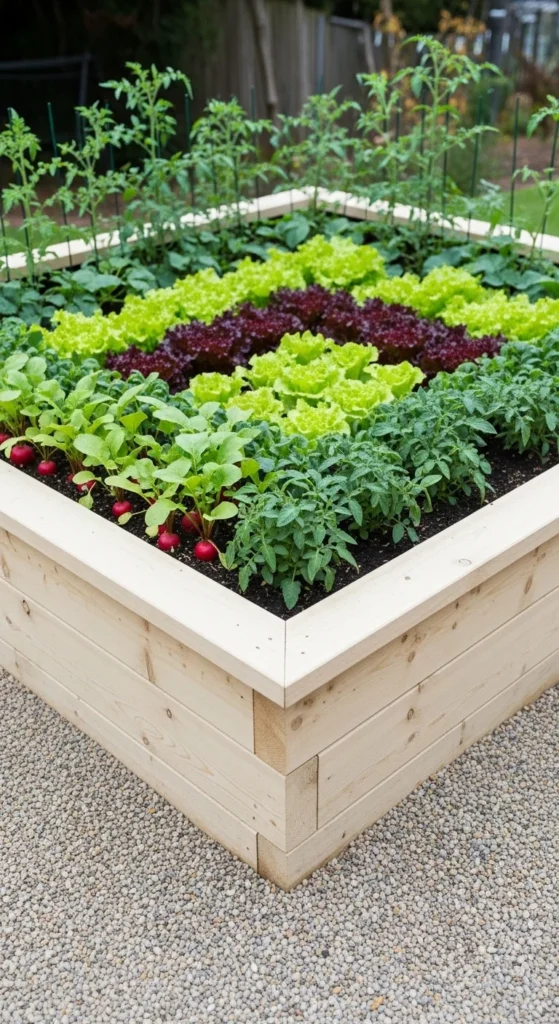
18. Corner Bed for “Three-Zone” Planting

Corners are perfect for zone planting because the shape naturally divides space. Think of it as three zones: back corner, left leg, right leg.
Back corner: put the tallest crop. Tomatoes, trellised beans, or a compact pepper variety. That uses the corner height without shading the whole bed.
Left leg: plant herbs and quick crops. Basil, cilantro, and radishes are easy wins.
Right leg: plant greens like lettuce or spinach. These can handle a little shade if the tall crop grows big.
This approach helps you avoid the “random mix” problem that makes corners look messy. It also helps with watering. Tall fruiting plants drink more. Greens prefer steadier moisture.
Budget tip: use simple markers like small stones or short wood dividers to keep zones tidy. You can also rotate zones each season, so soil stays balanced without extra work.
A three-zone corner bed gives you a mini garden plan without needing a big yard.
19. Corner Bed With Removable Panels for Seasonal Reset
Some corners are tricky to work in. Removable panels make a corner bed easier to refresh, repair, or reconfigure. This works well with bracket systems and modular kits.
You can remove a front panel to add compost, fix a liner, or change the shape. It also makes end-of-season cleanup faster.
This is useful if you garden in a rental or plan to move. You can take the bed apart without destroying boards.
Budget tip: choose one system and stick to it. Mixing hardware types can get expensive. Buy brackets once and reuse boards if you resize later.
Planting idea: use it for rotating crops. One season for tomatoes and basil. Next season for carrots and onions. The ability to reset panels makes crop rotation feel simpler in a small footprint.
A corner bed that adapts over time stays useful as your garden style changes.
20. Corner Bed With a Gravel Moat for Weed Control
Corners are weed magnets. Grass creeps in. Leaves pile up. A gravel moat keeps the bed edge clean and reduces weeding.
Lay cardboard around the bed perimeter. Then add 2 to 3 inches of gravel. Keep it wide enough to stop grass, around 6 to 12 inches if you can.
This gravel strip also improves drainage in corners that stay damp. It prevents muddy splash onto plants and makes the bed look crisp.
Budget tip: use inexpensive pea gravel or crushed stone. You can often buy small bags if you don’t want bulk delivery.
Planting idea: put herbs near the bed edges. The gravel keeps those edges tidy and makes harvesting easy. Add a small solar light in the gravel strip for a nice nighttime look if the corner is near a patio.
A gravel moat is one of the simplest ways to make a corner bed feel finished and easy to maintain.
21. Corner Bed for Balcony and Apartment Corners
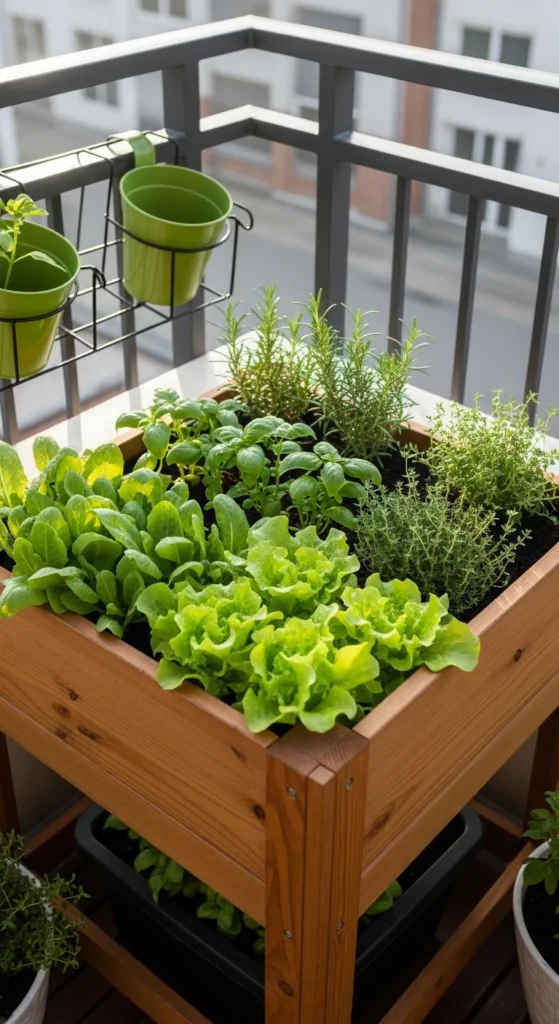
If you’re gardening in a small space, corners matter even more. Balcony corners often sit unused, but they can hold a compact raised bed or deep planter box.
Keep weight in mind. Use a lighter soil mix and avoid filling with heavy clay. Add a tray or liner if water runoff is an issue.
A corner box can grow a lot. Lettuce, arugula, basil, parsley, and green onions do well. Add a small trellis for peas if your railing allows it.
Budget tip: build with a simple frame and a sturdy liner. You don’t need thick lumber. Just make sure the corners are braced so the box doesn’t bow out.
Place the bed where it gets the best light. Balcony corners can be shady depending on the building. If sun is limited, focus on greens and herbs rather than fruiting plants.
A corner balcony bed turns small space into daily harvest space.
22. Corner Bed With a “Before/After” Cleanup Plan
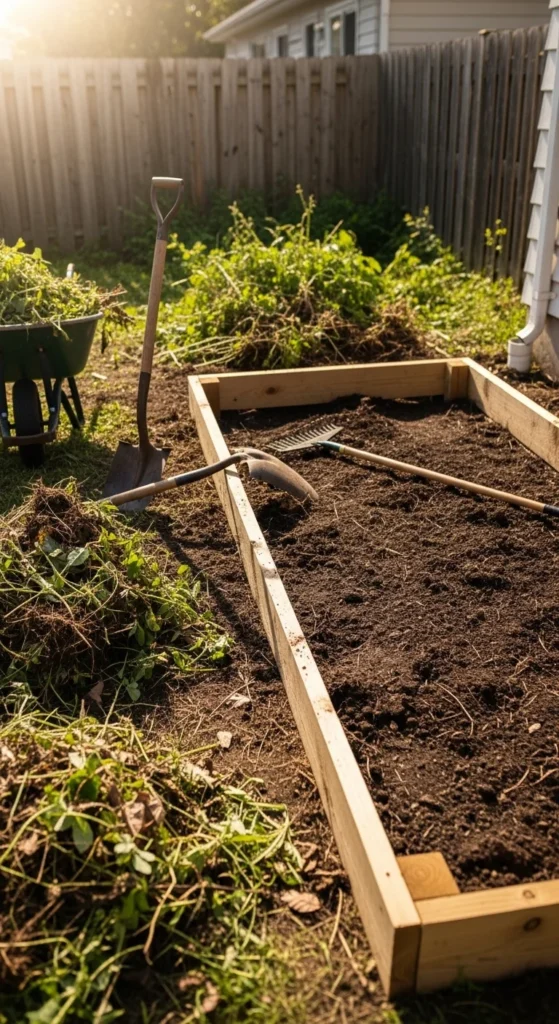
Corners get ugly fast. Old pots. Weeds. Random debris. A simple cleanup plan turns that chaos into a garden spot you’ll actually enjoy.
Start by clearing everything. Then level the ground as best you can. You don’t need perfect grading, just a stable base. Lay cardboard to block weeds. Add the bed frame on top.
Use the corner fence or wall as a backdrop. Add a small gravel strip along the base to prevent mud and keep edges clean.
Budget tip: make the corner look “done” with one or two details. A cap board. A gravel border. A small trellis. Those touches change the vibe without a big spend.
Plant something that grows fast. Salad greens are great. You’ll see results quickly, and that keeps motivation high.
This is a smart route if you want a visible win in your yard without building a huge garden. Corners are small, so transformation is fast and satisfying.
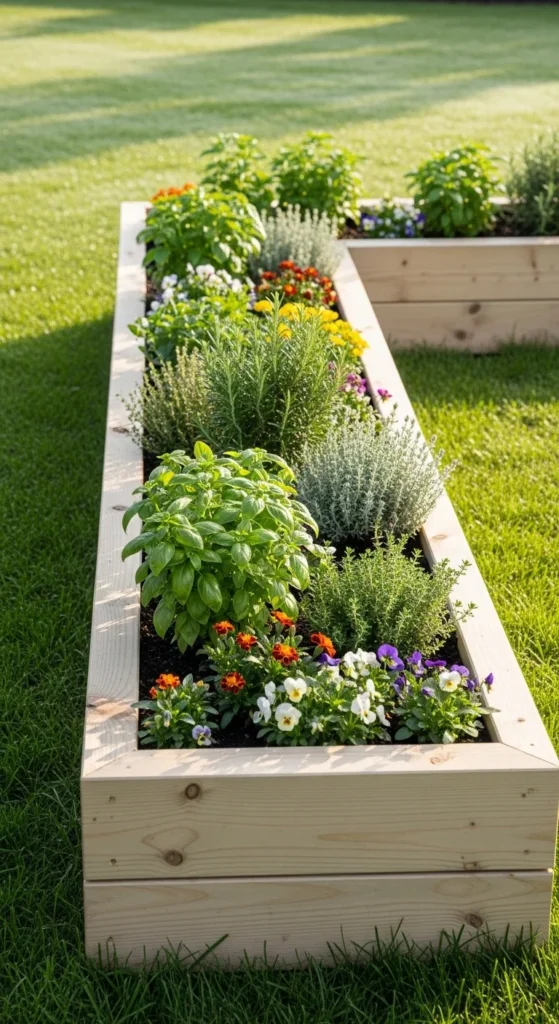
23. Corner Bed With Mixed Flowers + Veggies for a Tidy Look
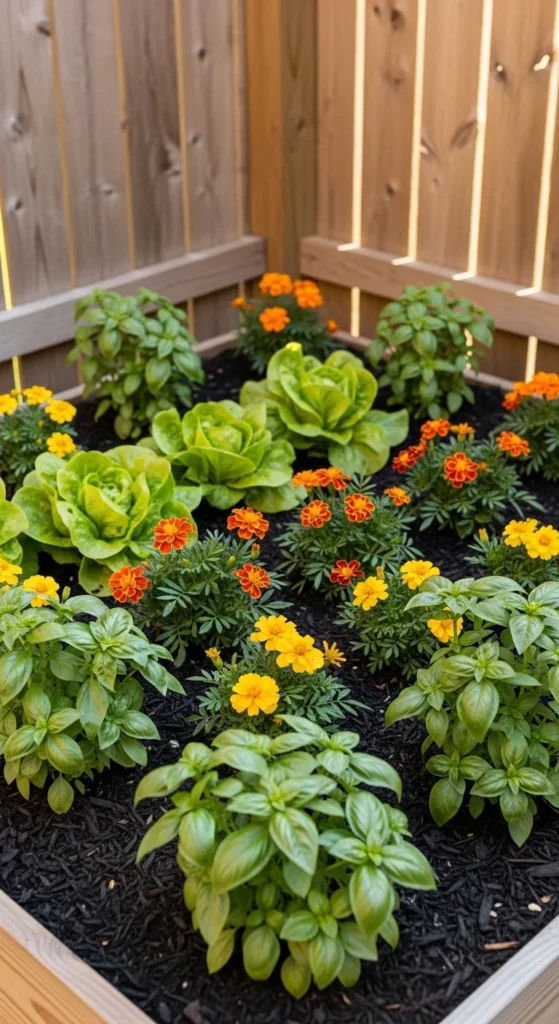
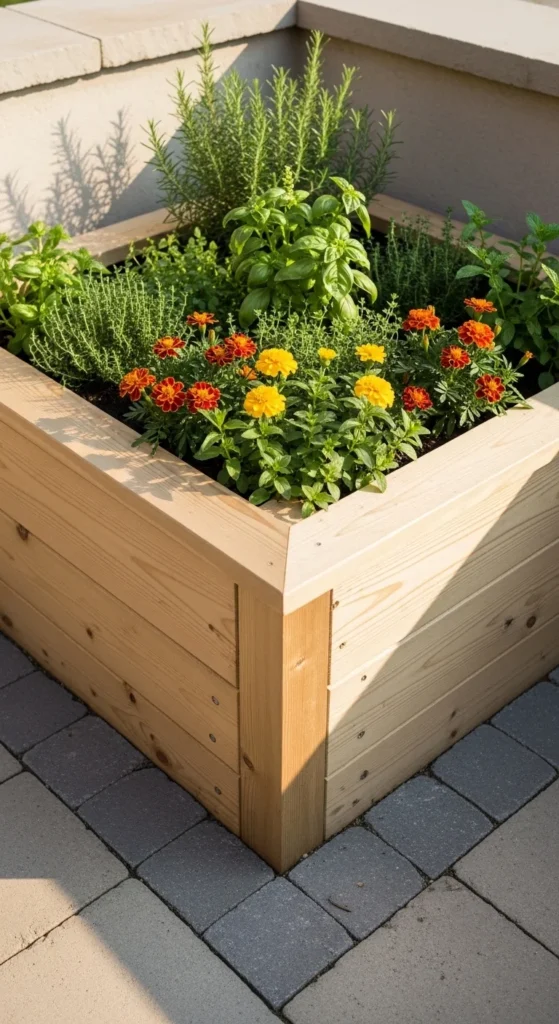
A corner bed can look messy if it’s all tall veggies. Mixing flowers with veggies keeps the corner looking neat and intentional, especially near patios or front yards.
Pick one or two main veggies. Then add flowers as “frames” around them. Marigolds, calendula, and alyssum are simple choices. Add basil or dill for a useful herb layer.
This approach also helps with spacing. Flowers can fill gaps where bare soil would invite weeds. Mulch still matters, but plants do some of the work too.
Budget tip: grow flowers from seed. A small packet goes far. Plant seedlings in clusters at the corners and along the front edge.
Use the back corner for the tallest plant, like a tomato on a stake. Keep the front edge low with greens and flowers. That keeps sight lines open and makes the bed easy to harvest.
A mixed corner bed is one of the easiest ways to make a small garden feel polished without adding extra structures.
Conclusion
Corner raised garden beds turn awkward edges into useful growing space. Pick a shape that fits how you move through the yard. Choose materials that match your budget and climate. Add simple details like braces, cap boards, and weed barriers for a cleaner build that lasts longer. Start with one corner, plant crops you’ll harvest often, and expand only when that first corner becomes a routine part of your day.

Leave a Reply