
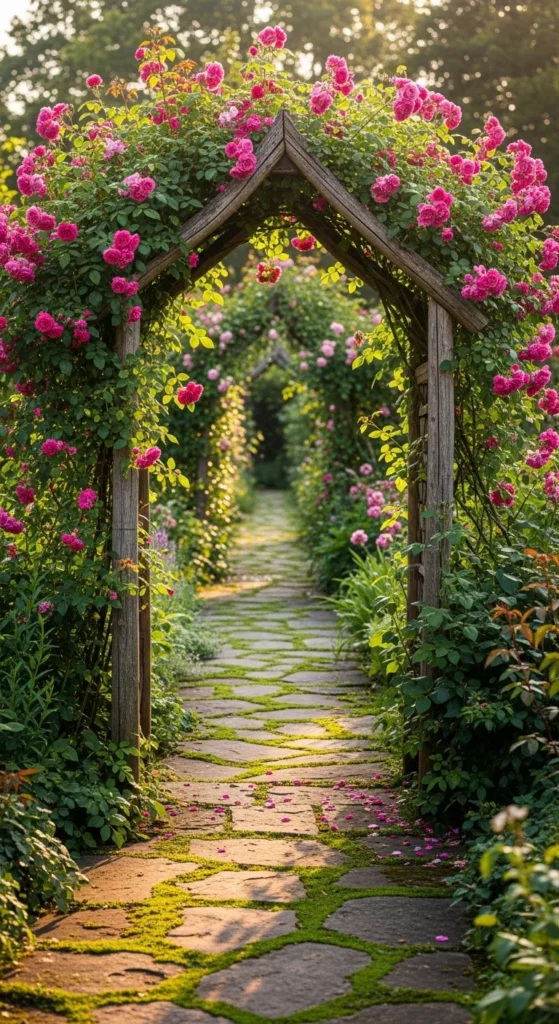
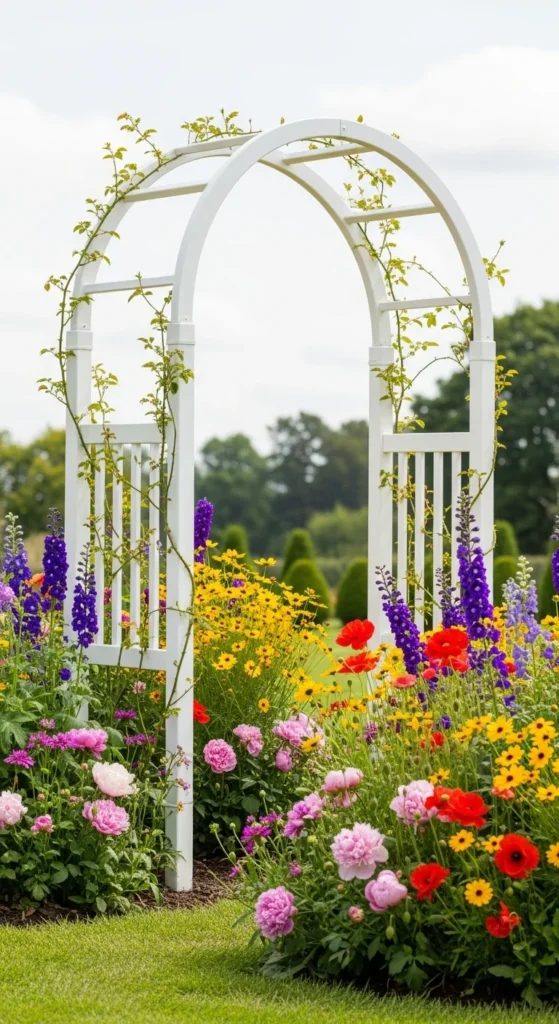
There’s something timeless and magical about a garden arch. Whether it’s covered in fragrant roses, sweet peas, or ivy, an arch instantly transforms your garden from simple to storybook-beautiful. It creates a sense of height, structure, and romance—and the best part is, you can build one yourself!
Even if you’re not a master carpenter, constructing a sturdy, elegant arch for your climbing plants is easier than you might think. With a few tools, some creativity, and a free afternoon, you can create a focal point that will grow more charming every season.
Here’s how to build a garden arch that looks gorgeous and lasts for years.
Step 1: Choose the Perfect Spot
Before picking up your tools, decide where your arch will make the biggest impact.
Ideal spots for a garden arch:
- Over a pathway or garden entrance to create a welcoming gateway
- Framing a bench or seating area for a romantic nook
- Between raised beds or vegetable patches to separate spaces beautifully
Make sure your spot gets enough sunlight for your chosen climbing plants—most thrive in 6+ hours of full sun daily.
Pro Tip: Place your arch where you can see it from your home’s windows—it’ll bring the garden view to life even from indoors.
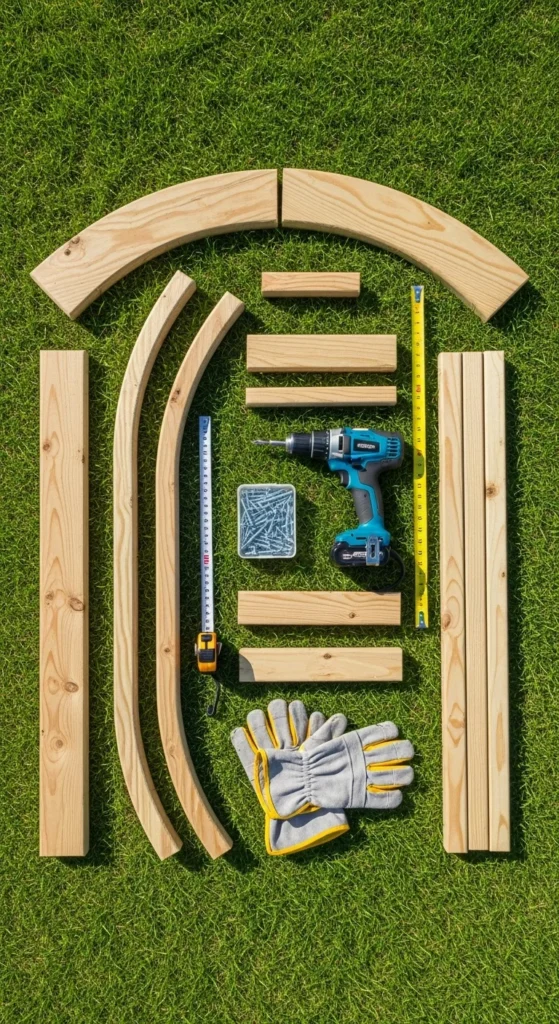
Step 2: Gather Your Materials
You can make a garden arch from wood, metal, or PVC pipe—each has its charm. For a rustic, natural look, wood is the most popular and easiest to work with.
What you’ll need (for a simple wooden arch):
- 4 sturdy wooden posts (2×2 or 4×4 lumber, about 8 feet tall)
- 2 cross beams for the top (about 3–4 feet long each)
- Screws or galvanized bolts
- Post anchors or concrete for stability
- Drill and screwdriver
- Measuring tape and level
Optional but beautiful additions:
- Decorative lattice panels or trellis sides for vines to climb
- Outdoor wood stain or sealant to protect from weather
Pro Tip: Cedar or redwood are great choices—they’re naturally resistant to rot and insects.
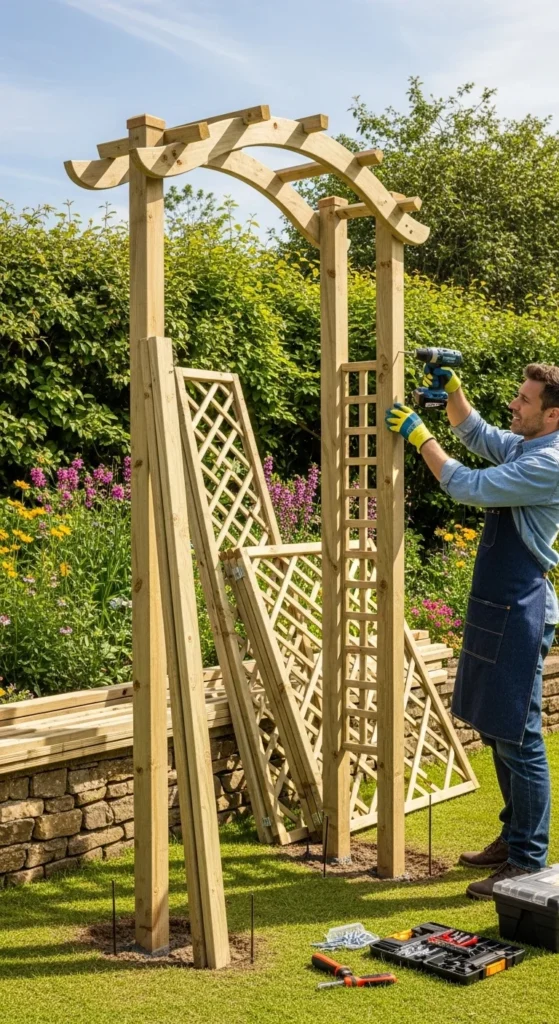
Step 3: Build the Frame
Now the fun part—assembling your arch! Don’t worry, it’s simpler than it looks.
Step-by-step:
- Mark your spots. Measure the distance between the two sides of your arch (typically 3–4 feet). Mark where each post will go.
- Install the posts. Dig holes about 18–24 inches deep and set your posts in concrete, or use metal post anchors if you prefer not to dig.
- Attach the crossbeams. Once the posts are level and secure, connect the tops with your crossbeams to form the archway shape.
- Add lattice sides (optional). Screw or nail decorative trellis panels to the sides for extra support and style.
Let everything dry or settle for 24 hours before adding plants.
Pro Tip: If you want a curved arch instead of square, use flexible metal rods or PVC pipes bent over the top and secured to each post—simple and stunning!
Step 4: Secure and Style It
Once your arch is standing tall, it’s time to make it look polished and ensure it’s sturdy enough to support climbing plants.
Tips for stability and style:
- Use brackets or corner braces to reinforce joints.
- Add decorative finials or caps to the tops of posts for a finished look.
- Paint or stain the wood to match your garden style—natural wood for rustic charm, or white for a cottage-garden feel.
Pro Tip: Anchor your arch deeper if you plan to grow heavy vines like wisteria or climbing roses—they can get surprisingly weighty when mature.
Step 5: Choose and Train Your Plants
Now comes the most rewarding part—bringing your arch to life!
Best climbing plants for garden arches:
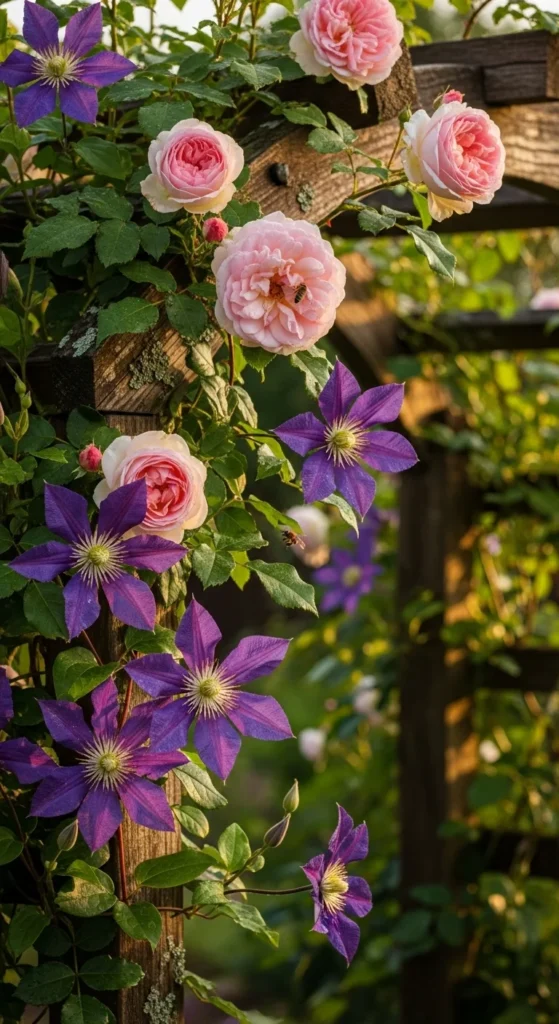
- Roses: Classic and romantic; choose repeat-blooming varieties.
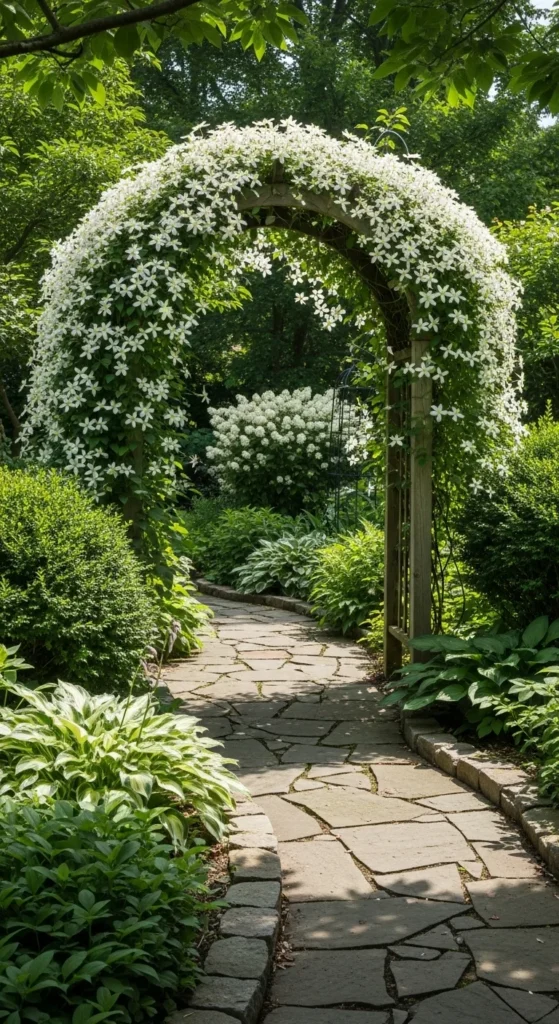
- Clematis: Produces stunning flowers in many colors.
- Morning Glory: Fast-growing and perfect for summer color.
- Jasmine: Adds heavenly fragrance in warm climates.
- Sweet Peas: Lovely pastel blooms with a sweet scent.
To train your plants, gently tie the stems to the arch using soft garden twine or plant clips. As they grow, keep guiding them up and over the structure.
Pro Tip: Combine two plants—like roses and clematis—for an arch that blooms in layers of color and texture.
Step 6: Maintain and Enjoy
Once your arch is complete and your plants are growing, it only takes a little maintenance to keep it looking stunning.
Quick care tips:
- Check for loose screws or wobbling posts every season.
- Prune your climbers to encourage healthy growth and airflow.
- Re-stain or repaint wood every 2–3 years to protect from weather.
By midsummer, your arch will be brimming with greenery and flowers, creating a breathtaking focal point in your garden.
Final Thoughts
A garden arch is more than just a structure—it’s a statement piece that adds personality, height, and romance to your outdoor space. Whether you build it from rustic wood or sleek metal, the joy of watching your plants climb, bloom, and transform it into living art is unmatched.

Leave a Reply