
A trellis is more than just a support system—it’s a way to add beauty and function to your garden. Whether you’re growing climbing beans, cucumbers, or vibrant flowering vines, a trellis helps plants grow tall, saves space, and makes harvesting a breeze. The best part? You don’t need to spend big money at a garden store. With a few basic materials, you can create your own DIY garden trellis in just an afternoon.
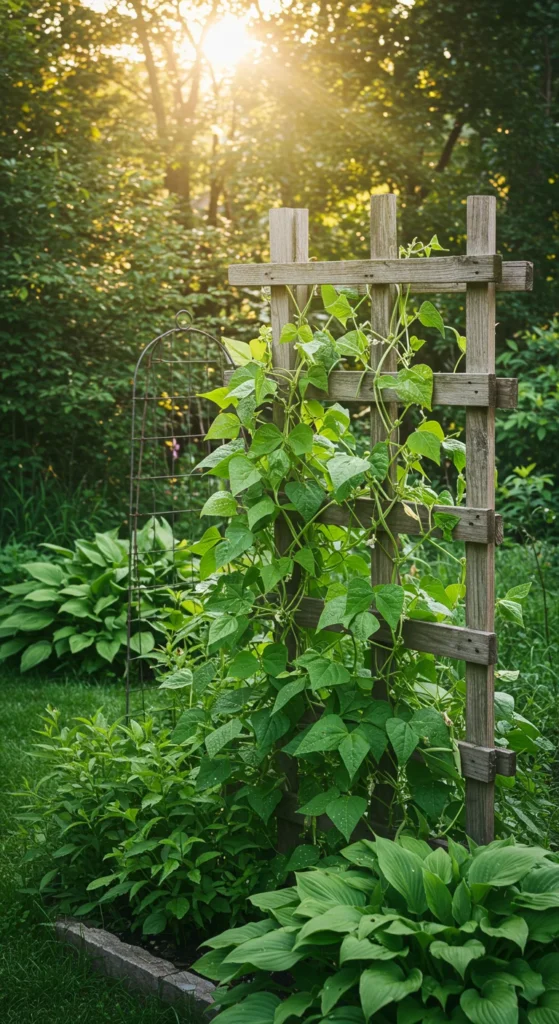
Why Use a Garden Trellis?
A trellis isn’t just for looks—it’s a game-changer for your garden.
- Keeps plants off the ground, reducing rot and pests.
- Improves airflow, which means healthier, stronger plants.
- Saves garden space by letting plants grow vertically.
- Adds a touch of charm to any outdoor area.
If you’re short on space or simply want a neat, tidy garden, a trellis is your best friend.
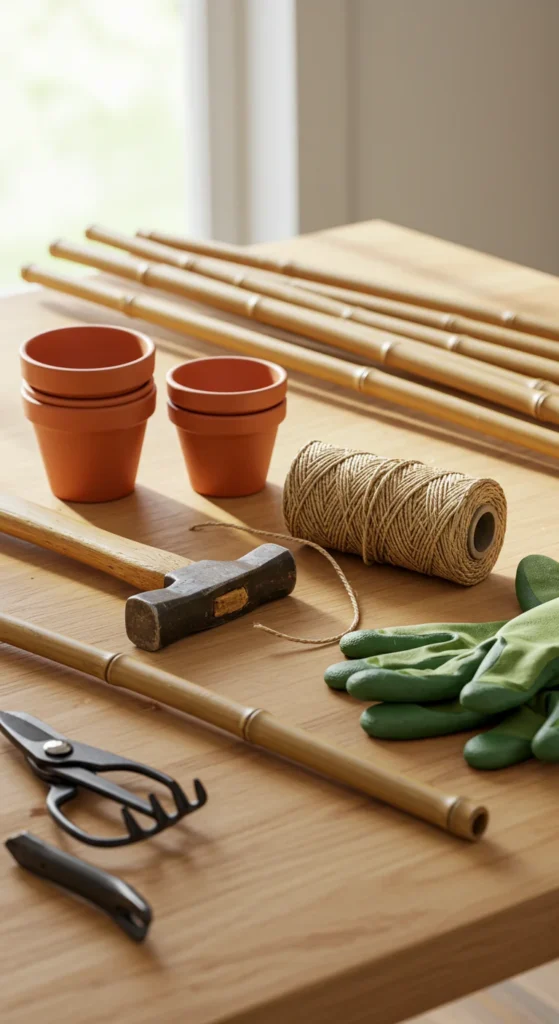
Gather Your Materials
Building a trellis doesn’t require fancy tools. Here’s what you’ll need for a simple design:
- Wooden stakes or bamboo poles (4–6 feet tall)
- Garden twine or wire
- Hammer or mallet
- Zip ties or nails (optional for extra strength)
Budget Tip: You can often repurpose items you already have—like old wooden pallets, leftover lumber, or sturdy tree branches.
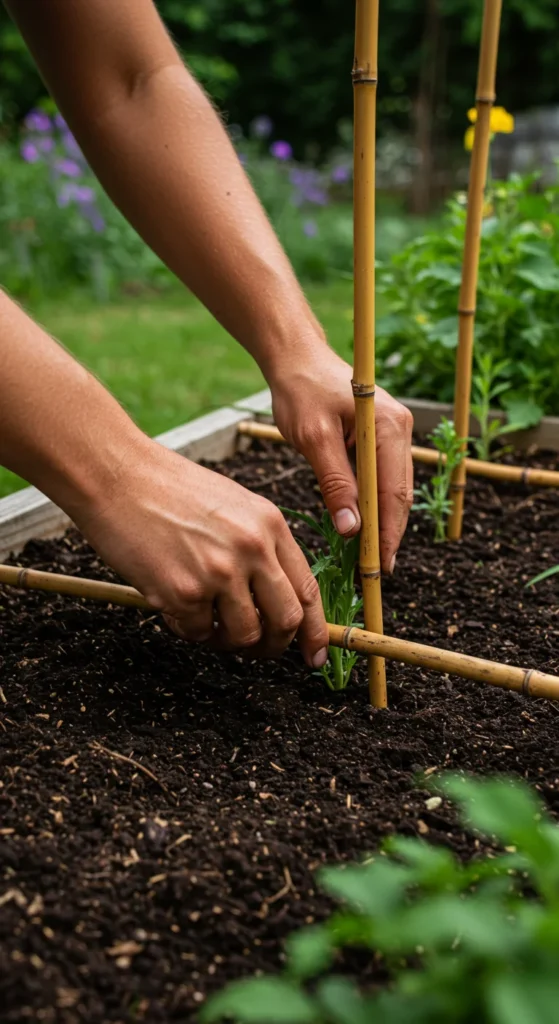
Step 1: Choose the Right Spot
Pick a sunny area where your climbing plants can thrive.
- Place the trellis on the north side of your garden bed so it won’t shade smaller plants.
- Make sure the soil is firm enough to hold the stakes steady.
A good foundation ensures your trellis won’t tip over once plants start climbing.
Step 2: Set Up the Frame
- Push or hammer two stakes into the ground, spacing them about 2–3 feet apart.
- For wider trellises, add more stakes to extend the length.
- Angle the tops slightly inward for stability, or keep them straight for a clean look.
This will form the sturdy backbone your plants need to climb.
Step 3: Add Cross Supports
Now it’s time to connect the frame.
- Use twine, wire, or strips of wood to create horizontal supports every 6–8 inches.
- Tie them tightly to each stake, making a ladder-like structure.
- For extra strength, crisscross the twine to form a net pattern.
This gives plants plenty of places to grab onto as they grow upward.
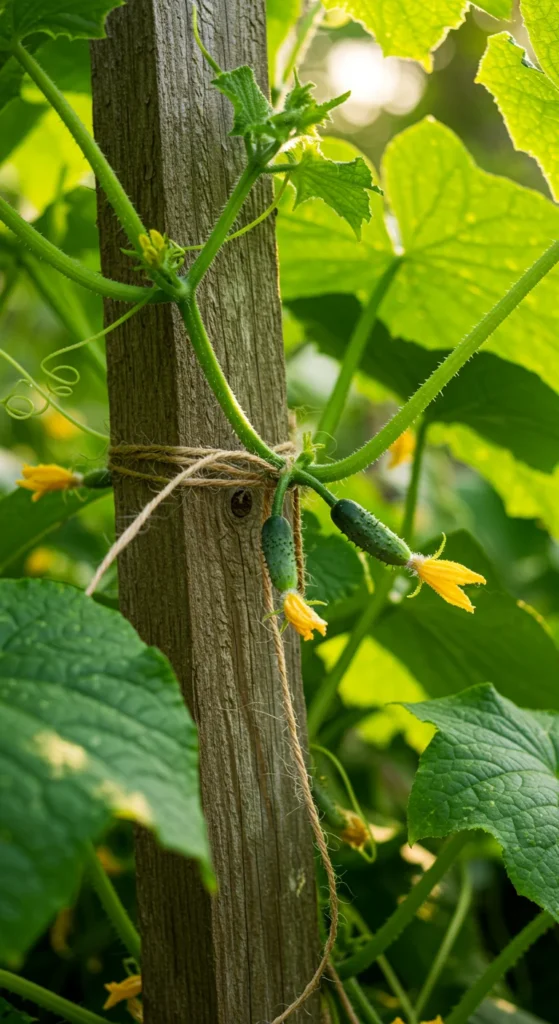
Step 4: Train Your Plants
Once your trellis is ready, guide your plants to climb.
- Gently tie young stems to the trellis with garden twine.
- As they grow, they’ll naturally start climbing and wrapping around the supports.
- Keep an eye on them and redirect any wandering vines.
Creative Variations
Want to get creative? Here are some fun trellis styles to try:
- A-Frame Trellis: Two stakes leaning together like a tent, great for peas and beans.
- Arch Trellis: Perfect for creating a garden walkway covered in vines.
- Recycled Trellis: Use old ladders, headboards, or wire panels for a rustic touch.
These variations add charm while still keeping your plants healthy and organized.
Final Takeaway
Building a DIY trellis is simple, affordable, and incredibly rewarding. With just a few materials, you can create a structure that helps your plants grow strong while adding beauty to your garden.

Leave a Reply