
Hydroponic gardening makes growing food simple, clean, and space-efficient. Instead of soil, plants grow in a nutrient solution supported by net pots and oxygenated water. For beginners, the key is starting small, managing pH correctly, and choosing easy crops like lettuce and basil. These tips break hydroponics into clear, manageable steps so you can build confidence fast and grow healthy plants indoors year-round.
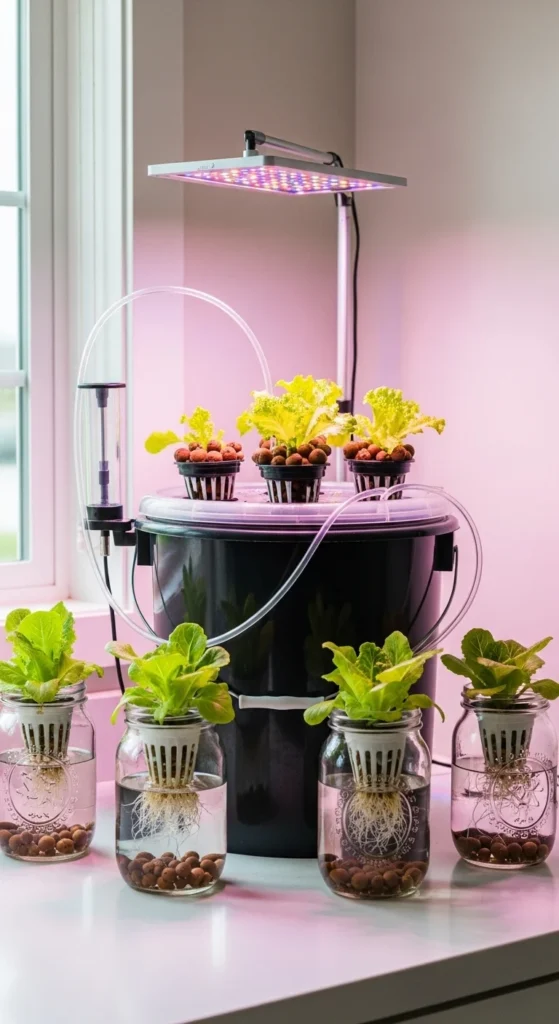
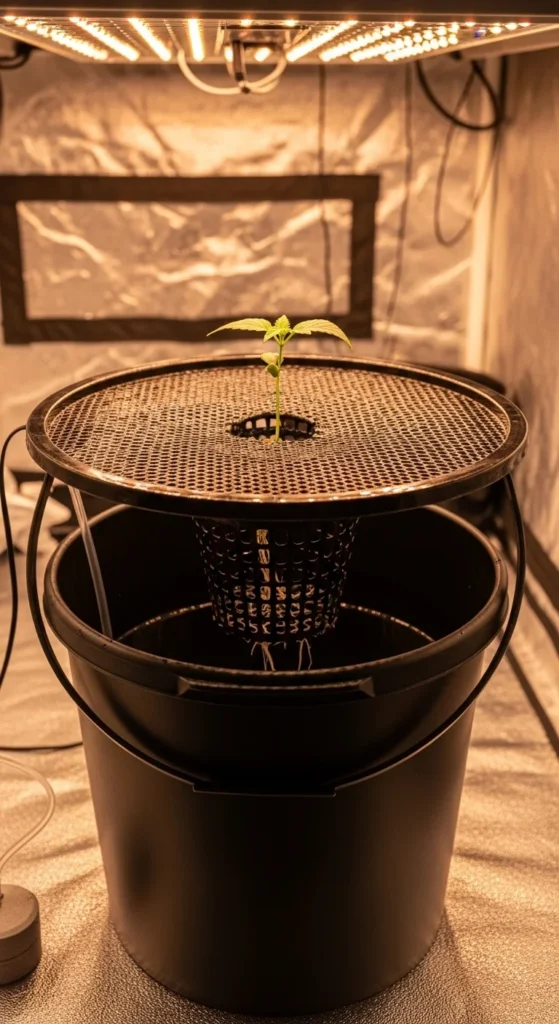
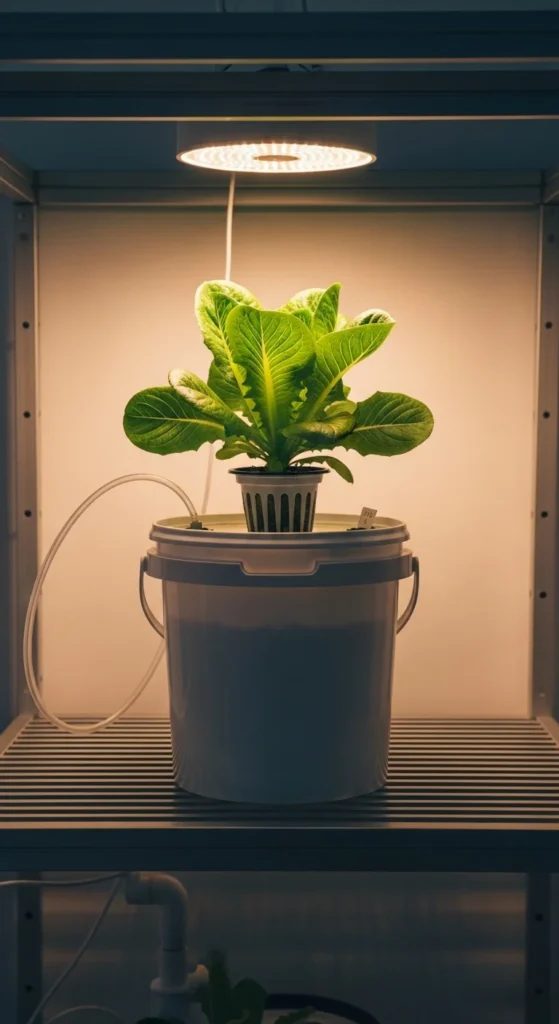
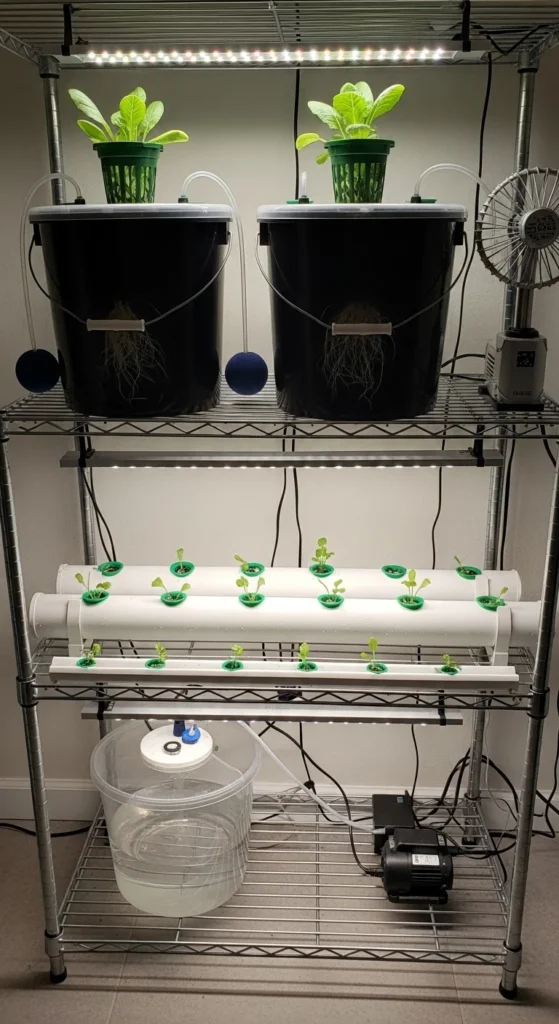
1. Start With a Simple DWC Bucket
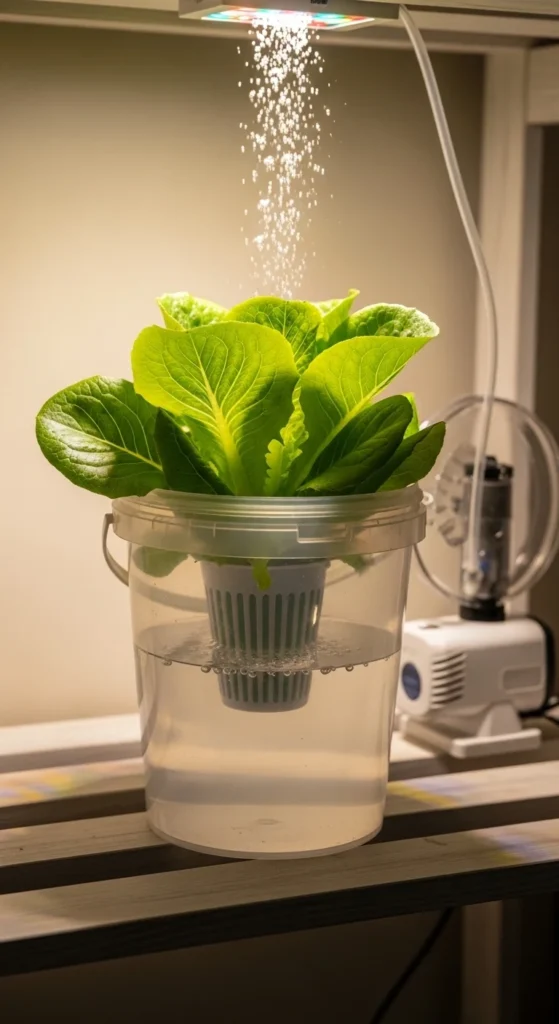
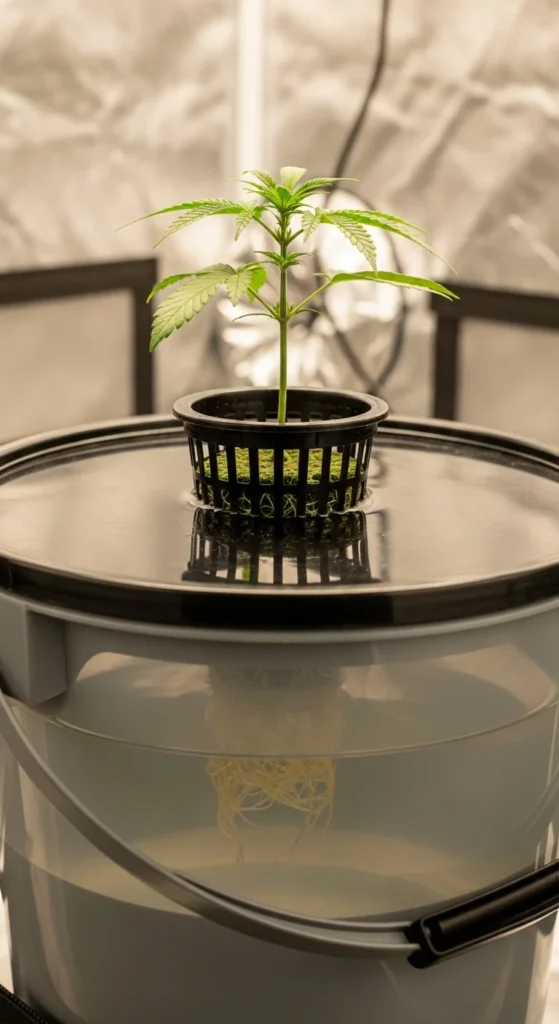
Deep Water Culture is one of the easiest systems to build.
Use an opaque five-gallon bucket with a tight lid. Drill a two-inch hole for a net cup.
Fill the bucket with nutrient solution. Add an air stone connected to a small air pump. The bubbling keeps roots oxygenated.
This system works great for lettuce and basil. Setup takes less than an hour.
Keep water levels steady and change the solution weekly. Rinse the bucket between refills.
Starting with one bucket keeps things manageable and affordable.
2. Try the Kratky Method for Zero Electricity

The Kratky method requires no pump at all.
Fill a jar or bucket with nutrient solution and place a net pot in the lid.
Leave an air gap between the water and the bottom of the net cup. As water drops, roots stretch down while upper roots access oxygen.
Perfect for leafy greens.
Low cost. No wiring.
Great first project for beginners.
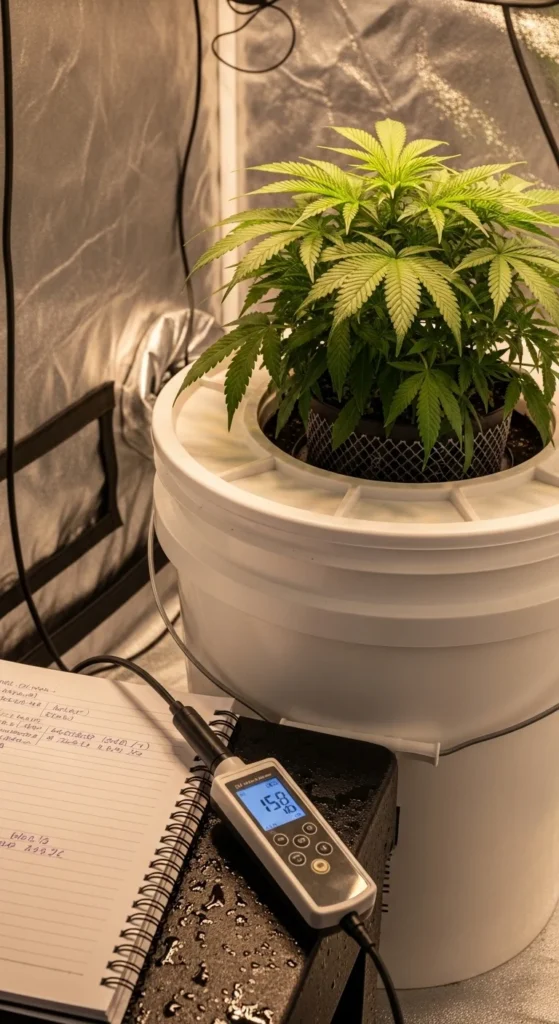
3. Keep pH Between 5.5 and 6.5
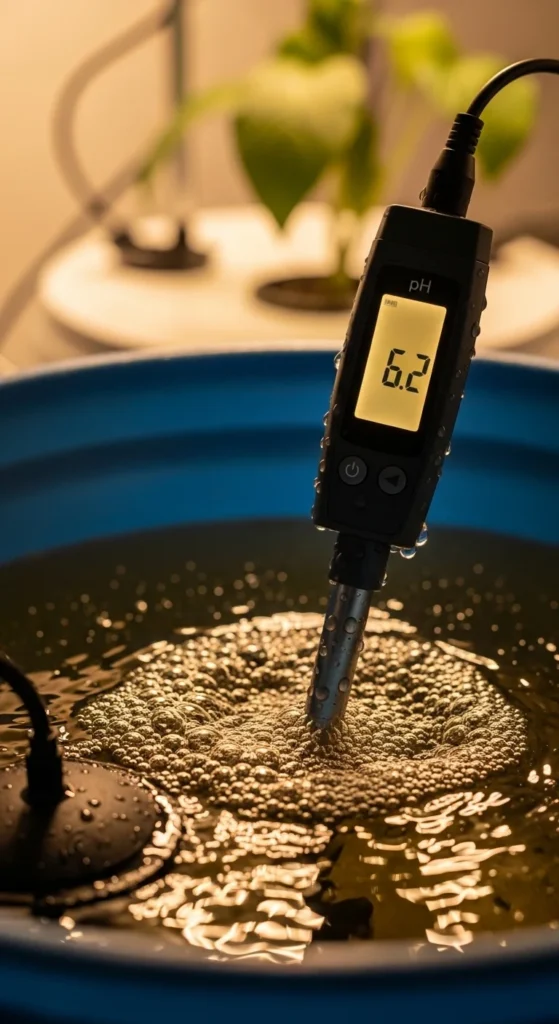
Hydro plants absorb nutrients best between pH 5.5–6.5. Outside this range, nutrient lockout can happen.
Use a simple digital meter or pH drops. Adjust with pH up or down solutions.
Test water every few days.
Small adjustments prevent plant stress and yellow leaves.
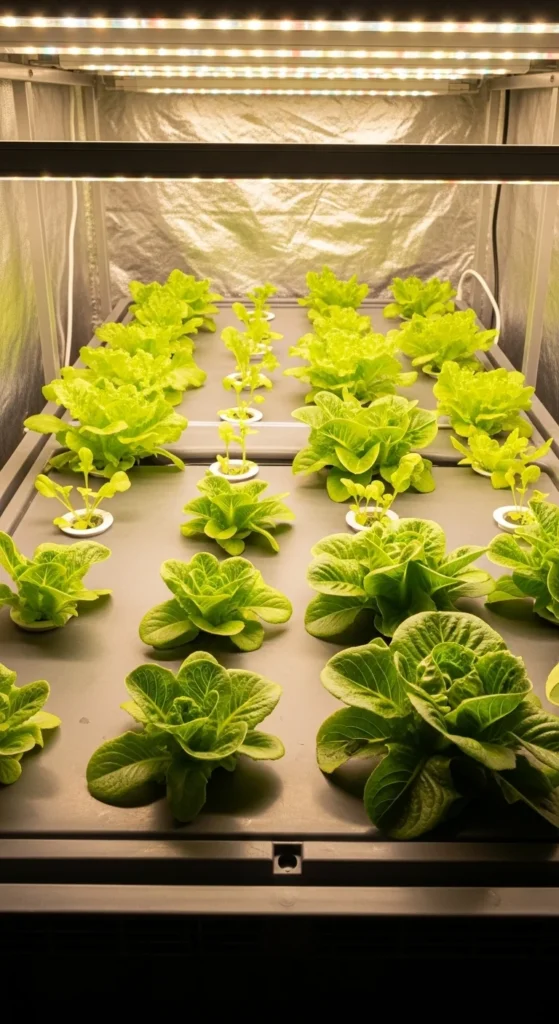
4. Choose Leafy Greens First
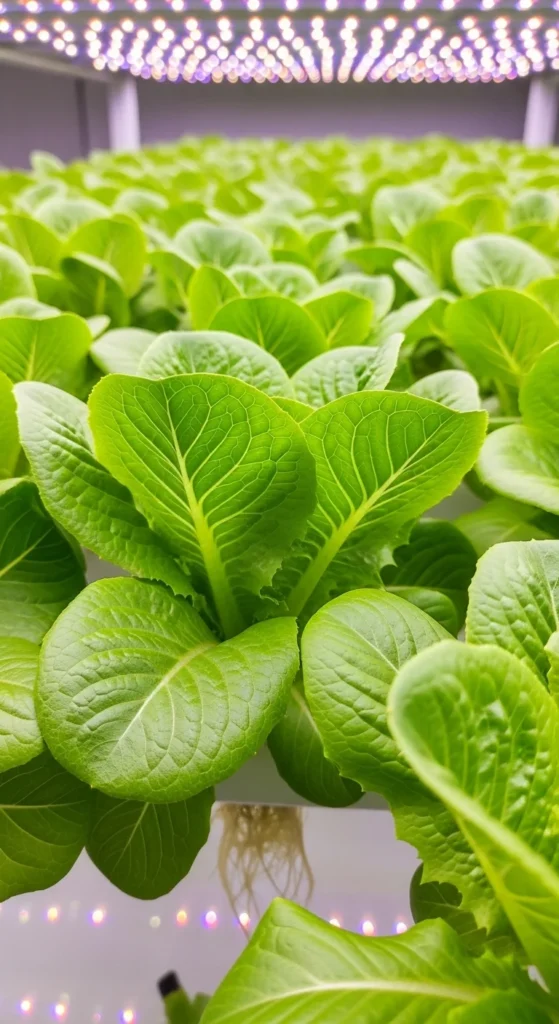
Lettuce, spinach, and basil grow quickly and forgive small mistakes. Many are ready to harvest in about 30 days.
Start with easy crops. Gain experience. Expand later.
Quick results keep motivation high.
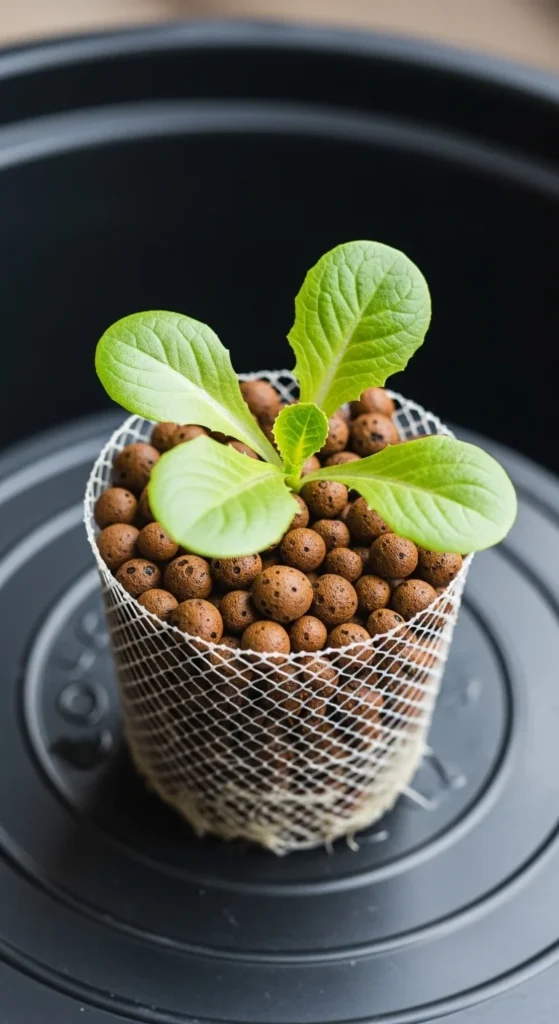
5. Use Rockwool Cubes for Seed Starting
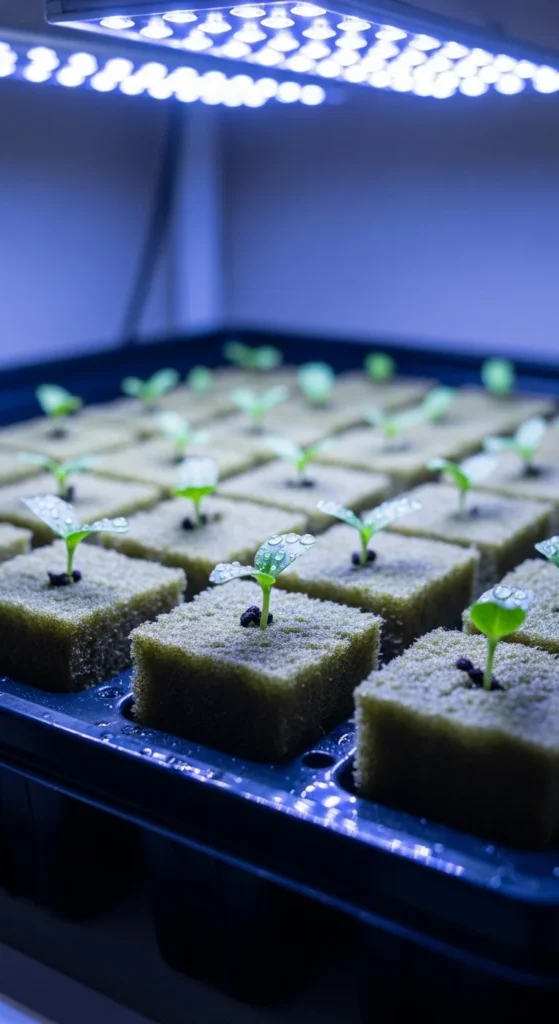
Soak rockwool cubes in pH-balanced water before planting seeds.
Place one seed per cube. Keep moist until sprouting.
Once roots appear, move cubes into net pots filled with clay pebbles.
This gives seedlings strong support.
6. Install LED Grow Lights
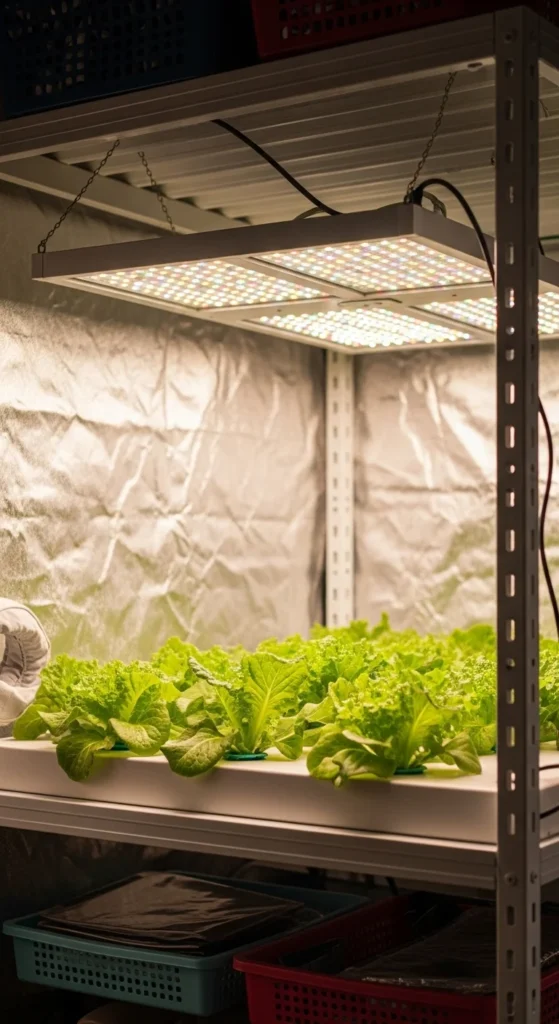
Indoor plants need 16–18 hours of light daily.
Full-spectrum LED grow lights are energy-efficient and affordable.
Hang lights a few inches above plants.
Use a timer so cycles stay consistent.
7. Add an Air Stone for Root Health
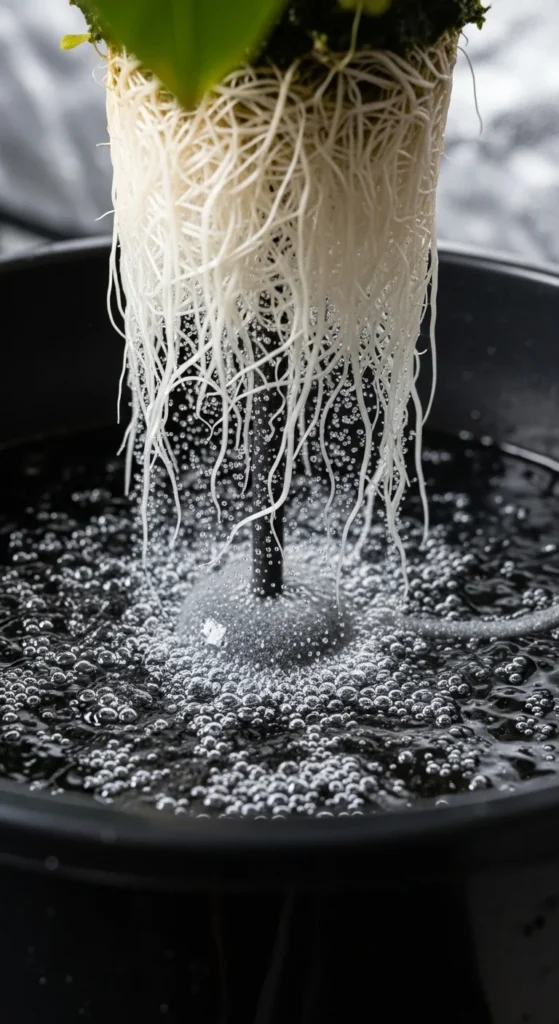
Roots require oxygen.
An air stone connected to an air pump prevents root rot and stagnation.
The bubbling keeps water moving and roots healthy.
Simple but powerful upgrade.
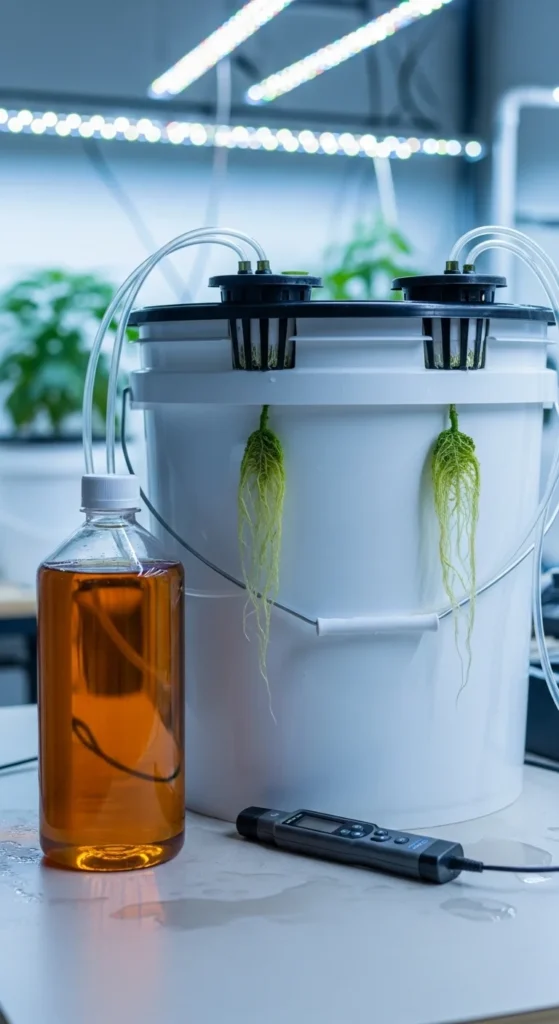
8. Mix Nutrients Slowly and Thoroughly
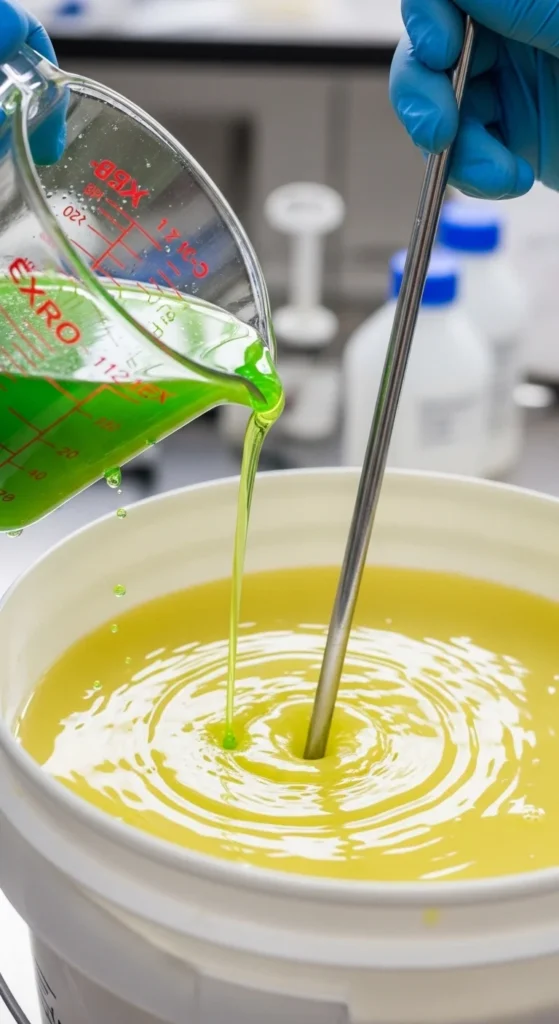
Add nutrients one part at a time. Stir between each addition.
Follow seedling dosage first. Increase gradually as plants mature.
Overfeeding causes leaf burn.
Careful mixing keeps plants balanced.
9. Use Net Pots With Clay Pebbles
Net pots hold plants securely in place.
Clay pebbles support stems while allowing water flow.
They are reusable and easy to rinse clean.
Simple support prevents tipping.
10. Try a Wick System for Simplicity

A wick system uses cotton rope to draw solution upward into growing medium.
No pump required.
Great for herbs and small plants.
Low cost and beginner-friendly.
11. Monitor Weekly
Set a weekly routine.
Check pH. Top off water. Inspect roots.
Regular checks prevent bigger problems later.
Simple habits keep systems running smoothly.
12. Maintain Ideal Temperatures
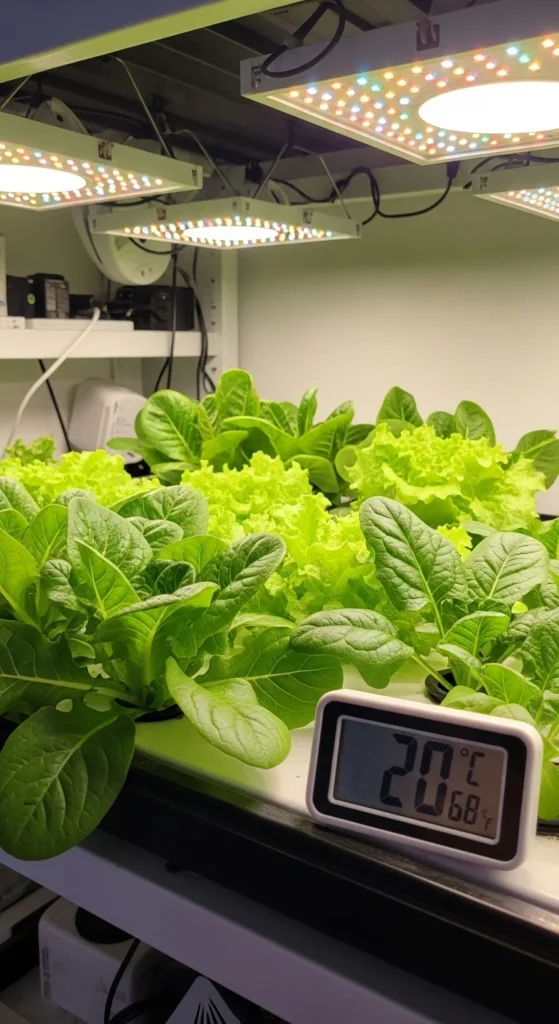
Most greens grow well between 18–24°C.
Use a small fan for airflow.
Good circulation reduces mold and keeps leaves strong.
13. Block Light From Reservoirs
Light hitting nutrient solution encourages algae.
Use opaque buckets or wrap containers with foil.
Dark reservoirs stay cleaner.
14. Start With One Plant
Try growing one plant first.
Learn how water levels change and how roots look.
Then expand.
Small beginnings build confidence.
15. Follow 6–8 Inch Spacing
Crowding plants reduces airflow and growth.
Space net pots six to eight inches apart.
Healthy spacing improves harvest quality.
16. Clean Equipment Regularly
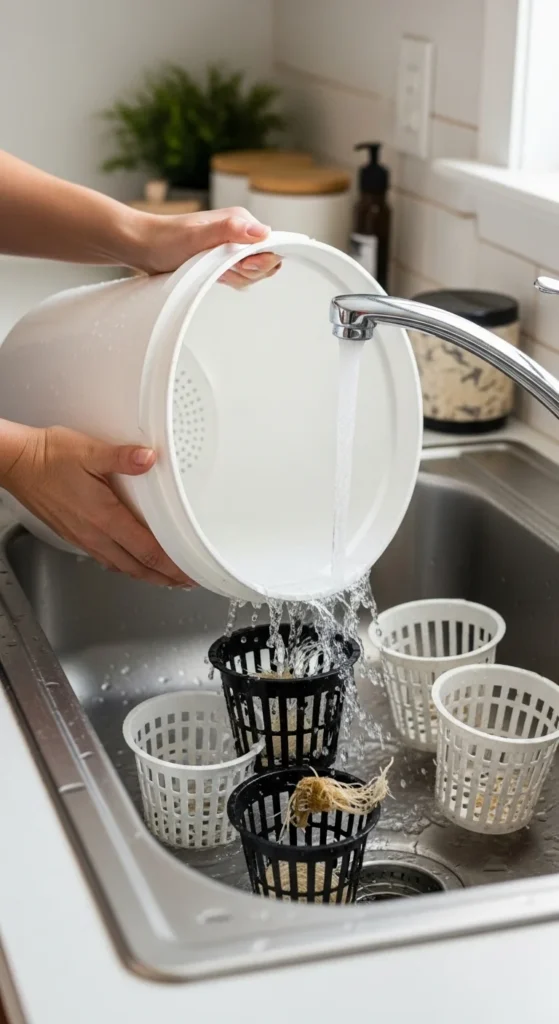
Rinse buckets and net pots with mild soap between cycles.
Remove residue.
Clean tools reduce disease risk.
17. Use Trusted Nutrients
Beginner formulas from brands like General Hydroponics are easy to follow.
Start with simple mixes.
Stick to instructions.
Consistency matters.
18. Consider a Starter Kit
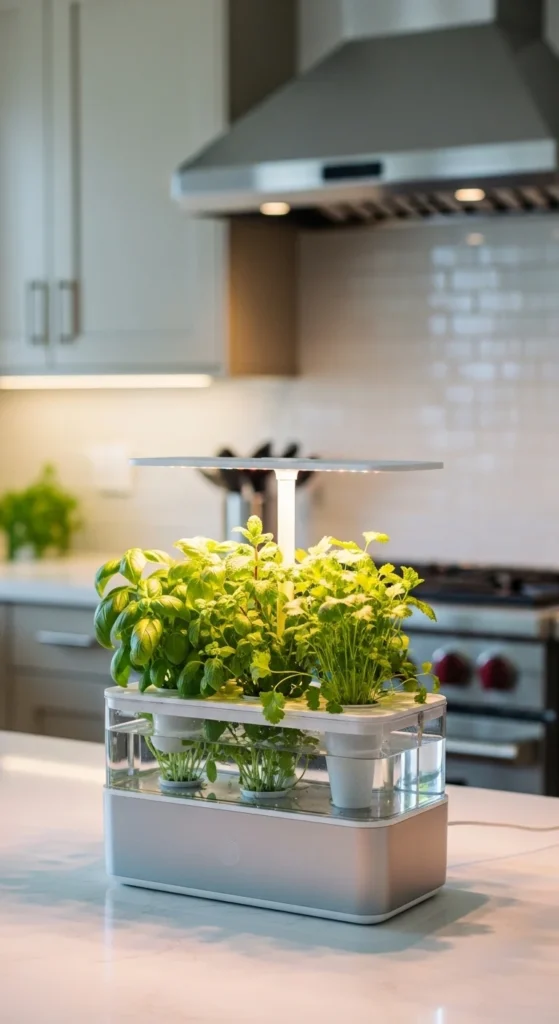
Plug-and-play systems such as AeroGarden Harvest simplify setup.
Pods, lights, and pumps come included.
Great for kitchens and small spaces.
19. Try Budget-Friendly Systems

Brands like iDOO offer simple indoor systems at lower prices.
Look for adjustable lights and timers.
Affordable entry point for beginners.
20. Plan for Modular Growth

Systems like Rise Gardens allow expansion later.
Start small. Add sections as needed.
Scalable setups grow with your experience.
21. Track Light Cycles With Timers
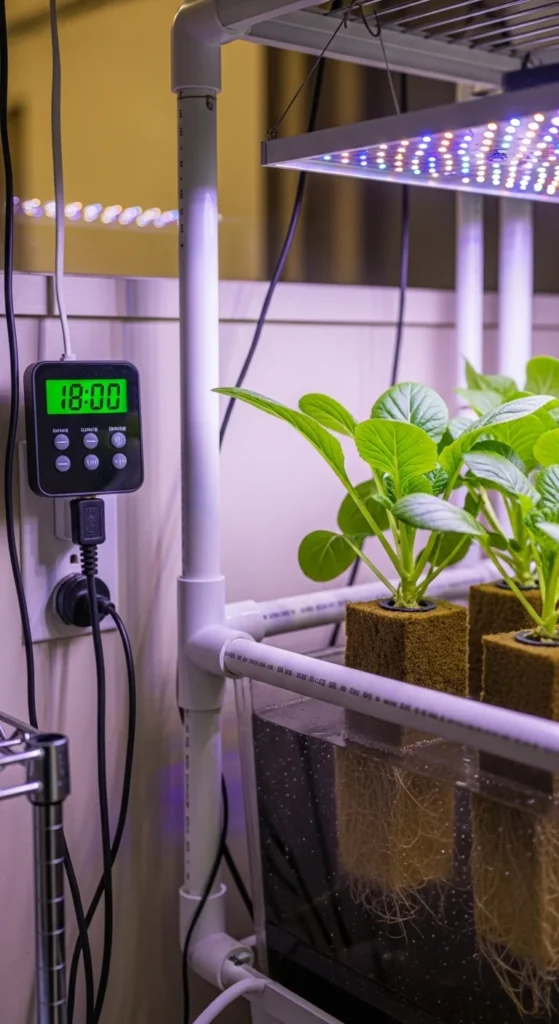
Automated timers keep light cycles consistent.
Plants respond well to steady schedules.
Simple timer plugs are inexpensive and reliable.
22. Watch Roots Weekly
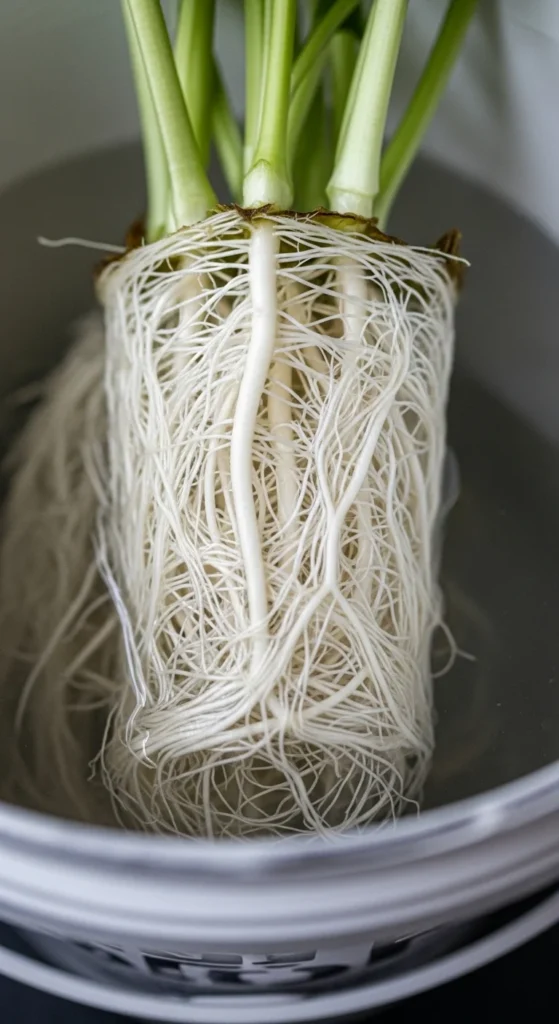
Healthy roots look white and firm.
Brown or slimy roots indicate trouble.
Regular inspection helps you act early.
23. Avoid Overfilling Water
Keep water just below the net pot bottom.
Roots need both water and air.
Too much water reduces oxygen access.
24. Expand Slowly After Success
Once one system runs smoothly, add another.
Try a tote or PVC pipe.
Build gradually.
Experience makes each new step easier.
Conclusion
Hydroponic gardening becomes simple when you start small, monitor pH, provide steady light, and focus on easy crops. Buckets, jars, and basic tools are often enough. With regular checks and clean equipment, plants grow quickly and reliably. Take one step at a time, learn how your system responds, and expand when you feel comfortable. Fresh greens indoors can become part of your routine all year long.

Leave a Reply