
Backyard composting works best when it fits your space and your routine. Some people want speed (hot piles, tumblers). Others want “low effort” (cold piles, trench composting). The good news is you can make great compost with kitchen scraps and yard waste if you keep airflow, moisture, and the 3:1 browns-to-greens balance in mind. Use this list to pick one method today, then add one simple upgrade that makes it easier to stick with.
1. Open Pile on Bare Soil
This is the simplest start. No bin required. The ground helps microbes and worms move in.
- Make a pile at least 3 feet wide for better heat.
- Keep it on bare soil, not concrete.
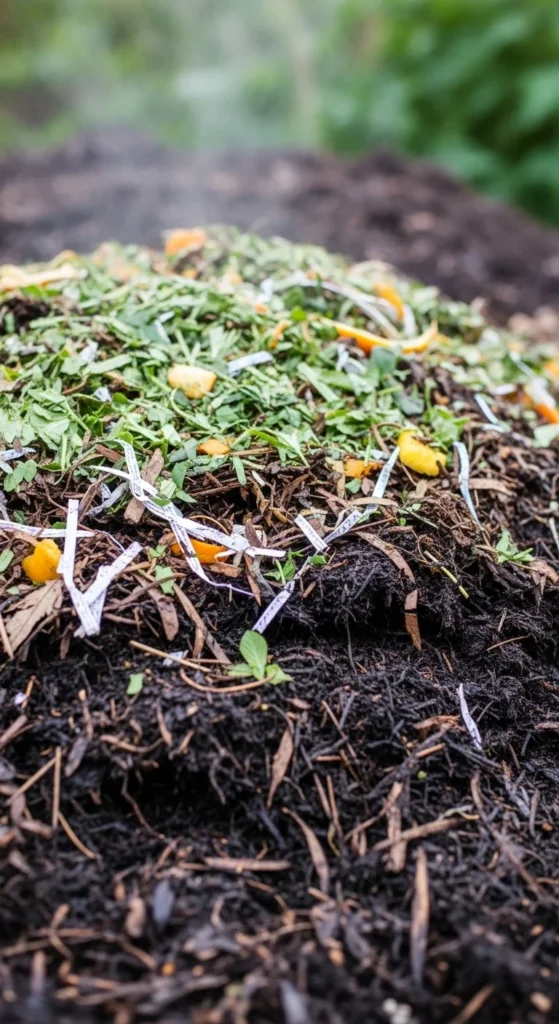
- Add layers:
- 3 parts browns (dry leaves, cardboard)
- 1 part greens (scraps, grass)
Budget-friendly tip:
- Use free leaves from neighbors in fall. Bag them dry and store.
Easy routine:
- Add scraps, then cover with a brown “blanket.”
- Turn with a garden fork every 1–2 weeks if you want faster results.
If odors show up, it’s usually too wet or too many greens. Add shredded cardboard and mix. If it looks dusty and dry, water lightly while turning until it feels like a wrung-out sponge.
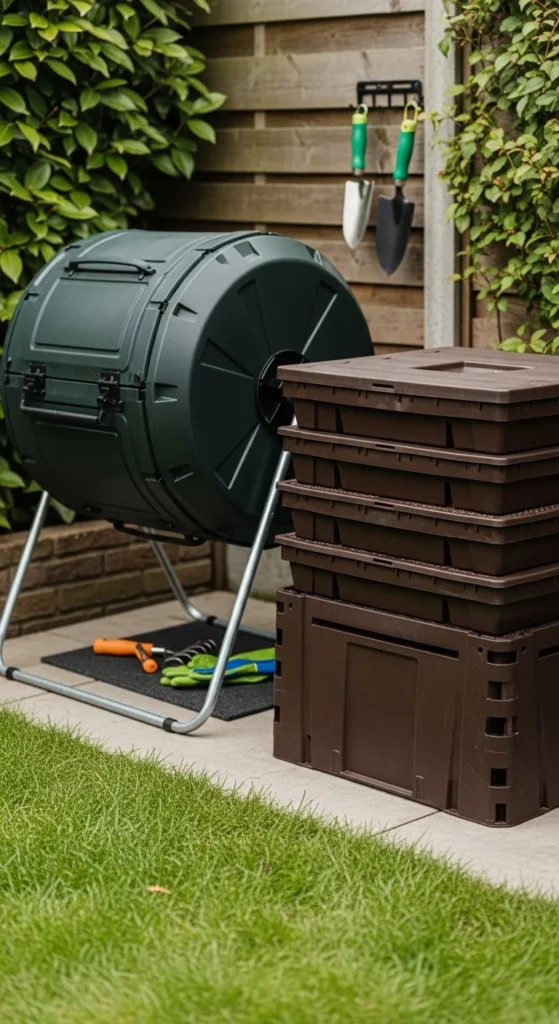
2. One-Bin Pallet Compost Box
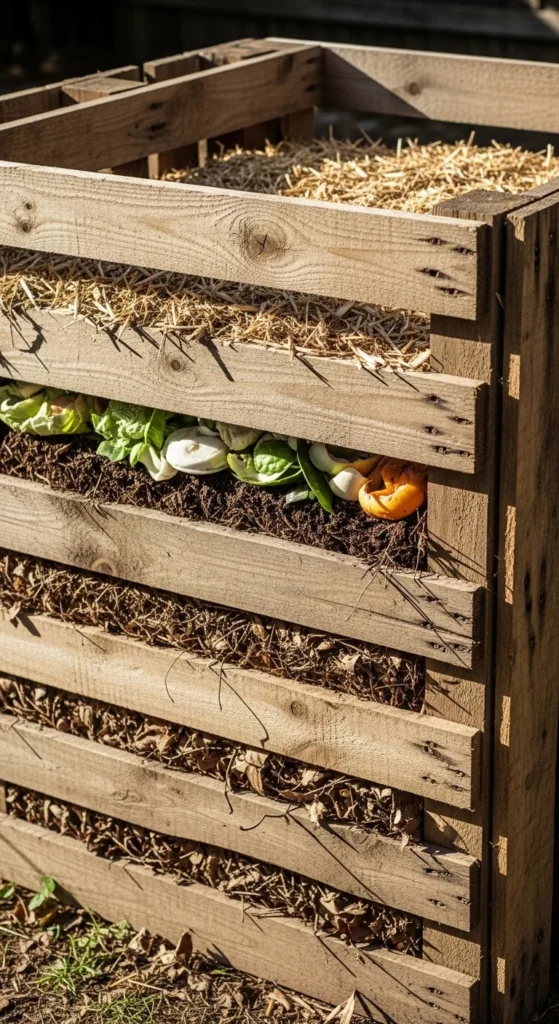
Pallet bins keep the pile tidy and improve airflow through the sides.
- Use 3 pallets for sides and back.
- Wire or screw them together at corners.
- Leave the front open for turning access.
Budget-friendly tip:
- Ask local shops for pallets. Pick solid ones that feel sturdy.
Use it well:
- Keep a bin of browns nearby.
- Every kitchen bucket gets covered with dry leaves or cardboard.
Turning becomes easier when the pile stays contained. You can fork from the front and push material back. If pests are a concern, staple hardware cloth along the bottom half of the inside walls.
3. 3-Bin Pallet Rotation System

This method keeps compost flowing so you don’t run out.
- Bin 1: fresh adds
- Bin 2: active pile you turn
- Bin 3: finished compost
Budget-friendly tip:
- Build one bin now, add the other two later.
Simple workflow:
- Start filling Bin 1.
- When it’s full, turn it into Bin 2.
- When Bin 2 looks dark and broken down, move it to Bin 3.
This setup is great for suburban yards with steady leaf and grass input. It also keeps you from mixing fresh scraps into finished compost.
4. Wire Fence Circle Bin
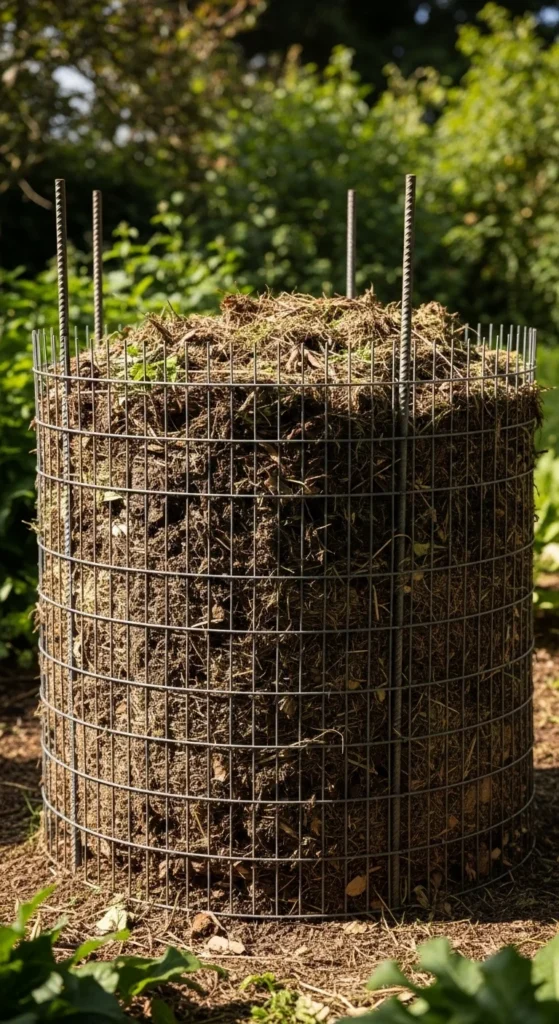
A wire circle is fast to build and has excellent airflow.
- Form a 3–4 foot diameter circle.
- Clip ends together.
- Stake it so it doesn’t bulge.
Budget-friendly tip:
- Use welded wire fencing. It lasts longer than thin chicken wire.
How to compost in it:
- Keep it slightly damp.
- Add browns after every greens add.
- Turn by unclipping one side and re-wrapping.
This bin shines for leaves and garden waste. If you add many food scraps, bury them in the center and cover with browns to avoid smells.
5. Aerated Static Pile With PVC Pipes
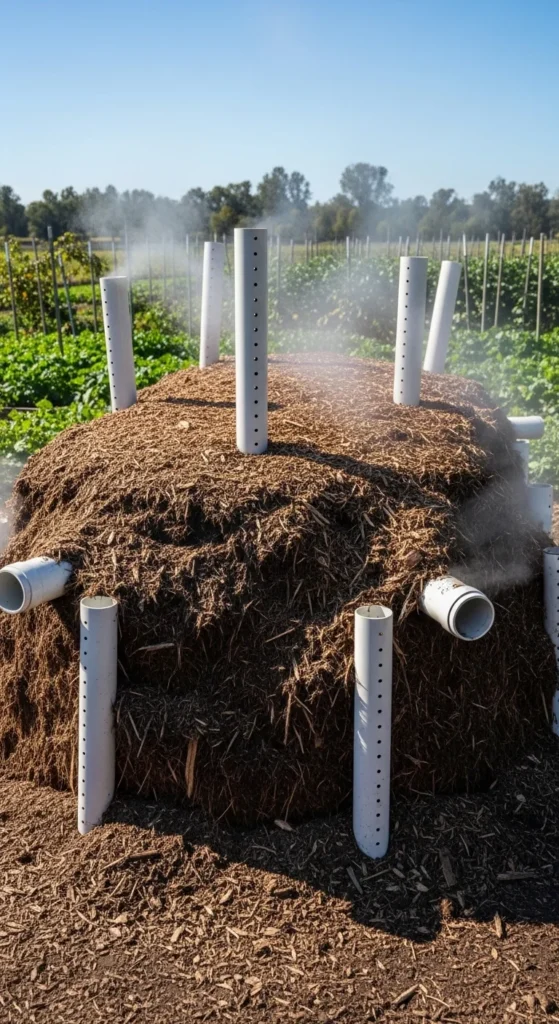
If turning is hard, pipes bring air into the pile.
- Drill holes along PVC pipes.
- Lay them under and through the pile.
- Build compost on top.
Budget-friendly tip:
- Use leftover PVC from home projects.
Why it helps:
- More oxygen without constant turning.
- Less odor when balanced well.
Add a simple cover (tarp or cardboard) to hold moisture. Check monthly. If the pile is soggy, add browns and loosen the top layer with a fork.
6. Compost Tumbler for Quick Mixing
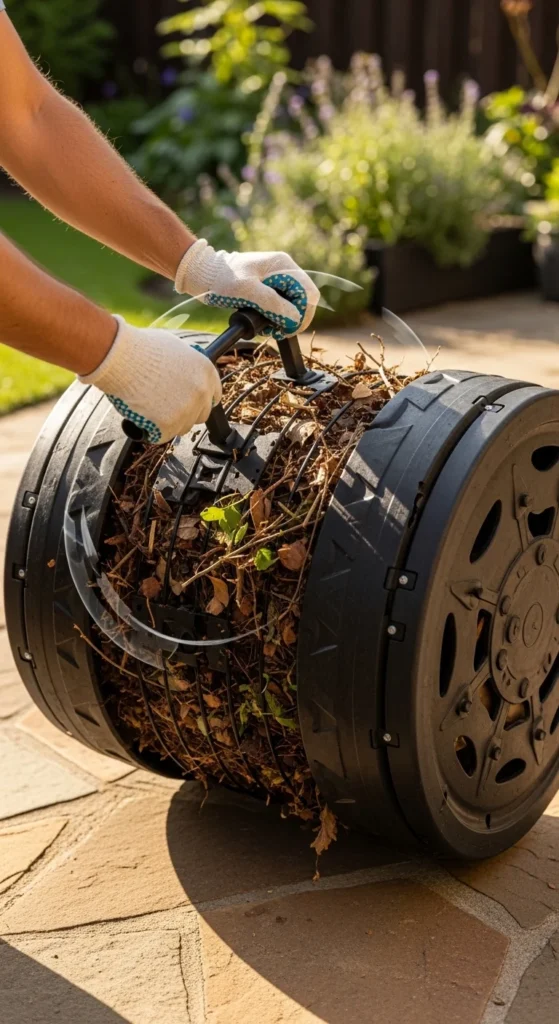
Tumblers are popular for speed and pest control. You spin instead of fork-turn.
- Keep it two-thirds full.
- Spin every 2–4 days.
- Balance inputs with 3:1 browns to greens.
Budget-friendly tip:
- Make browns easy: shred cardboard and store it dry in a tote.
Best for:
- Kitchen scraps
- Small yards
- People who want less mess
If the tumbler gets slimy, add dry leaves and spin. If it stalls, add a handful of grass clippings and a bit of water, then spin again.
7. DIY Rolling Trash Can Tumbler
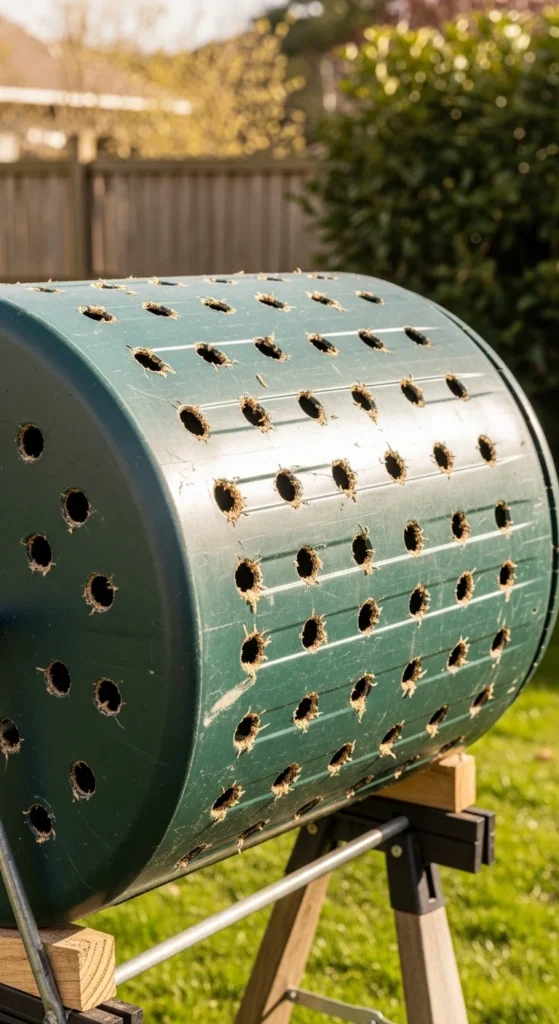
A heavy-duty trash can becomes a budget tumbler.
- Drill ventilation holes around the sides and lid.
- Add screened vents for pest control.
- Roll it on the ground every few days.
Budget-friendly tip:
- Find a used can locally and sanitize it.
Make it easier:
- Don’t add too many wet scraps at once.
- Add shredded cardboard with every kitchen load.
This works best for small batches. It’s also a good “starter” method while you learn your scrap volume.
8. Covered Pile for Faster Breakdown
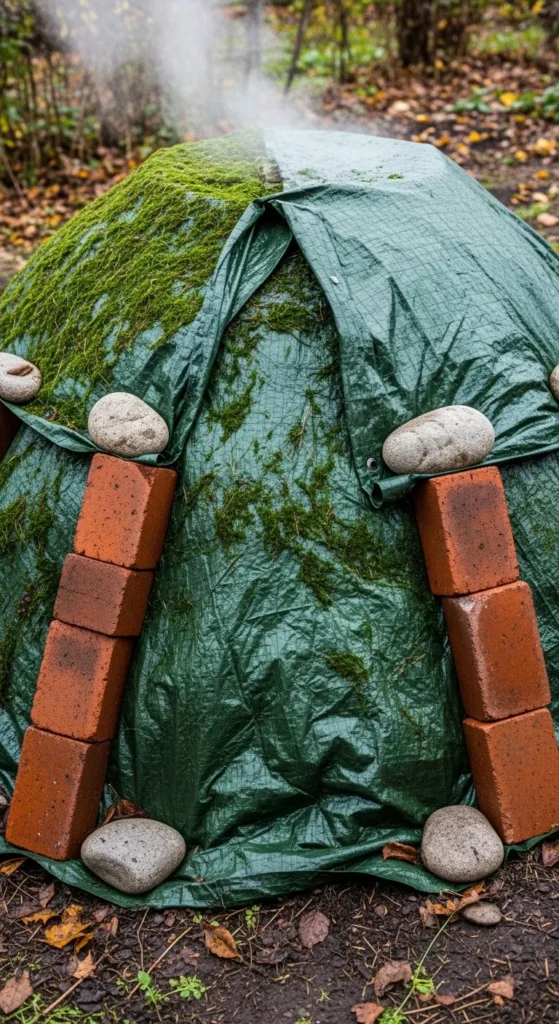
Covering helps compost stay warm and evenly moist.
- Use a tarp, old rug, or flattened cardboard.
- Weight edges with bricks.
- Leave some side airflow.
Budget-friendly tip:
- Cardboard sheets are free and compostable.
What it solves:
- Heavy rain sogginess
- Summer drying
- Winter heat loss
Lift the cover weekly to check moisture. If it smells sour, add browns and turn. If it’s dry, water lightly while mixing.
9. “Chop Small” Speed Method
Smaller pieces break down faster. This is a method you add to any system.
- Chop kitchen scraps before adding.
- Shred cardboard and paper.
- Mow over leaves to break them up.
Budget-friendly tip:
- Use a simple leaf rake and lawn mower pass to shred leaves.
Easy results:
- Faster heating
- Less turning effort
- Smoother, finer compost
If you want speed but don’t want extra gear, this is the simplest upgrade you can do.
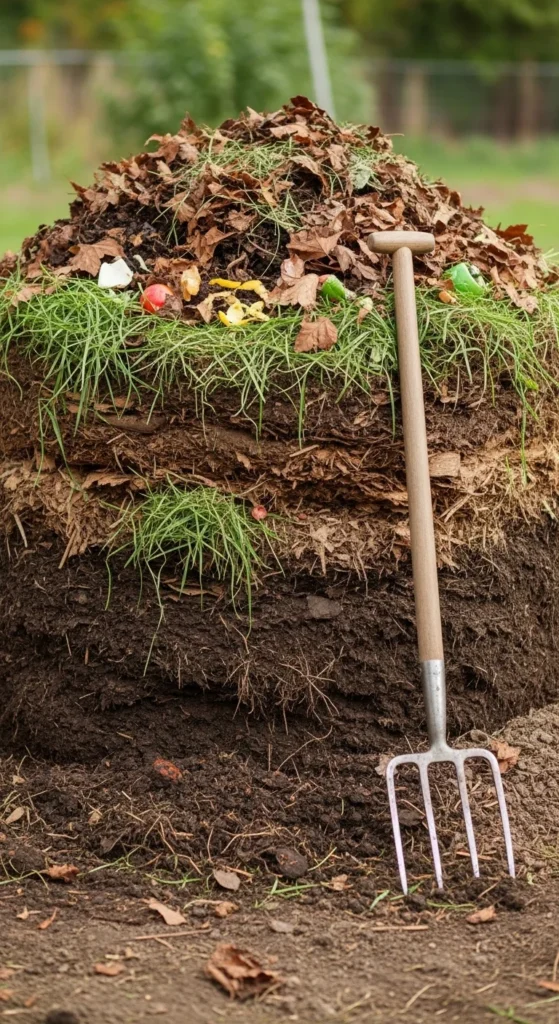
10. 3:1 Layered “Lasagna” Composting

This is a no-fuss method that uses layers instead of constant mixing.
- 3 buckets browns
- 1 bucket greens
- Repeat
Budget-friendly tip:
- Save paper bags and tear them up for browns.
How to keep it working:
- Keep it moist like a wrung sponge.
- Add a brown top layer each time.
You can turn it later if you want faster compost. Or leave it as a slower, steady pile that doesn’t stink when the ratio is right.
11. Hot Composting (Active Pile)
Hot composting is for speed. It takes more effort, but it finishes faster.
Basics:
- Big pile: about 3x3x3 feet
- Balanced mix: 3:1 browns to greens
- Turn when the center cools
Budget-friendly tip:
- Use dry leaves as your main brown. Store them in bags.
Helpful habits:
- Water while building the pile if materials are dry.
- Turn every few days during the hottest phase.
You’ll know it’s working when the pile warms up and breaks down quickly. If it never heats, it’s often too small, too dry, or too many browns.
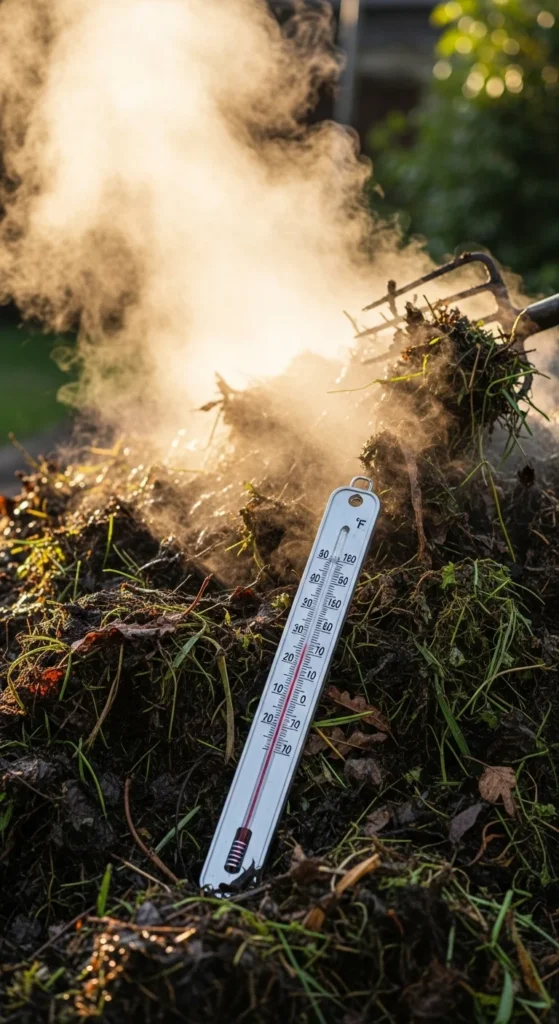
12. Thermometer-Guided Turning

A thermometer turns composting into a simple routine.
- Insert thermometer into the center.
- Turn when temps drop noticeably.
- Add browns if it smells.
Budget-friendly tip:
- If you don’t have a thermometer, use your hand near the center during turning—warmth is a good sign.
This method works with hot piles and bins. It helps you avoid over-turning and helps you learn what your compost “likes.”
13. Trench Composting in Garden Beds
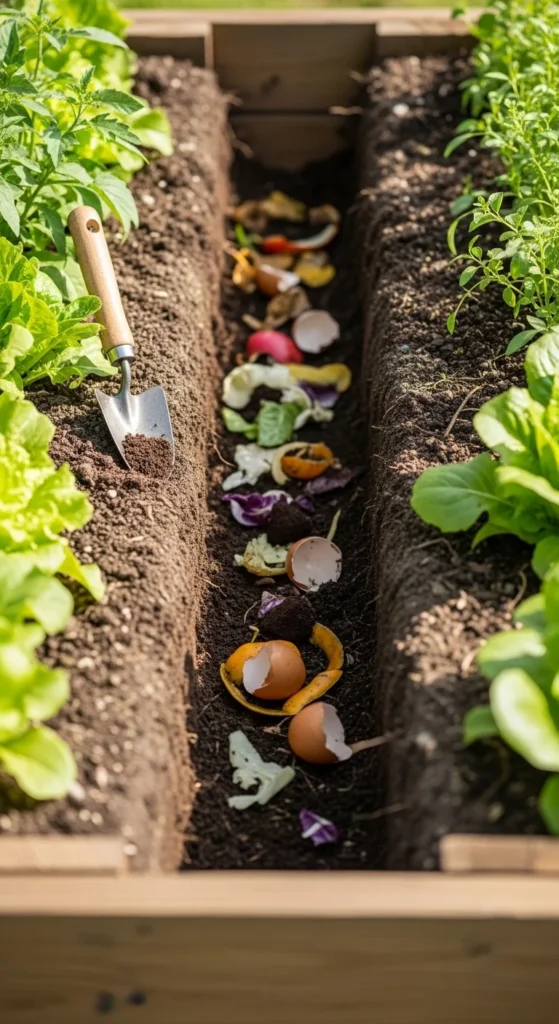
This is composting with almost zero equipment. You bury scraps and let the soil do the work.
- Dig a trench 8–12 inches deep.
- Add scraps.
- Cover fully with soil.
Budget-friendly tip:
- Use this in off-season beds or between rows.
Best for:
- Small yards
- People who don’t want a bin
- Pest-prone areas (since food is buried)
Avoid burying large volumes in one spot. Spread it out in sections so it breaks down evenly.
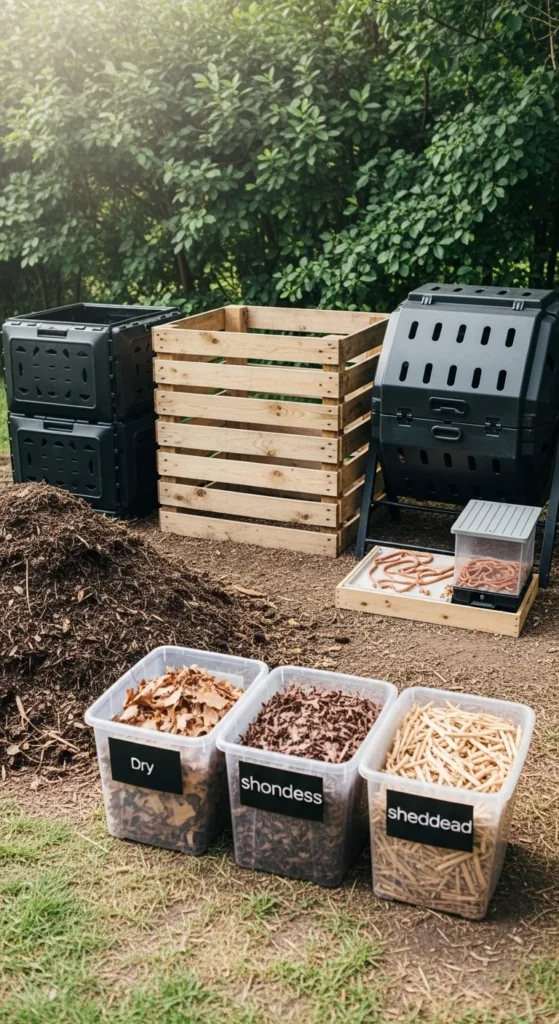
14. Kitchen Scrap Routine (Small Habit Method)

This is the method behind the method. Consistency matters more than bin style.
- Keep a small lidded bucket in the kitchen.
- Empty it every 1–3 days.
- Always cover scraps with browns.
Budget-friendly tip:
- Use a repurposed container with a lid.
Keep it easy:
- Store browns near the bin.
- Keep a small scoop nearby.
This simple routine reduces odor and bugs more than almost anything else.
15. Browns-First Composting (Odor Control Method)
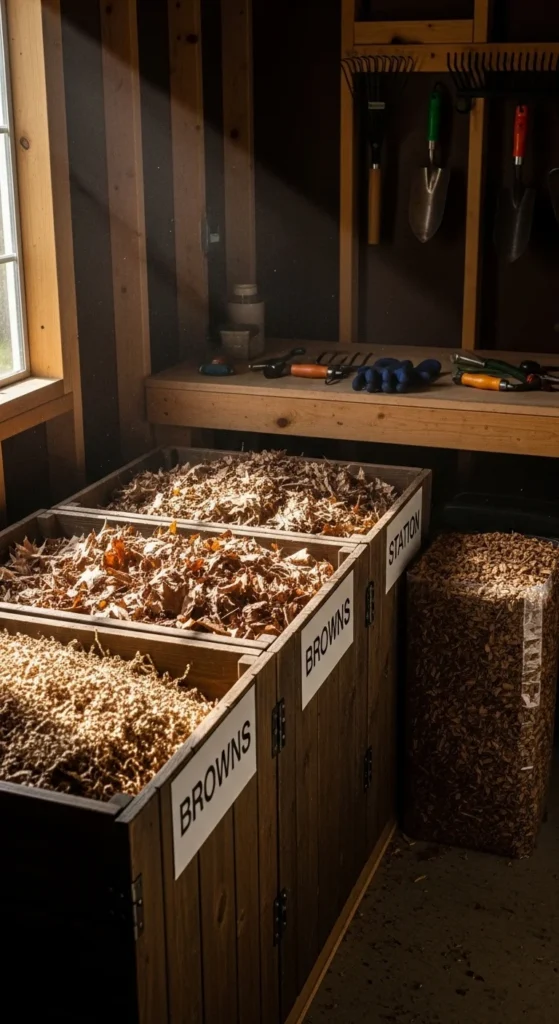
If compost smells, browns fix it. This approach makes browns the main focus.
- Stockpile dry leaves.
- Shred cardboard and paper.
- Add browns after every greens add.
Budget-friendly tip:
- Shred mail and boxes. Skip glossy paper.
This is great for:
- Wet climates
- Heavy kitchen-scrap composters
- Tumblers that get slimy
A dry top layer also discourages flies.
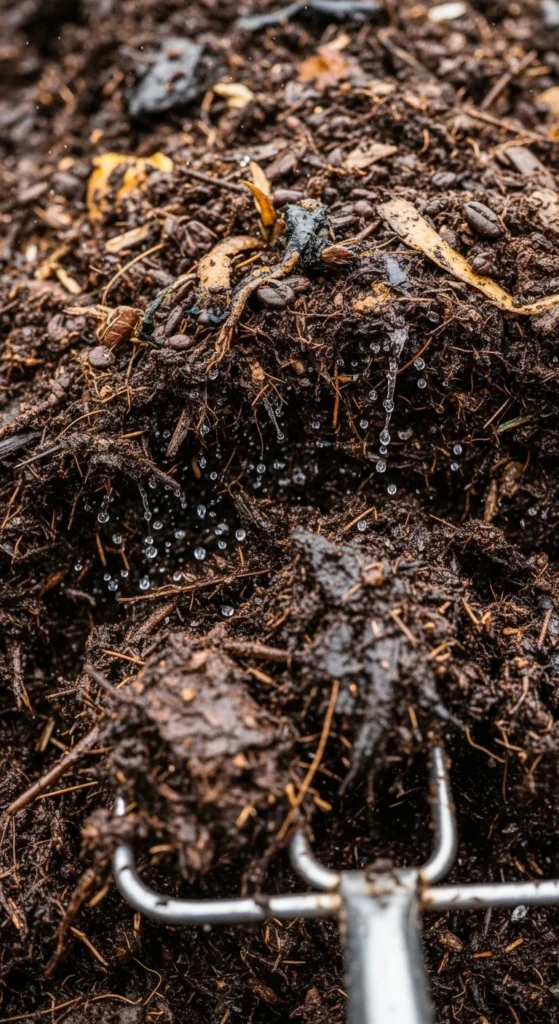
16. Moisture Control With the “Sponge Test”
Moisture is a big driver of compost speed and smell.
Check:
- Grab a handful.
- Squeeze.
- A couple drops: good
- Streams of water: too wet
- No clumping: too dry
Budget-friendly tip:
- Keep a watering can near the compost area.
Fixes:
- Too wet: add shredded cardboard and turn.
- Too dry: water while mixing.
This works with any compost system and keeps piles from stalling.
17. Leaf Cap Cover Method

A “cap” of leaves acts like a lid that still breathes.
- Keep a 4–6 inch leaf layer on top.
- Pull it back when adding scraps.
- Replace it after.
Budget-friendly tip:
- Collect leaves in fall and store them dry.
Why it’s popular:
- Less smell
- Fewer flies
- Better moisture balance
This is an easy add-on for open piles, pallet bins, and wire circles.
18. Pest-Resistant Hardware Cloth Base

If animals dig in, protect the bottom.
- Lay hardware cloth under the bin.
- Attach it to the frame or weigh it down.
- Keep scraps buried in the center.
Budget-friendly tip:
- Use mesh only on the bottom and lower walls.
This is ideal for pallet bins and wood slat bins. It keeps airflow while making entry harder for rodents.
19. Bulking Agent Composting (Airflow Shortcut)
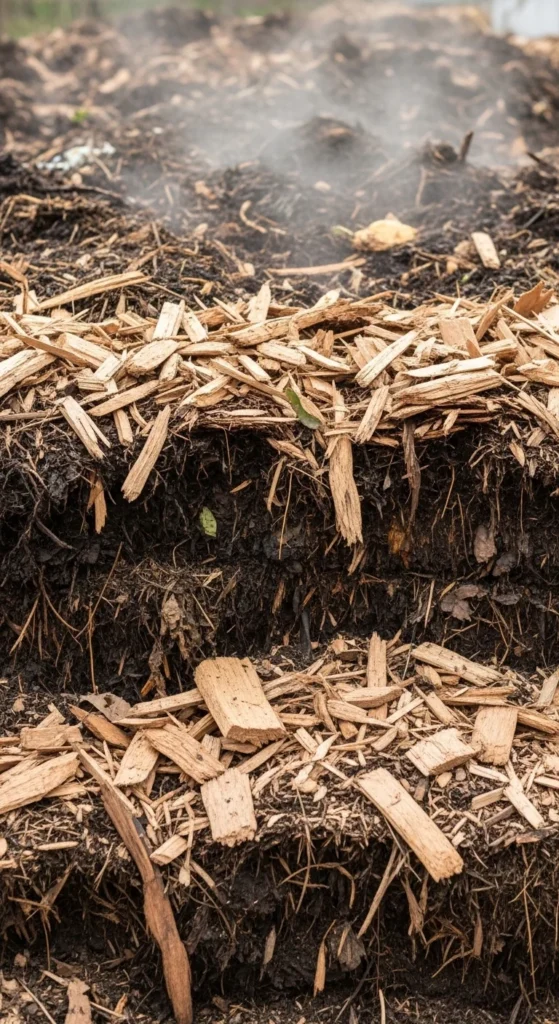
Bulking agents create air pockets that help compost breathe.
Good bulking materials:
- wood chips
- shredded branches
- straw
- coarse leaves
Budget-friendly tip:
- Save small twigs from pruning and chip them roughly.
Use it like this:
- Add a thin layer at the bottom.
- Mix a handful into wet greens.
This reduces compaction and helps prevent the “wet, smelly lump” problem.
20. Bokashi Pre-Fermentation + Outdoor Compost
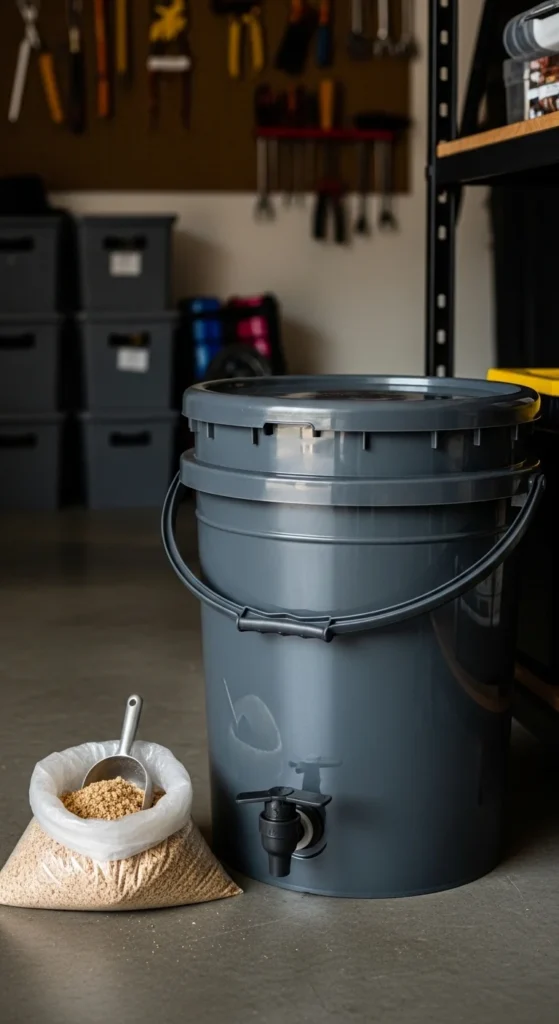
Bokashi ferments food scraps in a sealed bucket, then you bury or compost the fermented material.
How it works:
- Add scraps to bucket.
- Sprinkle bokashi bran.
- Seal and repeat.
Budget-friendly tip:
- Use bokashi for scraps you don’t want outdoors right away.
After fermentation:
- Bury in a trench
- Or add to a compost bin and cover with browns
This method helps with odor control and can handle a wider range of food waste when used correctly.
21. Vermicomposting Worm Bin (Indoor or Shed)
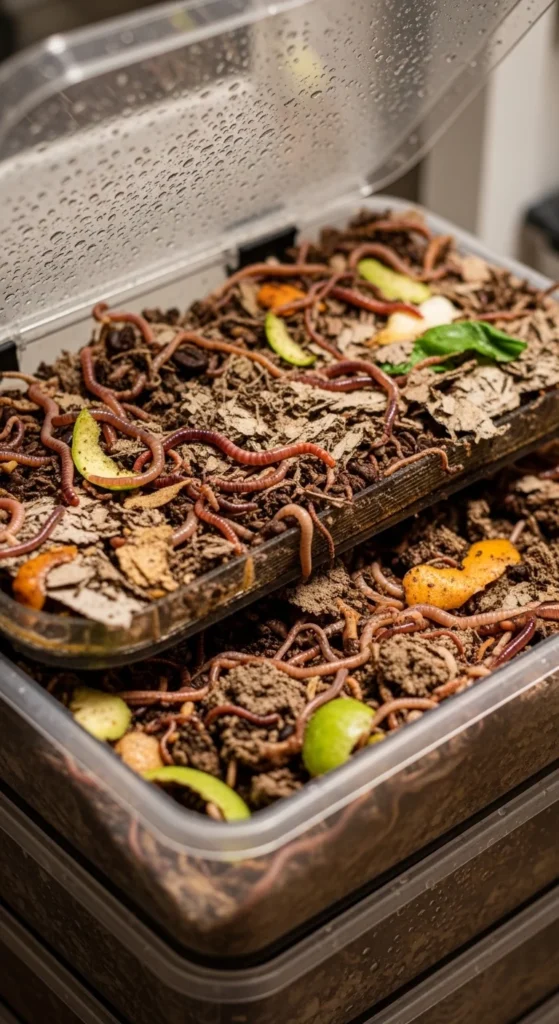
Worm bins are great for year-round composting and pest control.
Basic setup:
- Ventilated bin
- Bedding: shredded paper + cardboard
- Food scraps in small amounts
- Keep it moist, not wet
Budget-friendly tip:
- Start with a simple plastic tote.
What you get:
- Worm castings for containers
- Less outdoor smell
- Easy routine once stable
Keep it out of harsh heat. If fruit flies appear, bury scraps deeper and add more bedding.
22. Hybrid System: Tumbler + Worm Bin
A hybrid setup gives you speed and steady output.
- Tumbler: handles mixed scraps and turns fast
- Worm bin: handles small daily kitchen scraps
Budget-friendly tip:
- Start with one system, then add the second once you’re consistent.
How to run it:
- Put most scraps in the tumbler with browns.
- Feed worms small amounts weekly.
- Use worm castings for potted plants.
This method spreads the workload and gives you compost for both garden beds and containers.
23. Winter Composting With Simple Insulation
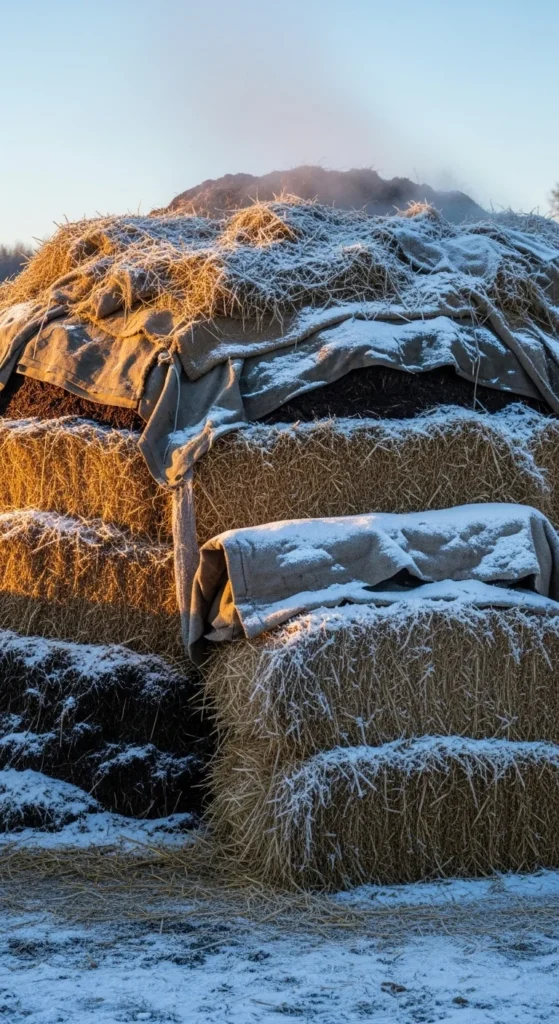
Cold slows compost. Insulation helps.
Easy insulation ideas:
- straw bales around the pile
- thick leaf cover
- tarp cover to reduce snow soak
Budget-friendly tip:
- Use leaves as insulation and store extra dry leaves for spring.
Winter routine:
- Keep adding browns and greens in balance.
- Turn less often.
- Focus on keeping it moist, not frozen solid.
Even if it slows, it will restart when temperatures rise.
24. Finished Compost Readiness + Quick Sift Method
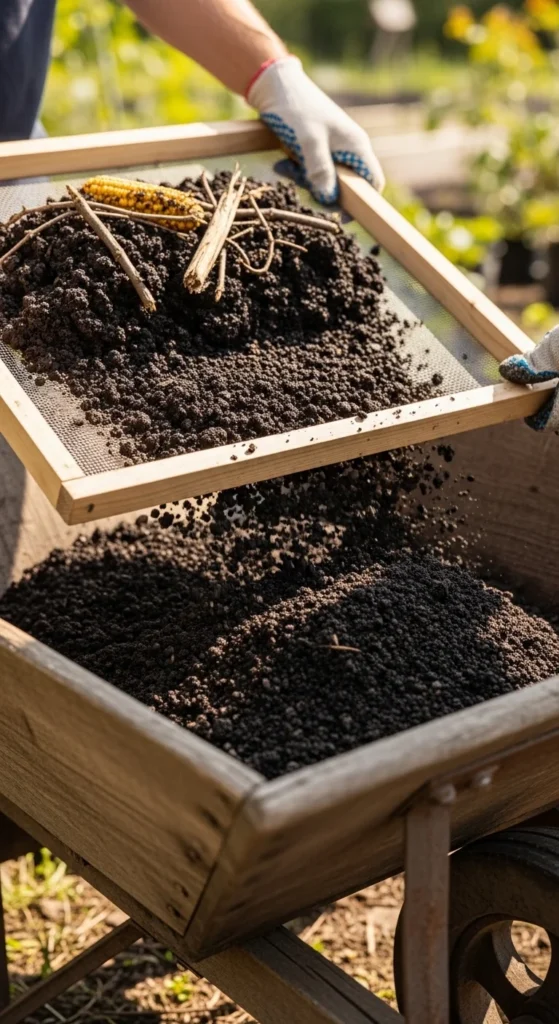
Knowing when compost is done saves frustration.
Signs it’s ready:
- dark and crumbly
- smells earthy
- no clear food scraps
- cool temperature
Budget-friendly tip:
- Make a sifter from a wood frame and hardware cloth.
How to use:
- Sift finished compost into a bucket.
- Return big chunks to the active pile.
This gives you finer compost for seed-starting and container mixes. It also keeps your system moving without wasting partially broken materials.
Conclusion
Fast composting comes from simple habits: keep 3 parts browns to 1 part greens, maintain moisture like a wrung sponge, and add oxygen by turning, tumbling, or using aeration pipes. Pick one method that fits your yard today—wire circle, pallet bin, tumbler, trench, or worms—then add one upgrade that makes it easier to stay consistent (a browns station, a cover, or a pest-resistant base). Within a season, you’ll have dark compost ready for raised beds, containers, and healthier soil across your whole backyard.

Leave a Reply