
Soil warming helps you start planting earlier, protect tender seedlings, and keep raised beds productive even when temperatures drop. A warmer bed encourages quicker germination and steadier root growth. These techniques focus on practical, simple setups you can prepare with low-cost materials. Whether you use insulation, heating elements, or natural methods, each idea gives you ways to maintain warmer soil through the coldest months.
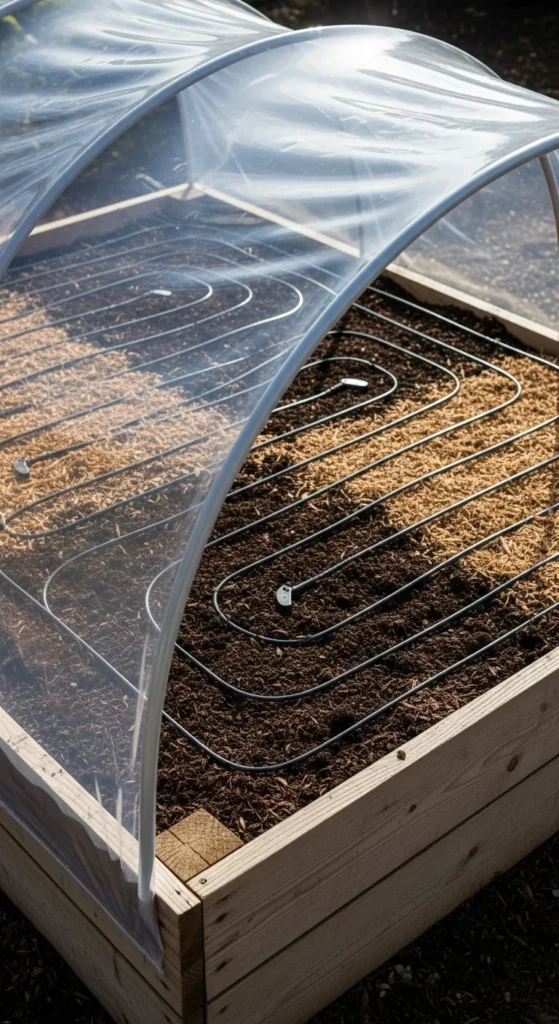
1. Clear Plastic Tunnels for Heat Retention
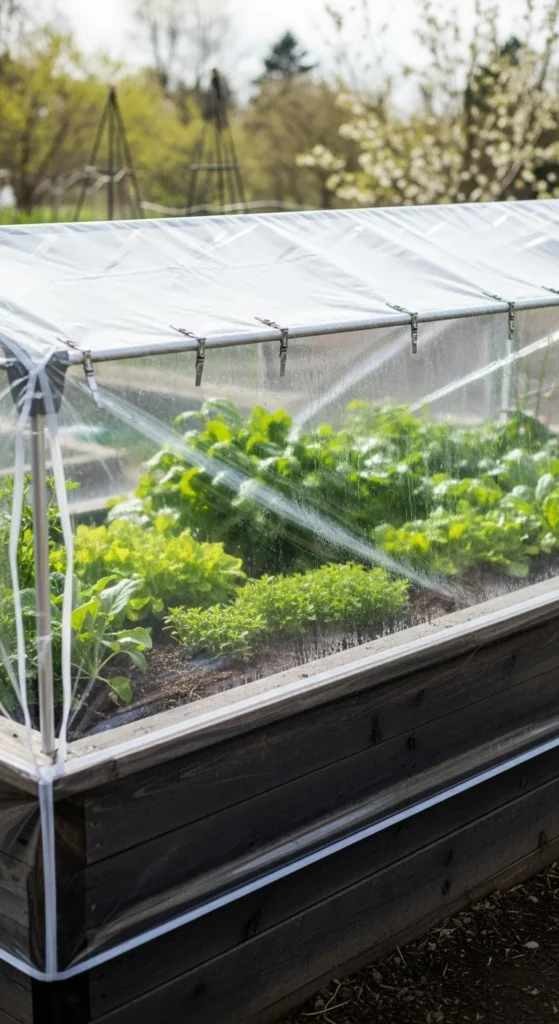
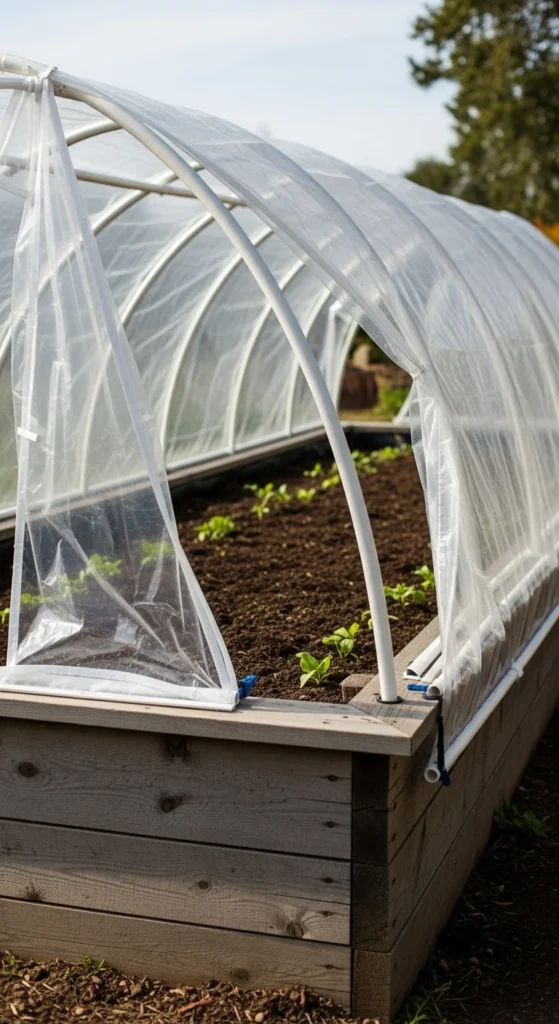
Plastic tunnels trap sunlight and help warm soil quickly. They act like a compact greenhouse sitting directly over the soil surface. Place the tunnel on your raised bed a few weeks before planting so the soil warms gradually.
You can make your own tunnel using flexible pipes and clear plastic sheets. Push the pipes into the sides of the bed to form arches. Stretch the plastic over the top and secure it with clips or bricks. Lift the tunnel during warm afternoons to prevent overheating. At night, close it again to keep warmth inside. This simple setup prepares soil faster than leaving it exposed.
2. Black Mulch Film for Faster Spring Warm-Up
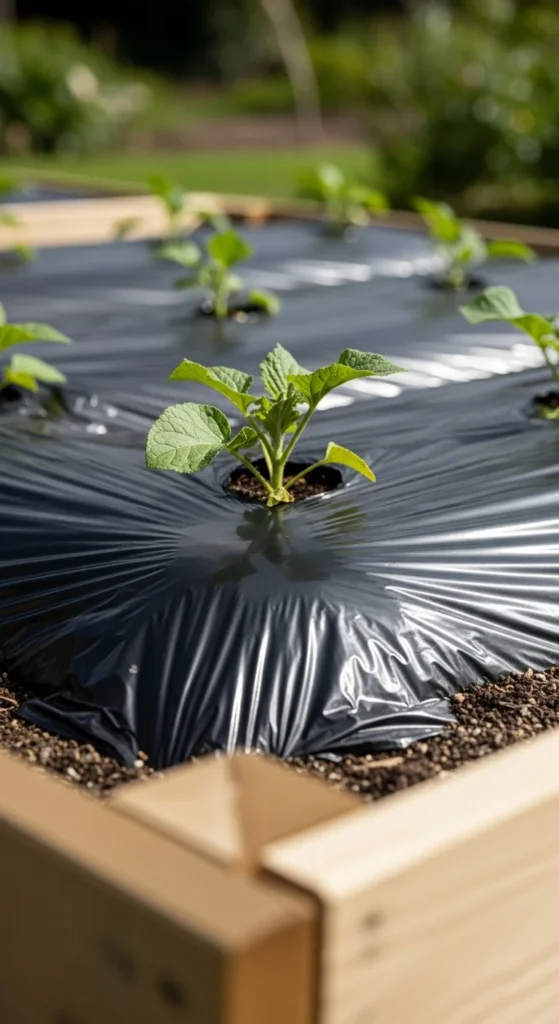
Black mulch traps heat and transmits it into the soil below. This method works well for early planting because the dark surface absorbs sunlight.
Lay the mulch film tightly across the raised bed and secure the edges with soil or stones. Cut small X-shaped openings for each plant when you’re ready to transplant. To save money, use thick black trash bags cut into large sheets. Smooth out wrinkles so the surface warms consistently. Keep the film on until crops grow strong enough to shade the soil themselves.
3. Hot Compost Core Through the Center of the Bed
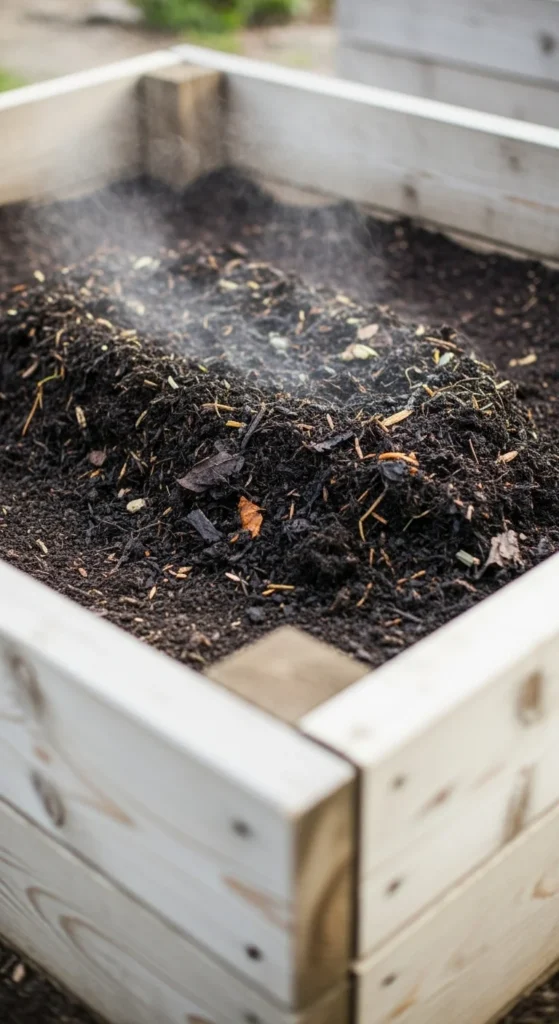
A compost core warms the soil from within. As organic material breaks down, it releases gentle heat that supports root activity.
Dig a trench down the middle of your raised bed. Fill it with kitchen scraps, straw, leaves, and manure. Cover it with soil and plant around the edges. As the compost decomposes, it radiates warmth through the surrounding soil. This method is nearly free and works all season. Add new compost into the trench every few weeks to keep the heat cycle active.
4. Low-Tech Water Bottle Heat Storage
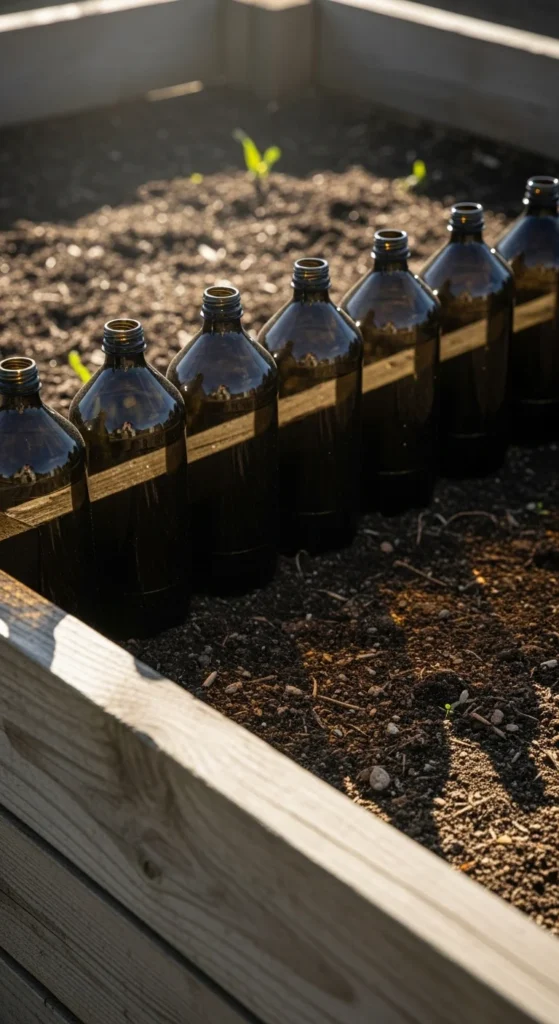
Water absorbs heat during the day and releases it slowly at night. Placing bottles along the inside edges of your raised bed helps moderate temperature swings.
Use black or dark brown bottles for stronger heat absorption. Fill them with water and place them where they receive direct sunlight. At night, the stored warmth radiates into the surrounding soil. This works well for early seedlings. For a budget setup, reuse soda bottles and paint them dark. Replace the water if algae begins to grow.
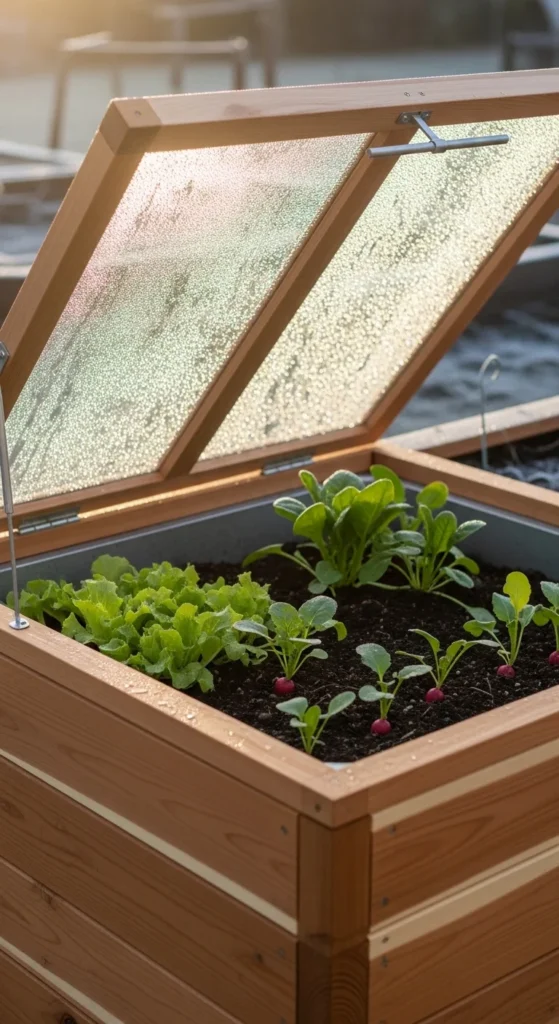
5. Clear Lid Covers for Micro-Greenhouse Effect
A hinged clear lid works like a small greenhouse top. It captures heat, prevents frost, and keeps soil warmer between weather changes.
Build a simple frame using wood or PVC. Attach clear acrylic sheets or rigid plastic panels. Place the lid directly over the raised bed and open it slightly during warm afternoons. This design is durable and easy to adjust. You can create a budget version using old window frames with clear plastic stapled across. Keep the lid tilted during rainy days to allow ventilation.
6. Soil Heating Cables Buried Beneath the Surface
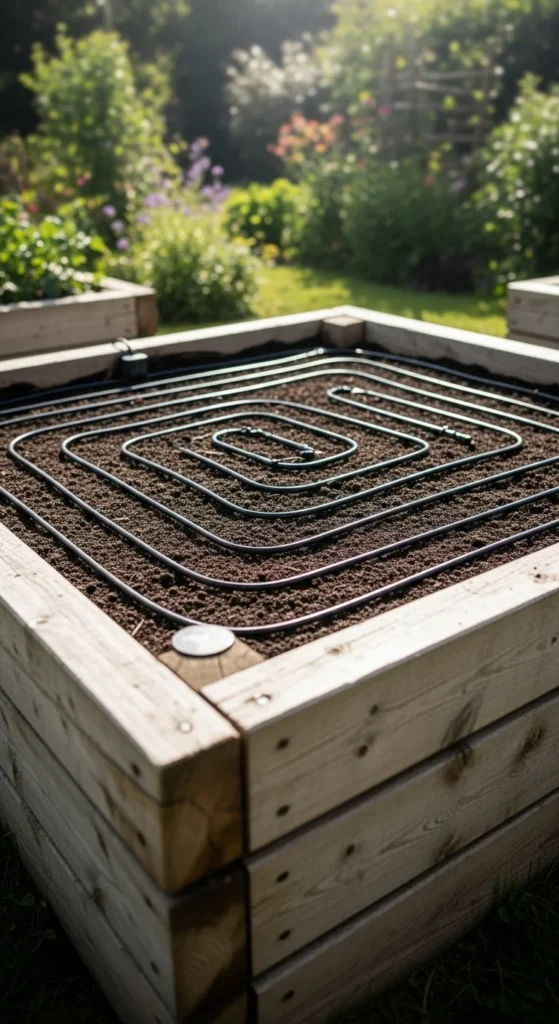
Heating cables give consistent warmth and help germinate seeds faster. They’re placed below the surface and run on low energy.
Install the cable in gentle loops and cover with 2–3 inches of soil. Keep the cable away from sharp tools. Use a timer to run the heat during colder nights. This method supports cold-sensitive crops early in the season. To stay budget-friendly, use cables only in one section of the bed for seedlings.
7. Straw Bale Perimeter for Insulated Bed Walls
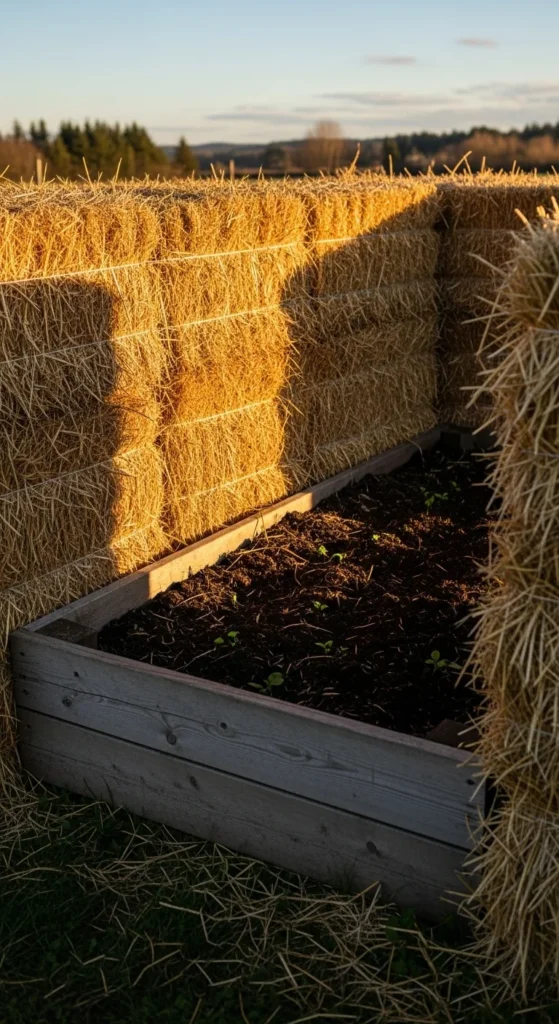
Straw bales insulate the sides of raised beds and keep warmth inside the soil. They reduce temperature loss from wind exposure.
Place bales around the outer edges of the bed, leaving the top open. This creates a warm pocket. For a cheaper method, use loose straw or dried leaves packed inside mesh bags. Replace the straw after heavy rains. This setup works especially well for root crops and young transplants.
8. Hot Manure Layer Beneath Planting Soil

Fresh manure generates heat as it decomposes. Adding a layer beneath your planting soil warms the bed from below.
Spread a thin layer of manure on the bottom of the bed and cover it with at least 6–8 inches of soil. The manure breaks down slowly, providing warmth through early planting months. For smaller budgets, source manure from local farms. Avoid planting root vegetables directly above the layer until decomposition slows.
9. Bubble Wrap Insulation Over Bed Frames
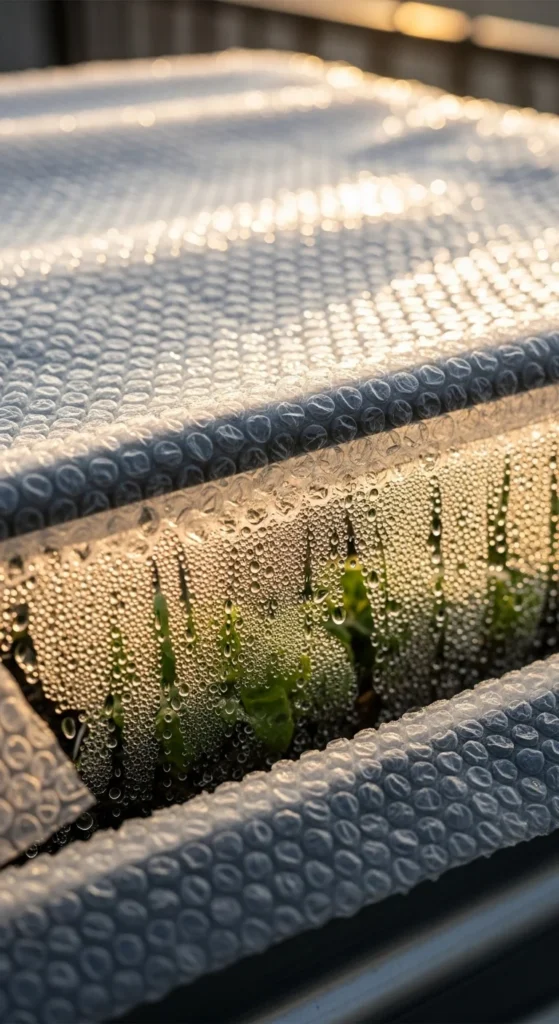
Bubble wrap creates an insulating barrier. It captures heat and reduces nighttime temperature drops.
Attach bubble wrap to hoops or frames using clips. Keep it slightly loose to trap warm air. A double layer works better during very cold nights. Use scrap bubble wrap from packaging to cut costs. Lift the wrap during warm afternoons to prevent moisture buildup.
10. Brick or Stone Heat Banks Inside the Bed
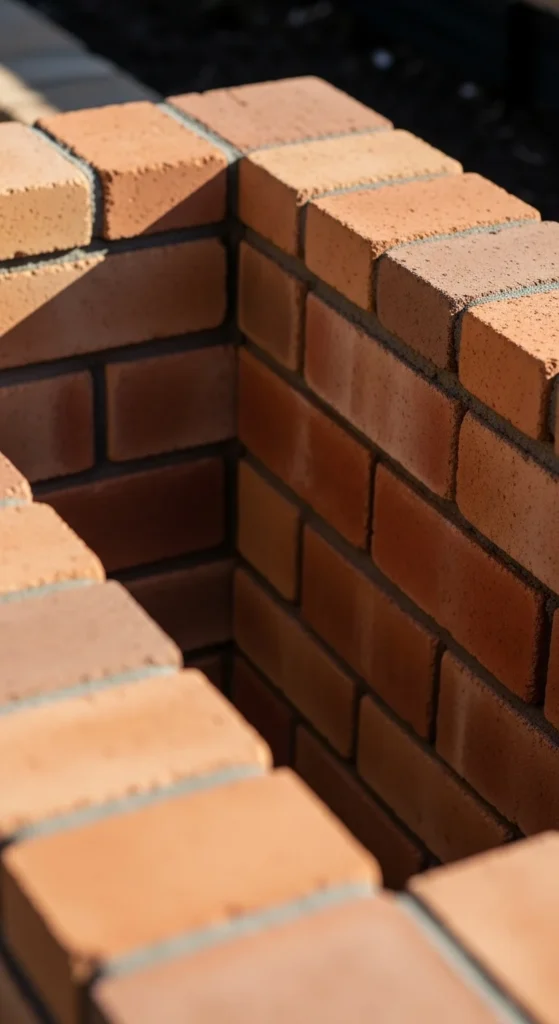
Bricks absorb warmth during sunny hours and radiate it back into the soil at night. This stabilizes soil temperature.
Line the inner edges of the raised bed with bricks or stones. Place darker stones for stronger heat storage. This technique costs little if you reuse leftover building materials. Keep the stones close to the soil surface for better heat transfer. Combine this method with mulch for extra warmth.
11. Cold Frame Add-On With Adjustable Venting
A cold frame creates a warm microclimate above the soil. It’s perfect for seedlings and early plantings.
Build a wooden frame and attach a clear lid. Set it on top of the raised bed. Open the lid slightly during warm days. Close it fully during frosty nights. A budget approach is to use scrap wood and a clear shower curtain. Keep the cold frame slightly tilted for better water runoff.
12. Compost-Heated Water Reservoir Under the Bed
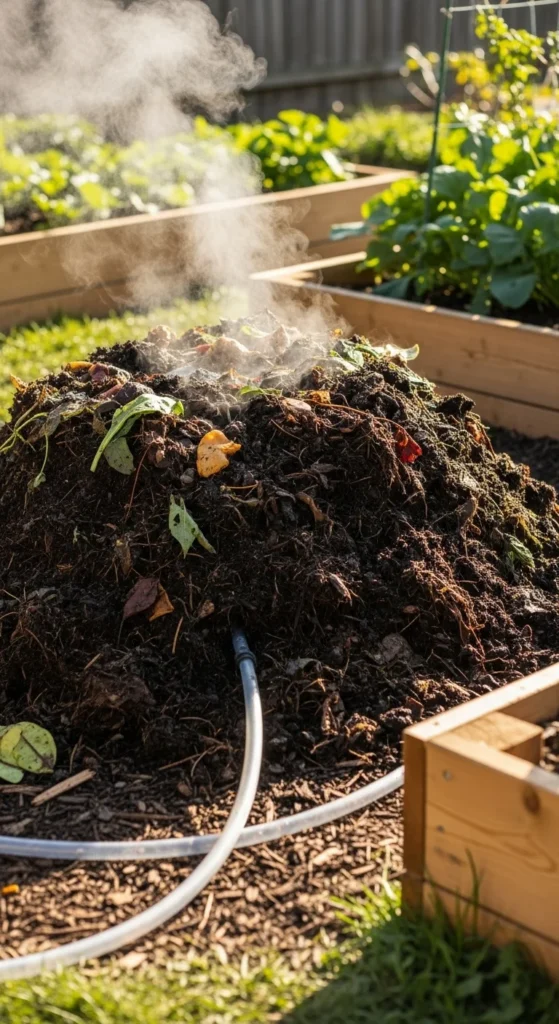
Water heated by compost can be routed under raised beds to add warmth. It’s simple and uses natural heat.
Run tubing through the compost pile and under the bed. As compost heats the water, the warmth transfers into the soil. Use a small pump to circulate water. For a low-cost version, skip the pump and let warm water naturally rise through the tubes. This method works best for large beds.
13. Thick Leaf Mulch Layer Over Newly Seeded Rows
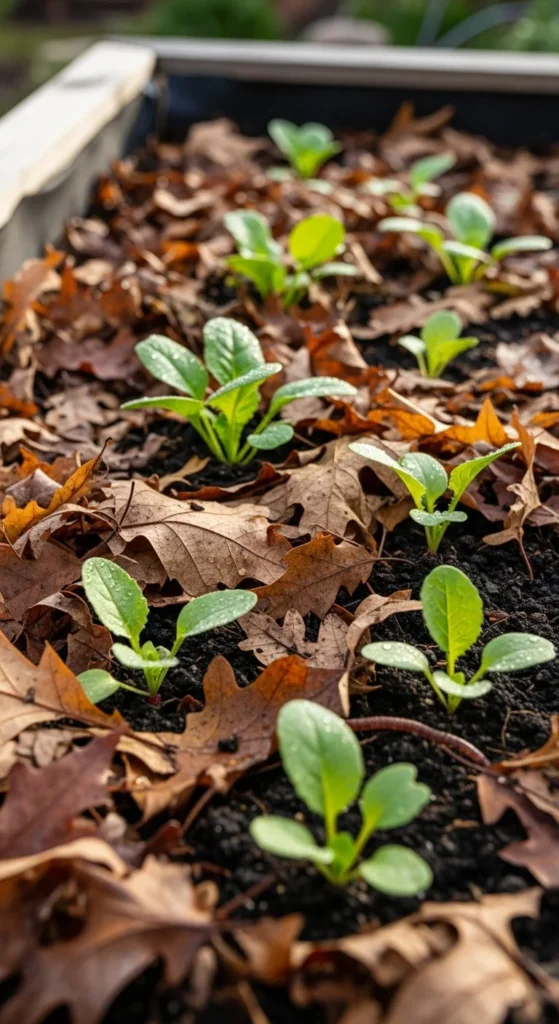
Leaf mulch traps warmth near the soil surface and shields young seeds from cold winds.
Spread a generous layer over newly planted seeds. Remove lightly once seedlings sprout so they can reach sunlight. Collect fallen leaves in the fall and store them in bags for winter use. This method is nearly free and improves soil texture. Make sure the mulch stays dry to avoid compaction.
14. Greenhouse Plastic Wrapped Around Bed Walls
Wrapping the exterior walls traps heat inside the soil and blocks cold air.
Cut sheets of greenhouse plastic and staple them to wooden bed walls. Keep the top open for airflow. Remove the wrap once temperatures stabilize. For a cheap alternative, reuse clear plastic from packaging. Avoid covering drainage holes so water can escape.
15. Hot Water Jugs Buried Halfway in Soil
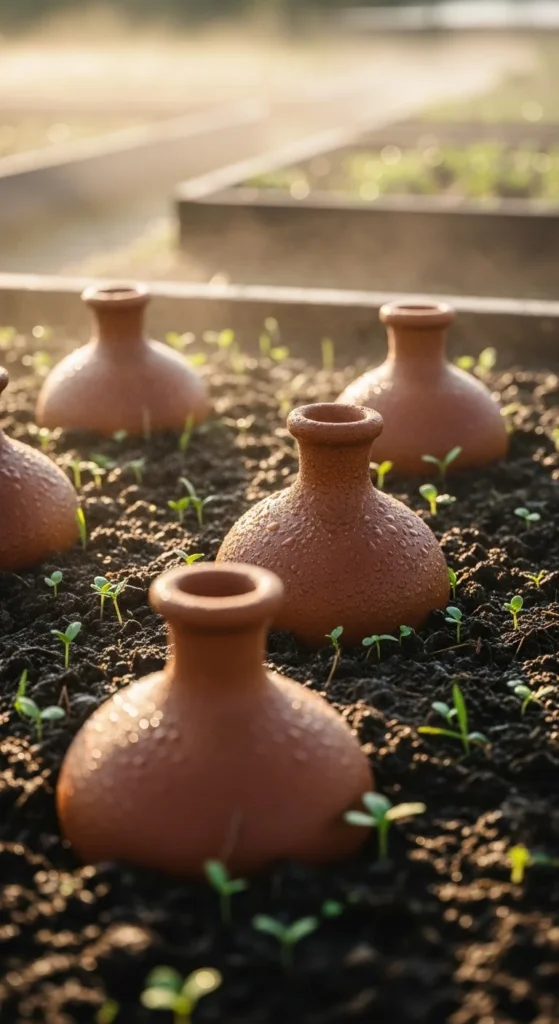
Warm water jugs raise soil temperature during cold nights.
Fill dark-colored jugs with hot water and bury them halfway in the soil near your plants. Replace the water daily during cold spells. For a no-cost method, reuse old juice bottles or milk jugs. Keep the jugs away from delicate roots to avoid overheating.
16. Metal Sheet Heat Reflectors on Bed Corners
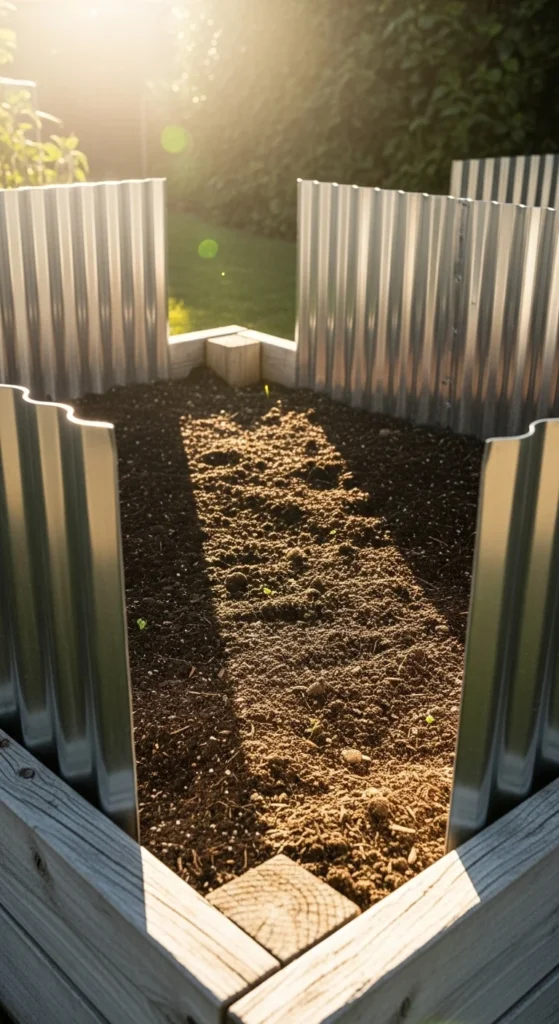
Metal sheets reflect sunlight and help warm soil surfaces.
Place reflective sheets or aluminum panels at angles facing the sun. This directs extra warmth into the bed. A low-cost option is to use foil-covered cardboard. Keep the panels steady using stakes. Remove them during extremely hot days to avoid excess heating.
17. Dark-Colored Soil Covers During Early Mornings
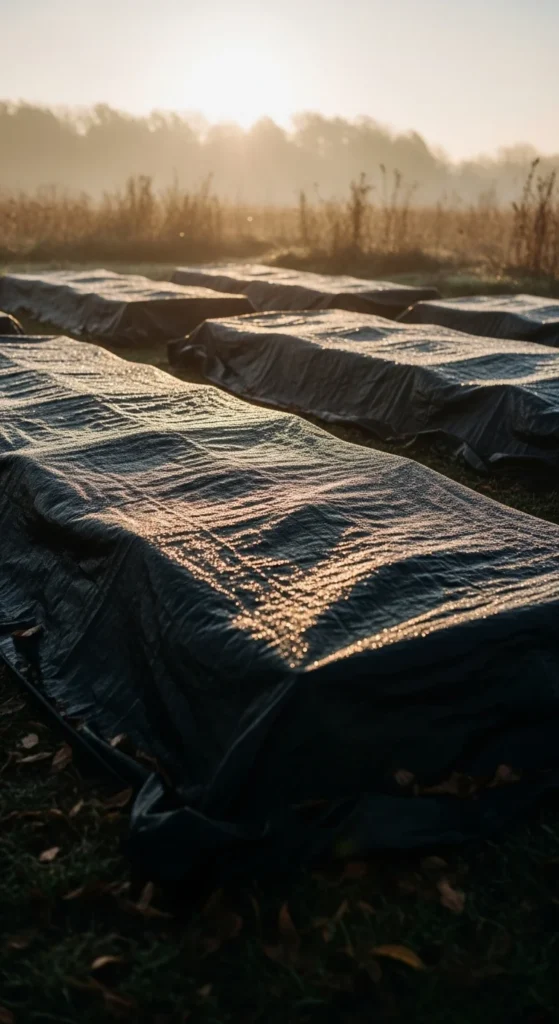
Dark covers absorb heat quickly and warm soil rapidly during cold mornings.
Spread a dark cloth or tarp over the bed an hour after sunrise. Remove it before midday so soil doesn’t overheat. Reuse old dark bedsheets or cotton fabric for a low-cost setup. Keep the covers dry so they warm more effectively.
18. Warm Gravel Layer Beneath Topsoil
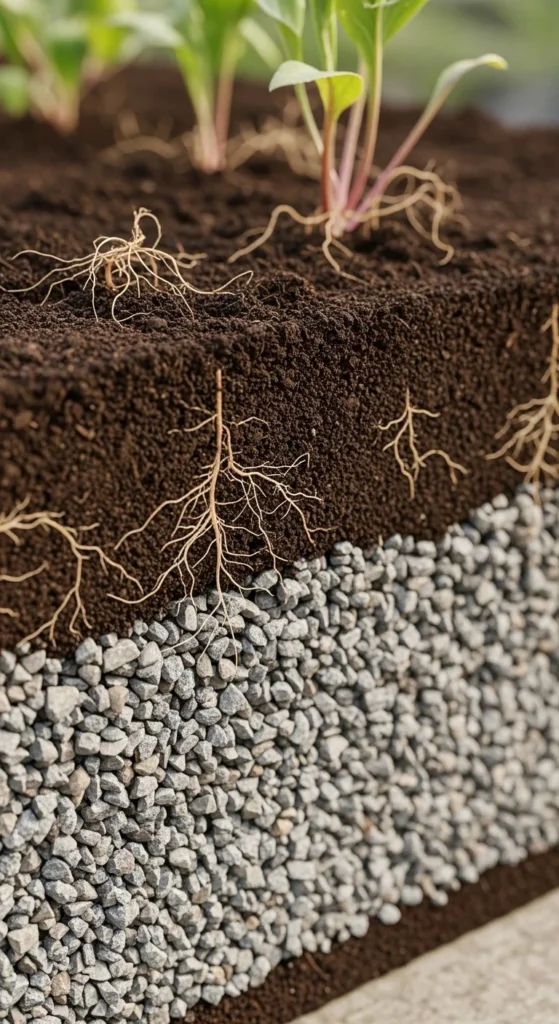
A gravel layer captures warmth faster than dense soil and helps release it slowly.
Spread 2–3 inches of gravel beneath your main soil layer. Add rich compost on top. This method creates better drainage while warming the soil. Use darker gravel for stronger heat retention. It works well for crops that dislike cold feet, such as peppers or tomatoes.
19. Hoop House Frame with Double Covering
Double coverings trap more heat than single layers.
Build a simple hoop structure with pipes. Cover it with two layers of clear plastic separated by 1–2 inches of air space. This air layer acts as insulation. A budget method is to tape plastic sheets together using wooden strips. Vent the structure slightly during warm afternoons.
20. Clay Tile Heat Radiators Placed Inside the Bed

Clay tiles warm during the day and keep soil warmer for longer periods.
Slide clay tiles into the soil around the edges of the bed. Keep the top part exposed so it captures sunlight. This is an inexpensive method if you reuse roofing tiles or broken terracotta pieces. Combine with mulch for even better warmth retention.
21. Solar Heat Sink Barrel Beside the Bed
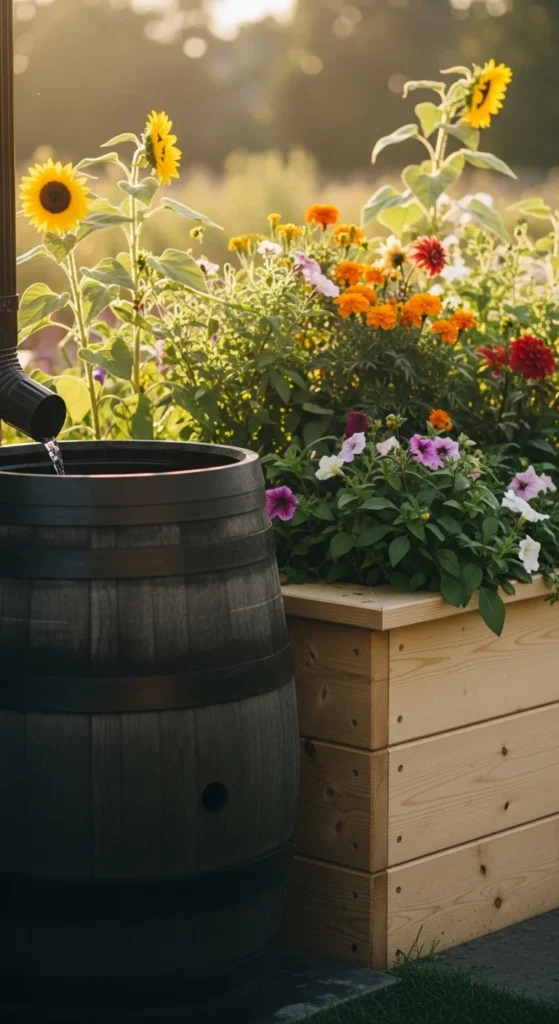
A dark barrel beside the raised bed absorbs sunlight and shares warmth with the nearby soil.
Fill a dark-colored barrel with water and place it close to the bed’s outer wall. During the day, the barrel warms up. At night, the heat radiates outward, raising soil temperature near the edge. This works best when the barrel receives direct sunlight. Use recycled barrels to save money.
Conclusion
Soil-warming techniques make early planting smoother and help crops settle into raised beds with fewer stress points. These simple setups—whether natural, insulated, or low-energy—create warmer soil that encourages stronger growth from the start. Choose a few ideas that match your climate and materials, prepare your bed early, and watch your planting space become productive even during colder months

Leave a Reply