
Planting a tree might seem as simple as digging a hole and dropping it in, but getting it right can make the difference between a thriving shade tree and one that struggles for years. Whether you’re adding beauty to your yard, growing fruit, or restoring nature, a properly planted tree is one of the most valuable gifts you can give the planet—and yourself.

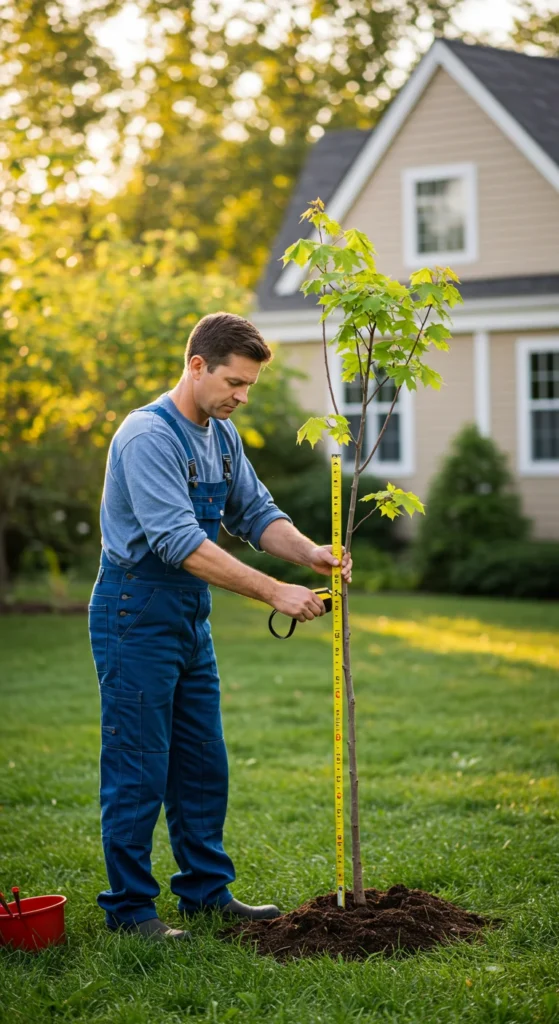
Step 1: Pick the Perfect Spot
Before you start digging, look up—and down. Your tree’s long-term success depends on where it’s planted.
- Choose a spot with at least 6 hours of sunlight daily.
- Avoid planting under power lines or too close to buildings.
- Check for underground utilities by calling your local service before digging.
Think about the mature size of your tree. A tiny sapling now might one day have a 30-foot canopy, so give it room to stretch.
Step 2: Prepare the Soil
Healthy roots need healthy soil. Here’s how to make it perfect:
- Test the soil: Use a simple pH kit to check if it’s neutral or slightly acidic (most trees prefer 6.0–7.0).
- Loosen the soil: Break up compacted dirt to help roots spread.
- Mix in compost: Add organic matter like compost or aged manure for nutrients and better drainage.
💡 Tip: Avoid adding fertilizers during planting — they can burn new roots. Compost provides a gentle, balanced start.

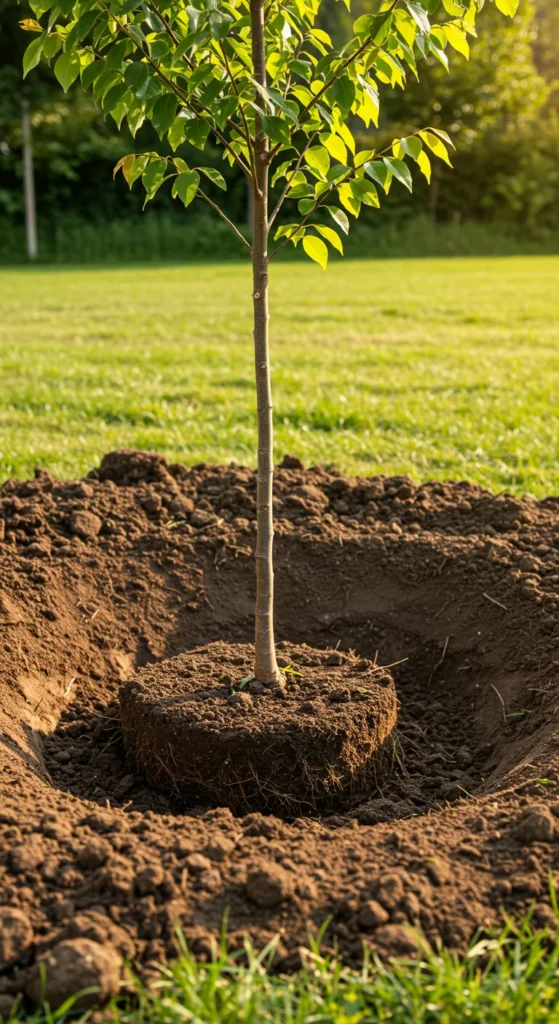
Step 3: Dig the Right Hole
This is where many people go wrong. A poorly dug hole can stunt growth from day one. Follow this rule of thumb:
- Width: The hole should be 2–3 times wider than the root ball.
- Depth: No deeper than the root ball’s height — planting too deep suffocates roots.
- Shape: Keep the sides slightly sloped, not vertical, to encourage outward root growth.
When placing the tree, make sure the root flare (where the trunk widens at the base) is slightly above ground level. This prevents rot and promotes strong root anchoring.
Step 4: Position and Backfill
Gently remove the tree from its container or burlap. If you see circling roots, loosen or trim them slightly so they don’t strangle the trunk later.
Then:
- Place the tree in the hole—straight and centered.
- Fill the hole halfway with the soil mix and water it to settle.
- Add the rest of the soil, lightly tamping it down (don’t compact it).
- Water thoroughly again.
Avoid burying the trunk or piling soil against the bark—this can lead to rot.

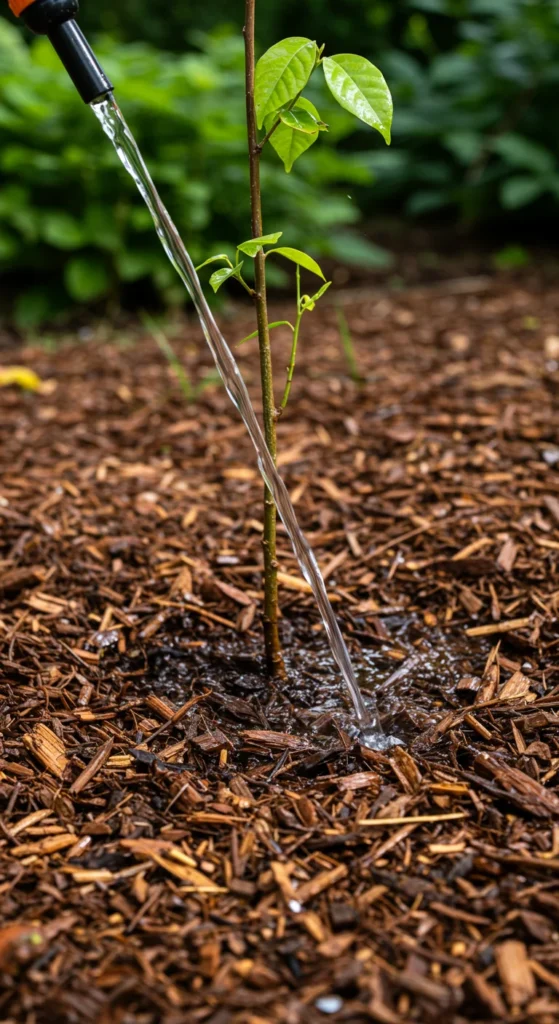
Step 5: Add Mulch and Water Wisely
Mulch is your tree’s best friend—it keeps roots cool, retains moisture, and blocks weeds. Spread 2–3 inches of organic mulch (like wood chips or shredded bark) in a wide ring around the base, but keep it a few inches away from the trunk.
Water your new tree deeply right after planting. For the first few weeks:
- Water 2–3 times a week if there’s no rain.
- After the first month, water once weekly during dry spells.
💧 Pro Tip: Deep watering encourages roots to grow down instead of staying shallow.
Step 6: Support and Protect
Newly planted trees can be vulnerable to wind, animals, or lawn equipment. To protect yours:
- Stake only if necessary (for tall or windy locations). Remove stakes after one year.
- Wrap the trunk with tree guards if deer or rodents are a problem.
- Mark the area to avoid mowing or trimming too close to the base.
Regularly check your tree’s stability, especially after storms or heavy watering.
Step 7: Monitor and Maintain
Over the next year, your tree will establish its roots. Help it along with simple care:
- Remove weeds and grass from the base area.
- Reapply mulch every spring.
- Prune lightly to remove dead or crossing branches, but avoid heavy pruning in the first year.
- Watch for signs of pests or disease early.
With just a little attention, your tree will grow strong and healthy for decades.
Final Takeaway
Planting a tree the right way isn’t hard—it’s about patience, preparation, and care. Each sapling you plant today becomes part of a greener tomorrow, offering shade, oxygen, and beauty for generations. 🌳

Leave a Reply